Table Saw Setup Essentials: Cut with Precision & Safety
Setting up a table saw involves ensuring the blade is aligned and adjusting the fence for accuracy. Proper setup enhances safety and improves cutting precision.
A well-set table saw is crucial for any woodworking project. It not only boosts accuracy but also enhances safety during operation. Many woodworkers overlook setup details, leading to mistakes and wasted material. Investing time in aligning the blade and setting the fence pays off in the long run.
Beginners and seasoned pros alike benefit from a thorough setup. This process helps achieve clean, precise cuts, which are essential for high-quality work. Understanding table saw components and their adjustments can significantly impact your woodworking experience. A meticulous setup transforms your table saw into a reliable tool, ready to tackle any project with ease.
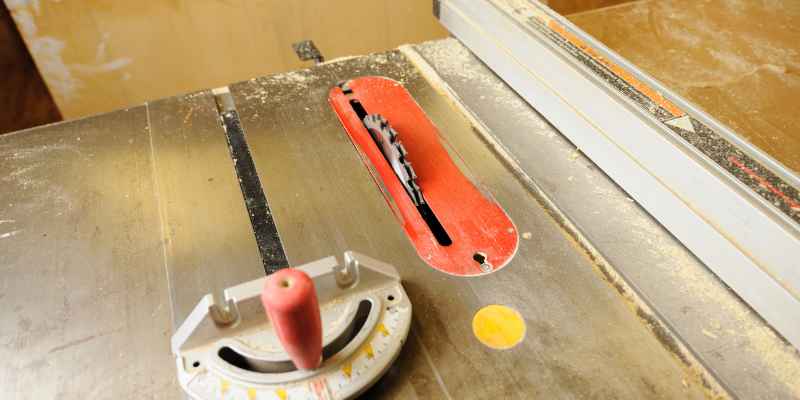
Essential Table Saw Components
Understanding the essential components of a table saw is crucial. Each part plays a significant role in ensuring safety and accuracy. Proper setup enhances performance and longevity. Here’s a closer look at these key elements.
Key Parts Of A Table Saw
Here are the main components of a table saw:
| Component | Description |
|---|---|
| Table | The flat surface where wood is placed for cutting. |
| Blade | The cutting tool that slices through wood. |
| Fence | Helps guide the wood for accurate cuts. |
| Riving Knife | Prevents wood from binding on the blade. |
| Guard | Protects hands from the blade during operation. |
| Motor | Powers the blade for cutting through materials. |
Each part contributes to the overall functionality of the table saw. Knowing them helps users operate the saw safely and effectively.
Importance Of Regular Maintenance
Regular maintenance ensures your table saw works well. Here are some key points:
- Check the blade: Replace dull blades to maintain clean cuts.
- Clean the table: Remove dust and debris for smooth operation.
- Inspect the fence: Ensure it aligns properly for accurate cuts.
- Tighten screws: Loose screws can affect performance and safety.
- Lubricate moving parts: Keep them operating smoothly.
Regular checks prevent accidents and extend the saw’s life. A well-maintained table saw ensures high-quality results every time.
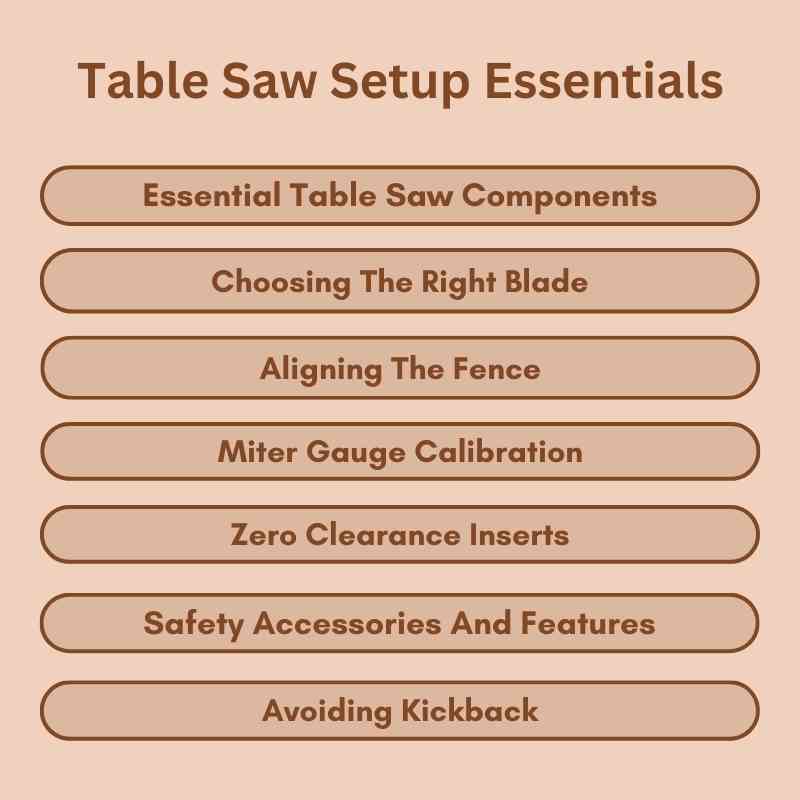
Choosing The Right Blade
Choosing the right blade for your table saw is crucial. The blade affects the quality of cuts and the safety of your operation. Understanding different blade types helps in making an informed decision.
Types Of Table Saw Blades
Table saw blades come in various types. Each type serves a specific purpose. Here are some common types:
- Rip Blades: Designed for cutting along the grain.
- Crosscut Blades: Ideal for cutting across the grain.
- Combination Blades: Versatile blades for both rip and crosscutting.
- Dado Blades: Used for making grooves and dados.
- Specialty Blades: Designed for specific tasks like laminates.
Matching Blade To Wood Type
Matching the blade to the wood type improves results. Different woods require different blades. Here’s a simple guide:
| Wood Type | Recommended Blade Type |
|---|---|
| Softwoods (e.g., Pine) | Rip Blade |
| Hardwoods (e.g., Oak) | Crosscut Blade |
| Plywood | Combination Blade |
| Laminates | Specialty Blade |
Choosing the correct blade improves cut quality. Always consider the wood type before making a choice.
Adjusting The Blade Height
Adjusting the blade height on a table saw is crucial. It affects the type of cuts you make. Proper height ensures safety and quality in your woodworking projects.
Optimal Height For Different Cuts
Setting the right blade height depends on the cut type. Here’s a quick guide:
| Cut Type | Recommended Blade Height |
|---|---|
| Through Cut | 1/8 inch above the material |
| Ripping | 1/4 inch above the material |
| Bevel Cut | 1/8 inch above the material |
| Dado Cut | Height of the dado stack |
Always adjust the height based on the material thickness. Use the table above for quick reference.
Effects On Cut Quality And Safety
Blade height directly impacts cut quality. Too low can cause binding. This leads to rough edges and splintering.
Too high can increase kickback risk. Maintaining proper height enhances safety during operation.
- Proper height: Ensures clean cuts.
- Increased safety: Reduces kickback chances.
- Improved control: Easier to handle the material.
Always check blade height before starting your project. Your safety and the quality of your work depend on it.
Aligning The Fence
Aligning the fence on a table saw is crucial for accurate cuts. A properly set fence ensures straight, precise pieces. Misalignment can lead to wasted material and dangerous cuts. Follow these steps for a reliable setup.
Steps For Accurate Fence Setup
- Clean the Surface: Remove dust and debris from the table.
- Check the Blade: Ensure the blade is square to the table.
- Loosen the Fence: Release the locking mechanism on the fence.
- Align the Fence:
- Use a square to check the fence’s position.
- Adjust until the fence is parallel to the blade.
- Lock the Fence: Secure the fence in place.
- Test the Setup: Run a test cut on scrap wood.
Troubleshooting Common Fence Issues
| Issue | Solution |
|---|---|
| Fence not parallel to the blade | Re-adjust the fence and check alignment again. |
| Fence moves during cuts | Tighten the locking mechanism firmly. |
| Blade binding on the fence | Ensure blade height is set correctly. |
| Inconsistent cuts | Check alignment and test with scrap wood. |
Regular checks and adjustments keep your table saw safe and effective. Proper fence alignment leads to successful woodworking projects.
Miter Gauge Calibration
Calibrating your miter gauge ensures perfect angled cuts. A well-calibrated miter gauge improves accuracy and efficiency. Small mistakes can lead to big problems in woodworking projects.
Ensuring Precision In Angled Cuts
Accurate cuts are crucial for any woodworking task. Here’s how to ensure precision:
- Check the miter gauge alignment.
- Use a square for measurements.
- Test cuts on scrap wood.
Regular calibration prevents errors. A precise miter gauge saves time and materials. Always aim for the highest accuracy.
Adjustment Techniques
Follow these steps for effective adjustments:
- Loosen the locking knob on the miter gauge.
- Set the angle using a protractor.
- Tighten the locking knob securely.
Use a digital angle finder for best results. This tool helps achieve exact angles easily. Make adjustments slowly to avoid mistakes.
| Angle | Measurement Method | Notes |
|---|---|---|
| 0° | Square | Most common angle for crosscuts. |
| 45° | Protractor | Used for miters in frames. |
| 90° | Square | For precise edge cuts. |
Calibrate regularly for consistent results. A well-adjusted miter gauge enhances your woodworking skills.
Zero Clearance Inserts
Zero clearance inserts are essential for table saw setups. They provide a tight fit around the blade. This minimizes gaps and improves cut quality. With these inserts, you can achieve cleaner cuts and reduce tear-out. Let’s explore their benefits and how to create custom inserts.
Benefits For Clean Cuts
Using zero clearance inserts offers several advantages:
- Reduced Tear-Out: The insert supports the wood fibers. This prevents splintering during cuts.
- Improved Accuracy: The insert aligns perfectly with the blade. This increases precision for your cuts.
- Enhanced Safety: The insert decreases the risk of kickback. A secure fit keeps the material stable.
- Cleaner Cuts: Less gap means smoother edges. Enjoy a polished finish on your projects.
Creating Custom Inserts
Making custom zero clearance inserts is simple. Follow these steps:
- Gather materials: plywood or MDF, measuring tools, and a jigsaw.
- Measure the opening of your table saw.
- Cut the plywood or MDF to match the dimensions.
- Drill a hole for the blade. Ensure it matches the blade width.
- Test fit the insert. Adjust as needed for a snug fit.
Here’s a quick comparison of materials:
| Material | Pros | Cons |
|---|---|---|
| Plywood | Durable, affordable | Can splinter |
| MDF | Smooth finish, easy to cut | Less durable |
Custom inserts enhance your table saw experience. Enjoy better cuts and increased safety.
Safety Accessories And Features
Setting up a table saw requires attention to safety. Using the right accessories can prevent accidents. These tools enhance protection while working with powerful equipment. Understanding safety features is crucial for every woodworker.
Essential Protective Gear
Protective gear is vital for any table saw user. This gear shields you from potential injuries. Here’s a list of essential protective items:
- Safety Glasses: Protects eyes from flying debris.
- Hearing Protection: Reduces noise from the saw.
- Dust Mask: Prevents inhalation of harmful sawdust.
- Cut-Resistant Gloves: Protects hands from cuts.
- Steel-Toed Boots: Protects feet from heavy falling objects.
Wearing these items reduces risks significantly. Always check your gear before starting work.
Built-in Safety Mechanisms
Modern table saws come with built-in safety features. These mechanisms are designed to reduce accidents. Here are some common features:
| Safety Feature | Description |
|---|---|
| Blade Guard | Protects the user from the spinning blade. |
| Anti-Kickback Pawls | Prevents the wood from kicking back towards the user. |
| Emergency Stop Button | Quickly shuts off power in emergencies. |
| Riving Knife | Prevents binding and keeps the wood aligned. |
Understanding these features enhances safety. Always ensure they are functioning before use.
Avoiding Kickback
Kickback can be dangerous when using a table saw. It occurs when the blade catches the wood and throws it back at the operator. Understanding how to avoid kickback is essential for safety and precision.
Understanding Kickback Risks
Kickback often happens due to various factors. Knowing these risks can help you stay safe.
- Improper alignment: Misaligned materials can cause kickback.
- Dull blades: Blades that are not sharp can snag wood.
- Incorrect feed rate: Pushing wood too fast invites kickback.
- Unstable workpieces: Loose or unstable pieces can shift unexpectedly.
Understanding these risks helps you prepare properly. Always stay alert while using your saw.
Preventive Measures And Accessories
Implementing preventive measures is crucial. Here are some tips and accessories to consider:
- Use a riving knife: This keeps the kerf open and reduces kickback.
- Install a blade guard: This protects you from accidental contact.
- Utilize push sticks: These keep your hands away from the blade.
- Secure the workpiece: Use clamps to hold it steady.
Consider the following table for common accessories:
| Accessory | Purpose |
|---|---|
| Riving Knife | Prevents wood from pinching the blade. |
| Blade Guard | Offers protection from the spinning blade. |
| Push Stick | Keeps hands away from the blade. |
| Clamps | Secures the material during cutting. |
Following these measures helps you work safely. Always prioritize your safety to enjoy woodworking.
Maintenance For Longevity
Proper maintenance extends the life of your table saw. Regular care ensures optimal performance and safety. Follow these tips to keep your saw running smoothly.
Cleaning And Lubrication
Cleaning and lubrication are essential for table saw upkeep. Dust and debris can affect performance. Use a soft brush or vacuum to remove particles.
- Clean the table surface after each use.
- Check the blade for build-up. Clean it with a blade cleaner.
- Lubricate moving parts regularly. Use a silicone spray or machine oil.
| Component | Cleaning Method | Lubrication Frequency |
|---|---|---|
| Table Surface | Soft cloth or vacuum | After every use |
| Blades | Blade cleaner | Every 5 uses |
| Moving Parts | Dry cloth | Every month |
When To Replace Components
Knowing when to replace parts is vital for safety. Worn components can lead to accidents. Check these parts regularly.
- Blades: Replace if dull or damaged.
- Belt: Inspect for wear. Replace if frayed.
- Motor: Listen for unusual noises. Replace if needed.
Keep a schedule for checking these components. This helps maintain safety and performance.
Advanced Techniques For Precision
Achieving precision in table saw setup requires advanced techniques. These methods enhance accuracy and improve overall results. Mastering these techniques can elevate your woodworking projects.
Using Jigs And Sleds
Jigs and sleds are essential tools for precise cuts. They help maintain straight lines and consistent measurements. Here are some popular jigs:
- Crosscut Sled: Great for making accurate crosscuts.
- Box Joint Jig: Perfect for creating strong box joints.
- Router Table Jig: Ideal for shaping edges with accuracy.
To make a simple crosscut sled:
- Cut a base from plywood.
- Attach runners to fit the table saw’s miter slots.
- Install a fence on the sled’s front edge.
- Adjust for square cuts.
Using jigs and sleds allows for repeatable, precise cuts. They save time and improve the quality of your work.
Incorporating Digital Measuring Tools
Digital measuring tools provide accurate readings. They help reduce human error during setup. Here are some popular tools:
| Tool | Function |
|---|---|
| Digital Caliper | Measures thickness and widths accurately. |
| Laser Distance Measurer | Offers quick distance readings. |
| Digital Angle Finder | Ensures precise angles for cuts. |
To use these tools effectively:
- Ensure the tool is calibrated.
- Read measurements carefully.
- Double-check before cutting.
Incorporating digital measuring tools enhances your setup. They boost accuracy and confidence in your work.
Frequently Asked Questions
How Do I Align The Blade On A Table Saw?
To align the blade on a table saw, use a reliable square. Place it against the blade and check for gaps. Adjust the alignment using the manufacturer’s settings. This ensures precision cuts and enhances safety while working. Regular alignment checks improve your overall table saw performance.
What Safety Gear Do I Need For Table Saws?
When using a table saw, wear safety glasses and hearing protection. A dust mask is essential to avoid inhaling sawdust. Additionally, consider using a push stick for safer handling of wood. Always wear closed-toe shoes and avoid loose clothing to minimize risks during operation.
How Do I Choose The Right Table Saw?
Choosing the right table saw depends on your needs. Consider factors like size, portability, and power. Evaluate whether you need a contractor, cabinet, or portable saw. Research features such as blade size and fence systems. Always read reviews to find a model that suits your woodworking projects.
What Are Common Table Saw Setup Mistakes?
Common setup mistakes include incorrect blade height and angle. Not using a proper fence can lead to uneven cuts. Forgetting to check for blade alignment may also cause issues. Always double-check your setup before starting. Taking time to ensure accuracy can prevent costly errors.
Conclusion
Setting up your table saw correctly is crucial for precision and safety. Following the steps outlined in this guide ensures optimal performance. Always prioritize safety and maintain your equipment. With practice, you’ll master the setup process, leading to better results in your woodworking projects.
Happy sawing!