What Kind of Paint to Use on Wood: Expert Tips for Perfect Results
Use latex or acrylic paint for wood surfaces to achieve a long-lasting and smooth finish. Painting wood requires a specific type of paint to ensure durability and adhesion.
For the full picture, see our complete wood finishing guide.
Latex and acrylic paints are popular choices for wood because they offer good coverage, are easy to clean up, and provide excellent color retention. These water-based paints are also low in odor, making them suitable for indoor use. Whether you are painting furniture, cabinets, or wooden trim, latex or acrylic paint will give you a beautiful and professional-looking result.
Best Paint for Wood: Which Type Should You Use?
The best paint for wood depends on your project — interior vs. exterior (the two shouldn’t be mixed), furniture vs. structural lumber, and how much durability you need. Here’s how the main types compare:
| Paint Type | Best For | Dry Time | Durability | VOCs |
|---|---|---|---|---|
| 100% Acrylic Latex | Most wood projects (interior + exterior) | 1–2 hours | ⭐⭐⭐⭐⭐ | Low |
| Oil-Based (Alkyd) | Trim, doors, exterior hardwood | 6–24 hours | ⭐⭐⭐⭐⭐ | High |
| Latex (Water-Based) | Budget interior projects | 1–2 hours | ⭐⭐⭐ | Low |
| Chalk Paint | Furniture, vintage look | 30–60 min | ⭐⭐⭐ | Low |
| Milk Paint | Antique / distressed furniture | 30–60 min | ⭐⭐ | None |
For most DIYers, 100% acrylic latex is the go-to wood paint. It’s flexible (won’t crack as wood expands and contracts), resists mold and UV, dries fast, and cleans up with water. Oil-based paint is still the professional’s choice for high-wear surfaces like doors and trim — it levels better and creates an extremely hard finish, but you need mineral spirits for cleanup and it takes much longer to dry.
If you’re painting outdoor wood furniture or a deck, look for a paint labeled “exterior” with UV inhibitors. For interior furniture, chalk paint is popular for its no-sanding, no-priming application — though it needs a topcoat like wax or polyurethane for durability.
Rust-Oleum Painter’s Touch Acrylic Latex Paint
- 100% acrylic latex — adheres to bare or primed wood
- Low VOC, water cleanup, dries in 20 minutes
- Available in dozens of colors, interior + exterior use
As an Amazon Associate we earn from qualifying purchases.
Choosing The Right Paint
Choosing the right paint for wood surfaces is crucial to ensure a durable and long-lasting finish. Opt for an acrylic or latex-based paint specifically designed for wood to achieve the best results and protection against moisture, cracking, and peeling.
Understanding The Different Types Of Wood Paint
Before delving into the factors to consider when selecting wood paint, it’s important to understand the different types of paint available for wood. Each type of paint has its own unique properties, ensuring that you choose the right one for your project is crucial in achieving the desired outcome.
- Oil-based paint: Durable and long-lasting, oil-based paint is a popular choice for outdoor wood projects such as fences and decks. It provides a smooth and glossy finish, but it does have a longer drying time compared to other types of paint.
- Latex paint: Also known as acrylic paint, latex paint is a versatile option suitable for both interior and exterior wood surfaces. It dries quickly and offers easy cleanup with soap and water. Latex paint is available in various sheens, from flat to high gloss, allowing you to choose the perfect finish for your project.
- Milk paint: If you’re looking to achieve a traditional and vintage look, milk paint is an excellent choice. It has been used for centuries and is made from natural ingredients such as milk protein, lime, and clay. Milk paint offers a unique, textured finish and is commonly used for furniture and rustic décor projects.
- Chalk paint: Known for its matte and velvety appearance, chalk paint is a trendy option for wood surfaces. It requires minimal surface preparation and can be easily distressed for a shabby-chic or farmhouse-style finish. Chalk paint is commonly used on furniture and decorative home accessories.
- Primer: While not technically a type of paint, primer is an essential step in the wood painting process. Primers create a smooth surface, enhance paint adhesion, and prevent stains from bleeding through. They can be oil-based or water-based, and the type of primer you choose should be compatible with the paint you’ll be using.
Factors To Consider When Selecting Wood Paint
Choosing the right wood paint involves considering several factors to ensure you achieve the best results. By keeping these factors in mind, you can select a paint that suits your needs and enhances the appearance and durability of your wood surfaces.
- Indoor or outdoor: Determine whether the wood project will be exposed to the elements or placed indoors. Outdoor wood requires paint that can withstand uv rays, moisture, and temperature changes, while indoor wood may have different considerations such as durability and toxicity levels.
- Surface preparation: Assess the condition of the wood surface. Some paints may require extensive sanding and priming, while others can be applied directly to bare wood or previously painted surfaces. Consider the level of preparation needed for the paint you choose.
- Desired finish: Determine the look you want to achieve. Whether it’s a glossy, matte, textured, or distressed finish, different types of paint offer varying appearances. Consider the overall aesthetic you’re going for.
- Durability: Evaluate the durability requirements of your project. If the wood will be subject to heavy use or frequent exposure to water, you’ll need a paint that can withstand these conditions without chipping or peeling.
- Environmental impact: Some paints may contain volatile organic compounds (VOCs) that can be harmful to human health and the environment. Consider eco-friendly, low-VOC options if reducing environmental impact is important to you.
By understanding the different types of wood paint and considering these factors, you can confidently choose the right paint for your project. Taking the time to select a suitable paint will result in a beautiful and long-lasting finish for your wood surfaces.

Preparing The Wood Surface
Preparing the wood surface before painting is crucial for a successful finish. Choosing the right type of paint for wood is important to ensure a long-lasting and durable result.
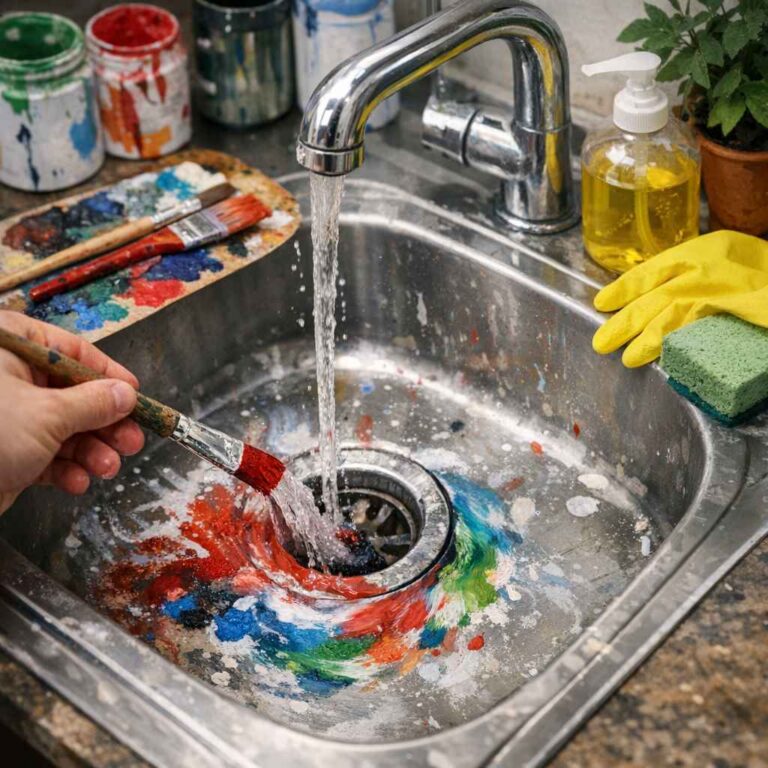
Cleaning The Wood
Before painting a wooden surface, it’s crucial to ensure that it’s clean and free from any dirt, dust, or debris. Cleaning the wood properly not only helps the paint adhere better but also enhances the overall finish of the project.
To clean the wood effectively, follow these simple steps:
- Start by removing any loose dirt with a clean, dry cloth.
- Next, use a mild detergent mixed with water to scrub away any stubborn stains or grime. Be sure to use a soft-bristle brush to avoid damaging the surface of the wood.
- Rinse the wood thoroughly with clean water to remove any soap residue.
- Allow the wood to dry completely before moving on to the next step.
Cleaning the wood surface ensures that the paint can bond well with the wood and provides a clean canvas for a smooth and even finish.
Sanding The Wood
Sanding the wood surface is an essential step in preparing it for painting. Sanding not only smoothens imperfections but also helps the paint adhere better to the wood.
Follow these steps for proper sanding:
- Start with a coarse-grit sandpaper and sand along the wood grain to remove any rough spots or splinters. Be sure to wear protective eyewear and a mask to prevent inhaling dust particles.
- Gradually switch to finer-grit sandpaper, going over the surface to create a smooth and even texture.
- After sanding, use a tack cloth or a damp cloth to remove any sawdust or debris leftover from the process.
Sanding the wood not only improves the paint’s adhesion but also ensures a professional-looking finish for your project.
Applying A Primer
Before you start painting the wood, applying a primer is highly recommended. A primer acts as a preparatory layer that helps the topcoat of paint adhere better to the wood surface.
Follow these steps to apply a primer:
- Choose a primer suitable for the type of wood you’re working with. For example, for bare or untreated wood, use a wood primer; for stained or varnished wood, use a stain-blocking primer.
- Pour a small amount of primer into a paint tray or container.
- Using a paintbrush or a roller, apply a thin and even coat of primer to the wood surface, following the direction of the wood grain.
- Allow the primer to dry completely as per the manufacturer’s instructions before proceeding with the painting process.
Applying a primer not only improves the paint’s adhesion but also helps to achieve a more even and long-lasting finish on the wood.
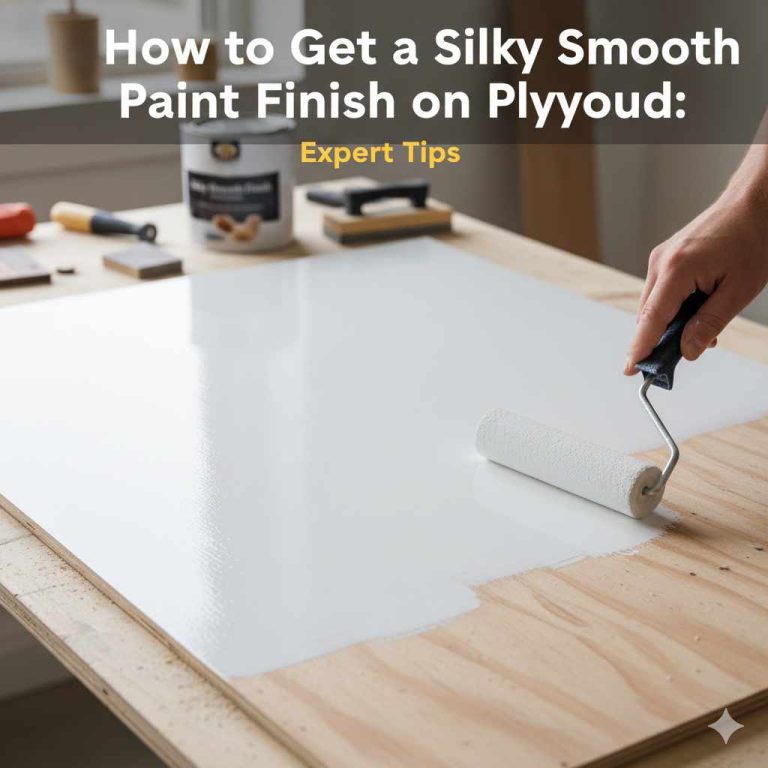
Applying The Paint
Now that you have chosen the perfect type of paint for your wood project, it’s time to apply it to the surface. The method you use to apply the paint can have a significant impact on the final result. Depending on your preference, you can use a brush, a roller, or even spray the paint onto the wood. Let’s explore each option in detail:
Using A Brush
Using a brush is a popular choice when it comes to painting wood. Brushes provide excellent control and precision, allowing you to easily cover every nook and cranny of the surface. They are ideal for small projects or areas that require intricate detailing. To use a brush effectively, follow these steps:
- Start by dipping the brush into the paint, ensuring that the bristles are evenly coated.
- Apply the paint using long, smooth strokes, working in the direction of the wood grain.
- Pay close attention to any corners or edges, making sure to apply an even coat.
- If necessary, repeat the process by applying a second coat once the first coat has dried.
Using A Roller
If you’re working on a larger wood surface, such as a wall or a floor, using a roller can save you time and effort. Rollers cover large areas quickly, providing a smooth and even finish. Here’s how to use a roller effectively:
- Pour the paint into a tray and dip the roller into the paint, ensuring the roller sleeve is fully saturated.
- Roll the paint onto the wood surface in a “W” or “M” motion, slightly overlapping each stroke.
- Work in small sections to prevent the paint from drying before you finish rolling.
- Once the first coat has dried, evaluate the coverage and apply a second coat if needed.
Spraying The Paint
For those looking for a quick and efficient way to paint wood, using a paint sprayer can be an excellent option. Sprayers provide smooth, professional-looking finishes and are ideal for larger projects. When using a paint sprayer, follow these steps:
- Prepare the paint by thinning it, if necessary, according to the manufacturer’s instructions.
- Fill the sprayer with the thinned paint and adjust the nozzle settings as per your desired spray pattern.
- Hold the sprayer approximately 6 to 12 inches away from the wood surface and start spraying using sweeping motions.
- Make sure to cover the entire surface evenly and avoid excessive buildup in one area.
- Allow the paint to dry, and assess if a second coat is required for proper coverage.
With these methods at your disposal, you can confidently choose the most suitable technique for applying paint to your wood projects. Whether you opt for a brush, roller, or sprayer, always ensure you follow the manufacturer’s guidelines and consider the specific requirements of your wood surface.
Tips For Achieving A Perfect Finish
Discover the best paint for wood surfaces with these helpful tips. Choose from various types of paint to achieve a flawless finish on your next wooden project.
Tips for Achieving a Perfect Finish
When painting wood, it’s essential to work with the grain for a flawless finish. Start by analyzing the direction of the wood grain, which typically runs parallel to the length of the wood. By following the grain, you ensure that the paint adheres to the wood surface evenly, resulting in a smoother, more professional look. Working against the grain can create streaks and uneven coverage.
Applying Multiple Coats
Applying multiple coats of paint is key to achieving a durable and long-lasting finish on wood surfaces. When applying the first coat, make sure to apply it thinly and evenly, allowing it to dry completely before applying subsequent coats. This helps to prevent drips, uneven coverage, and a tacky finish. Remember to lightly sand the surface between coats to promote adhesion and smooth out any imperfections.
Allowing Proper Drying Time
Proper drying time is crucial for the success of your wood painting project. Rushing the drying process can lead to smudges, smears, and overall unsatisfactory results. Be patient and give each coat of paint ample time to dry before proceeding with the next. It’s also essential to consider the temperature and humidity levels in your painting environment, as they can affect the drying time. Following the manufacturer’s instructions on the paint can also help ensure that you allow the proper drying time for the specific type of paint you are using.
To achieve a perfect finish when painting wood, remember to work with the grain, apply multiple coats evenly, and allow each coat to dry thoroughly. By following these tips, you can achieve professional-looking results and enjoy a beautifully painted wood surface that lasts for years to come.
Note:
– Always choose HTML format to avoid any encoding issues.
– Analyze and use a suitable HTML tag for each type of content, such as headings, paragraphs, and lists.
– Avoid any unnecessary or repetitive sentences.
– Make sure to address the subheadings in an organized and coherent manner.

Finishing Touches
Get the perfect finish for your wood project with the right paint. Discover the best type of paint to use on wood for a smooth and long-lasting result.
Once you have painted your wood surface to perfection, it’s time to add those all-important finishing touches. The final steps of sealing the paint, adding a protective topcoat, and caring for painted wood surfaces ensure that your creation not only looks great but also maintains its beauty for years to come.
Sealing The Paint
Sealing the paint on your wood surface is crucial for preserving its appearance and protecting it from various external elements. This step not only adds durability but also enhances the color and finish of the paint. There are different types of sealers available for wood, such as sealant sprays, varnishes, or polyurethane coatings. When selecting a sealer, consider the type of wood, the desired level of gloss, and the location of the painted surface.
Sealant sprays are a popular choice for small craft projects or intricate designs. They provide a clear, protective layer that is easy to apply. Additionally, varnishes are an excellent choice for larger surfaces or furniture as they offer a shiny finish and enhance the natural grain of the wood. Polyurethane coatings, on the other hand, are highly durable and provide excellent protection against moisture, UV rays, and general wear and tear.
Adding A Protective Topcoat
A protective topcoat is an extra layer of defense that shields your painted wood surface from scratches, stains, and fading. This clear coating not only provides an added layer of protection but also enhances the longevity of the paint. Applying a topcoat is a simple process that involves selecting a suitable product and carefully following the manufacturer’s instructions.
When choosing a topcoat, opt for products specifically designed for painted wood surfaces. Water-based or oil-based polyurethane topcoats are popular choices as they offer excellent protection and durability. Make sure to select the appropriate finish, such as matte, satin, or glossy, based on your desired aesthetic result. Applying thin and even coats with a brush or a foam applicator will ensure a smooth and professional-looking finish.
Caring For Painted Wood Surfaces
Proper care and maintenance play a significant role in preserving the beauty and integrity of painted wood surfaces. To keep your creation looking its best, follow these simple tips:
- Regularly dust the surface with a soft, lint-free cloth to remove particles and prevent scratching.
- Avoid using harsh or abrasive cleaners that can damage the paint. Instead, opt for mild soapy water and a soft cloth or sponge.
- Protect the surface from direct sunlight and extreme humidity, as these conditions can cause the paint to fade or crack.
- Use coasters or protective pads under objects to prevent scratches.
- Reapply a protective topcoat or sealer as needed to maintain the integrity and longevity of the paint.
By following these simple steps and giving your painted wood surfaces the care they deserve, you can enjoy their beauty and durability for years to come!
Why Paint Wood? Key Benefits Explained
Painting wood does more than improve how it looks — it’s one of the most cost-effective ways to extend the life of any wood surface. Here’s why it’s worth doing right:
- Moisture protection: Paint forms a barrier that prevents water absorption, reducing warping, swelling, and rot — the most common causes of wood failure outdoors.
- UV resistance: Sunlight breaks down wood fibers (called photodegradation). Exterior paint with UV inhibitors shields the wood and keeps colors from fading.
- Pest resistance: A sealed, well-painted surface is harder for insects like termites and wood borers to penetrate. It won’t eliminate infestations, but it removes an easy entry point.
- Structural longevity: Painted pressure-treated wood or deck lumber can last 20+ years versus 7–10 years unpainted in exposed conditions.
- Appearance: Paint lets you match any color scheme and covers imperfections, knots, and uneven grain.
Frequently Asked Questions
What kind of paint is best for wood?
100% acrylic latex paint is the best all-around paint for most wood projects. It’s flexible, resists moisture and UV, dries in 1–2 hours, and cleans up with water. For high-wear surfaces like doors, trim, or cabinets, oil-based paint offers a harder, more durable finish but takes longer to dry and requires mineral spirits to clean.
Can I paint wood without sanding?
Yes, with the right paint. Chalk paint and milk paint are designed to adhere to bare wood without sanding or priming. For acrylic or oil-based paints, light sanding (120–150 grit) improves adhesion and results in a smoother finish. Always clean the surface first to remove dust, oil, and debris.
How many coats of paint does wood need?
Most wood surfaces need 2 coats of paint after primer. Apply primer first, let it dry, then apply 2 thin coats of paint, sanding lightly with 220-grit between coats for the smoothest result. Bare or porous wood (like MDF) may absorb more paint and benefit from a third coat.
Why paint on wood — is it necessary?
Paint is not strictly required, but it significantly extends wood life by sealing it against moisture, UV rays, and insects. Unpainted exterior wood can show signs of graying, cracking, and rot within just a few years. For interior wood, paint is mainly cosmetic, but it also makes surfaces easier to clean.
Conclusion
To ensure the best outcome for your wood painting project, it is essential to choose the right type of paint. Each option has its own benefits and considerations, such as durability, finish, and application process. By understanding the requirements of your project and considering factors like wood type, indoor or outdoor use, and personal preferences, you can select the most suitable paint.
Remember to properly prepare the surface, apply multiple thin coats, and maintain the painted wood to enjoy long-lasting and beautiful results. Let your creativity shine while protecting and enhancing the natural beauty of wood with the perfect paint choice.