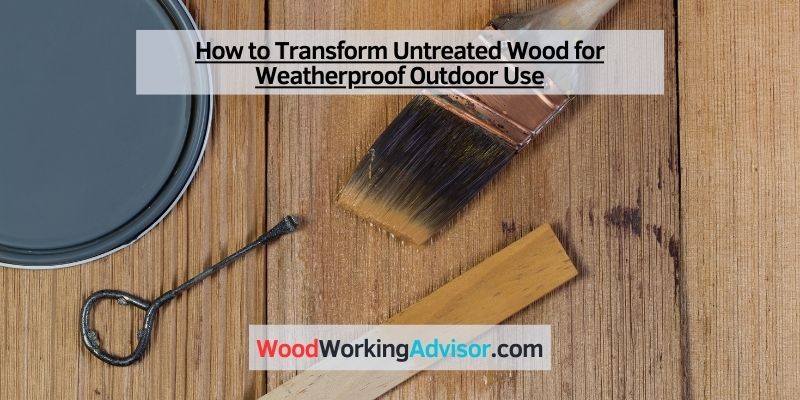
How to Transform Untreated Wood for Weatherproof Outdoor Use
To treat untreated wood for outdoor use, apply a water-repellent finish and protect it with a sealant. Untreated wood used outdoors is vulnerable to moisture, rot, and insect damage.
Proper treatment is essential to enhance its durability and weather resistance. By applying a water-repellent finish first, you can prevent water absorption and minimize swelling or shrinking. This step also helps protect the wood from mold and mildew. Once the finish is dry, apply a sealant to create a protective barrier against the elements.
Choose a sealant specifically designed for outdoor use, such as a clear wood preservative or a penetrating oil-based sealant. Regular maintenance, including cleaning and reapplying the finish, will prolong the life and beauty of your outdoor wood.
Importance Of Treating Wood For Outdoor Use
Properly treating untreated wood for outdoor use is crucial to extend its lifespan and protect it from the damaging effects of weather and insects. By applying the right treatment, such as sealants, wood preservatives, and stains, you can ensure that your outdoor wood remains durable and visually appealing for years to come.
Understanding The Effects Of Weather On Untreated Wood
Untreated wood exposed to the harsh outdoor elements is prone to various issues that can compromise its integrity and appearance. When wood is left untreated, it becomes vulnerable to rotting, warping, splitting, and degradation caused by moisture, sunlight, insects, and fungi. These weather-related effects can significantly reduce the lifespan of outdoor wood products and lead to costly repairs or replacements.
Enhancing The Durability And Longevity Of Wood Products
To ensure the durability and longevity of wood products in outdoor settings, it is crucial to treat the wood properly. Treating wood for outdoor use involves applying protective finishes or sealants that create a barrier against moisture, UV radiation, pests, and decay-causing organisms. By enhancing the natural resistance of the wood, treatment minimizes the potential for damages and extends the lifespan of outdoor wood products.
Understanding The Effects Of Weather On Untreated Wood
When exposed to the elements, untreated wood absorbs moisture, leading to swelling, warping, and cupping. Moisture also provides a conducive environment for fungi, such as mold and mildew, which can cause discoloration and decay. Additionally, sunlight can cause the wood to fade, dry out, and become brittle over time. UV radiation breaks down the lignin, a substance responsible for the wood’s strength and stability, resulting in cracking, splintering, and reduced structural integrity.
Furthermore, insects like termites and carpenter ants are attracted to untreated wood and can cause extensive damage. They burrow into the wood, creating tunnels and hollow sections that weaken the structure. The combination of these factors degrades the overall quality of untreated wood, making it vulnerable to premature failure.
Enhancing The Durability And Longevity Of Wood Products
By treating wood for outdoor use, you can prevent or mitigate these weather-related issues. The application of protective finishes, such as varnishes, paints, stains, or water repellents, creates a barrier that shields the wood from moisture, UV radiation, pests, and fungal growth. This protective layer reduces the wood’s absorption of moisture, minimizing swelling, warping, and cupping.
In addition to moisture resistance, treated wood products are better equipped to withstand the damaging effects of sunlight. The protective finishes offer UV protection, preventing the wood from fading, drying out, and becoming brittle. This keeps the wood looking vibrant and extends its lifespan.
Treating wood for outdoor use also deters insects from infesting the wood. The protective sealants and chemical treatments used during the treatment process act as a deterrent or pesticide, preventing termite and carpenter ant infestations. By eliminating these wood-boring insects, the structural integrity of the wood is maintained, significantly prolonging its lifespan.
In conclusion, treating wood for outdoor use is of utmost importance. It combats the effects of weather, prevents wood degradation, and enhances the durability and longevity of wood products. By applying protective finishes or sealants, you can safeguard your outdoor wood against moisture, sunlight, insects, and decay. Treating wood not only preserves its natural beauty but also saves you from unnecessary expenses and the hassle of premature repair or replacement. So go ahead and treat your outdoor wood – it’s an investment that will pay off in the long run.
Choosing The Right Type Of Wood
Choose the perfect untreated wood for outdoor use by considering factors like durability, resistance to weather and rot, and maintenance requirements. Proper treatment can enhance the wood’s lifespan and protect it from elements, ensuring a long-lasting and beautiful outdoor structure or furniture piece.
Wood is a popular choice for outdoor projects, thanks to its natural beauty and durability. However, not all types of wood are suitable for outdoor use straight out of the box. Untreated wood can be susceptible to various issues such as rot, decay, and insect damage when exposed to the elements. By properly treating your untreated wood, you can enhance its strength and resilience, making it ideal for outdoor applications. The first step in this process is choosing the right type of wood. In this section, we will explore two important factors to consider when selecting the best wood for your outdoor project: understanding wood species and their properties, and considering cost and availability.
Understanding Wood Species And Their Properties
Different wood species have varying levels of natural resistance to decay and rot. Some are naturally more durable and require less treatment, while others may require more extensive measures. It’s important to familiarize yourself with the properties of different wood species to choose the one that suits your needs best.
| Wood Species | Durability | Treatment Requirements |
|---|---|---|
| Cedar | High | Minimal |
| Redwood | High | Minimal |
| Treated Pine | Medium | Regular maintenance and treatment |
| White Oak | High | Minimal |
| Pressure-Treated Wood | High | Initial treatment required |
Note: The durability and treatment requirements mentioned above are general guidelines and may vary based on specific wood quality and environmental conditions.
Considering Cost And Availability
Apart from durability and treatment requirements, cost and availability are also important factors to consider when choosing the right type of wood for your outdoor project.
- Cost: Different wood species come with different price tags. Exotic or imported species might be more expensive compared to locally available options. Consider your budget and the overall cost of the project when making your selection.
- Availability: Some wood species may be readily available in your region, while others may be harder to find. Local availability can impact the cost, as well as the convenience of sourcing the wood for your project.
By carefully weighing the factors of durability, treatment requirements, cost, and availability when choosing your wood species, you can ensure that your untreated wood is a suitable and long-lasting option for outdoor use. Next, we will delve into the various treatment methods available to preserve and protect your wood for outdoor applications.
Preparation Of Untreated Wood
When it comes to using untreated wood for outdoor projects, it is essential to properly prepare the wood to ensure its durability and longevity. Without proper treatment, untreated wood is susceptible to rotting, warping, and insect infestation. Therefore, before using untreated wood in outdoor settings, it is crucial to follow a few essential steps to prepare the wood properly.
Cleaning The Wood Surface
Before you begin treating untreated wood for outdoor use, the first step is to thoroughly clean the wood surface. Outdoor wood may be exposed to dust, dirt, and other contaminants that can affect the treatment process and the overall finish.
To clean the wood surface, follow these steps:
- Remove any loose dirt or debris using a broom or brush.
- Prepare a solution of mild soap or wood cleaner and water.
- Using a sponge or soft brush, gently scrub the wood surface with the cleaning solution.
- Rinse the wood surface with clean water to remove any leftover residue.
- Allow the wood to dry completely before proceeding to the next step.
Cleaning the wood surface ensures that the treatment can penetrate the wood effectively and provides a clean, smooth canvas for the next steps.
Sanding And Smoothing The Wood
After cleaning the wood surface, the next step is to sand and smooth the wood. Sanding removes rough edges, splinters, and any existing coatings or finishes on the wood.
Here’s how to sand and smooth the wood:
- Start by selecting the appropriate sandpaper grit, depending on the condition of the wood.
- Using a sanding block or an electric sander, sand the wood in the direction of the grain.
- Be sure to sand all surfaces and edges of the wood to achieve an even finish.
- Check the wood periodically to ensure the desired smoothness is achieved.
- Remove any dust or debris resulting from sanding using a clean, dry cloth.
Sanding and smoothing the wood not only enhances its appearance but also helps the treatment to penetrate the wood surface more effectively, ensuring better protection against outdoor elements.
Removing Any Imperfections
Lastly, before applying any treatments, it is essential to identify and address any imperfections on the wood surface. This includes cracks, knots, or any other visible defects that may impact the wood’s durability and effectiveness of the treatment.
To remove imperfections on the wood surface, follow these steps:
- Inspect the wood surface carefully, paying attention to any cracks, knots, or irregularities.
- If necessary, use a wood filler or epoxy resin to fill in any cracks or holes.
- Gently smooth the filled areas using sandpaper or a sanding block.
- Remove any excess filler or dust resulting from the smoothing process.
By removing any imperfections, you ensure that the treatment can be applied evenly and provide maximum protection to the wood, prolonging its lifespan in outdoor environments.
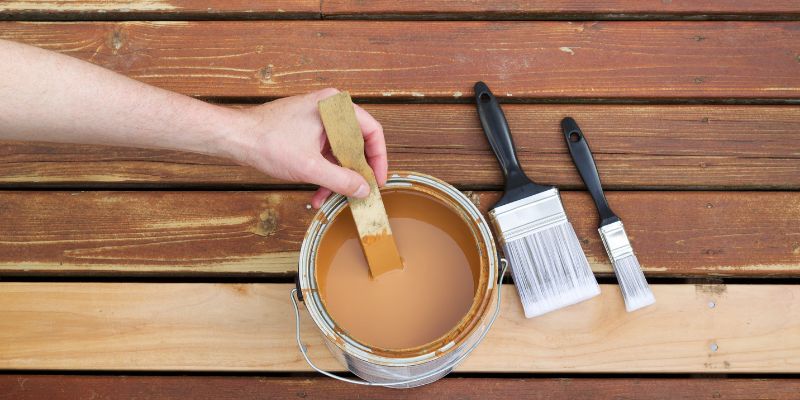
Applying A Protective Finish
When it comes to treating untreated wood for outdoor use, applying a protective finish is essential. A protective finish not only enhances the aesthetic appeal of the wood but also prolongs its lifespan by shielding it from the harsh outdoor elements. There are several options available for applying a protective finish to untreated wood, including selecting the appropriate weatherproofing product, applying wood stain or paint, and using sealants for added protection.
Selecting The Appropriate Weatherproofing Product
Choosing the right weatherproofing product for your untreated wood is crucial to ensure long-lasting protection. There are various options available in the market, including oils, varnishes, and sealants. It is important to consider factors such as the type of wood, the desired level of protection, and personal preferences when making your selection.
Applying Wood Stain Or Paint
Wood stains and paints not only protect the wood from moisture and UV rays but also add a touch of color and character to your outdoor space. Before applying a wood stain or paint, it is vital to prepare the wood surface properly. This involves sanding any rough areas, cleaning the surface to remove dust and debris, and ensuring it is completely dry. Applying a primer can also help improve adhesion and enhance the durability of the finish.
Using Sealants For Added Protection
Sealants provide an extra layer of protection to untreated wood, helping to prevent moisture penetration and minimize the risk of rot, decay, and warping. Silicone-based sealants are a popular choice due to their durability and flexibility. Before applying a sealant, it is important to ensure the wood surface is clean and free from any previous finishes. Using a brush, roller, or sprayer, carefully apply the sealant to all exposed surfaces, paying extra attention to joints and end grains for maximum protection.
Sealing Joints And Edges
When it comes to using untreated wood for outdoor projects, it’s essential to properly seal the joints and edges. This step is crucial for preventing moisture penetration, which can lead to swelling, warping, and decay over time. By applying caulk to seal gaps and cracks, as well as using wood fillers for imperfections, you can ensure the longevity and durability of your outdoor woodwork.
Applying Caulk To Seal Gaps And Cracks
If you notice any gaps or cracks in the joints and edges of your untreated wood, it’s important to address them before moving forward. Caulk is an excellent option for sealing these imperfections, creating a watertight barrier that protects the wood from moisture damage.
Here’s a step-by-step guide on how to apply caulk effectively:
- Clean the area: Before applying caulk, make sure the surface is clean and free from dust, debris, and any old caulk. Use a putty knife or a brush to remove any loose material.
- Select the right caulk: There are various types of caulk available, including silicone and acrylic-based options. Consider the specific needs of your project and choose a caulk that is suitable for outdoor use and compatible with the type of wood you’re working with.
- Prepare the caulk gun: Cut the nozzle of the caulk tube at an angle, approximately the same size as the gap or crack you need to fill. Load the caulk tube into a caulk gun and squeeze the trigger until the caulk begins to flow.
- Apply the caulk: Slowly and evenly apply the caulk along the gap or crack, ensuring complete coverage. Use a caulk smoothing tool or a wet finger to smooth the surface and remove any excess caulk.
- Allow drying and curing: Follow the manufacturer’s instructions for drying and curing time. This step is crucial to ensure the best adhesion and effectiveness of the caulk.
Using Wood Fillers For Imperfections
In addition to sealing gaps and cracks, wood fillers are an excellent solution for repairing and smoothing out any imperfections in the wood surface. They can help create a uniform and seamless finish, enhancing the appearance and durability of the untreated wood.
Here’s how to use wood fillers effectively:
- Prepare the surface: Ensure that the wood surface is clean and free from dust, dirt, and any loose material. Sand the area lightly to create a better bond between the wood filler and the surface.
- Select the right wood filler: There are different types of wood fillers available, including water-based and solvent-based options. Choose a wood filler that matches the color of your untreated wood or can be stained to match.
- Apply the wood filler: Using a putty knife or a filling knife, scoop out the wood filler and apply it to the imperfections. Press the filler firmly into the gaps or cracks, ensuring complete coverage.
- Smooth and level the filler: Use the putty knife or filling knife to smooth and level the wood filler, ensuring it is flush with the surrounding wood surface. Remove any excess filler to create a seamless finish.
- Allow drying and curing: Follow the manufacturer’s instructions for drying and curing time. This step is essential to ensure the wood filler hardens sufficiently.
- Sand and finish: Once the wood filler is completely dry, sand it gently to blend it with the surrounding wood. Apply a suitable finish or stain to protect the wood and maintain a consistent appearance.
By sealing joints and edges with caulk and using wood fillers for imperfections, you can effectively treat untreated wood for outdoor use. These steps not only protect the wood from moisture damage but also enhance its aesthetics and extend its lifespan. Enjoy the beauty and resilience of your outdoor woodwork with the right sealing techniques!
Weatherproofing Techniques For Different Wood Projects
Weatherproofing techniques are essential to ensure the longevity and durability of untreated wood when used for outdoor projects. Different wood projects require varying methods of weatherproofing to protect them from the elements and prevent damage caused by moisture, sunlight, and other environmental factors. In this article, we will explore effective weatherproofing techniques for outdoor furniture, decks and patios, as well as wood structures and sheds.
Weatherproofing Outdoor Furniture
Outdoor furniture is exposed to various weather conditions throughout the year, which can lead to wear and tear if left untreated. By weatherproofing your outdoor furniture, you can enhance its lifespan and maintain its aesthetic appeal. Here are some techniques to consider:
- Applying a protective finish: Choose a high-quality finish specifically designed for outdoor use, such as an oil-based varnish or polyurethane. Apply a thin coat evenly to the furniture, allowing it to dry thoroughly before adding additional coats.
- Sealing joints: Outdoor furniture often has joints and connections where moisture can seep in. Seal these areas with a waterproof adhesive or caulk to prevent water damage and ensure longevity.
- Regular cleaning and maintenance: Clean your outdoor furniture regularly with mild soap and water, and remove any dirt or debris that may accumulate. Additionally, consider covering your furniture during extreme weather conditions to further protect it.
Protecting Decks And Patios
Decks and patios are highly susceptible to weather-related damage due to their constant exposure to the elements. Proper weatherproofing techniques can safeguard these areas and extend their lifespan. Consider the following measures:
- Waterproofing sealant: Apply a waterproofing sealant specifically designed for wood to protect your deck or patio from moisture. This sealant forms a protective barrier, preventing water absorption and minimizing the risk of warping, cracking, or rotting.
- Regular cleaning: Regularly sweep and clean your deck or patio to prevent the buildup of dirt and leaves, which can retain moisture and promote mold growth. Use a pressure washer or a mild detergent solution for a thorough clean.
- Regular maintenance: Inspect your deck or patio for any signs of damage or wear regularly. Replace or repair any loose boards, nails, or screws promptly to maintain structural integrity.
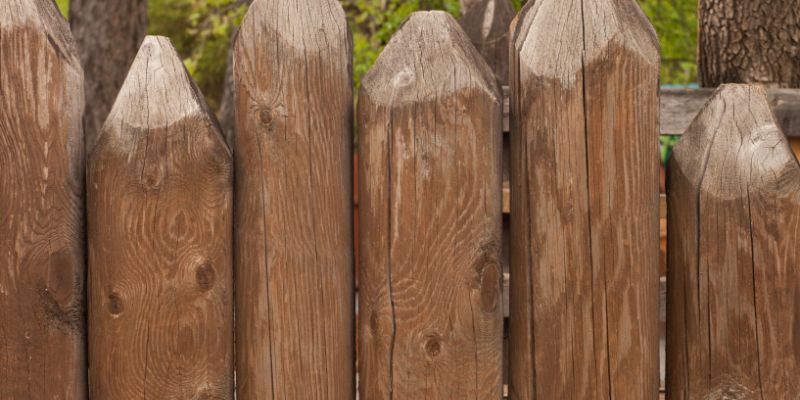
Securing Wood Structures And Sheds
Wood structures and sheds, such as fences, pergolas, and storage sheds, require weatherproofing to withstand the elements and maintain their structural integrity. Here are some techniques to consider when weatherproofing these wood projects:
| Technique | Description |
| Pressure-treated wood | Consider using pressure-treated wood for your structures. Pressure-treated wood is infused with preservatives that protect against rot, decay, and insect damage. |
| Waterproof paint or stain | Applying a waterproof paint or stain can provide an additional layer of protection against moisture and UV rays. Choose a product specifically formulated for exterior applications. |
| Sloping and proper drainage | Ensure proper sloping and drainage of water away from your wood structures and sheds to prevent water accumulation, which can lead to water damage and rot. |
By implementing these weatherproofing techniques for different wood projects, you can protect your untreated wood from the damaging effects of weather and prolong its life, ensuring many years of enjoyment and functionality.
Maintaining And Reapplying The Weatherproofing Treatment
When it comes to using untreated wood for outdoor projects, it’s essential to understand the importance of maintaining and reapplying the weatherproofing treatment. Without proper care, untreated wood can quickly deteriorate, leading to rot, warping, and other damage. In this section, we will discuss the necessary steps for keeping your outdoor wood looking its best and how to properly reapply the weatherproofing treatment.
Regular Cleaning And Inspection:
Regular cleaning and inspection are crucial for maintaining the longevity of your outdoor wood. Over time, dirt, debris, and moisture can accumulate on the surface, promoting the growth of mold and mildew. To prevent this, it’s recommended to clean your outdoor wood regularly. Here’s how:
- Begin by using a stiff-bristle brush to remove any loose dirt or debris from the wood surface.
- Mix a solution of mild detergent and water, and scrub the wood surface using a sponge or soft-bristle brush.
- Rinse thoroughly with clean water to remove any soapy residue.
- Allow the wood to dry completely before proceeding with the inspection.
Regular inspections are essential for identifying any signs of damage or wear. It’s crucial to address these issues promptly to prevent further deterioration. Here are some key points to consider during your inspection:
Checking For Signs Of Damage And Wear:
- Look for any signs of discoloration, cracking, or splintering on the wood surface.
- Check for areas with excessive moisture or dampness, as this can indicate potential rot.
- Inspect the wood for any signs of insect infestation, such as holes or sawdust.
- Assess the overall stability and structural integrity of the wood.
If you notice any signs of damage or wear during your inspection, it’s crucial to address them promptly. Small issues can often be repaired with minimal effort, but neglecting them can lead to more significant problems down the line.
When And How To Reapply The Weatherproofing Treatment:
Reapplying the weatherproofing treatment is an essential step in maintaining the longevity of your outdoor wood. The frequency of reapplication will depend on various factors, such as climate conditions, exposure to sunlight, and the type of weatherproofing product used. Here are some guidelines to follow:
- Check the manufacturer’s instructions for the recommended reapplication intervals.
- Pay attention to any noticeable changes in the wood’s appearance, such as fading or water absorption.
- If the wood’s surface feels rough or dry to the touch, it may be time to reapply the treatment.
Before reapplying the weatherproofing treatment, it’s crucial to prepare the wood surface properly:
- Begin by cleaning the wood as outlined in the previous section to remove any dirt or debris.
- Allow the wood to dry completely before applying the treatment.
- Using a brush or roller, apply the weatherproofing treatment evenly across the entire wood surface.
- Follow the product’s instructions regarding the number of coats and drying times.
Remember, investing time in regular maintenance and reapplying the weatherproofing treatment will help protect your outdoor wood from damage, ensuring it remains durable and beautiful for years to come.
Additional Tips For Weatherproofing Wood
When it comes to outdoor use, untreated wood requires proper treatment to protect it from the elements. In our previous sections, we discussed the importance of treating untreated wood for weatherproofing. In this section, we will dive deeper into additional tips to ensure your wood stays protected for longer.
Proper Storage And Protection During Construction
Proper storage and protection during construction plays a vital role in weatherproofing your wood. Here are some key pointers to keep in mind:
- Store your untreated wood in a dry and well-ventilated area to prevent moisture buildup. Excessive moisture can lead to mold, rot, and decay.
- Cover the wood to protect it from rain or snow during construction. This will prevent the wood from absorbing excess moisture.
- Use tarps or plastic sheeting to shield the wood from direct sunlight. Exposure to the sun’s UV rays can cause discoloration and weaken the wood over time.
- If possible, construct under a temporary shelter or canopy to provide added protection.
Avoiding Common Mistakes
By avoiding common mistakes, you can significantly extend the lifespan of your untreated wood. Take note of these tips:
- Apply multiple coats of a high-quality wood sealer or preservative. This helps to create a strong barrier against moisture, insect damage, and UV rays.
- Make sure to follow the manufacturer’s instructions when applying the wood treatment products. Using the correct amount and proper application techniques is crucial for effective protection.
- Regularly inspect and maintain your treated wood. Promptly address any signs of discoloration, cracking, or damage to prevent further deterioration.
- Be cautious when using pressure-treated wood. While it is known for its resistance to decay, it can still benefit from additional weatherproofing treatments and protective finishes.
Considering Environmentally Friendly Alternatives
If you are conscious about the environmental impact of your outdoor wood treatment, there are several eco-friendly alternatives to consider:
- Look for water-based wood sealers or preservatives that are free from harmful chemicals.
- Consider using natural oils, such as linseed oil or tung oil, as they provide excellent moisture resistance.
- Explore eco-friendly wood treatments made from plant-based ingredients.
- Opt for reclaimed or recycled wood for your outdoor projects, promoting sustainability and reducing the demand for new timber.
By following these additional tips for weatherproofing wood, you can ensure the longevity and durability of your outdoor projects. Proper storage, avoiding common mistakes, and considering environmentally friendly alternatives will help you enjoy your natural wood surfaces for years to come.
Frequently Asked Questions For How To Treat Untreated Wood For Outdoor Use
Can You Weatherproof Untreated Wood?
Yes, untreated wood can be weatherproofed. Applying a weatherproofing sealant or stain helps protect the wood from moisture, UV rays, and other weather elements. It creates a barrier that prevents damage and extends the lifespan of the wood.
How Do You Seal Raw Wood For Outdoor Use?
To seal raw wood for outdoor use, you can follow these simple steps:
1. Sand the wood surface to make it smooth.
2. Apply a wood sealer or primer to protect against moisture and UV damage.
3. Allow the sealer to dry completely.
4. Sand the surface lightly again to remove any imperfections.
5. Apply an outdoor wood finish or paint for added protection.
How Do You Treat Wood So It Doesn’t Rot Outside?
To prevent wood from rotting outside, apply a wood preservative that contains chemicals like copper or zinc. Seal the wood with a waterproof sealant and make sure to keep it clean and free from debris. Regularly inspect and maintain the wood to ensure its longevity.
How Long Will Untreated Wood Last Outside If Painted?
Untreated wood painted for outdoor use can last for many years, typically up to 10-15 years with proper maintenance. The paint provides a protective barrier against rot, moisture, and sun damage, significantly extending the lifespan of the wood. Regular maintenance, including repainting, can further prolong its durability.
Conclusion
Treating untreated wood for outdoor use is crucial for preserving its longevity and durability. By following the steps mentioned in this blog post, you can ensure that your wood remains protected from moisture, insects, and other types of damage. Whether you choose to use sealants, stains, or oils, remember to clean and prepare the wood beforehand for optimal results.
Taking these steps will help you enjoy your outdoor wood projects for years to come.