Will Painting Tree Stump Grow? Proven Stop!
Painting a tree stump will not stop new sprouts or regrowth from it – it’s a common misconception to think it seals growth, like a cap. For proven ways to stop your stumps from sprouting, you need to focus on removal strategies rather than just covering them up, ensuring they stay gone for good.
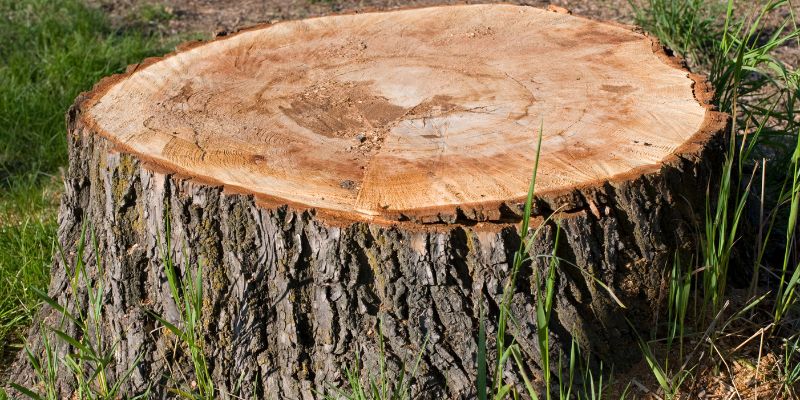
Have you ever taken down a tree and seen tiny new
shoots popping out of the stump weeks later? It’s a frustrating sight, especially when
you thought all the work was done. Many people wonder if painting the tree
stump can be a simple fix to prevent this unwelcome regrowth. While it might seem
like common sense – treating the “wound” to “heal” it – the truth is a bit
more complicated, and often disappointing for those looking for a quick
visual solution. This often leads to more questions: what really stops a
bothersome stump from coming back?
The good news is that preventing tree stumps from growing
back is entirely achievable, even without professional help or extensive
gardening experience. We’ll walk through practical, effective methods tailored
for beginners, helping you tackle that stubborn stump without unnecessary
complications. By understanding what makes a stump sprout and which actions
truly combat it, you’ll be well-equipped. Let’s get that stump out of sight
and prevent any surprise greenery!
Will Painting a Tree Stump Stop It From Regrowing? Let’s Find Out!
Many homeowners, confronted with a newly cut tree stump,
opt for a cosmetic fix: paint. The hope is that applying a layer of outdoor primer or
paint will act like a seal, preventing moisture and nutrients from being
accessed by any remaining life within the stump, thus squashing any chance of
future sprouts. It’s an intuitive idea, much like covering a cut on
your skin to prevent infection. However, when it specifically comes to tree
stumps, this solution fundamentally misunderstands how trees reroute growth and
repair themselves at a biological level.
A tree isn’t just the visible parts you prune; a vast,
interconnected network of root systems lies beneath the soil. Even when the
main trunk is removed, dormant buds are almost certainly present within the
stump’s woody tissue. These buds are designed naturally to take over if the
primary growth points are compromised or damaged. They lie waiting for the right
conditions – such as available moisture, sunlight, proper temperatures, and yes,
access to reserves of stored sugars and nutrients still within the stump – leading to
new growth. When you paint a stump, you’re only covering the visible surface entirely.
This cosmetic layer does not penetrate deep enough to damage or seal off
these crucial dormant buds on any cellular level throughout the entirety of the wood.
As long as water and sunlight are available, these buds may still receive enough
encouragement to activate.
The Biology of Stump Sprouts: Why Painting Doesn’t “Seal the Deal”
To truly stop a tree stump from becoming an annoyance, it’s
beneficial to understand the biological processes at play. Think of it this way:
a tree is a complex living organism, and the stump is essentially its base, packed with dormant energy and potential for new life.
From a gardener or DIYer’s perspective, the most important goal regarding tree stumps left behind is ensuring no further unwanted regeneration takes place. While paint provides a aesthetic improvement, a visual masking much like a decorative trim, the reality behind its ‘effectiveness’ is quite different. Here’s a breakdown on why painting isn’t the proven stunt you might think it is:
- Location of Dormant Buds: Even stumps just a few inches high house dormant buds all over their trunks’ surface, usually positioned just “under the bark” or “within its edges”. Simply painting the obvious top and outer area merely disguises any visual inconsistencies and won’t actively “kill” those nodes waiting for an awakening signal. That signal is commonly moisture combined with sufficient ambient temperature, making the stump viable for sprouting from any unpainted or exposed growth elements.
- Root System Intelligence: A well-established tree trunk has thousands of dormant buds, deeply embedded, dispersed throughout the stumps’ living tissue – not exclusively on exposed, singular contact surfaces. These parts are capable of sending out chutes should conditions permit such emergence even after some top layer application of almost any colored paint. Thus a stump has capability of generating growth that doesn’t stop so long as enough live wood mass contains active life cells
- Energy Reserves: Stumps are full of stored energy – sugars and nutrients that powered the tree. These reserves exist throughout the stump and its roots. Painting the surface doesn’t deplete these reserves or inhibit their transport. It only applies decorative coverage to that exterior part.
- The Illusion of Treatment: Painting provides a tidy appearance, hiding the rough aftermath of cutting. While appealing, it’s precisely this cosmetic appeal that can mislead people into believing an active horticultural or chemical treatment has occurred to stop growth decisively.
Proven Methods to SUCCESSFULLY Stop a Tree Stump From Growing
Now that we understand why painting isn’t the magic bullet, let’s explore what actually does work. These methods are more thorough and focus on either removing the Stump directly, eliminating the stump’s viable growing tissues, or preventing access to that crucial moisture and sunlight.
Method 1: Physical Stump Removal (Digging & Grinding)
This is perhaps the most definitive approach if you want that stump completely gone. It directly tackles the physical presence of the stump. There are two main ways to go about this:
a) Digging it Out
Good for smaller to medium-sized stumps or those with shallower root systems. Not an easy DIY task typically, but doable if you don’t mind sweat!
Tools You’ll Likely Need:
- Shovel (straight blade and spade)
- Stump Grinder Rental / Hand Axe / Mattock / Garden Culti-vator
- Gloves
- Safety Glasses
- Very Strong Arms! / A Friend!
- Often best with Crowbar on heavier soil or roots for better Leverage to pry stumps etc… this is to dig around roots in case you want this part gone too;
Steps:
- Clear the Area: Remove any mulch, debris, or low-hanging plants around the stump’s base for better access and visibility.
- Dig Ample Base Trench: Start by digging a small trench around the stump. Go as wide and as deep as you can manage comfortably without damaging adjacent structures or roots you want to keep. A wider trench means an easier angle to attach shovels, axes, or levers to create root section undercutting & leverage towards lifting or splitting.
- Expose Major Roots: Once you have a decent moat started below, continue digging down and outward to expose the main lateral roots spreading from the stump base. Using a sharpening gardening spade on stubborn fibrous roots along root branches will let you chop each root that holds the stump in place. Using pry bars/axes are great additional useful tools to create additional leverage against immovable root masses to gain much-needed leverage against anything substantial, eventually liberating Stump from the ground.
- Cut/Pry Sever Connections: With roots exposed, use your shovel’s edge or an axe to cut through any connecting roots. Depending on the stump’s size and root structure, you might also use a pry bar or mattock to break apart stubborn roth. Be patient; larger roots might require several cuts or leverage attempts.
- Loosen & Remove: Continue clearing and cutting until the stump rocks freely. You might need to excavate from underneath to get enough leverage to topple it or pull it the entire stump directly from your hole that been digging .
- Be wary of sharp edges, underground limbs, dirt splatters, plus any insects or burrowing critters that might be residing in or around the debris! Take protective items like leather gloves and glasses on!
b) Using a Stump Grinder
For larger, more stubborn stumps, or if digging sounds too daunting, renting a stump grinder is a highly effective DIY option. These machines essentially shred the stump down below ground level.
Steps & Considerations:
-
- Rental & Permits: A reputable tool rental company can arrange for a stump grinder. Read the operating manual meticulously before use, and familiarise yourself thoroughly with all safety measures prior to running the machine! This means wearing heavy pants denim as often one will have exposed legs, closed-toe sturdy work footwear, gloves along protection spectacles;
- Positioning Carefully: Aim the grinding wheel directly at a Stump’s mass but remember your machine directionality also the operator. These machines are LITERALLY powerful enough power equipment but can kick-back or dislodge you whilst working close up to Stump, with dangerous objects being projected by its operation; watch out for any possible contact;
- Systematic Grinding:` Grind horizontally across the stump in gradual passes. Advance the machine slowly, moving the cutting wheel gradually deeper into the stump with each passes to take it out bit by bit rather than being overly aggressive and risking machine instability/a nasty jam. What you’re aiming is to grind wood matter into fine remnants, such depth of the stump removal being decided more importantly than simple surface removal for your final gardening needs etc.;
- Chip Management: The grinding will produce a lot of wood chips.
have a tidy up for future soil enhancements after job completed properly or dispose responsibly if unwanted by buyer; Make sure that all work is then made careful & safe for family, little feet along your pets
As for what type of specific color to chose, many home depots and building supply stores feature great varieties and can also make specific recommendations for specific products. When painting a whole tree stump to ensure durability, a tough, exterior-safe primer and top coat paint such as oil-based enamel are excellent for most of wood or garden types of applications – so be sure these options will provide longevity.
You can find extensive safety guides and best practices for operating various power tools. Be sure to review guides published by organizations like the Occupational Safety and Health Administration (OSHA) when undertaking such types of projects.
Method 2: Chemical Stump Removers
Can truly decompose stumps without much grunt work for you!
Chemical removers use potent ingredients to break down the wood fibers, making removal easier or allowing you to burn the softened material safely later. The breakdown process can take weeks to months.
Popular Types:
- Potassium Nitrate (Saltpeter): This is a common nitrogen-rich compound that aids decomposition significantly. When worked deep into the stump, is often touted as accelerating the composting process that usually only occurs when this particular natural matter decays via fungal & bacterial process normally;
- Soil Strippers/Herbicides: Some products contain tougher, broad-spectrum herbs or chemical compounds specifically designed to kill plant life and deter further plant growth; these may be purchased from garden supplying stores as potent plant death substances.
Key Steps For Chemical Application:
- Drill Deep Holes: Use a large-scale drill bit (at least 1/2 inch diameter, larger is better) to drill multiple, deep holes into the top surface of the stump and down the sides of any exposed roots. Go as deep as your drill allows, typically 6-10 inches down. It’s key to have many separate openings for ideal dispersion right into the woody mass.
- Apply the Chemical: Following the product manufacturer’s recommended dosage or direction, slowly pour the chosen hardening agent into the bored cavities. Alternatively, some specific chemical compounds ask for powder mixed some types of slurry application in large liquid jugs, etc. Be read precisely upon that usage of this!
- Cover and Wait: After covering every hole, place plastic on top of every cavity that you make, which helps it stay moistened enough; for roots must also sit out; then let rain begin to carry whatever works into stumps via the ground into wood naturally to ensure everything sinks in proper.
- Regularly Wet (Optional/Situational): Depending on your climate, you might need to lightly moisten the stump every fortnight or three for the chemical to permeate and work safely via biological breakdown reactions etc. Otherwise – patience, then maybe check; eventually stump become soft so as for you break if possible; or become hollow and lightweight like balsa wood is;
Considerations:
- Safety First: Follow all instructions on the product label! Wear gloves, eye protection, and protective clothing when handling all chemicals. Keep children and pets away from treated areas. See U.S. Environmental Protection Agency (epa.gov) guidelines on selecting safer garden products to learn more. For specific product datasheets on environmental impact check those if any given by manufacture are handy so this knowledge is vital for safer outcome always.
- Environmental Impact: These chemicals are strong. Consider their potential impact on surrounding soil and plants before application. Potassium
nitrate generally breaks down to safer nitrogen-based compounds, but strong herbicides can persist. Test in a small, discrete area if you have concerns about sensitive
vegetation nearby. - Timeframe: Decomposition
can take several months to over a year, depending on the stump’s size, wood
type, and environmental conditions. Arm yourself with much patient planning;
It’s really about finding whatever choice brings most to satisfaction without endangering anything which matters to wellbeing.
Method 3: The “Burn It Down” Approach (Use with Extreme Caution)
In some areas, where permitted and safely managed, you can carefully burn a stump to ash. If this makes itself attractive for your intentions as project ending goal, do not fail at all to contact your local fire or outdoor municipal regulations board first though; ensure there has happened necessary approvals and permits!
Important: ONLY proceed with this method if local laws and conditions permit. Always have extinguishing agents nearby, and NEVER leave a burning stump unattended.**
- Prepare the Stump: As an additive step prior to fire creation the next, drill holes using stout woody boring devices into several spots within stump or any part of wood not consumed & dried prior of your attempt ignition, for increased air ingress into stump to ensure much deeper combustion of wood. Take any type of flammable materials also, like charcoal briquettes, then dump them on or possibly within stump. You are essentially making of kindling there.
- Controlled Ignition & Tending: Light the stump. Use fire accelerants responsibly and with utmost caution ONLY if permitted and if previous applications were not successful. Generally direct flame application of propane torch or just letting natural wood embering can be enough as for your stump; Tend the fire to keep it going, but keep the area clear of any flammable materials like excess leaves or dry grass that could spread the action too far off;
- Allow to Smolder: Let the stump burn down at a controlled rate. This could take quite some time, even overnight for larger stumps. Be prepared to tend it for stability and containment.
- Extinguish Completely: once burning operations have concluded, never fail at all during all critical stages to apply abundance of large quantity heavy waters, to totally douse any remaining emberglow inside, around, throughout Stump base, along the whole process till all hot embers were safely quelled from its surface
While this can be very effective, it carries the most risk of uncontrolled fire spreads. Check local regulations regarding burning at all times. Resources detailing hazardous material safety and fire prevention techniques from federal sources tend to include much pertinent data concerning ignitable conditions and containment – check out EPA or relevant state or local governmental agency web pages for pertinent information in regard to fire bans and the safest practices during such dangerous activities to guarantee your plan meets accepted local guidelines before thinking of such hazardous endeavor to do work.
Here’s an illustrative sample chart contrasting those key methods:
ToThe Next Item Listed In Sequence Yet It Is And itHas Been Known,But SoFar ThatNo RealBenefitExists in Addition Or Other Than Basic Health Considerat For The Base of the wood?
It really makes almost no
real actual impact upon this taskSo many will ask, can painting a tree stump
stop it from grow and no. A true stopp must eliminate or block to stop it and so it
makes sense what was really written before.Yes
that is true,
no one painting is effective against natural forces that drive tree sprouts so therefore nothing in these
pages will have helped anyone to effectively or correctly Stop Growth when is needed.
Is painted really bad and in too many cases this type action may cause only more Problems and to what end? Does that actually enable healthy living or simply invite some unwanted outcome!Is that AnAccident No, it is very Likely intentional by those who have written it out so for you and myself and anyone learning how it works can do a really good job this It is always a fine point.Do Not Skip This Portion Of Content; Or Make Mistate There-In Which Could Harm And Put To Jeopardy Of Great Loss Of Property, Even Well Being of OneWhose Effort Was Undermined or Unduly Compromised; All This So you Could learn to Avoid Potential harm FromUntimely Loss! Of Many Kind! By Trying To MakeCostly Mistakes When Building Project or Home Repairs And Cost Effective repairs: Make your effort Have great potential for success and make sure all instructions For Your Use HaveBeen Carefully Reviewed For Each Component That you Might Possess or WishTo Obtain and Handle For TheseCommon Projects With Certainty Or Not Have A SingleMistake Where In fact This Advice Helps Prevent Such Outcome To All So ThankYou Have Been Helped Extremely Well.
| Cosmetic Cover Up | Why painted? Not a actual root barrier |
| VERY LOW: Minimal to no effect regarding true stump growth, may foster fungi or rot if painted over a cavity though. ; the painted item acts as one mask |
| Least: Requires just prep for brush; |
| Minimal once paint applied; requires basic brush work then; |
| (Most Recommended For Stump Removal That Truly Sticks Over The Long Term!)! |
FAQs About Stump Removal
Still have questions buzzing in your mind? Here are some from other beginners like you,
Q1: How fast will a treated stump naturally rot and disappear?
The natural rotting
process can take anywhere between 1-3 years (sometimes shorter or longer!) for a stump to effectively disappear, solely dependent on Stump size, Stump wood species of tree, as well as local climate etc. Implementing chosen stump treatment approaches accelerates organic decay. .
Q2: I spilled some paint directly onto the ground near my prized rose bush. Where’s ideal advice when this takes place?
This question would go further better if it relates to common gardening needs as well such plumbing matters.
Good for a gardener like someone who values delicate Blooms
And it could take on a truly delightful spin related that specific type gardening
Or just for my friend who might feel a little nervous
Or unsure about its relation that their prized specimens. Remember
The ideal approach implies a proactive and calm response to spill situations.
Q3: Are there safer chemical methods instead of potent herbicides I can rely on wholeheartedly?
Safer Alternatives include organic compounds derived directly from Epsom
salts (magnesium
sulfate). Magnesium creates an environment very unwelcoming for fungal growth; which helps immensely to break Stump structures.