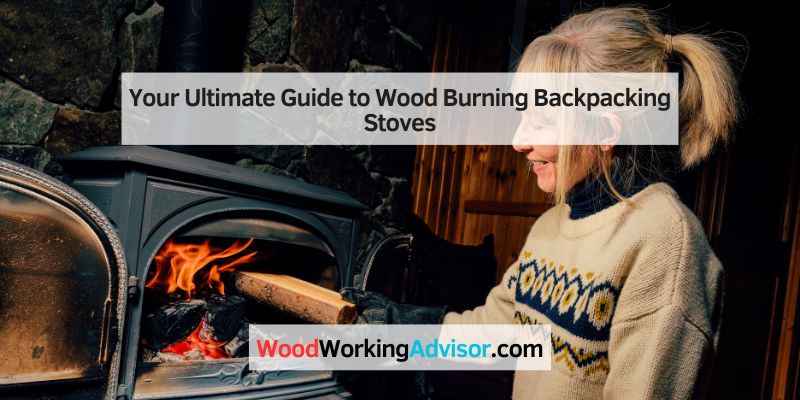
Your Ultimate Guide to Wood Burning Backpacking Stoves
Hey there, fellow adventurer! If you’re like me, there’s nothing quite like the thrill of packing up and heading into the wilderness. The smell of pine, the crunch of leaves underfoot, and the promise of a cozy meal under the stars—it’s pure magic. But let’s talk about something that can make or break your backcountry cooking experience: wood burning backpacking stoves. I’ve spent countless nights in the woods, tinkering with different stoves, gathering twigs, and perfecting my fire-starting skills. Trust me, these little stoves are game-changers for anyone who loves lightweight, sustainable camping.
In this guide, I’ll walk you through everything you need to know about wood burning backpacking stoves—why they’re awesome, how to choose one, and tips to make your meals taste like they came from a five-star kitchen (well, almost). So, grab a cup of coffee, and let’s dive in!
What Are Wood Burning Backpacking Stoves?
Picture this: you’re deep in the forest, miles from the nearest store, and you’re craving a hot meal. Instead of lugging heavy fuel canisters, you grab a handful of twigs and light up a wood burning backpacking stove. These stoves are compact, lightweight devices that use natural materials like sticks, leaves, or pinecones as fuel. Unlike gas or liquid fuel stoves, they don’t require you to carry extra fuel, which makes them a favorite for ultralight backpackers like me.
I remember my first trip with a wood burning stove. I was skeptical—could a few twigs really boil water for my pasta? But after a quick setup and a small fire, I had steaming hot water in minutes. It felt like I was channeling my inner caveman, but with a modern twist. These stoves come in two main types: can-based stoves, which are often cylindrical and use gasification for efficient burning, and folding stoves, which collapse flat for easy packing. Each has its perks, and I’ll break them down later.
The beauty of these stoves lies in their simplicity. They’re eco-friendly, rely on renewable fuel (hello, Mother Nature!), and add a touch of primal satisfaction to your camping routine. But they’re not perfect for every situation, so let’s explore why you might want one.
Why Choose a Wood Burning Backpacking Stove?
When I first started backpacking, I relied on a canister stove. It was quick and easy, but those fuel canisters added weight and always seemed to run out at the worst times. Then I discovered wood burning stoves, and it was a revelation. Here’s why I think they’re worth considering:
- Lightweight and Packable: Most wood burning stoves weigh between 2 and 9 ounces. Some, like the titanium models, are as light as 1 ounce! They save you from carrying heavy fuel, which is a lifesaver on long trips.
- Eco-Friendly: Using twigs and leaves means you’re not burning fossil fuels or tossing out empty canisters. Plus, these stoves produce minimal ash when used correctly, aligning with Leave No Trace principles.
- Cost-Effective: After the initial purchase, your fuel is free. No more hunting for overpriced fuel canisters before a trip.
- Fun and Engaging: There’s something deeply satisfying about building a small fire. It’s a skill that connects you to nature and makes every meal feel like an accomplishment.
- Versatile: Many stoves, like the Littlbug or Solo Stove Lite, can also burn alcohol or solid fuel tablets, giving you options if wood is scarce.
But let’s be real—they’re not for everyone. They can be slower than gas stoves, and you’ll need to gather dry fuel. If you’re hiking in a desert or above the treeline, finding twigs might be tough. Still, for most three-season backpacking in the USA, they’re a fantastic choice.
Types of Wood Burning Backpacking Stoves
Over the years, I’ve tested a bunch of these stoves, and they generally fall into two categories. Knowing the difference helps you pick the right one for your adventures.
Can-Based Stoves
These are cylindrical stoves, often made of stainless steel or titanium. They use a double-wall design to create a gasification effect, where wood burns more efficiently by turning into gas before combusting. The result? A hot, clean flame with less smoke. My first wood stove was a can-based model, and I loved how quickly it boiled water. However, they’re bulkier than folding stoves and can get sooty, so I always pack them in a Ziploc bag to keep my gear clean.
Folding Stoves
Folding stoves are my go-to for ultralight trips. They collapse into flat panels, making them super packable. Setup is a breeze—you just slot the pieces together, add a burn pan to protect the ground, and you’re ready to go. I’ve used models like the Emberlit and Firebox Nano, which weigh next to nothing and fit in a side pocket of my pack. The downside? They don’t always burn as efficiently as can-based stoves, so you might need to tend the fire more.
Here’s a quick comparison to help you decide:
| Feature | Can-Based Stoves | Folding Stoves |
|---|---|---|
| Weight | 4-9 oz | 1-6 oz |
| Packability | Bulkier, less packable | Collapses flat, highly packable |
| Burn Efficiency | High (gasification) | Moderate (requires more tending) |
| Ease of Use | Easy to light, less refueling | Simple setup, but needs frequent fuel |
| Best For | Longer burns, efficient cooking | Ultralight trips, quick setup |
How to Choose the Best Wood Burning Backpacking Stove
Picking the right stove can feel overwhelming with so many options out there. I’ve made my share of mistakes—like buying a stove that was too bulky for my pack. Here’s what I’ve learned to look for:
- Weight and Size: If you’re an ultralight hiker, go for a titanium folding stove like the Vargo Hexagon (4.1 oz). For group trips, a slightly heavier can-based stove might be worth it for better efficiency.
- Material: Titanium is lighter and more durable but pricier. Stainless steel is affordable and sturdy but heavier. I’ve used both and find titanium worth the investment for frequent hikers.
- Fuel Availability: Make sure you’re hiking where dry wood is plentiful. In wet climates or high altitudes, consider a multi-fuel stove that can also use alcohol or Esbit tablets.
- Ease of Use: If you’re new to wood stoves, look for models with simple designs and clear instructions. Can-based stoves like the Bushbuddy are beginner-friendly because they require less tending.
- Stability: A wobbly stove is a recipe for disaster. I once spilled a pot of soup because my stove tipped over. Look for wide bases or stoves that pair well with your cookware.
- Price: You can find decent stoves for $20-$50, but high-end models like the Solo Stove Lite can cost $70 or more. Set a budget and weigh it against how often you’ll use it.
My top pick? The MSR PocketRocket 2 for its balance of weight, efficiency, and durability, but for wood-only fans, the Solo Stove Lite is a dream.
Tips for Using a Wood Burning Backpacking Stove
Using a wood stove is a bit like learning to ride a bike—it takes practice, but once you get the hang of it, it’s second nature. Here are my tried-and-true tips from years of trial and error:
- Gather the Right Fuel: Stick to small, dry twigs and shavings. Hardwoods like oak or maple burn hotter and cleaner than softwoods like pine, which can leave soot. I always carry a small knife to shave down larger branches if needed.
- Start Small: Use tiny twigs or dry leaves to get the fire going. Once it’s burning steadily, add slightly larger pieces. I learned the hard way that throwing in big sticks too soon smothers the flame.
- Mind the Weather: Wet wood is a nightmare. If it’s been raining, look for dead branches still attached to trees—they’re often drier. I also carry a small amount of firestarter (like cotton balls soaked in petroleum jelly) as a backup.
- Use a Windscreen: Wind can steal heat and make your stove less efficient. Many folding stoves have built-in windscreens, but for can-based models, a simple aluminum foil barrier works wonders.
- Practice Leave No Trace: Always use a burn pan or place your stove on a rock to avoid scorching the ground. Pack out any ash and scatter it away from your campsite.
- Clean Regularly: Soot builds up fast. I clean my stove after every trip with a damp cloth and store it in a dedicated bag to keep my pack clean.
One of my favorite memories is sitting by a lake in Colorado, feeding twigs into my stove while the sun set. The crackle of the fire and the smell of boiling coffee made it feel like I was part of the wilderness.
Pros and Cons of Wood Burning Backpacking Stoves
Let’s break down the good and the not-so-good. I’ve had amazing experiences with these stoves, but they’re not perfect.
Pros
- No Fuel Weight: You don’t need to carry fuel, which is a huge plus for long trips.
- Eco-Friendly: They reduce reliance on fossil fuels and align with sustainable camping practices.
- Affordable Fuel: Twigs are free, unlike gas canisters or liquid fuel.
- Fun Factor: Building a fire is a skill that feels rewarding and connects you to nature.
- Backup Option: Many stoves can use alternative fuels, giving you flexibility.
Cons
- Slower Cooking: Boiling water can take 5-10 minutes, compared to 2-3 minutes with a canister stove.
- Fuel Availability: No wood, no fire. Deserts, high altitudes, or fire ban areas can make these stoves useless.
- Messy: Soot and ash can get everywhere. I’ve ruined a favorite shirt by not being careful.
- Learning Curve: It takes practice to master fire-building and stove maintenance.
- Weather Dependent: Rain or wind can make starting a fire tricky.
My Favorite Wood Burning Backpacking Stoves
After testing dozens of stoves, here are my top picks based on real-world use:
- Solo Stove Lite: At 9 oz, this can-based stove is a gasification champ. It boils water fast and burns cleanly. Perfect for solo or duo trips.
- Vargo Hexagon Titanium: This 4.1 oz folding stove is ultralight and packs flat. It’s my go-to for minimalist hikes.
- Littlbug Junior: A versatile stainless steel option that can burn wood or alcohol. It’s durable and great for small groups.
- Firebox Nano: A folding titanium stove that’s super light (2.7 oz) and easy to use. Ideal for beginners.
- Bushbuddy Ultra: A premium can-based stove with excellent efficiency. It’s pricier but worth it for frequent users.
Each has its strengths, so choose based on your hiking style and budget. I’ve used the Solo Stove Lite on multi-week trips and never been disappointed.
Safety Tips for Wood Burning Backpacking Stoves
Safety is non-negotiable in the backcountry. I’ve had a few close calls—like a small spark landing on my sleeping pad—so here’s what I do to stay safe:
- Check Fire Regulations: Some areas, like parts of Yosemite above 9,600 feet, ban wood stoves. Always check local rules before you go.
- Choose a Safe Spot: Set up on a non-flammable surface like a rock or dirt. Clear away dry grass or leaves.
- Keep Water Nearby: A small bottle of water can extinguish stray sparks or an out-of-control fire.
- Never Leave It Unattended: A small gust of wind can turn a tiny fire into a big problem. Stay close while it’s burning.
- Cool It Down: Let the stove cool completely before packing it. I once burned my hand rushing to pack up.
How to Maintain Your Wood Burning Backpacking Stove
A well-maintained stove lasts for years. I’ve had my Vargo Hexagon for over a decade, and it’s still going strong. Here’s how I keep it in top shape:
- Clean After Every Trip: Wipe off soot with a damp cloth or scrub with a mild abrasive if it’s stubborn.
- Check for Damage: Inspect for cracks or warping, especially on titanium stoves. A quick check can prevent failures in the field.
- Store Properly: Keep it in a dedicated bag to avoid soot spreading to your gear. I use a small stuff sack.
- Dry Thoroughly: If it gets wet, dry it completely to prevent rust (especially on stainless steel models).
- Test Before Trips: Light a small fire at home to ensure everything’s working. It’s better to find issues in your backyard than 10 miles into the wilderness.
Conclusion
Wood burning backpacking stoves have transformed the way I experience the outdoors. They’re lightweight, eco-friendly, and add a touch of adventure to every meal. Whether you’re a seasoned hiker or just starting out, these stoves offer a unique way to connect with nature while keeping your pack light. From the satisfying crackle of twigs to the joy of a hot meal after a long day, they bring something special to the trail.
Sure, they take a bit of practice, and they’re not perfect for every situation, but for me, the pros far outweigh the cons. So, next time you’re planning a trip, consider tossing a wood burning stove in your pack. It might just become your new favorite piece of gear. Happy hiking, and may your fires always burn bright!
FAQs
Are Wood Burning Backpacking Stoves Safe to Use?
Yes, they’re safe if you follow basic precautions. Always set up on a non-flammable surface, check local fire regulations, and keep water nearby to extinguish sparks. Never leave the stove unattended, and let it cool completely before packing.
Can I Use a Wood Burning Stove in Any Weather?
They work best in dry conditions with plenty of twigs available. In wet weather, finding dry fuel can be tough, so carry a firestarter. Wind can reduce efficiency, so use a windscreen. They’re less reliable in deserts or above the treeline where wood is scarce.
How Long Does It Take to Boil Water with a Wood Burning Stove?
It depends on the stove and conditions, but most take 5-10 minutes to boil 2 cups of water. Gasification stoves like the Solo Stove Lite are faster, while folding stoves may need more tending.
Are Wood Burning Stoves Allowed in National Parks?
It varies. Some parks, like Yosemite, ban them above certain elevations or during fire bans. Always check the park’s website or ranger station before using one.
How Do I Clean a Wood Burning Backpacking Stove?
Wipe off soot with a damp cloth after each trip. For stubborn residue, use a mild abrasive like steel wool. Dry thoroughly to prevent rust, and store in a dedicated bag to keep soot off your gear.