Wood Burning Stencils for Beginners: 15 Designs + Free Patterns
Simple bold-outline stencils burn cleanest for beginners, so start with a flower, an animal, or a geometric shape, but pick basswood over plywood, because burning plywood can vaporize its glue into formaldehyde fumes. This guide gives you 15 beginner designs with burn-order tips, three ways to transfer a stencil, a basswood versus birch hardness table, and where to find free printable patterns.
Start with bold, simple outlines such as a flower, an owl, or a basic geometric shape. Trace the stencil onto basswood with graphite transfer paper, then burn the lines at medium heat. Skip plywood, work with a fan or smoke extractor, and wear a respirator.
Introduction To Wood Burning
Best Reusable Floral Stencil Pick | |
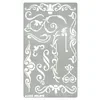 |
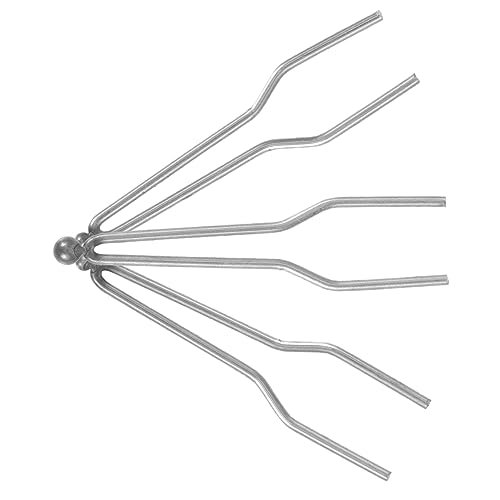
Aleks Melnyk No.4 Metal Stencil, Flowers and Vines, 4 x 7 in (stainless steel) – $8.95 One reusable sheet of floral, vine, and scroll outlines you can trace again and again, which suits the simple flower and leaf designs in the floral section below. The listing describes it as a template for pyrography and woodburning pens.
As an Amazon Associate we earn from qualifying purchases. |
Wood burning, formally called pyrography, is the craft of drawing on wood with a heated pen tip. A stencil removes the hardest part for a beginner: drawing a clean outline freehand. You transfer the shape, then follow the lines with the burner. Branding irons and stamps are a different technique that presses a fixed mark in one go, covered in our guides to branding your woodwork and wood burning stamps.
Getting Started With Stencils
A stencil is a guide that fixes the outline before the hot tip touches the wood. That matters because a burn cannot be erased: a slipped line stays. Paper patterns and reusable metal templates both work, and the transfer method you choose matters more than the stencil material.
Why Use Stencils?
Stencils and templates give consistent, repeatable shapes, which lowers the learning curve. You can reuse one design on a set of coasters, and you can scale a printed pattern up or down before transferring it. A reusable metal stencil keeps its shape through many traces, while a paper pattern is usually good for one or two transfers.
Tools And Materials Needed
- A wood burning pen with a fine or universal tip (a fixed-heat pen is fine for stencil outlines; our kit comparison counts usable tips)
- Basswood blanks, coasters, or plaques (see the wood table below)
- Graphite transfer paper or a soft pencil, plus masking tape
- A ballpoint pen for tracing, and an eraser for stray graphite
- A heat-safe stand for the pen, a fan or smoke extractor, and a respirator
How to Print and Use These Wood Burning Templates
Choose a design from the 15 below, or print one from a free pattern library (listed near the end), and follow these steps:
- Print the design at 100% scale on standard 8.5 x 11 paper, or resize it to fit your blank.
- Tape the paper to the wood, slide graphite transfer paper dark side down underneath, and trace the outline with light pressure.
- Lift one corner to check the lines before you remove the paper.
- Burn along the transferred lines with a fine tip, working slowly.
- Shade with a shader tip if you want depth, then seal the finished piece.
Three Ways to Transfer a Stencil to Wood
Burn Savvy’s transfer guide describes three common methods. The pencil rub is the cheapest, graphite paper is the cleanest, and heat transfer is the most precise but the least forgiving.
| Method | How it works | Reuse the pattern? | Watch out for |
|---|---|---|---|
| Pencil rub | Scribble graphite on the back of the pattern, tape it face up, trace the lines | No | Pressing too hard gouges the wood; hard on the hands |
| Graphite or carbon paper | Place the paper dark side down under the pattern and trace | Yes | Lines are slightly harder to erase, so use light pressure |
| Heat transfer | Mirror the pattern, print it on a laser printer, tape it face down, and run the pen over it at low heat | No | Inkjet prints will not work, and the pattern is easy to scorch |
One detail most guides skip: erase stray graphite before you burn. Heat can set the pencil lines into the wood, so either erase first or burn directly over the lines you plan to keep. Once your lines are on the wood, our guide to shading and texture techniques covers what to do next.
Wood Burning Designs: Best Styles for Beginners
The best beginner designs have bold, clear outlines and little fine detail. They forgive wobbly lines and still look good with basic technique. Five categories cover most first projects.
5 Best Design Categories for Beginners
- Floral patterns: simple flowers and leaves with rounded curves burn smoothly. Start with a single daisy or sunflower before attempting wreaths.
- Animal silhouettes: a solid owl, bear, or fox needs no shading skill. Trace the outline and fill it at a steady medium heat.
- Geometric shapes: straight lines, triangles, and hexagons look crisp. Use a ruler for your first few.
- Celtic knots: interlocking lines look hard but repeat. Trace carefully before you burn.
- Text and monograms: block letters are easier than script. Outline each letter first, then fill at lower heat so edges do not over-burn.
Free vs. Paid Wood Burning Designs: What to Use
Free patterns cover most beginner needs: Burn Savvy, for example, offers six free beginner patterns in JPEG and PDF, including a mandala and a mountain scene. The catch with free patterns is licensing: Burn Savvy states its patterns are for personal use only, so check each pattern’s terms before selling anything you burn from it.
Floral Patterns
Simple Flower
A flower with a round center and five to eight oval petals is a good first stencil. Burn the center circle first, then each petal outline, and add a few short lines inside the petals for texture.
Leaf Design
A single leaf with a center vein and a few side veins teaches line control. Burn the outline, then the center vein with a steady pull from base to tip, then the side veins, keeping the pen angle consistent.
Sunflower
The bold round head and repeating petals are easy to trace. Print or scale it to about 5 or 6 inches, burn the center disc first, then work the petals from the inside out. A shader tip darkens the seed head for contrast.
Animal Patterns
Cute Owl
An owl has a simple body and big round eyes. Outline the body, burn the eyes and beak at slightly higher heat for contrast, then add short light strokes for feathers.
Butterfly
Outline the wings first, then add dots and curved lines inside. Vary your speed instead of the temperature: slow passes darken the wing patterns and quick passes keep them light.
Fox Silhouette
A sitting fox has triangular ears and a bushy tail that read clearly even at small sizes. Burn the outer edge, then fill the body with medium shading and leave the chest lighter.
Geometric Patterns
Basic Shapes
Circles, squares, and triangles show you how your pen behaves. Burn repeating rows of each shape on a scrap board until your line width stays even from start to finish, then use them as borders on real projects.
Complex Patterns
Tessellations and interlocking shapes add up to many short lines. Save them for your second or third project.
Mandala
A mandala repeats the same segment around a center point, which is easier than it looks once the stencil is on the wood. Trace the repeating segments, burn from the center outward with a fine tip, and shade alternating sections for depth. A 4 inch mandala fits a standard coaster blank.
Nature-inspired Patterns
Tree Silhouette
A bare tree with branching limbs is mostly lines. Burn the trunk, then the main branches, then finer twigs, lifting the pen to taper each branch.
Mountain Scene
Start with the ridge outlines, then add texture. Short angled strokes suggest rock, and leaving paler areas near the peaks reads as snow.
Feather
A feather has a long center shaft with symmetrical barbs. Burn the shaft first, then the barbs outward in the direction they grow. Easing pressure toward the tips gives the soft, tapered look.
Seasonal Patterns
Snowflake
A six-armed snowflake is the same short arm repeated six times, so one good stencil does most of the work.
Pumpkin
A rounded pumpkin with curved ribs and a short stem is quick to burn. Burn the outline, then the curved rib lines, and shade the stem darker for contrast.
Christmas Tree
A triangle of tiered branches is easy to trace and works on gift tags and ornament blanks. Burn the tiers, then add a star and a few simple decorations after the tree outline is complete.
Best Wood and Safety for Stencil Burning
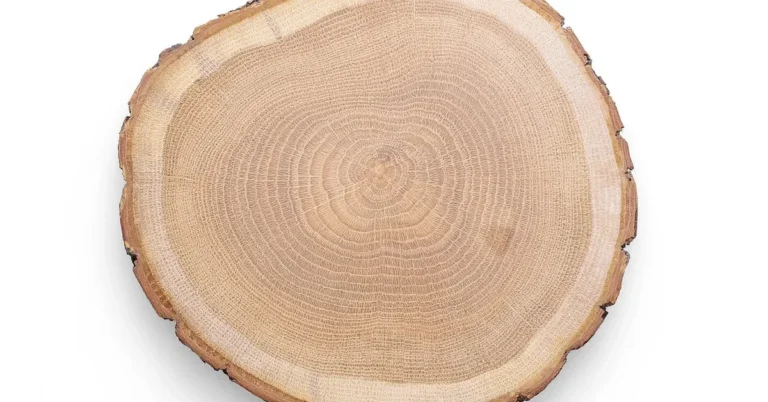
Most beginner guides recommend basswood, and the numbers explain why. Basswood is soft and fine-grained, so a pen glides without much pressure. The common advice to use birch plywood has a catch, though: plywood is layered with glue, and burning can release that glue as fumes.
Basswood rates 410 lbf on the Janka scale; yellow birch rates 1,260 lbf, about three times harder. Source: Wood Database, basswood.
| Wood | Janka hardness | Fit for stencil burning |
|---|---|---|
| Basswood | 410 lbf | Best beginner choice: soft, pale, fine and even grain. It darkens with age, so seal finished pieces. |
| Yellow birch (solid) | 1,260 lbf | Fine, even grain but much harder, so test your heat on scrap first. |
| Standard plywood, birch or otherwise | Layered veneers, not rated | Held together with phenol-formaldehyde adhesive; burning can vaporize the glue. Not recommended. |
| Treated, stained, painted, MDF, pallet wood, cedar | Varies | Do not burn: finishes, binders, and resins release harmful fumes. |
Formaldehyde-free plywood (labeled NAF, for no added formaldehyde) exists, but The Wood Workplace still points beginners to basswood, which is cheaper and safer. For burning near finishes, our article on burning treated wood explains the risk in more detail.
Safety Checklist
- Work in a well-ventilated space, ideally with a fan or smoke extractor drawing smoke away from you.
- Wear a dust mask or respirator, and safety glasses.
- Keep the hot pen on a heat-safe stand and a fire extinguisher nearby.
- Never burn over stain, dye, paint, or sealer, and avoid MDF, pallet wood, and cedar.
Tips For Using Stencils
Positioning Your Stencil
Tape the stencil down with masking tape on at least two edges so it cannot slide. Keep a metal template flat against the wood so lines do not drift.
Heat Settings for Stencil Work
According to Wood Burning University, low heat suits soft shading and delicate work, medium heat is the all-round setting for outlining and moderate shading, and high heat is for deep, dark lines and filling large areas quickly. For a stencil outline, start at medium on basswood and adjust on a scrap piece. Exact numbers vary by pen, so see our wood burning pen temperature chart for typical ranges.
Avoiding Common Mistakes
- Pressing too hard: let the tip do the work; pressing deepens the burn and can gouge soft wood.
- Skipping a scrap test: every board burns differently, so test heat and speed on offcuts.
- Burning over stray graphite: erase transfer smudges first or they can set into the wood.
- Starting too complex: a clean flower beats a messy mandala.
Finishing Touches
Adding Color
Burn first, then finish: never burn over stain or paint. Colored pencils or thin watercolor washes show clearly on pale basswood. Let the wood cool completely and test on scrap first.
Sealing Your Work
A clear spray or brush-on sealer protects the surface. Wood Database notes that basswood darkens over time, so a clear finish helps preserve a pyrography piece. Apply thin coats and work in a ventilated area.
Resources For More Patterns
If you want more designs than the 15 above, a pattern library is the fastest route. Always read the terms before you sell finished pieces.
Online Sources
Burn Savvy’s free woodburning patterns offer six beginner patterns, including a saguaro cactus, mountains, a peony, and a mandala, in JPEG and PDF. The page says they are for personal use only. For ideas grouped by skill level, see our companion guide to free wood burning patterns to trace. If you also cut with a scroll saw, the free Steve Good scroll saw patterns roundup is a no-cost library worth bookmarking.
Frequently Asked Questions
What Is The Difference Between Pyrography And Wood Burning?
They are the same craft. Pyrography is the formal name for drawing on wood with a heated pen or tip, and wood burning is the everyday term. Branding irons and stamps press a fixed mark in one stroke, which is a different technique.
Do You Stain Wood Before Or After Wood Burning?
Stain after burning. Burning over stained, dyed, or painted wood can release fumes from the finish, so burn bare wood first and add stain, color, or sealer afterward.
How Do You Trace A Pattern For Wood Burning?
Tape the printed stencil to the wood, slide graphite transfer paper dark side down underneath, and trace the lines with a ballpoint pen using light pressure. Lift a corner to check the lines are transferring. The pencil-rub method also works, but you cannot reuse the pattern.
What Is The Best Wood For Beginner Wood Burning?
Basswood. It is soft (410 lbf Janka), pale, and fine-grained, so a pen glides easily. Yellow birch (1,260 lbf) also works but is harder. Avoid plywood, because burning can vaporize the glue.
Can You Use Plywood For Wood Burning Stencils?
It is best avoided. Standard plywood uses phenol-formaldehyde adhesive, and burning can vaporize the glue into toxic fumes. Formaldehyde-free (NAF) plywood exists but costs more, and solid basswood is the simpler choice.
Can You Sell Wood Burning Made From Free Patterns?
Check each source. Burn Savvy states its free patterns are for personal use only and asks you to credit the original artist when sharing finished burns on social media. Terms differ by site, so read the license or ask the artist before selling.
Conclusion
Pick a bold, simple design, transfer it with graphite paper, and burn it on basswood at medium heat. Skip plywood and treated wood, ventilate the room, and test on scrap first.
Sponsored / affiliate links. As an Amazon Associate I earn from qualifying purchases. I may earn additional commission from eligible campaigns.