Wood Burning Letters and Numbers: Stencil Guide for Straight Lines
Shaky, uneven letters are almost never a pen problem – they are a guide problem. The fix most beginners skip is using a stencil: trace a metal letter stencil directly with the hot tip, or transfer a paper template with an embossing tool first, and every letter comes out the same height and spacing without a single freehand stroke. This guide covers that stencil-transfer method in detail, plus the pressure-and-dwell-time habit that keeps burn depth consistent letter to letter, so your finished sign or plaque does not have one dark letter next to a faint one.
What Is Wood Burning, and Why Letters and Numbers?
Wood burning, or pyrography, is the art of using a heated metal tip to scorch designs, patterns, or text into wood. Letters and numbers are one of the most popular places to start because the shapes are structured – you are tracing a known outline rather than inventing one – while still being genuinely useful: monogrammed coasters, house numbers, name plaques, and gift tags are all built on the same skill. Get consistent letters down and you already have a sellable, giftable craft.
Best For Straight Letters
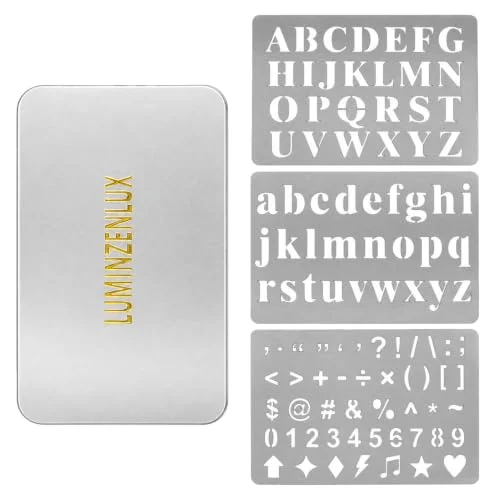 |
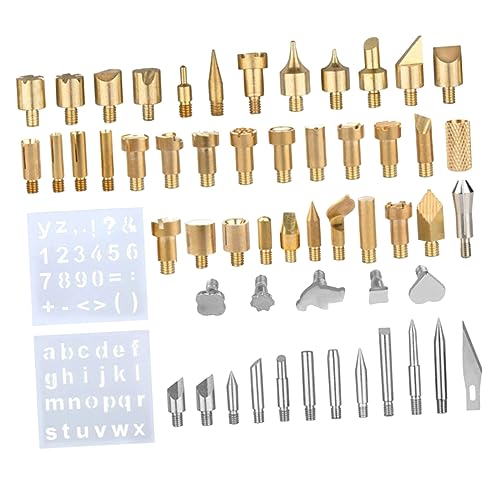
3pcs Metal Wood Burning Stencils, Letters Number & Symbol Set – $22.99 This is the exact fix for shaky freehand letters this guide walks through below – a stencil you trace with the hot tip itself, no paper transfer step needed.
|
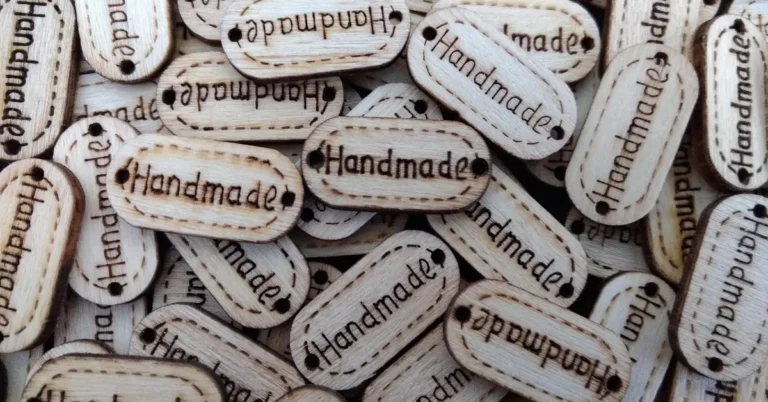
The appeal of this craft is that it does not require drawing talent. A steady hand, the right guide, and some patience get you a professional-looking result. A custom wooden plaque with a friend’s initials or a date burned into it reads as personal and deliberate, even on a first or second attempt, as long as the letters are even.
Choosing the Right Tools for Wood Burning
A wood burning pen, also called a pyrography pen, is the main investment. There are two types: fixed-heat, soldering-iron-style pens and variable-temperature pens. A basic $15 fixed pen works fine for simple letters. A variable-temperature pen costs more but gives you real control over heat, which matters most for clean, consistent lines across a full word. If you have not bought one yet, our wood burning kit buying guide compares the current options.
You will also need tips or nibs – the metal attachments that screw onto the pen, each producing a different line. For letters and numbers, a universal tip handles outlining and a calligraphy tip gives bold, thick strokes. Round out the kit with sandpaper to smooth the wood, transfer paper or a metal stencil for tracing, and basic safety gear.
Quick reference for tool choices:
| Tool | Purpose | Beginner-Friendly? | Price Range |
|---|---|---|---|
| Basic Pyrography Pen | Simple designs, fixed heat | Yes | $10-$30 |
| Variable-Temperature Pen | Precise control, versatile designs | Yes (with practice) | $40-$100 |
| Universal Tip | Outlining letters and numbers | Yes | $5-$15 |
| Calligraphy Tip | Bold, thick lines for letters | Yes | $5-$15 |
| Metal Letter Stencil | Tracing straight, repeatable letters | Yes | $15-$25 |
| Sandpaper (120-220 grit) | Smoothing wood surface | Yes | $5-$10 |
Do not skimp on ventilation. Wood burning produces smoke, so work near an open window or run a small fan to pull fumes away from your face.
Selecting the Perfect Wood for Your Project
Not all wood behaves the same under a hot tip. Softwoods like pine, basswood, and cedar are the easiest starting point – lightweight, affordable, and they burn smoothly without much resistance. Basswood in particular has a light, minimal-grain surface that lets clean letter edges show up instead of getting lost in dark grain lines. Hardwoods like oak or maple are denser and trickier to control but hold up better for signs meant to last outdoors.
Sand the surface smooth with 120-220 grit sandpaper before you start – rough wood makes even a steady hand produce jagged, uneven letters. Always avoid treated or painted wood; the preservative or coating chemicals vaporize into the smoke when scorched, and sanding the surface first does not remove that risk. For numbers, small wooden rounds make cheap, forgiving practice pieces for coasters or tags.
Preparing Your Design: The Stencil-Transfer Method
This is the step that separates straight, evenly spaced letters from shaky freehand ones. There are two reliable ways to get a guide onto the wood before you ever touch it with a hot tip:
Graphite transfer paper: print or draw your letters and numbers on regular paper, then place a sheet of graphite transfer paper between the design and the wood. Trace over your printed letters with a pencil, pressing firmly, and the graphite leaves a faint but followable outline on the wood underneath.
Stylus-and-indent method: tape a printed template directly onto the wood so it cannot shift, then trace the outline of each letter with a stylus or embossing tool, pressing hard enough to leave a shallow indent in the wood fibers below the paper. Peel the template off and you are left with a physical groove – not just an ink line – so the pen tip has something to settle into as you burn, which helps even more with keeping curves and diagonals consistent.
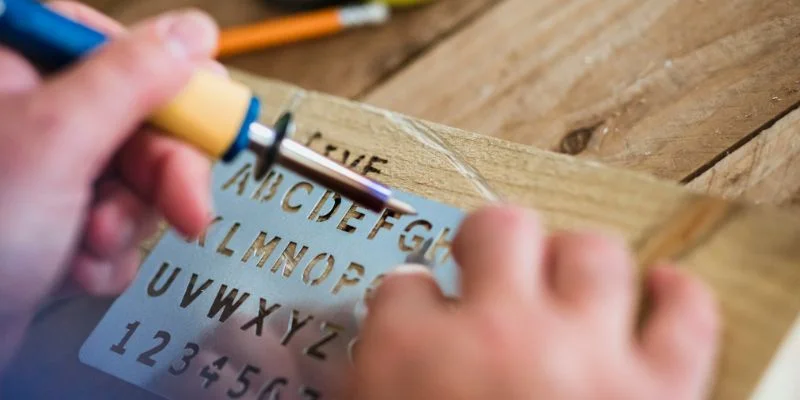
Tracing directly through a metal stencil – no transfer step needed, and the metal will not warp under the heat.
A metal stencil skips the transfer step entirely: you trace each letter’s cutout directly with the hot tip, and the guide never scorches, warps, or catches fire the way a paper or plastic template eventually can under repeated heat. If you are freehand-confident, sketch lightly in pencil instead – stick to simple, bold fonts like Arial for beginners, since cursive and intricate scripts are much harder to keep consistent without a guide.
Mastering Wood Burning Techniques for Letters
Hold the pen like a pencil, keep it close to a 45-degree angle, and move slowly and steadily rather than pressing hard. For straight strokes (the letter “I” or number “1”), pull the tip toward you for better control. For curves (“O” or “6”), rotate the wood slightly as you burn instead of trying to bend the stroke with your wrist.
Consistent depth and darkness across every letter comes down to two variables: pressure and dwell time, meaning how long the tip lingers in one spot before moving on. Keep both steady from letter to letter – the same light pressure, the same pace. Just as important, let the tip fully reheat between strokes. A pyrography tip loses heat the moment it touches wood, and if you move to the next letter before it recovers, that letter comes out noticeably lighter than the one before it. Rushing is the single most common reason a finished sign has one dark, crisp letter next to a pale, thin one right beside it. If your pen has adjustable heat, start around 300-400 degrees F for thin outline work and increase for bolder fill strokes, testing on scrap wood first.
Adding Style to Your Letters and Numbers
Once basic letters feel steady, shading adds real depth – use a shading tip or lower heat to build a gradient around a letter, which reads especially well on monograms. Cross-hatching (burning fine intersecting lines) adds texture inside larger block letters. Mixing a large, bold font for initials with smaller numbers for a date below it is an easy way to make a piece look intentional rather than uniform. If a stroke goes wrong, lightly sand the area and try again – it is rarely a total loss.
Finishing and Protecting Your Wood Burned Art
A finished piece left unsealed will fade under sunlight and pick up dirt over time. Sand away any leftover pencil or stylus marks, wipe the surface clean, then apply a clear sealant such as polyurethane or polycrylic. Water-based sealants are the safer choice for keeping the wood’s natural color, since some oil-based products yellow over time. Brush or spray it on in thin layers, letting each one dry fully before the next.
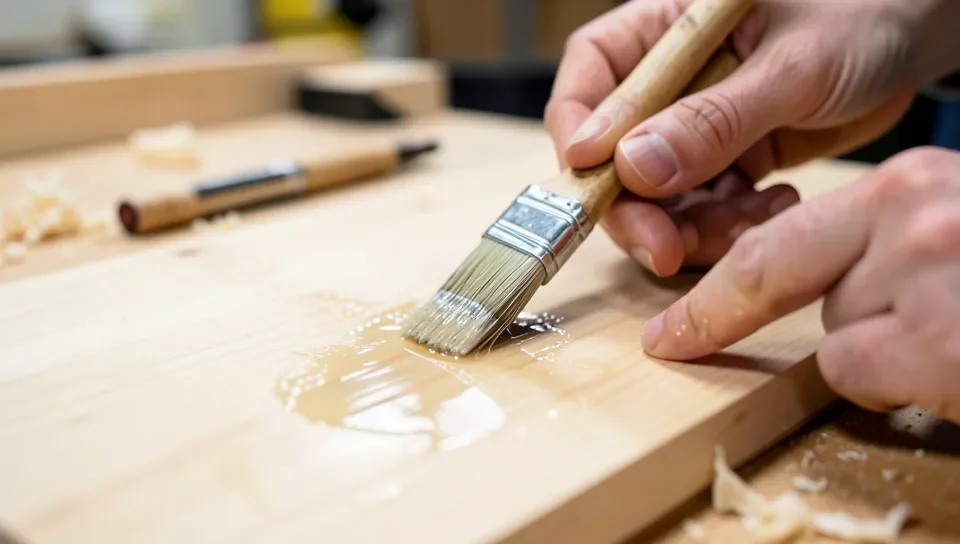
A thin, even coat of water-based sealant protects the burned letters without yellowing the wood.
For color, acrylic paint or wood stain works well around a burned design – a light walnut stain in particular makes dark letters pop against the surrounding wood without covering the burn lines themselves, as long as you seal it and avoid painting over the letters directly. For anything left outdoors, like house numbers, use a weatherproof sealant and plan to reapply it roughly once a year.
Common Mistakes and How to Avoid Them
Rushing is the top mistake – burning too fast leads to uneven lines and, as covered above, letters that vary in darkness because the tip never gets a chance to reheat between strokes. Pressing too hard is the second – it scorches wider than intended and wears down the pen’s tip faster than normal use. Always test heat and speed on a scrap piece of the same wood before starting on the real project.
Wood grain can also throw off a straight line, especially on grainier woods like oak – burn lightly and let the stencil or transferred guide keep you on track rather than following the grain. And do not skip ventilation; a closed room fills with smoke faster than it seems like it should, and a headache is the mildest possible outcome.
Inspiration for Your Wood Burning Projects
Personalized coasters with initials, house number signs, and a growth chart with numbers burned along the edge are all beginner-friendly starting points. Name plaques for kids’ rooms, porch welcome signs, and holiday gift tags all use the same letter-and-number skills at a slightly larger scale. Wooden bookmarks with a single word like “Dream” or “Hope” burned into them are quick, low-risk projects that still look finished.
For numbers specifically, think past house signs – burn an anniversary or birthday date onto a small plaque as a gift, build a wooden clock face with burned numerals, or make a countdown sign for an event. Start with a single letter on a basswood round before attempting a full word or phrase.
Other Wood Burning Methods Worth Knowing
A pyrography pen is not the only way to burn letters into wood. If you want a fixed, single-tip tool and already own one, a soldering iron can burn wood too – it runs hot enough for simple lettering, though it lacks interchangeable tips and true temperature control. On the other end, a diode laser engraver burns letters with a computer-guided beam instead of a handheld tip, trading hand-burned character for machine-level precision and repeatability – see our wood engraving methods overview for how laser and rotary engraving compare to hand pyrography.
Where to Find Supplies and Resources
Craft stores like Michaels or Hobby Lobby carry basic pyrography kits, tips, and pre-cut wood blanks. Online, Amazon has pens, tips, and metal stencils, while Etsy sells unique wood blanks. Pinterest and YouTube are useful for technique tutorials, and many pyrography artists share free printable stencils. Walnut Hollow is a well-known US source for basswood plaques and burning tools.
A local craft group or an online community like Reddit’s r/Pyrography is a good place to troubleshoot a specific problem or get feedback on a finished piece.
Conclusion
Wood burning letters and numbers is forgiving enough for a first project and open-ended enough to keep improving for years. The two habits that matter most – tracing from a real stencil or transferred guide instead of freehand, and keeping pressure and dwell time consistent letter to letter – are what separate a shaky first attempt from a sign that looks like it came from a shop. Pick up a stencil, grab a piece of basswood, and start with a single letter.
Frequently Asked Questions
What’s the best wood for burning letters and numbers?
Softwoods like basswood and pine are ideal for beginners. They’re easy to burn and have minimal grain, making your letters look clean and sharp. Basswood is a favorite because its light, even color shows off crisp letter edges instead of competing with dark grain lines.
Can I wood burn letters without a stencil?
Yes, if you’re confident freehand. For anyone else, a stencil or transfer gives noticeably straighter, more even results – that’s the actual difference between amateur-looking and professional-looking lettering, not the pen or the wood.
How do I keep letters straight without freehand drawing?
Use a stencil. A metal letter stencil lets you trace each character with the hot tip directly, so the tip never wanders off the shape. A paper template works too – tape it down, then trace over each letter’s outline with a stylus or embossing tool pressed firmly enough to leave a shallow indent in the wood underneath. Lift the paper and you have a guide groove to follow with the pen, keeping every letter the same height and evenly spaced.
How do I avoid burning too deeply or unevenly?
Depth and darkness come down to two things: pressure and dwell time – how long the tip sits in one spot. Keep both consistent letter to letter, moving at a steady, unhurried pace rather than rushing. Also let the tip fully reheat between strokes; moving on before it recovers its temperature is the single most common cause of one letter burning dark and the next coming out pale on the same piece.
Is wood burning letters and numbers safe?
It’s safe with basic precautions: work in a ventilated area or run a small fan to clear smoke, never leave a hot tip unattended even for a minute, and never burn treated, painted, or finished wood – those coatings release toxic fumes when scorched, and sanding first does not remove that risk.
How long does it take to learn wood burning letters?
You can burn a legible, presentable letter or two within an hour of practice on scrap wood. Consistent depth and spacing across a full word or name typically takes a few practice sessions before it looks deliberate rather than shaky.
Can I sell wood burned letter and number signs?
Yes. Personalized name signs, house numbers, and monogrammed pieces are popular at craft fairs and on sites like Etsy. Just finish each piece with a sealant for durability before selling it.
Sponsored / affiliate links. As an Amazon Associate I earn from qualifying purchases. I may earn additional commission from eligible campaigns.