Adjustable Depth Circular Saw: How to Set Blade Depth Correctly
A circular saw’s depth adjustment is the lever that decides how much of the blade actually sticks out below the shoe — and getting that number right, cut after cut, is the difference between a clean pass and a saw that’s fighting you, kicking back, or shredding the exit side of the board. Here’s how depth adjustment actually works, what to set it to, and what changes when you’re cutting plywood versus dimensional lumber versus MDF.
How Circular Saw Depth Adjustment Actually Works
Best Depth-Adjustment Circular Saw
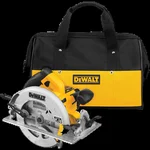 |
DEWALT DWE575SB 7-1/4″ Circular Saw – $99 A lightweight 13-amp corded saw with an easy-to-read depth scale and a pivoting shoe that holds its setting instead of creeping under vibration.
|
Almost every circular saw — corded or cordless, worm drive or sidewinder — uses the same basic mechanism: a lever or knob near the back of the shoe loosens a pivot that lets the whole motor-and-blade assembly swing up or down relative to the base plate. Raise the assembly and less blade shows below the shoe (shallower cut); lower it and more blade is exposed (deeper cut). Most saws mark the depth scale in fractions of an inch along a small quadrant next to the pivot, though the markings are notoriously optimistic on cheaper saws — measuring the actual blade-to-shoe distance with a tape measure before a critical cut is worth the ten seconds.
Bevel adjustment is a separate lever (usually at the front of the shoe) that tilts the shoe itself, changing the angle of the cut rather than its depth. The two controls are independent, which matters because a beveled cut effectively increases how much blade the material sees even at the same depth setting — something worth remembering when you’re cutting a 45-degree bevel through thick stock and the saw suddenly feels underpowered.
The Depth Rule That Actually Matters: 1/4 Inch Past the Material
The standard shop rule is to set blade depth so the teeth extend about 1/4 inch (roughly one tooth-height) below the bottom face of the material you’re cutting — not the full blade diameter, not “as deep as it goes.” That small overhang keeps enough tooth engaged to clear sawdust cleanly and cut efficiently, without so much blade exposed that you lose control, increase kickback risk, or turn a stumble into a serious injury.
Going deeper than that doesn’t make the cut faster or cleaner — it mostly increases the amount of spinning blade that’s unsupported by the material, which is exactly the condition that makes kickback more violent if the saw binds. Going shallower forces the blade to work harder per pass and tends to produce more tear-out and burning, since the gullets between teeth can’t clear waste fast enough at a steep entry angle relative to blade exposure.
Depth Settings by Material
- 3/4-inch plywood or MDF: set for roughly 1 inch of blade exposure (3/4 material + 1/4 overhang). For MDF specifically, a slower feed rate at this depth reduces the fuzzy, torn edge MDF is prone to.
- 2×4 or 2×6 dimensional lumber (1.5 inches actual thickness): set for about 1.75 inches of exposure. If you’re cutting at a bevel, re-check depth after setting the bevel angle, since the effective cut path through the material gets longer.
- Doubled-up material (two sheets of subfloor, for example): most 7-1/4-inch circular saws max out around 2.5 inches of depth at 90 degrees, which is enough for two layers of 3/4-inch material with margin — but check your specific saw’s max-depth spec before assuming.
- Thin trim or paneling under 1/2 inch: resist the urge to leave the saw set deep from the last cut. Excess blade exposure on thin material is where most bad tear-out on cabinet-grade plywood happens.
Why “Deeper Is Safer” Is Backwards
It’s a common instinct to leave the blade set deep “just in case,” but that instinct runs the wrong direction for both safety and cut quality. OSHA’s guidance on portable circular saws specifically calls out excessive blade exposure below the material as a kickback and laceration risk factor, and saw manufacturers size their blade guards assuming a shoe-to-material relationship close to that quarter-inch standard — not a blade buried three extra inches into open air below your workpiece. Re-setting depth for each new material thickness takes seconds and is one of the few pure-safety habits that also happens to improve your cut quality.
Quick Fixes When Depth Adjustment Won’t Hold
If the depth lever slips under vibration mid-cut, the pivot bolt is usually just loose — most saws have a hex or Phillips fastener at the pivot point that can be snugged with a wrench without disassembling anything. If the depth scale markings don’t match reality, trust a tape measure over the printed scale; stamped depth scales can be off by 1/8 inch or more from the factory, and that’s enough to matter on a critical cut. And if the shoe itself has developed play or doesn’t sit flat, that’s usually a sign the saw has taken a drop at some point — a bent shoe changes your effective depth even when the lever setting hasn’t moved.
Frequently Asked Questions
How deep should a circular saw blade be set?
Set the blade so the teeth extend about 1/4 inch below the bottom of the material you’re cutting, not deeper. For 3/4-inch plywood that means roughly 1 inch of total blade exposure; for 1.5-inch dimensional lumber, about 1.75 inches.
Is it safer to set a circular saw blade deeper than needed?
No — it’s less safe. Excess blade exposed below the material increases kickback severity if the saw binds and exposes more spinning blade near your hands and the workpiece edge. Match the depth to the material plus about a quarter inch, and re-adjust for every material-thickness change.
How do you adjust the depth on a circular saw?
Loosen the depth adjustment lever near the rear pivot of the shoe, raise or lower the saw body until the blade shows the right amount below the shoe (check against a tape measure, not just the printed scale), then re-tighten the lever fully before cutting.
Sponsored / affiliate links. As an Amazon Associate I earn from qualifying purchases. I may earn additional commission from eligible campaigns.