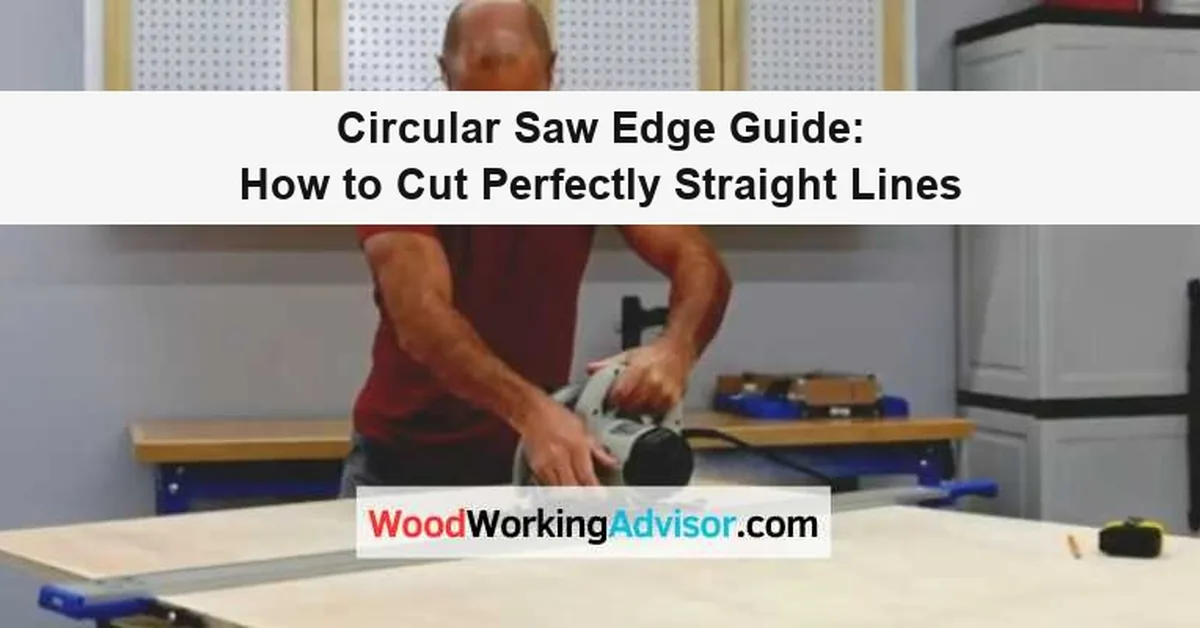
Circular Saw Edge Guide: How to Cut Perfectly Straight Lines
A circular saw edge guide is a straightedge clamped to your material that keeps the blade on one line — but worm-drive saws mount the blade left of the motor and sidewinders mount it right, so the guide goes on the opposite side. Guessing wrong ruins a full sheet of plywood in one pass. This guide covers the offset chart by saw type, setup, buying the right guide, and fixing one that slips.
What Is a Circular Saw Edge Guide?
Best Circular Saw Edge Guide Pick
BORA NGX Circular Saw Guide Rail, 50″ Straight Edge Clamp
A 50-inch aluminum rail with built-in quick-lock clamps — long enough for most crosscuts and rips without the bulk of a full 100-inch track.
- Best for: Most furniture-scale rip and cross cuts
- Why we picked it: Clamps in seconds with no separate hardware to lose
- Main drawback: Not long enough alone for a full 8-foot rip on a 4×8 sheet
Compare more edge guide options
 Option 1 Kreg Straight Edge Guide XL, 98″
|
 Option 2 Swanson 100″ Aluminum Cutting Guide
|
 Option 3 POWERTEC 36″ Circular Saw & Router Guide
|
As an Amazon Associate we earn from qualifying purchases.
A circular saw edge guide is a straightedge or fence that clamps to a board or sheet so the saw’s base plate rides against it instead of following a hand-drawn pencil line. It turns a handheld circular saw into something closer to a track saw for the length of that one cut, which matters most when you’re breaking down full sheets of plywood or MDF where a wandering freehand cut wastes material.
The guide itself does nothing to correct your aim — it only holds a straight reference line. Precision comes from getting the offset right (the distance from the guide to the blade) and keeping the saw’s base plate pressed against the fence for the entire cut, not just the first few inches.
Types of Circular Saw Edge Guides
Two styles cover most jobs: a clamped straightedge (an aluminum bar or fence you clamp directly to the workpiece) and a rail or track guide (a longer aluminum track with its own clamping feet, often with an anti-splinter edge). A few saws also accept a rip-fence attachment that bolts to the base plate for narrow cuts near an edge, with no clamps at all.
| Guide Type | Typical Cost | Best For |
|---|---|---|
| Clamped straightedge | $35-$90 | Occasional rips and crosscuts, moving between different-size boards |
| Rail / track guide | $50-$130+ | Frequent sheet-good breakdowns, splinter-free finish edges |
| Bolt-on rip-fence attachment | $15-$30 | Narrow rips within about 6 inches of an existing edge, no clamping needed |
If you’d rather build a guide instead of buying one, our zero-clearance DIY guide jig walks through cutting your own from a strip of plywood and hardboard for about the cost of a fast-food lunch. It won’t clamp as fast as a commercial rail, but it costs a fraction of one. For repeat angled cuts like stair stringers rather than long straight rips, stair gauges are the better specialty accessory — they lock a repeatable angle instead of a straight line.
Choosing the Right Edge Guide for Your Saw
Match the guide length to what you actually cut. A 50-inch rail handles most crosscuts and rips on furniture-scale stock; a 100-inch rail is worth the extra cost if you regularly break down full 4×8 sheets. Check the mounting hardware too — some rails need a saw-specific base plate adapter, while universal clamp-style guides work with almost any circular saw regardless of brand.
Aluminum construction is worth paying for. A guide that flexes under clamp pressure will bow away from the blade mid-cut, and that bow shows up as a curve in what should be a straight line. Look for a rail with a raised lip or anti-slip strip on the underside so it can’t creep sideways while you’re cutting.
Circular Saw Blade Offset: Which Side Does the Guide Go On?
Blade offset is the distance between the edge of your saw’s base plate and the blade itself — and it changes depending on which side of the motor the blade is mounted. Most competing guides skip this entirely, but it’s the single most common reason a first-time guide user cuts on the wrong side of the line.
Sidewinder (direct-drive) saws — the type most homeowners own — mount the blade to the right of the motor when viewed from behind the saw. Worm-drive saws, common on job sites, mount the blade to the left. Swap from one saw type to the other and keep using the same guide setup without rechecking which side the blade sits on, and your cut lands the full offset-width away from where you meant it to.
📊 A 7-1/4″ circular saw typically has a base-plate-to-blade offset of roughly 1-3/8″ to 2″, depending on the model — always confirm yours with a test cut in scrap rather than trusting a published number, since base plate width varies by manufacturer.
| Saw Type | Blade Position | Guide Goes On |
|---|---|---|
| Sidewinder / direct-drive | Right of motor | Left side of the cut line |
| Worm-drive | Left of motor | Right side of the cut line |
The fastest way to confirm your own offset: clamp the guide to a piece of scrap, make one cut, then measure from the guide edge to the cut edge. Write that number on a strip of tape stuck to your saw’s base plate — it’s faster than remeasuring every time.
How to Set Up a Circular Saw Edge Guide
Setup takes about five minutes once you know your saw’s offset. Follow these steps in order every time — skipping the test cut is the most common way a guide setup goes wrong.

- Mark your cut line: draw the actual cut line on the material with a pencil and square, not just an approximate mark.
- Measure your offset: use the blade-offset chart above (or your own tested number) to find how far the guide sits from the line.
- Position the guide: measure that offset distance from the cut line at both ends of the board, and mark it.
- Clamp it down: secure the guide at both ends, checking that it hasn’t shifted while you tightened the second clamp.
- Make a test cut: cut a few inches into scrap or a waste area first, then check the result against your line before committing to the full cut.
- Cut in one continuous pass: keep the base plate pressed against the guide the entire length of the cut — easing off partway through is what causes a visible kink in the line.
Cutting Plywood, Melamine, and Other Sheet Goods With a Guide
Sheet material behaves differently under the blade depending on the surface. On melamine and laminate-faced panels, tear-out along the top edge is the main risk — score the cut line first with a utility knife, or run painter’s tape along the line before cutting, so the coating doesn’t chip as the teeth exit the cut. A blade with more teeth (60T or higher) also helps on melamine specifically.
On plywood, support the sheet on both sides of the cut line with rigid foam insulation board or 2×4 sleepers so the offcut doesn’t sag and pinch the blade partway through. Sagging is also what causes a guide to lift off the surface mid-cut on long rips, which throws off your offset even if the clamps held.
For solid lumber, the guide matters less for tear-out and more for keeping a long rip from wandering with the grain — softwood in particular tends to pull a freehand cut off line more than sheet goods do.
Maintaining a Straight Cut and Cutting Safely
Wear eye protection and keep your free hand well clear of the cut path — a guide changes where the blade travels, not the fact that it’s spinning. Check the blade guard retracts and resets on its own before every session; sawdust buildup around the guard is a common cause of it sticking open.
For the cut itself, let the saw reach full speed before it touches the material, and keep steady, even forward pressure — pushing harder doesn’t cut faster, it just increases the chance the base plate rides up off the guide. On rip cuts longer than about three feet, support the guide at a third clamp point in the middle if the rail flexes at all when you press on it.
Guide Maintenance and Care
Wipe sawdust and resin off the fence edge after every use — a buildup as thin as a business card is enough to throw off your offset on the next cut. Check clamps periodically for worn threads or a spring that no longer holds tension, since a clamp that creeps under pressure is the single biggest cause of a guide sliding mid-cut.
Store rail guides flat or hung vertically rather than leaning at an angle, which can bow aluminum over time. A light coat of paste wax on the fence edge keeps the saw’s base plate gliding smoothly instead of catching.
Troubleshooting: Guide Slipping or Cuts Drifting Off Line
Most drift problems trace back to one of three causes: the guide moved during the cut, the offset was measured wrong, or pressure eased off partway through. Work through these fixes in order.
- Cut curves away from the guide partway through: the base plate likely lifted off the fence — re-clamp with a third clamp at the midpoint and keep steady sideways pressure into the guide, not just forward pressure.
- Cut is consistently off by the same amount the whole length: the offset measurement was wrong, not the technique — redo the test-cut measurement from the “Blade Offset” section above.
- Guide rocks or wobbles under the saw: check for sawdust trapped under the fence, or a warped board underneath it — shim the low spot before clamping again.
- Clamps won’t hold tight anymore: worn clamp threads or a cracked plastic housing need replacing — don’t compensate by over-tightening, which can bow a thin aluminum rail.
Frequently Asked Questions
How do you measure the offset on a circular saw for a guide?
Clamp the guide to a piece of scrap at any distance, make one cut, then measure from the guide’s edge to the resulting cut edge — that distance is your saw’s offset. Most 7-1/4″ saws measure roughly 1-3/8″ to 2″, but base plate width varies by model, so always confirm with your own saw rather than trusting a published number.
What’s the difference between a track saw and a circular saw with a guide rail?
A track saw’s blade rides in a slot cut directly into its track, so there’s no offset to measure and almost no play. A circular saw clamped to a separate guide rail needs the offset measured and marked for every cut, and the base plate can shift slightly against the fence. Track saws cost more but are faster and more repeatable for frequent sheet-good work.
Can you make your own straight edge guide for a circular saw?
Yes — a shop-made guide from a strip of hardboard and plywood, trimmed to your own saw’s exact offset with one pass, removes the offset-measuring step entirely for future cuts. See our zero-clearance DIY guide jig for the full build.
Why won’t my circular saw cut straight even with a guide?
The most common causes are the base plate lifting off the fence mid-cut, sawdust trapped under the guide throwing it out of position, or an offset that was measured wrong in the first place. Work through each of these in order rather than assuming the guide itself is defective.
What length guide rail do you need for a 4×8 sheet of plywood?
For a full 8-foot rip, use a rail at least 100 inches long so both clamps sit fully on the material with some overhang at each end. A 50-inch rail works for crosscutting a sheet in half but won’t span a full length rip in one setup.
Are circular saw edge guides worth it?
For anyone who breaks down sheet goods more than a few times a year, yes — a $35-$90 clamped guide pays for itself in reduced material waste after the first miscut it prevents. For occasional one-off cuts, a shop-made guide or a straight factory edge used as a fence works nearly as well for free.
Conclusion
A circular saw edge guide only works as well as its setup — get the offset right for your specific saw, clamp both ends, and keep steady pressure into the fence for the whole cut. Confirm your saw’s offset once with a test cut, and every guided cut after that comes down to clamping straight and pushing steady. For help picking the saw itself to pair with a guide, see our full woodworking tools and saws guide.
Sponsored / affiliate links. As an Amazon Associate I earn from qualifying purchases. I may earn additional commission from eligible campaigns.
 7 Inch Circular Saw Edge Guide Positioner, 85cm Adjustable Wood Cutting Guide Rail, Stainless Steel Large Cutting Range Positioning Frame Tool for Woodworking
 Circular Saw Edge Guide with Scale for DC390K DW936 DC300 DC310 DCS391B DCS393, Metal Rip Fence Attachment for Straight Cuts, 10.7 Inch Silver(11mm Guide)