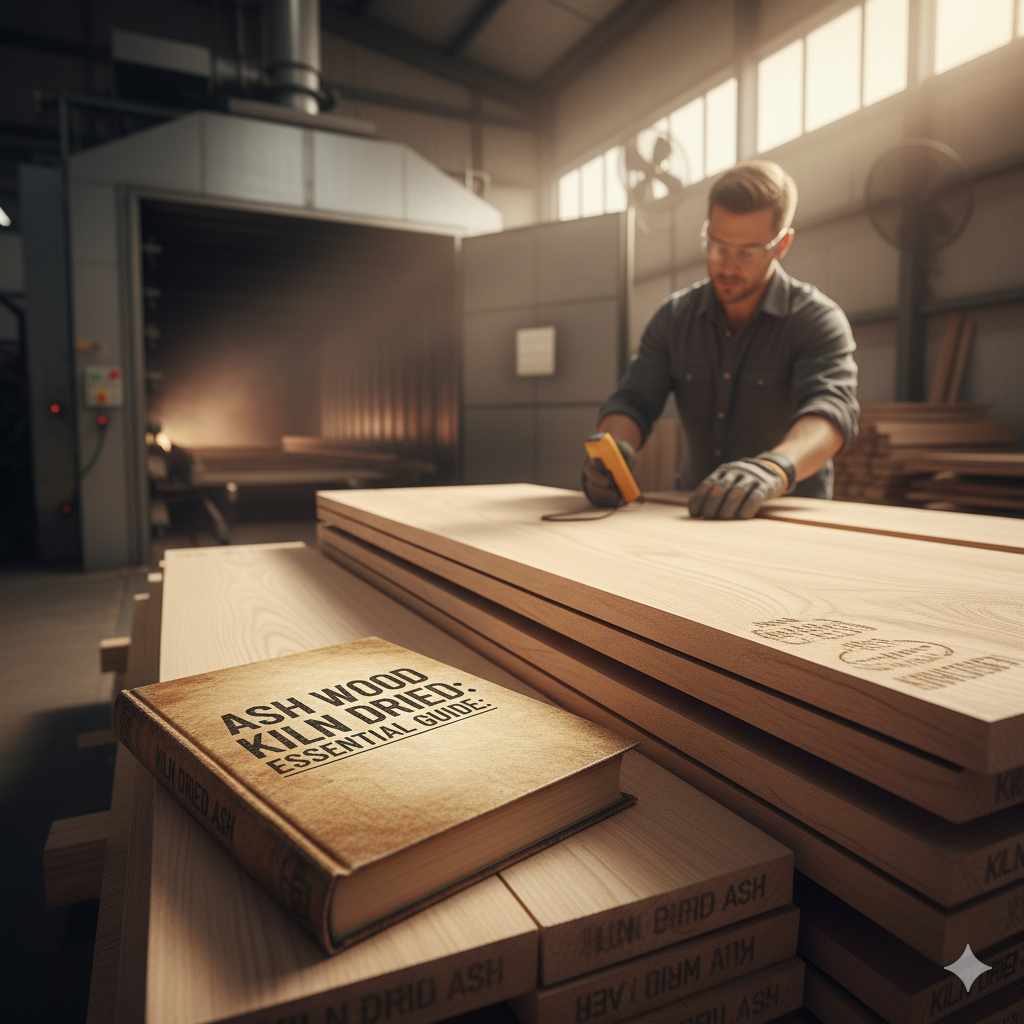
Ash Wood Kiln Dried: Essential Guide
Kiln-dried ash wood is dried in special ovens to remove moisture, making it stable, strong, and less prone to warping or cracking, perfect for furniture, flooring, and crafts.
Hey everyone, Md Meraj here! Ever looked at a beautiful wooden table or a sturdy chair and wondered how it stays so perfect for years? A lot of that magic comes down to how the wood itself was prepared. Specifically, when wood like ash is ‘kiln-dried,’ it goes through a process that makes it a dream to work with and incredibly durable. If you’ve been curious about why this type of wood is so popular or how it’s treated, you’re in the right place. It might sound technical, but I’m here to break it all down in simple terms. We’ll cover what kiln-dried ash wood is, why it’s so great, and what you need to know before you use it in your next project. Get ready to feel confident about choosing and using this fantastic material!
What is Ash Wood and Why is it Special?
Ash wood is a hardwood that comes from ash trees. It’s a favorite among woodworkers for a few really good reasons. Firstly, it’s known for its strength and flexibility. Think of a baseball bat; many are made from ash because it can take a good hit without breaking! This makes it great for things that need to be tough.
It also has a beautiful, distinctive grain pattern. It’s often straight-grained with a medium texture, giving wood projects a classic, clean look. You’ll see this grain beautifully showcased in furniture, tool handles, and even sports equipment.
Plus, ash wood is relatively easy to work with. It machines, sands, and finishes nicely, meaning beginners and experienced crafters alike can achieve great results. It takes stains and paints well if you want to add color, or it looks fantastic with just a clear coat to show off its natural beauty.
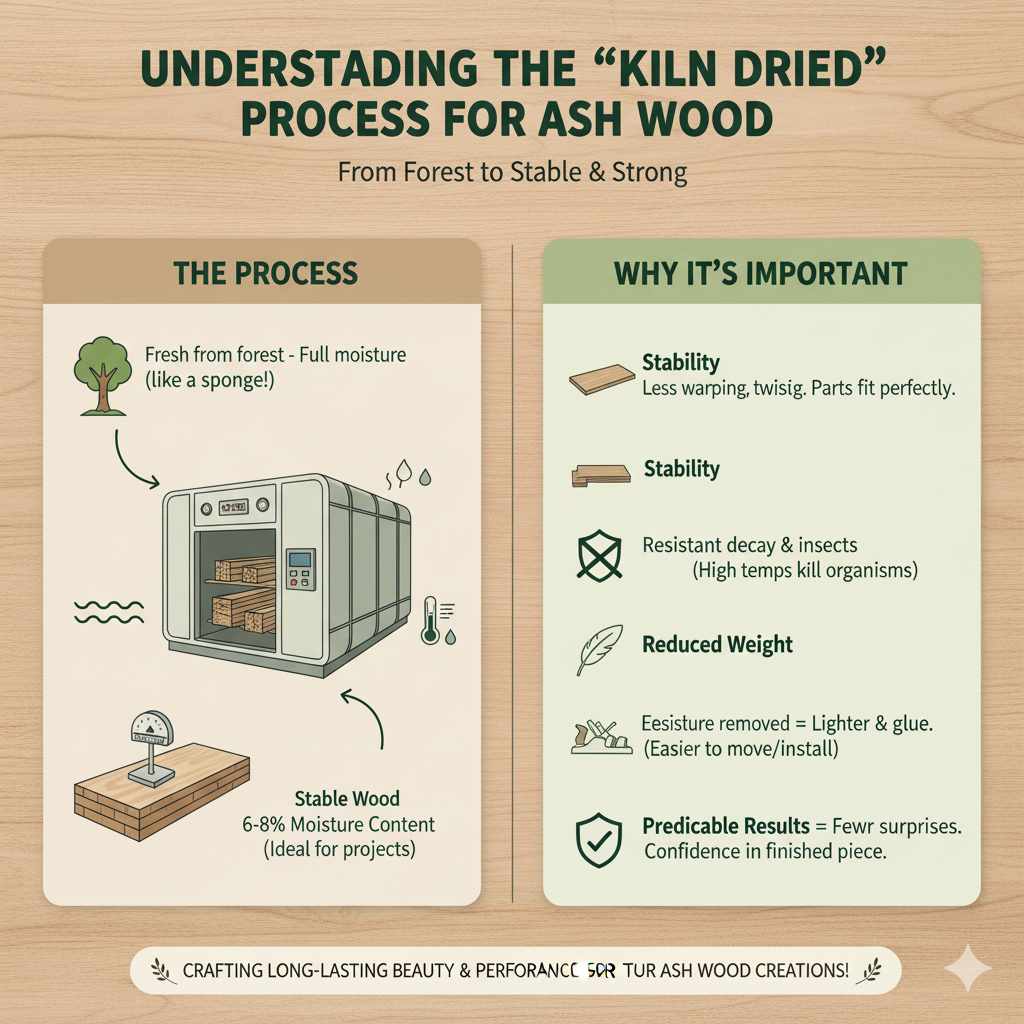
Understanding the “Kiln Dried” Process
So, what does “kiln dried” actually mean for ash wood? Imagine wood fresh from the forest. It’s full of moisture, like a sponge. This moisture can cause all sorts of problems later on: the wood can shrink, twist, crack, or even develop mold. That’s where the kiln drying process comes in.
A kiln is essentially a large oven designed specifically for drying wood. The process involves carefully controlling heat and humidity levels over a period of time. This gradual drying removes most of the moisture from the wood, bringing it down to a stable moisture content that’s ideal for woodworking.
This controlled environment is key. Unlike air-drying (where wood sits outside), kiln drying is much faster and more predictable. It ensures the wood dries evenly and reaches a specific moisture level, usually between 6% and 8% for furniture-grade wood. This stability is what makes kiln-dried ash so valuable.
Why is Kiln Drying So Important for Ash Wood?
For ash wood, kiln drying is not just a nice-to-have; it’s often essential for achieving the best results in your projects. Here’s why:
- Stability: As mentioned, the biggest benefit is stability. Reduced moisture means the wood is far less likely to warp, twist, or cup after you’ve made it into something. This is crucial for furniture where parts need to fit together perfectly.
- Durability: Kiln drying can also make wood more resistant to decay and insect infestations. The high temperatures help kill off any lurking organisms that could damage the wood over time.
- Reduced Weight: Removing moisture naturally makes the wood lighter, which can be a big advantage, especially if you’re moving or installing larger projects.
- Easier to Work With: Drier wood is generally easier to cut, shape, and glue. It’s less likely to tear out when planing or routing.
- Predictable Results: When you buy kiln-dried ash, you know you’re starting with a stable material. This means fewer surprises and more confidence in your finished piece.
The Kiln-Dried Ash Wood Buying Guide
When you head out to buy kiln-dried ash wood, knowing a few things can help you choose the best quality lumber for your needs. Don’t just grab the first board you see!
What to Look For (and Avoid!)
- Moisture Content (MC): Reputable lumber suppliers will often state the moisture content of their kiln-dried wood. For indoor projects like furniture or cabinets, aim for wood with 6-8% MC. For exterior projects, you might see higher percentages, but for most indoor woodworking, a lower, stable MC is best. You can check this yourself with a wood moisture meter, which is a handy tool for any woodworker to have.
- Grain Pattern: Ash can have a straight or wavy grain. Straight grain is often considered more stable and easier to work with, while wavy grain can be beautiful but sometimes trickier. Decide what look you prefer for your project.
- Color: Ash typically has a light-colored sapwood and heartwood that ranges from pale yellowish-brown to darker brown. Look for boards where the color is consistent and appealing to you, avoiding excessive dark streaks unless that’s the look you want.
- Warping and Bending: Even kiln-dried wood can have slight issues. Lay boards flat and look down their length. Are they bowed, twisted, or cupped? A little bit might be acceptable depending on your project and where you cut from, but severe warping is a big no-no.
- Cracks and Checks: Inspect the ends of the boards especially. Small surface checks (thin cracks) might be okay if they aren’t deep, but large cracks or splits can weaken the wood.
- Wormholes or Pests: While kiln drying helps kill bugs, always check for signs of past or present insect activity. You don’t want to bring unwanted guests into your workshop or home!
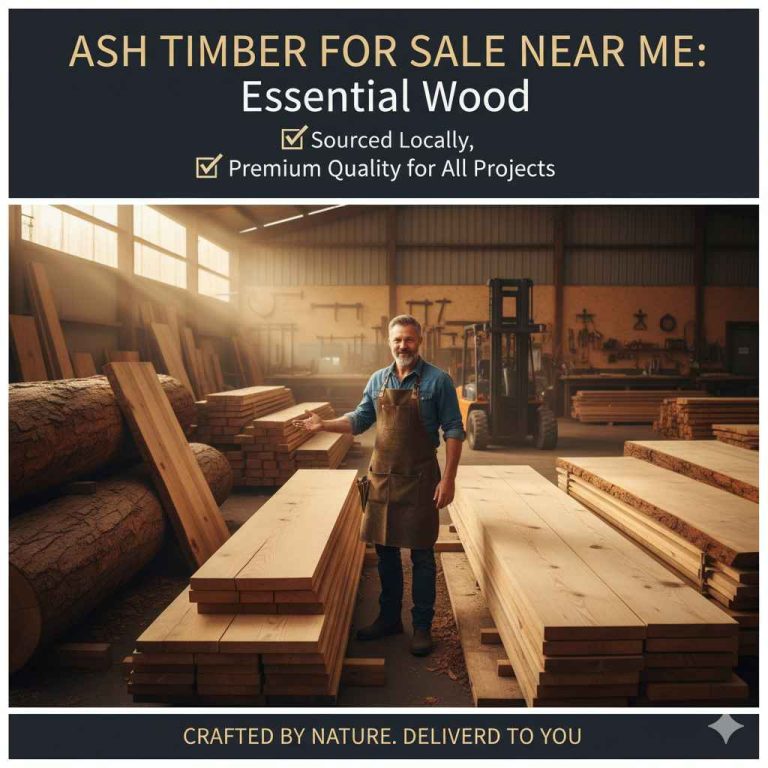
Where to Buy Kiln-Dried Ash Wood
You have a few options when it comes to sourcing this material:
- Local Sawmills and Lumber Yards: These are often the best places to find quality hardwood. You can usually see the wood in person before buying, which is a big advantage. Staff can often offer advice too.
- Online Retailers: Many online stores sell lumber, including kiln-dried ash. This can be convenient, but you lose the ability to inspect the wood beforehand. Read reviews and check shipping policies carefully.
- Big Box Home Improvement Stores: While they might carry some hardwoods, they often have a more limited selection and the wood might not be as high quality or as carefully dried as from specialized lumber suppliers.
Pros and Cons of Kiln-Dried Ash Wood
Like any material, kiln-dried ash wood has its strengths and weaknesses. Understanding these will help you decide if it’s the right choice for your project.
| Pros | Cons |
|---|---|
| Excellent Strength and Durability: Resilient and can withstand impact. | Can Be Pricier: The kiln-drying process adds cost compared to air-dried or green lumber. |
| High Stability: Minimal shrinkage, warping, or cracking once dried. | Grain Can Be Pronounced: Some prefer a subtler grain; ash’s can be quite noticeable. |
| Good Workability: Machines, sands, and finishes well. | Availability Varies: Depending on your region, high-quality kiln-dried ash might be harder to find than more common woods. |
| Attractive Appearance: Nice natural color and grain patterns. | Can Stain Darker: While it takes stains well, lighter ash can absorb darker stains more than some other woods, so test first. |
| Lighter Weight: Compared to some other hardwoods of similar strength. | Susceptible to Moisture Fluctuations (if not properly sealed): While stable, any wood can be affected if constantly exposed to high humidity without protection. |
How to Use Kiln-Dried Ash Wood in Your Projects
Now that you’ve got your kiln-dried ash, how do you actually use it? The great news is that because it’s stable and well-prepared, it’s a forgiving wood for beginners.
Essential Tools for Working with Ash
You don’t need a professional shop to work with ash, but a few basic tools will make the job much easier and safer:
- Measuring Tape and Pencil: For accurate marking.
- Saw: A handsaw, circular saw, or miter saw for cutting boards to size.
- Drill: For making pilot holes and driving screws.
- Screwdrivers or Drill Bits: To match your screws.
- Sandpaper or Orbital Sander: For smoothing surfaces. Start with a coarser grit (like 80 or 100) and move to finer grits (150, 220, or higher) for a smooth finish.
- Wood Glue: For strong joints.
- Clamps: To hold pieces together while the glue dries.
- Safety Gear: This is non-negotiable! Safety glasses are a must when cutting or sanding. Hearing protection is recommended for power tools. A dust mask will protect your lungs from fine wood particles.
Basic Steps for a Simple Project (e.g., a Small Box or Shelf)
Let’s walk through a very basic idea. Imagine you’re making a simple, solid box to hold tools or keepsakes.
- Design and Measure: Sketch out what you want to build and decide on your dimensions. For a box, this means deciding the length, width, and height of the sides and the size of the bottom.
- Cut Your Pieces: Using your chosen saw, carefully cut your kiln-dried ash boards to the exact sizes you measured. Always measure twice and cut once! If you’re using a power saw, ensure you understand its operation and safety features. For precise cuts, especially at angles, a miter saw is excellent. For straight cuts on longer boards, a circular saw or a table saw (if you have access to one) works well. You can often find resources on safe saw operation from organizations like OSHA, which sets standards for workplace safety, including woodworking machinery.
- Sand the Pieces: Before assembly, it’s often easier to sand the inside surfaces of your pieces smooth. Start with medium-grit sandpaper (like 120-grit) and then move to finer grits (like 180 or 220-grit) for a silky smooth feel. This is especially important for surfaces that will be hard to reach after assembly.
- Assemble the Sides: Apply a good quality wood glue to the edges that will join. For a box, this means the ends of your side pieces. Bring the pieces together and use clamps to hold them firmly in place. Make sure the corners are square – a carpenter’s square is your friend here! Let the glue dry completely according to the manufacturer’s instructions.
- Attach the Bottom: Once the sides are secure, you can attach the bottom. You can glue and then fasten it with small screws, drilling pilot holes first to prevent the ash from splitting.
- Final Sanding: Once the glue is dry and all pieces are assembled, do a final sanding on the outside of your project. Smooth any rough spots, ease the edges slightly so they aren’t sharp, and ensure everything looks neat.
- Finishing: This is where your project really comes to life! You can apply a clear protective finish like polyurethane, varnish, or a natural oil like tung oil or linseed oil. If you want to color the wood, apply a wood stain first, let it dry, and then follow with a clear topcoat. Always test your finish on a scrap piece of ash first to see how it looks.
Tips for Finishing Ash Wood
Ash wood’s grain can sometimes absorb finishes unevenly, leading to blotchiness, especially with lighter stains. To get a beautiful, consistent finish:
- Use a Pre-stain Conditioner: For staining light-colored ash, applying a pre-stain conditioner is highly recommended. It helps the wood absorb the stain more evenly, preventing dark blotches.
- Test Your Finish: Always test your stain and topcoat on a scrap piece of the same ash wood. This allows you to see the final color and how the finish interacts with the grain before applying it to your project.
- Apply Thin Coats: Whether it’s stain or a clear coat, applying multiple thin coats is better than one thick coat. This provides a more durable and even finish.
- Scuff Sand Between Coats: After a clear coat has dried, lightly sand it with very fine-grit sandpaper (like 320 or 400-grit) before applying the next coat. This smooths out any dust nibs and helps the next coat adhere better.
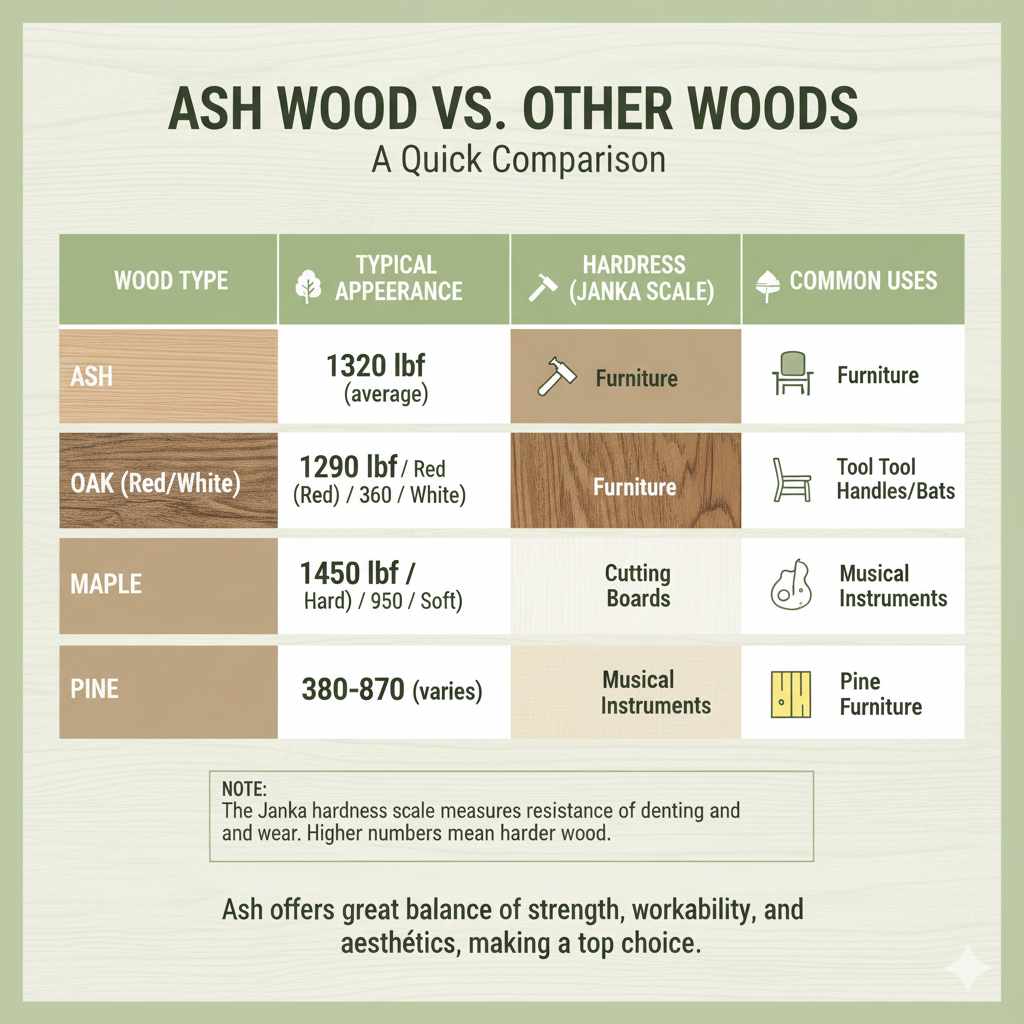
Ash Wood vs. Other Woods: A Quick Comparison
How does kiln-dried ash stack up against some other popular hardwoods you might encounter?
| Wood Type | Typical Appearance | Hardness (Janka Scale) | Common Uses | Kiln-Dried Considerations |
|---|---|---|---|---|
| Ash | Light to medium brown, distinct straight grain. | 1320 lbf (average) | Furniture, flooring, tool handles, baseball bats. | Very stable, strong, flexible. |
| Oak (Red/White) | Light to medium brown, prominent, open grain pattern. | 1290 lbf (Red) / 1360 lbf (White) | Furniture, cabinetry, flooring, barrels. | Stable, durable, can be heavy. |
| Maple (Hard/Soft) | Creamy white to light brown, fine, uniform texture. Hard maple has a subtle grain. | 1450 lbf (Hard) / 950 lbf (Soft) | Furniture, cabinetry, flooring, cutting boards, musical instruments. | Extremely stable, very hard, takes finish well. |
| Pine (Softwood) | Yellowish to pale brown, distinct knots, straight grain. | 380-870 lbf (varies greatly) | Construction, basic furniture, crafts, paneling. | Less stable than hardwoods if not kiln-dried; prone to dents. |
Note: The Janka hardness scale measures the resistance of wood to denting and wear. Higher numbers mean harder wood.
As you can see, ash offers a great balance of strength, workability, and aesthetics, making it a top choice for many projects. Its strength and flexibility are often highlighted when compared to woods like maple or oak, though all three are excellent hardwoods.
Frequently Asked Questions About Kiln-Dried Ash Wood
Are there safety concerns when working with ash wood?
Ash wood dust can be an irritant to the skin, eyes, and respiratory system. Always wear safety glasses and a dust mask when cutting or sanding. Good ventilation in your workspace is also important. For specific safety guidelines on woodworking machinery, refer to resources like those provided by the Woodworking Association of North America (WANA).
Can I use kiln-dried ash wood for outdoor projects?
While kiln-dried ash is more stable than green wood, it’s still a hardwood that will eventually degrade outdoors unless very well protected. For true outdoor durability, woods like cedar or redwood, or specially treated lumber, are generally better choices. If you must use ash outdoors, ensure it’s thoroughly sealed with multiple coats of a high-quality exterior-grade finish.
How do I store kiln-dried ash wood?
Store kiln-dried ash in a stable environment. Keep it indoors, away from direct sunlight, extreme temperatures, and high humidity. Stack boards flat with spacers (stickers) between them to allow air circulation and prevent warping. This helps maintain its stability.
Is kiln-dried ash wood good for beginners?
Yes, kiln-dried ash is a great choice for beginners! It’s stable, easy to work with, and forgiving. It won’t twist or warp as easily as air-dried lumber, giving you more confidence as you learn.