Best Way To Deep Clean Wood Floors: Genius Touch
The best way to deep clean wood floors involves a gentle yet effective approach: vacuuming or sweeping away loose debris, followed by a damp (not wet!) mop with a pH-neutral cleaner specifically designed for wood. Regular light cleaning prevents the need for harsh scrubbing.
Hey there, fellow DIYers and homeowners! Ever look down at your beautiful wood floors and feel a pang of dread when you see that stubborn grime or dullness that just won’t budge? You’re not alone. Keeping wood floors looking their best can feel like a puzzle, especially when you want to avoid damaging that gorgeous finish. Don’t worry, though! With a few simple, genius touches, you can bring back their shine and keep them looking like new. We’re going to walk through a process that’s easy on your floors and surprisingly effective. Get ready to make your wood floors sparkle!
Why Deep Cleaning Matters for Your Wood Floors
Your wood floors are more than just a surface; they’re a significant part of your home’s beauty and character. Over time, everyday life leaves its mark: dirt, dust, pet dander, spills, and scuffs can build up, not just on the surface but in the tiny crevices of the wood. This buildup can dull the finish, making your floors look tired and worn, even if they’re structurally sound. Regular cleaning helps, but a good deep clean goes a step further. It removes the stubborn grime that regular sweeping or quick mopping misses, thus protecting the wood and its finish from long-term damage. Think of it as a spa day for your floors!
Understanding Your Wood Floor Finish: The First Genius Step
Before you grab any cleaner, it’s crucial to know what kind of finish your wood floors have. This is the absolute first step to a successful deep clean, and it’s a genius move because using the wrong product can cause damage. Most modern wood floors have a protective coating, often polyurethane, which is very durable. Older floors might have a penetrating oil finish or wax. The finish dictates what cleaning products and methods are safe.
Here’s a quick rundown:
- Surface-Sealed Floors (Polyurethane, Urethane, Aluminum Oxide): These finishes form a protective layer on top of the wood. They are generally more resistant to moisture and easier to clean. Most cleaning methods suitable for wood floors will work here.
- Penetrating Oil or Wax Finishes: These finishes soak into the wood rather than sitting on top. They offer a more natural look and feel but are more susceptible to moisture and require special care. Harsh cleaners or excessive water can strip these finishes.
How to tell? Often, manufacturers provide this information. If not, a common test is to place a drop of water in an inconspicuous spot. If the water beads up and stays on the surface, it’s likely a surface seal. If it soaks in quickly and darkens the wood or leaves a ring, it might be an oil or wax finish. For wax finishes, you might also notice a duller sheen and a slightly softer feel. If you’re unsure, it’s always best to consult a flooring professional or an authoritative resource like Wood Floor Business for guidance.
Gather Your Deep Cleaning Arsenal: Tools and Supplies
Having the right tools makes any job easier and more effective. For deep cleaning your wood floors, you don’t need a lot of fancy equipment. The key is gentle effectiveness.
Here’s what you’ll need:
- Vacuum Cleaner with a Hard Floor Attachment or Brush Roll Off: Essential for removing dry debris without scratching. The beater bar needs to be turned off or a special brush roll used.
- Soft-Bristled Broom or Microfiber Duster: For those quick sweeps between deep cleans and corners.
- Two Buckets: One for your cleaning solution, one for rinsing. This is a genius trick to prevent spreading dirty water.
- pH-Neutral Wood Floor Cleaner: Critically important! Avoid all-purpose cleaners, ammonia, vinegar (undiluted can dull finish), or steam mops if you have a surface-sealed floor, as they can damage the protective coating. Look for cleaners specifically labeled for wood floors.
- Microfiber Mop: These are excellent because they are absorbent and have soft fibers that won’t scratch. A flat mop head is ideal for covering larger areas efficiently.
- Clean, Absorbent Towels or Microfiber Cloths: For drying any damp spots and for spot cleaning.
- Optional: Wood Floor Revitalizer or Polish (Use Sparingly): For very dull floors after cleaning, a product designed for your specific finish can add a boost. Use this very sparingly and only when needed.
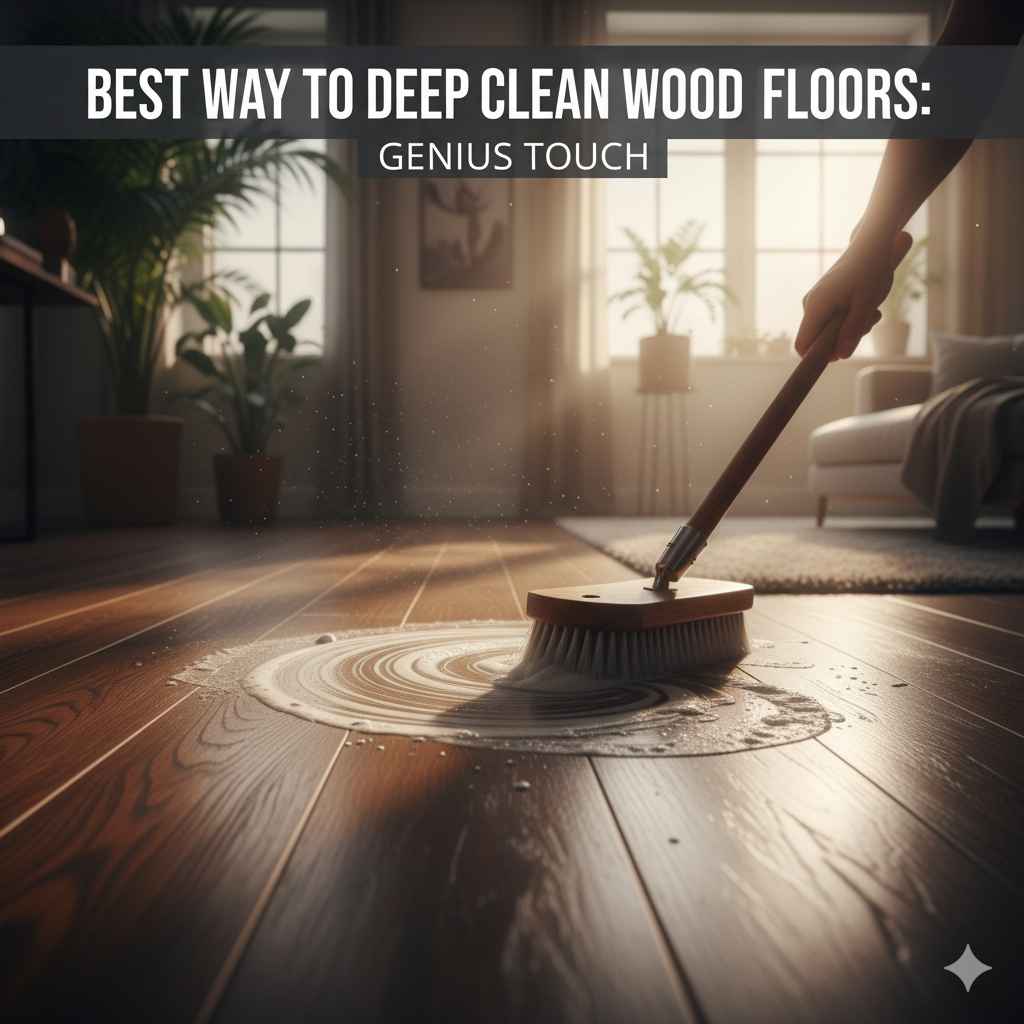
The Genius Step-by-Step Deep Cleaning Process
Now that you’ve got your supplies and know your floor’s needs, let’s get cleaning! Remember, the key is to be gentle and work methodically.
- Preparation: Clear the Decks Start by removing all furniture, rugs, and mats from the floor area you’ll be cleaning. This gives you a clear, unobstructed workspace. If you have a lot of furniture, you can group it in the center of the room or move it to an adjacent room if possible. This step ensures you can clean every inch without having to wriggle around obstacles.
- Step 1: Dry Debris Removal (The Foundation) This is non-negotiable and a truly genius way to start. Use your vacuum cleaner with the appropriate attachment (hard floor setting, brush roll off) to thoroughly pick up all loose dirt, dust, crumbs, and pet hair. Pay attention to edges, corners, and the gaps between floorboards where debris loves to hide. If you don’t have a vacuum with a suitable attachment, use a good quality soft-bristled broom or a wide microfiber dust mop. The goal here is to remove anything gritty that could scratch the floor during the wet cleaning phase.
- Step 2: Prepare Your Cleaning Solutions Fill one of your buckets with the manufacturer-recommended amount of pH-neutral wood floor cleaner and cool water. In the second bucket, fill it with clean, cool water for rinsing your mop. Having two buckets is a fantastic habit to get into. It ensures you’re always mopping with a relatively clean solution and not just spreading dirty water around. For those with oil or wax finishes, follow the specific cleaner instructions very carefully, as these finishes often require specialized, milder formulations.
- Step 3: The Damp Mop Technique (The Genius Touch) Dip your microfiber mop head into the cleaning solution bucket. Wring it out thoroughly! This is the most critical part of the “genius touch.” Your mop should be damp, not wet or dripping. Excess water is the enemy of wood floors; it can seep into seams, cause swelling, and damage the finish over time. A slightly damp mop will clean effectively without saturating the wood. Begin mopping your floors. Work in small sections, moving systematically across the room. Use long, even strokes, following the grain of the wood. Overlap your strokes slightly to ensure no spots are missed. Don’t let water pool on the floor. If you notice any damp areas, use a clean, dry towel to blot them up immediately.
- Step 4: Rinse and Repeat (Mop Head) As you mop, your mop head will inevitably pick up dirt. When it starts to look dirty, rinse it thoroughly in the clean water bucket. Wring it out again until just damp before returning it to the cleaning solution bucket. Continue this process, switching to fresh rinse water if your rinse bucket gets too dirty. This two-bucket method is a true game-changer for a streak-free, clean finish.
- Step 5: Drying and Airing Out Once you’ve mopped the entire floor, go back over any areas that still look damp with a clean, dry microfiber cloth or towel. Ensure the floor is allowed to air dry completely before you replace furniture or rugs. You can open windows or turn on a fan to speed up the drying process. Proper drying prevents water damage and potential warping.
- Step 6: Buffing (Optional, for Extra Shine) For an extra touch of brilliance, after the floor is completely dry, you can gently buff it with a clean, dry microfiber cloth or a soft buffer pad on a floor machine (if you have one and are comfortable using it). This can help bring out a deeper sheen and remove any faint hazing.
Troubleshooting Common Deep Cleaning Challenges
Even with the best methods, you might run into a few snags. Here’s how to tackle them:
- Stubborn Scuff Marks: For tough marks that a damp mop doesn’t remove, try gently rubbing the spot with a clean tennis ball or a pencil eraser. For more persistent scuffs on durable finishes, a tiny amount of mineral spirits on a clean cloth can sometimes work, but test in an inconspicuous spot first and ensure good ventilation.
- Sticky Residue: This often comes from using the wrong cleaner or too much product. A thorough damp mopping with a pH-neutral cleaner should help remove it. You may need to rinse and wring your mop frequently.
- Dullness: If your floors look dull even after cleaning, it might be a buildup of residue or a worn finish. Ensure you’ve removed all cleaner residue. If the dullness persists, consider a wood floor polish or revitalizer after deep cleaning, following product instructions precisely.
- Water Stains: Light water spots on durable finishes can sometimes be buffed out with a dry cloth. Deeper stains might require more intensive work, possibly involving a specialized cleaner or even light sanding and refinishing by a professional.
Remember, a step-by-step approach and the right tools, like the two-bucket system, prevent many of these issues before they start!
How Often Should You Deep Clean Your Wood Floors?
The frequency of deep cleaning depends on several factors, including foot traffic, the presence of pets and children, and your general cleaning habits. Here’s a good guideline:
Regular Cleaning (Daily/Weekly):
- Sweep or vacuum at least once a week, more often if you have pets or high traffic.
- Wipe up spills immediately.
Deep Cleaning (Every 2-6 Months):
- This is your more thorough process described above. Aim for every 2-3 months in high-traffic areas or homes with pets, and perhaps every 4-6 months in lighter-use areas.
- Observe your floors’ appearance. If they look visibly dull, grimy, or have accumulated noticeable buildup, it’s probably time for a deep clean.
It’s better to deep clean a little more often with gentler methods than to let dirt build up and require harsh chemicals or aggressive scrubbing down the line.
Comparing Deep Cleaning Methods: A Quick Look
It’s helpful to see how the “genius touch” method stacks up against less ideal approaches. This table highlights why the gentle, damp, pH-neutral approach is superior.
| Method | Pros | Cons | Best For |
|---|---|---|---|
| “Genius Touch”: Damp Mopping with pH-Neutral Cleaner | Protects finish, prevents water damage, streak-free results, removes tough grime effectively. | Requires proper wringing of mop, specific cleaner needed. | All sealed wood floors (polyurethane, etc.). |
| Soaking Wet Mopping | Seems like it cleans more aggressively. | High risk of water damage, warping, bubbling finish, dullness. | Never recommended for wood floors. |
| Steam Mops | Quick, uses no chemicals. | Can force moisture into seams, damage finish (especially polyurethane), void warranties. High heat can be detrimental. | Some specialized engineered wood floors (check manufacturer), but generally not recommended for solid or most engineered wood. Refer to National Association of Home Furnishers recommendations. |
| All-Purpose Cleaners (e.g., with Ammonia or Vinegar) | Readily available, can seem effective initially. | Can dull or etch the finish over time, break down protective coatings, leave residue. Vinegar is acidic. }) | Generally not recommended for wood floors; can cause permanent damage. |
| Oil Soap or Wax-Based Cleaners | Can add shine, good for older, unsealed or wax-finished floors. | Can build up on polyurethane finishes, making them sticky and dull, difficult to remove. Require reapplication. | Raw wood, oiled, or waxed finishes (follow product specific to that finish type). |
Protecting Your Wood Floors Between Deep Cleans
Prevention is always better than cure, and smart protection can significantly reduce the need for frequent deep cleaning and prevent minor damage.
- Door Mats: Place high-quality mats both outside and inside every exterior door. This captures dirt, grit, and moisture before it gets tracked onto your floors.
- Area Rugs: Use rugs in high-traffic areas like hallways, living rooms, and kitchens. Ensure they have a breathable backing and consider placing a felt protector under them to prevent indentations.
- Furniture Pads: Attach felt or rubber pads to the bottom of all furniture legs. This prevents scratches and makes it easier to move furniture, reducing friction. Regularly check and replace worn pads.
- Pet Care: Keep pet nails trimmed and clean their paws after they come inside, especially if they walk through muddy or wet areas.
- Wipe Spills Immediately: This is a golden rule! Have a soft cloth handy and address any liquid spills—water, juice, pet accidents—the second they happen. Don’t let them sit.
- Avoid High Heels and Cleats: Ask guests to remove shoes with sharp heels or cleats, as these can easily dent or scratch wood floors.
These simple habits are part of the “genius touch” to maintain your floors’ beauty for years to come.
Frequently Asked Questions About Deep Cleaning Wood Floors
Q1: Can I use a steam mop on my wood floors?
Generally, no. While some manufacturers might claim their steam mops are safe for certain engineered wood floors, the high heat and moisture can still damage the finish, cause the wood to swell, or force water into seams, leading to long-term issues. It’s always best to check your floor manufacturer’s warranty and recommendations. Damp mopping is a much safer bet.
Q2: Is vinegar safe for cleaning wood floors?
Undiluted vinegar is acidic and can dull or even damage the finish on your wood floors over time. If you choose to use it, it must be heavily diluted (e.g., 1/4 cup vinegar to a gallon of water) and used very infrequently, followed by thorough rinsing. However, a pH-neutral wood cleaner is always the safest and most recommended option.
Q3: What about using baby wipes or disinfectant wipes?
Most standard baby wipes or disinfectant wipes are not designed for wood floors. They can contain chemicals that may break down the finish or leave a residue. It’s best to stick to products specifically formulated for cleaning wood floors.
Q4: How do I get rid of that dull film on my wood floors?
A dull film is often caused by a build-up of cleaning product residue or dirt. First, ensure you are using a pH-neutral cleaner and the two-bucket method, wringing your mop well. If the film persists after a proper deep clean, you might have a residue layer that needs a specialized wood floor cleaner designed to remove buildup or a wood floor polish applied sparingly on a clean, dry floor.
Q5: My floors have a wax finish. Can I use the same deep cleaning method?
No. Wax finishes require specialized care. You should use a cleaner specifically designed for waxed wood floors. These often involve gentle cleaning and may require re-waxing afterward to maintain the protective layer and shine. Never use water-based cleaners or excessive water on waxed floors.