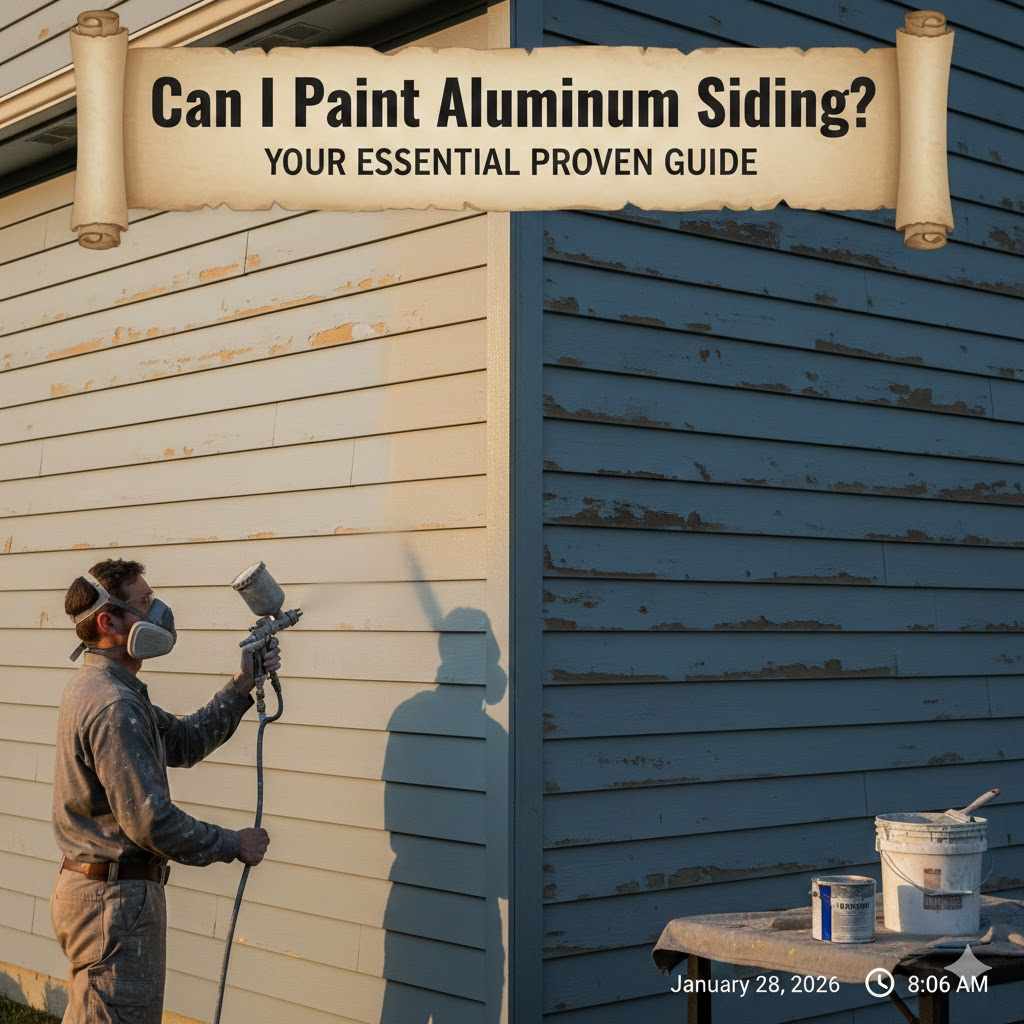
Can I Paint Aluminum Siding? Your Essential Proven Guide
Yes, you can absolutely paint aluminum siding. With the right preparation and materials, painting is a fantastic and budget-friendly way to refresh your home’s exterior. The key to a durable, professional-looking finish is thorough cleaning, proper sanding, using a quality acrylic primer, and choosing 100% acrylic latex paint designed for outdoor use.
Does your home’s aluminum siding look a little tired? Maybe the color is faded from years in the sun, or it’s just not your style anymore. You might be wondering if you’re stuck with it or facing a costly replacement. I’m here to share some great news: you don’t need to replace it! Painting aluminum siding is a completely achievable DIY project that can dramatically boost your curb appeal without breaking the bank.
It’s a common question I get in the workshop, and I understand the hesitation. You want to make sure it will last and look good. Don’t worry. In this guide, I’ll walk you through every simple step, from picking the right paint to applying it like a pro. We’ll turn that old, faded siding into something you can be proud of.
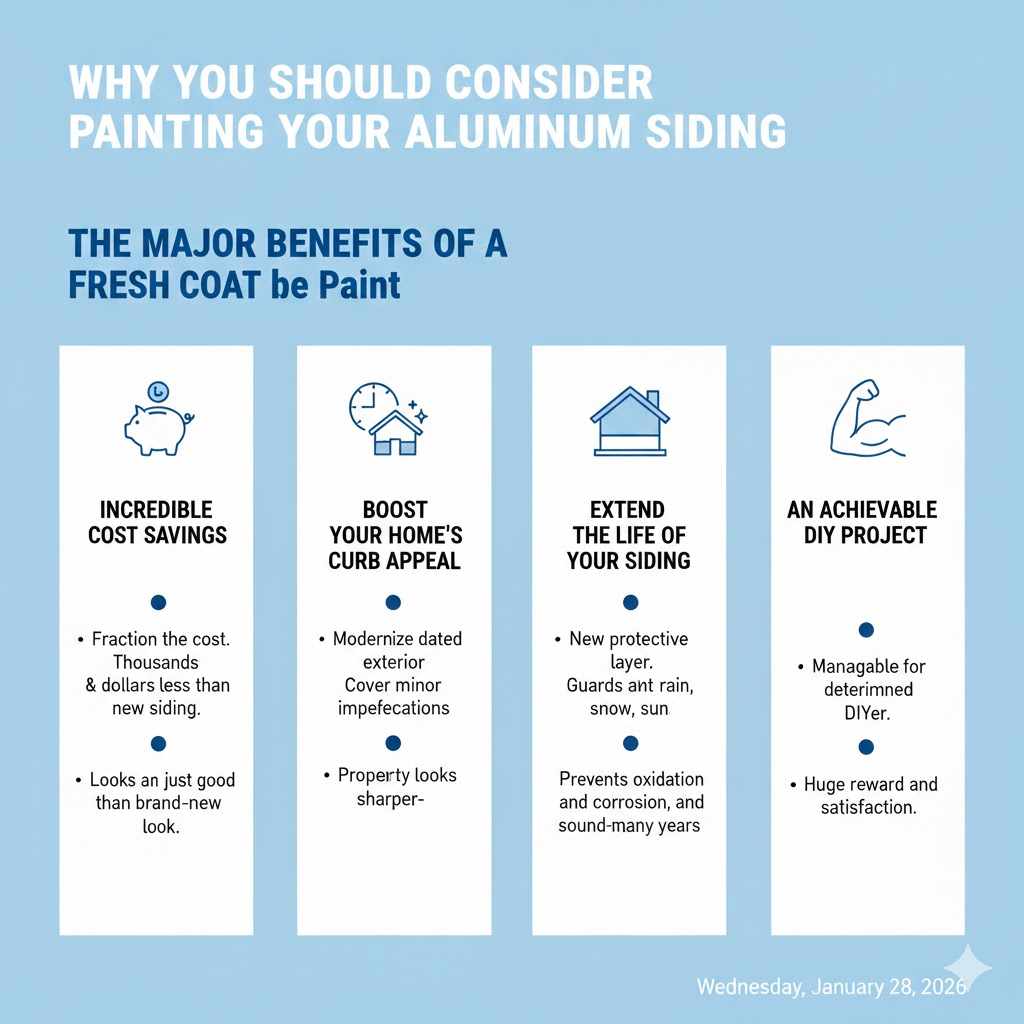
Why You Should Consider Painting Your Aluminum Siding
Before we grab our brushes, let’s talk about why this project is such a great idea. It’s more than just a color change; it’s about protecting and improving your home. For many homeowners, the benefits make it a clear winner over expensive replacement.
The Major Benefits of a Fresh Coat of Paint
- Incredible Cost Savings: Let’s be frank, replacing siding is a huge expense. We’re talking thousands of dollars. Painting, on the other hand, is a fraction of the cost. For the price of some paint, primer, and a few supplies, you can achieve a transformation that looks just as good as new siding.
- Boost Your Home’s Curb Appeal: A fresh coat of paint works wonders. It can modernize a dated exterior, cover up minor imperfections, and make your entire property look sharper and more valuable. You can choose any color you like to reflect your personal style.
- Extend the Life of Your Siding: Aluminum siding is tough, but it’s not invincible. A quality paint job adds a new protective layer against the elements—rain, snow, and sun. This barrier helps prevent oxidation and corrosion, keeping your siding in great shape for many more years.
- An Achievable DIY Project: While it takes time and effort, painting aluminum siding is a very manageable project for a determined DIYer. The steps are straightforward, and the satisfaction of doing it yourself is a huge reward.
Is Painting Aluminum Siding Always the Right Choice?
Now, while I’m a big fan of this project, it’s important to be honest about when it might not be the best solution. Taking a moment to assess your siding’s condition will save you headaches down the road.
When to Pause and Reconsider
- Severe Damage: Take a walk around your house. Do you see large dents, deep gouges, or panels that are bent and warped beyond repair? Paint is great at covering color, but it can’t fix significant structural damage. If your siding is heavily damaged, replacement might be the more sensible long-term investment.
- Heavy, Stubborn Chalking: Aluminum siding oxidizes over time, creating a chalky powder on the surface. Light to moderate chalking can be washed off (we’ll cover that!). But if the chalking is extremely heavy and returns almost immediately after cleaning, it means the original factory finish has failed completely. This can make it very difficult for new paint to adhere properly.
- You Don’t Have Time for Prep: I can’t stress this enough: preparation is 90% of the job. If you’re tempted to skip the cleaning, sanding, and priming, it’s better not to start. A poorly prepped surface will lead to a paint job that peels, cracks, and looks terrible within a year or two.
The Best Time to Paint Your Siding
Timing is everything when it comes to outdoor painting. The weather plays a huge role in how well your paint applies and cures. Painting in the wrong conditions can ruin your hard work before it even has a chance to dry.
For the best results, aim for a string of clear, dry days. Check the forecast before you begin!
- Temperature: The ideal temperature range for most exterior acrylic paints is between 50°F (10°C) and 90°F (32°C). If it’s too cold, the paint won’t cure correctly, leading to poor adhesion. If it’s too hot or in direct, blazing sun, the paint can dry too fast, showing brush strokes and creating blisters.
- Humidity: High humidity is your enemy. It slows down drying time and can trap moisture under the paint film, causing bubbles and peeling later on. Try to paint when the relative humidity is below 60%.
- Time of Day: Avoid painting in direct, intense sunlight. The heat on the siding surface can cause the paint to dry too quickly. It’s often best to work in the shade, following the sun around your house as the day progresses.
Gathering Your Tools and Materials
Having everything you need on hand before you start makes the entire process smoother and more enjoyable. Think of it as setting up your workshop for success. Here’s a checklist of what you’ll need.
Cleaning and Prep Supplies:
- Pressure washer (optional, but highly recommended) or a garden hose with a spray nozzle
- Stiff-bristle brush on a long pole
- Bucket
- Trisodium Phosphate (TSP) or a quality siding cleaner
- Mildewcide or a simple solution of 1 part household bleach to 3 parts water
- Heavy-duty gloves and safety glasses
- Scrapers, wire brushes, and medium-grit sandpaper (around 120-150 grit)
- Rags or cloths
- Drop cloths or plastic sheeting
- Painter’s tape
Painting Supplies:
- High-quality exterior primer (look for one formulated for metal or aluminum)
- 100% acrylic latex exterior paint
- Paint sprayer (airless sprayer is best for large areas)
- Paint roller with a nap appropriate for siding
- High-quality paintbrushes for cutting in around windows and doors
- Paint tray and liners
- Ladders or scaffolding
Choosing the Perfect Paint for Aluminum Siding
The paint you choose is the most important decision you’ll make in this project. Using the wrong type of paint will guarantee failure. Thankfully, the choice is simple.
Why 100% Acrylic Latex is the Only Choice
You must use a high-quality, 100% acrylic latex exterior paint. Do not use oil-based paints. Here’s why:
- Flexibility: Aluminum siding expands and contracts with temperature changes. Acrylic paint is flexible and can move with the siding without cracking or peeling. Oil-based paints are rigid and will fail quickly.
- Adhesion: Modern acrylic paints are formulated to bond exceptionally well to properly prepared metal surfaces.
- Breathability: Acrylic paint allows tiny amounts of moisture to escape, which helps prevent blistering and peeling.
- Durability: It’s tough! Quality acrylics are resistant to fading from UV rays and stand up to harsh weather.
- Easy Cleanup: Cleanup is simple with just soap and water.
When you’re at the paint store, look for paint specifically labeled for “exterior use” and check that the label says “100% acrylic.” A satin or low-lustre finish is usually best, as it offers a nice clean look without highlighting minor imperfections the way a high-gloss paint would.
| Paint Type | Pros | Cons | Best For Aluminum Siding? |
|---|---|---|---|
| 100% Acrylic Latex (Water-Based) | Flexible (expands/contracts with siding), excellent adhesion, UV resistant, easy cleanup, breathable. | Requires careful surface prep, can be sensitive to temperature during application. | Yes, this is the best and recommended choice. |
| Oil-Based Alkyd (Solvent-Based) | Creates a very hard, smooth finish. | Becomes brittle over time, will crack and peel on aluminum, strong odor, difficult cleanup, prone to fading/chalking. | No, avoid at all costs. It will fail. |
| Vinyl or Rubber-Based Paint | Extremely flexible. | Limited color options, can be difficult to find, may not adhere as well as acrylic. | No, stick with 100% acrylic for proven results. |
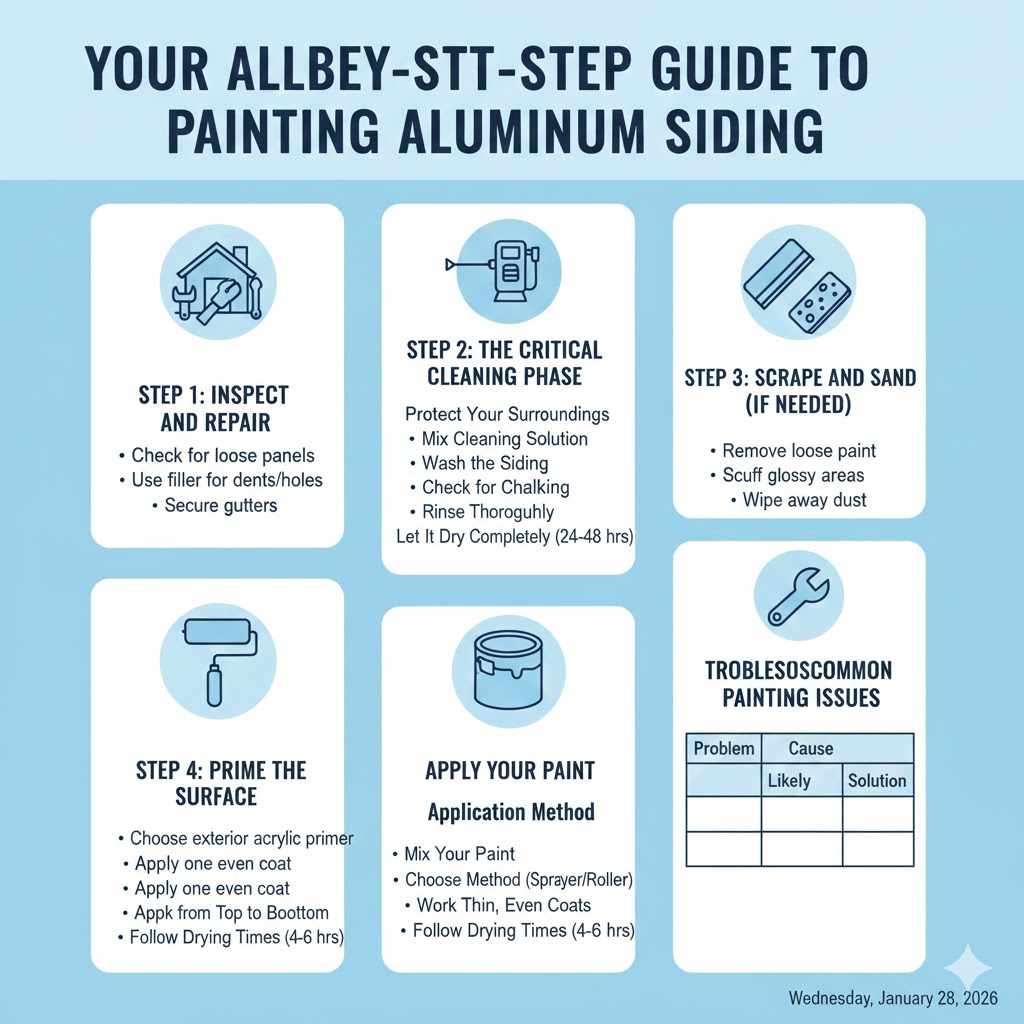
Your Step-by-Step Guide to Painting Aluminum Siding
Alright, with our tools ready and our paint chosen, it’s time for the fun part! Let’s break this down into simple, manageable steps. Follow these carefully, and you’ll have a finish you can be proud of.
Step 1: Inspect and Repair
Before you get anything wet, take a slow walk around your house. Look for any issues that need addressing first.
- Check for loose panels and secure them with aluminum or stainless steel screws.
- Use an auto body filler or an aluminum-specific epoxy filler for any small dents, dings, or holes. Let it cure completely, then sand it smooth so it’s flush with the surrounding siding.
- Make sure gutters and downspouts are securely attached and not leaking onto the siding.
Step 2: The Critical Cleaning Phase
This is the most important step in the entire process. The paint will only stick to a clean, dry surface. You need to remove all the chalk, dirt, and mildew.
- Protect Your Surroundings: Use your drop cloths or plastic sheeting to cover any plants, shrubs, walkways, and windows you don’t want to get dirty or sprayed with cleaner.
- Mix Your Cleaning Solution: In a bucket, mix a solution of TSP and water according to the manufacturer’s directions. If you see any green or black spots (mildew), you’ll need to treat those areas. You can use a dedicated mildewcide or follow the EPA’s guidance on mold cleanup, which often suggests a simple bleach solution. Always wear gloves and eye protection when working with cleaners.
- Wash the Siding: If you have a pressure washer, use a low-pressure setting (around 1500-2000 PSI) with a wide-angle tip (25 or 40 degrees). Start at the top and work your way down, keeping the nozzle at least a foot away from the siding to avoid damaging it. If you don’t have a pressure washer, a stiff-bristle brush on an extension pole and a garden hose will work just fine—it just takes a bit more elbow grease. Scrub every square inch.
- Check for Chalking: After scrubbing a section, wipe your hand across it. Do you still see a chalky powder on your glove? If so, scrub it again. You must remove all of this oxidized residue for the primer to adhere.
- Rinse Thoroughly: Once everything is scrubbed clean, rinse the entire house from top to bottom with plain water until all cleaning residue is gone.
- Let It Dry Completely: This is crucial. Wait at least 24-48 hours for the siding to dry completely before moving on to the next step.
Step 3: Scrape and Sand (If Needed)
If your siding already has a layer of old, peeling paint, you’ll need to remove it. If the existing finish is just faded but intact, you can likely skip this step.
- Use a paint scraper or wire brush to gently remove any loose, flaking paint.
- Lightly scuff any glossy areas with medium-grit sandpaper. You aren’t trying to remove the entire old finish, just “de-gloss” it to give the new primer something to grip onto.
- Wipe away any sanding dust with a clean, damp cloth and let it dry.
Step 4: Prime the Surface
Do not skip priming! Primer does two things: it helps the paint bond to the slick aluminum surface, and it blocks stains.
- Choose a high-quality exterior acrylic primer formulated for use on metal.
- Apply one even coat of primer to the entire surface. If you’re using a paint sprayer, this is the best time to get comfortable with it. If not, a roller and brush work well too.
- Follow the manufacturer’s instructions for drying time. Don’t rush it! Let the primer cure completely before you start painting.
Step 5: Apply Your Paint
This is where the transformation happens! For best results, plan on applying two thin coats of paint rather than one thick one.
- Mix Your Paint: Stir your paint thoroughly before and during application to ensure the color is consistent.
- Choose Your Application Method: A paint sprayer provides the smoothest, most professional finish in the shortest amount of time. If you use a sprayer, “back-brushing” or “back-rolling” the first coat can help work the paint into the surface for better adhesion. If you’re using a roller and brush, use the brush to “cut in” around windows, doors, and corners first, then use the roller for the large, flat areas.
- Work from Top to Bottom: Always start painting at the top of a wall and work your way down. This helps you catch and fix any drips as you go.
- Apply Thin, Even Coats: Whether spraying or rolling, focus on applying a consistent amount of paint. This prevents runs and helps with even drying.
- Follow Drying Times: Let the first coat dry completely according to the paint can’s instructions before applying the second coat. This is usually 4-6 hours but can vary based on weather.
| Problem | Likely Cause | Solution |
|---|---|---|
| Paint is Peeling/Flaking | The surface was not cleaned or primed properly. Moisture was trapped underneath. | Scrape and sand the peeling area back to a stable surface. Clean thoroughly, spot-prime the bare aluminum, and repaint. |
| Blisters or Bubbles | Painting in direct hot sun, or applying a second coat before the first one was fully dry. High humidity. | Scrape off the blisters, sand the area smooth, prime if needed, and repaint in better weather conditions (cooler, less humid, out of direct sun). |
| Visible Brush or Roller Marks | Paint was applied too thickly or dried too quickly. Using low-quality tools. | Lightly sand the affected area once fully cured, then apply another thin, even coat. Always maintain a “wet edge” while painting to blend sections together seamlessly. |
| Mildew Growing on New Paint | Original mildew was not completely killed and removed during the cleaning phase. | Clean the area with a bleach/water solution or mildewcide cleaner, rinse well, let dry, and apply a coat of mildew-resistant paint. |
Frequently Asked Questions (FAQ)
Can I paint aluminum siding without sanding?
Yes, often you can. If the existing factory finish is just chalky and faded but not peeling, a thorough cleaning and a high-quality bonding primer may be enough for the new paint to adhere well. However, you must sand any areas with peeling paint or glossy surfaces to ensure a good bond.
What is the best way to apply paint to aluminum siding: sprayer, roller, or brush?
For the fastest and smoothest finish, an airless paint sprayer is the best tool. It creates an even, factory-like coating. If you don’t have a sprayer, a high-quality roller and brush can still give you great results, though it will take more time. Use a brush for cutting in edges and a roller for the flat surfaces.
How long does painted aluminum siding last?
A properly prepared and painted aluminum siding job can last for 10 to 15 years, or even longer. The key factors are thorough prep work, using high-quality 100% acrylic paint, and the local weather conditions. It’s a very durable and long-lasting solution when done right.
What kind of primer should I use on aluminum siding?
You should use a high-quality exterior acrylic (latex) bonding primer. Look for a primer that is specifically formulated for use on metal or hard-to-paint surfaces. Do not use an oil-based primer, as it can become brittle and crack over time.
Do I need to clean the siding if it looks clean?
Absolutely, yes! Even if your siding looks clean, it is likely covered in microscopic dirt, pollen, and oxidized “chalking” that will prevent new paint from sticking. This cleaning step is the most critical part of the entire process and should never be skipped.
Can you paint over chalky aluminum siding?
No, you cannot paint directly over chalky siding. The chalk is a powder of oxidized paint that must be completely removed. Painting over it is like painting on dust—the new paint will peel off, taking the chalk with it. You must wash and scrub the siding until a clean cloth wiped on the surface comes away clean.
Bringing It All Together
So, can you paint aluminum siding? As you can see, the answer is a resounding yes! It’s a project that is well within your reach and offers a tremendous return on your effort. By giving your siding a thorough cleaning, using the right primer and paint, and taking your time with each step, you can achieve a beautiful, durable finish that will protect your home and make you proud for years to come.
Don’t be intimidated by the process. Just break it down into the simple steps we’ve outlined. This isn’t just about changing a color; it’s about restoring your home’s character and taking ownership of your space. Grab your tools, put on some old clothes, and get ready to see your home in a brand new light. You’ve got this!