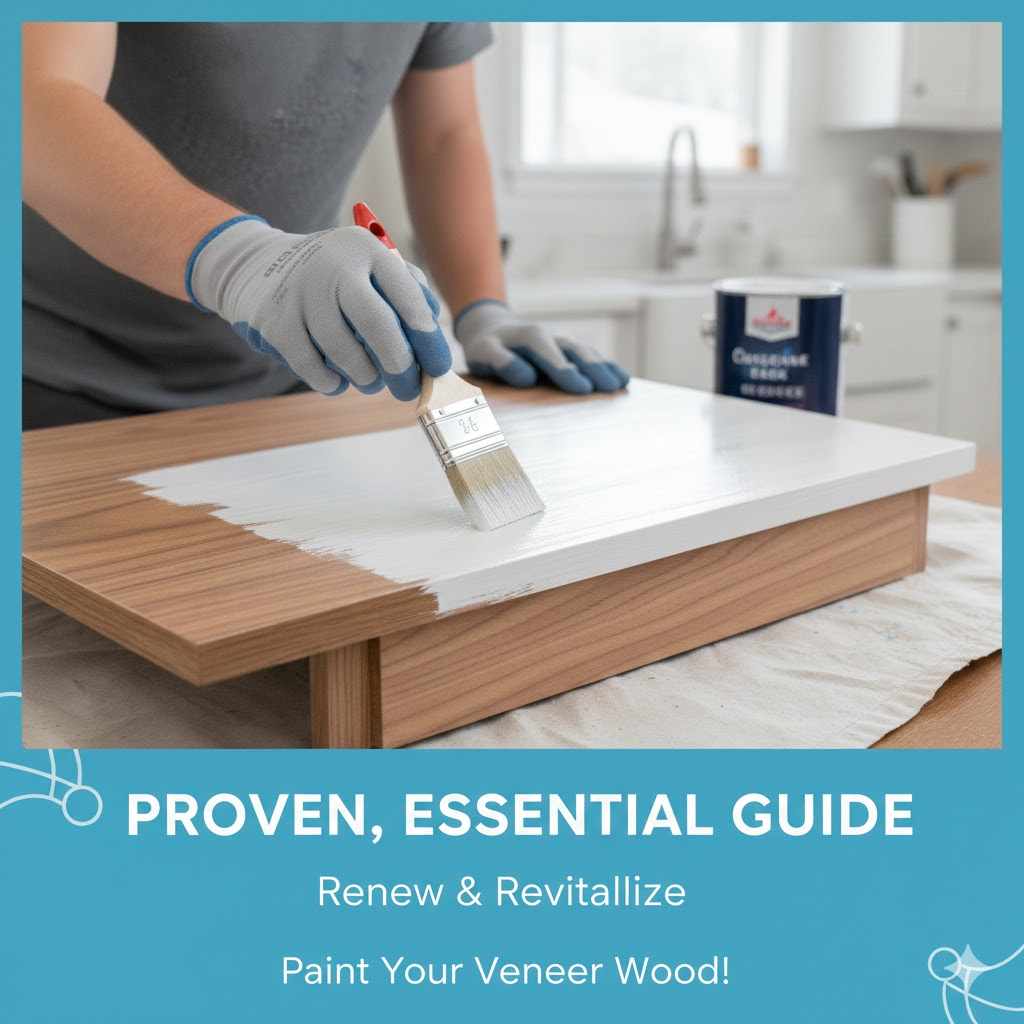
Can I Paint Veneer Wood? A Proven, Essential Guide
Yes, you can absolutely paint veneer wood! The secret is in the preparation. With proper cleaning, light scuff sanding, and a high-quality bonding primer, you can create a durable, beautiful finish on veneer furniture. This guide will show you the exact steps to achieve a professional-looking result without peeling or chipping.
Have an old dresser or coffee table that’s seen better days? You love the shape, but the finish is dated or damaged. You wonder, “Can I paint this?” Then you discover it’s wood veneer, and you pause. You’ve heard painting veneer is tricky. Many people worry the paint will just peel right off.
Well, I’m here to tell you that you can achieve a fantastic, long-lasting finish on veneer. It’s not as hard as you think! All you need are the right steps and a little patience. In this guide, I’ll walk you through a proven method, making it simple and successful. Let’s get that old furniture looking brand new again!
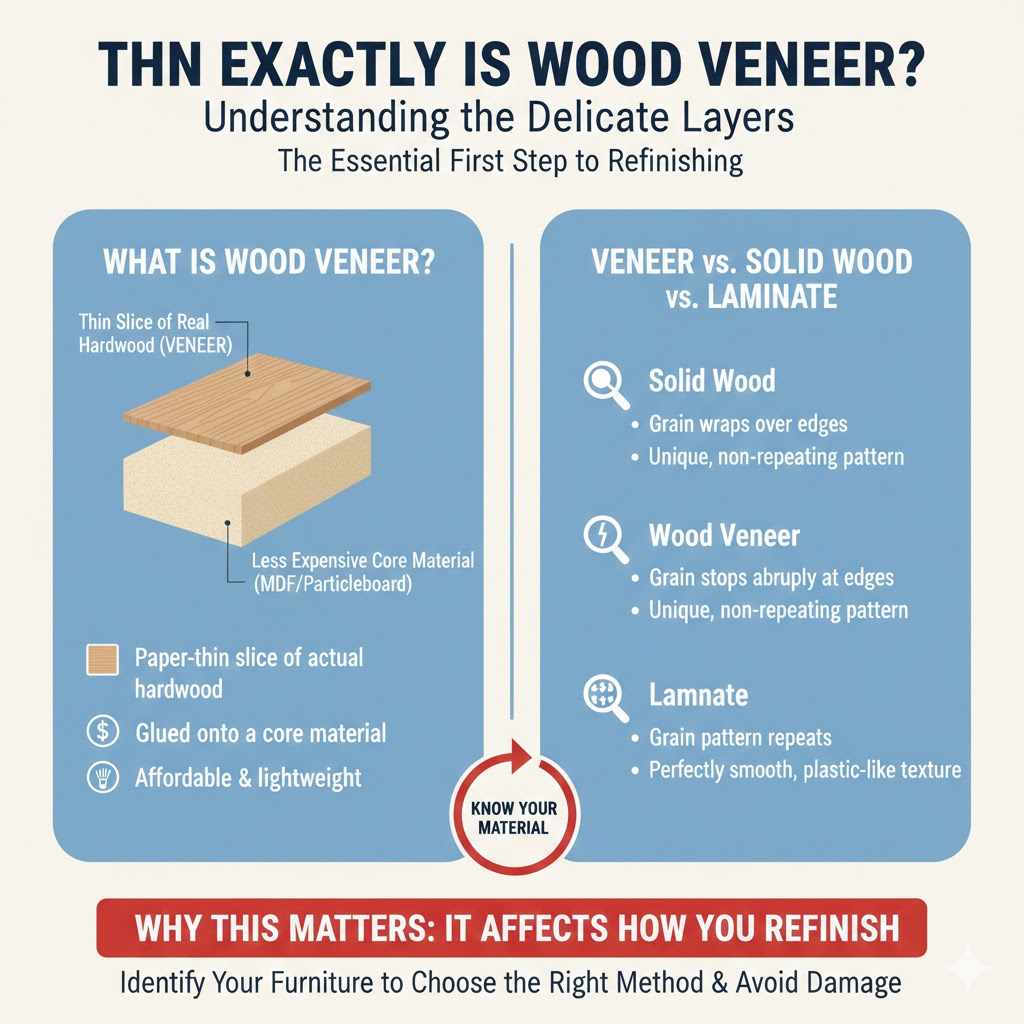
First Things First: What Exactly Is Wood Veneer?
Before we grab our paintbrushes, it’s important to know what we’re working with. Understanding wood veneer will help you see why certain steps are so crucial. Think of it as a beautiful, but very thin, layer of real wood.
Wood veneer is a paper-thin slice of actual hardwood (like oak, maple, or cherry) that is glued onto a less expensive core material. This core is usually made of particleboard, MDF (medium-density fiberboard), or plywood. This technique allows manufacturers to create furniture that has the beautiful grain and look of expensive solid wood, but at a much more affordable price.
How to Tell Veneer from Solid Wood and Laminate
It’s easy to get veneer, solid wood, and laminate mixed up. Here’s a quick way to tell them apart:
- Check the Grain Pattern: Look at the edge of a tabletop or drawer front. If the wood grain on the top surface wraps perfectly over the edge and continues down the side, it’s likely solid wood. If the grain pattern stops abruptly at the edge and a different pattern or material is visible on the side, you’re looking at veneer.
- Look for Repetition: Laminate is essentially a photograph of wood grain printed on plastic or paper and glued to a core. If you look closely at a large surface, you might see the grain pattern repeating itself. Real wood veneer, like solid wood, has a unique, non-repeating grain.
- Feel the Texture: Laminate often feels perfectly smooth, almost like plastic. Wood veneer feels like real wood because it is. You may feel a slight texture from the wood grain.
Why Painting Veneer Requires a Special Touch
You might be thinking, “It’s real wood, so can’t I just paint it like any other wood project?” Not quite. Painting veneer successfully comes down to overcoming two main challenges:
- A Smooth, Non-Porous Surface: The original finish on most veneer furniture is a sealant or lacquer. This creates a very slick, non-porous surface that paint struggles to stick to. Without proper prep, your new paint job could scratch or peel off with very little effort.
- It’s Very Thin: The veneer layer is delicate. If you get too aggressive with a sander, you can easily sand right through the thin wood layer, exposing the core material underneath. This damage is very difficult to repair and can ruin the piece.
Don’t let these challenges scare you! They are easy to overcome with the right technique. The key isn’t brute force; it’s smart preparation. We won’t be doing heavy sanding. Instead, we’ll focus on creating a “grip” for our new finish to hold onto for years to come.
Your Toolkit: Supplies You’ll Need for the Job
Gathering all your supplies before you start will make the process smooth and enjoyable. You don’t need a lot of fancy tools, just the right ones. Here’s a simple checklist:
- Cleaning Supplies:
- Cleaner (TSP substitute or a 50/50 mix of denatured alcohol and water)
- Clean, lint-free cloths or rags
- A bucket for your cleaning solution
- Repair Materials:
- Wood filler (for chips and deep scratches)
- Wood glue (for peeling or lifted edges)
- Putty knife
- Clamps (for holding down glued sections)
- Sanding Gear:
- Fine-grit sandpaper (120 to 150-grit is perfect)
- A sanding block or sponge
- Tack cloth or a vacuum with a brush attachment
- Priming & Painting:
- High-quality bonding primer (shellac-based or water-based adhesion primer)
- Your choice of paint (latex, acrylic enamel, or alkyd paint work well)
- High-quality paintbrush and/or small foam roller
- Paint tray
- Sealing & Safety:
- Durable top coat (water-based polycrylic is a great choice)
- Painter’s tape
- Drop cloths
- Gloves and safety glasses
The Proven 7-Step Method to Paint Veneer Flawlessly
Ready to transform your furniture? Follow these steps carefully, and I promise you’ll be proud of the result. Remember, patience is your best tool in the workshop!
Step 1: Clean the Surface Thoroughly
This is the most important step of all. Paint cannot stick to dirt, grease, or furniture polish. Mix your TSP substitute according to the package directions or use your denatured alcohol and water solution. Wearing gloves, use a clean cloth to scrub down every inch of the furniture you plan to paint. Pay special attention to areas like drawer pulls and tabletops. Wipe it down with a separate cloth dampened with clean water to remove any cleaning residue, and then let it dry completely.
Step 2: Repair Any Damage
Now is the time to play furniture doctor. Inspect the piece closely for any issues.
- For peeling edges: Carefully apply a small amount of wood glue under the lifted veneer. Press it down firmly. Use a clamp with a block of scrap wood (to protect the surface) to hold it in place while it dries. Wipe away any squeezed-out glue with a damp cloth immediately.
- For chips or gouges: Use a putty knife to apply a small amount of wood filler to the damaged area. Overfill it slightly, as the filler will shrink a bit as it dries. Once it’s fully cured (check the instructions), sand it smooth and flush with the surrounding surface.
Step 3: Scuff Sand (The Gentle Way)
Remember, we are not trying to strip the old finish. We are just “scuffing” it to give the primer something to grip. Wrap a piece of 120-grit sandpaper around a sanding block and lightly sand the entire surface. Your goal is just to knock off the shine. The surface should look dull and feel slightly gritty when you’re done. Move in the direction of the wood grain and be extra gentle on edges and corners.
Step 4: Clean Again, Thoroughly
Sanding creates a lot of fine dust. This dust is the enemy of a smooth paint finish. Use a vacuum with a soft brush attachment to remove the bulk of it. Follow up with a tack cloth, which is a sticky cheesecloth designed to pick up every last speck of dust. Wipe gently until the cloth comes away clean.
Step 5: Apply a High-Quality Primer
Do not skip this step! Primer is the bridge between the old slick surface and your new paint. It’s what makes this whole project successful and long-lasting.
Use a high-quality bonding primer. Shellac-based primers (like Zinsser B-I-N) are fantastic because they stick to anything and block stains. Water-based bonding primers (like INSL-X Stix) are also excellent and have less odor. Apply a thin, even coat with a brush or foam roller. Don’t worry if it looks a little patchy; its job is to bond, not provide full coverage. Let it dry completely according to the can’s instructions.
Step 6: Paint with Your Chosen Color
Finally, the fun part! Once the primer is dry, apply your first coat of paint. The secret to a professional-looking finish is to apply multiple thin coats rather than one thick one. A thick coat is more likely to drip, show brush marks, and take forever to dry. Use a high-quality brush for details and a small foam roller for large, flat surfaces to get a super-smooth finish. Let the first coat dry completely, then apply a second coat. You may even need a third for full, rich coverage.
Step 7: Seal for Lasting Durability
Once your final coat of paint is fully cured (this can take 24 hours or more), it’s time to protect your hard work. This is especially important for high-traffic pieces like tables, desks, and dressers. Apply two to three thin coats of a clear top coat. A water-based polycrylic is a great choice because it dries clear and won’t yellow over time like some oil-based sealers. Apply it with a good quality brush and let it dry completely between coats.
Choosing the Right Primer and Paint for Veneer
The product aisle can be confusing. To make it easier, here’s a breakdown of the best options for your veneer project. The right primer is non-negotiable, so let’s start there.
Primer Comparison Table
| Primer Type | Best For | Pros | Cons |
|---|---|---|---|
| Shellac-Based Primer (e.g., Zinsser B-I-N) | Problem surfaces, blocking stains and wood tannins, covering glossy finishes. | Sticks to anything, dries very fast, excellent stain blocker. | Strong smell (requires good ventilation), requires denatured alcohol for cleanup. |
| Water-Based Bonding Primer (e.g., INSL-X Stix) | Most veneer projects, low-odor environments. | Excellent adhesion, low odor, easy soap and water cleanup. | Longer cure time than shellac, may not block tough stains as effectively. |
| Oil-Based Primer (e.g., Kilz Original) | Durable base, good for high-moisture areas (not typically needed for furniture). | Very durable, levels out nicely. | Very strong smell, long dry time, requires mineral spirits for cleanup. |
Paint Comparison Table
| Paint Type | Durability | Finish | Ease of Use |
|---|---|---|---|
| Water-Based Acrylic or Latex Enamel | Good to Excellent | Offers satin, semi-gloss, and gloss finishes that are scrubbable. | Very easy. Dries fast, low odor, soap and water cleanup. Great for beginners. |
| Alkyd Enamel (Water-Based or Oil) | Excellent | Cures to a very hard, durable finish. Great for cabinets and tabletops. | More advanced. Water-based alkyds are easier to work with than traditional oils. |
| Chalk Paint | Fair to Good (Requires a top coat) | Ultra-matte, shabby chic look. Can be distressed easily. | Extremely easy. Sticks well, but MUST be sealed with wax or polycrylic for durability. |
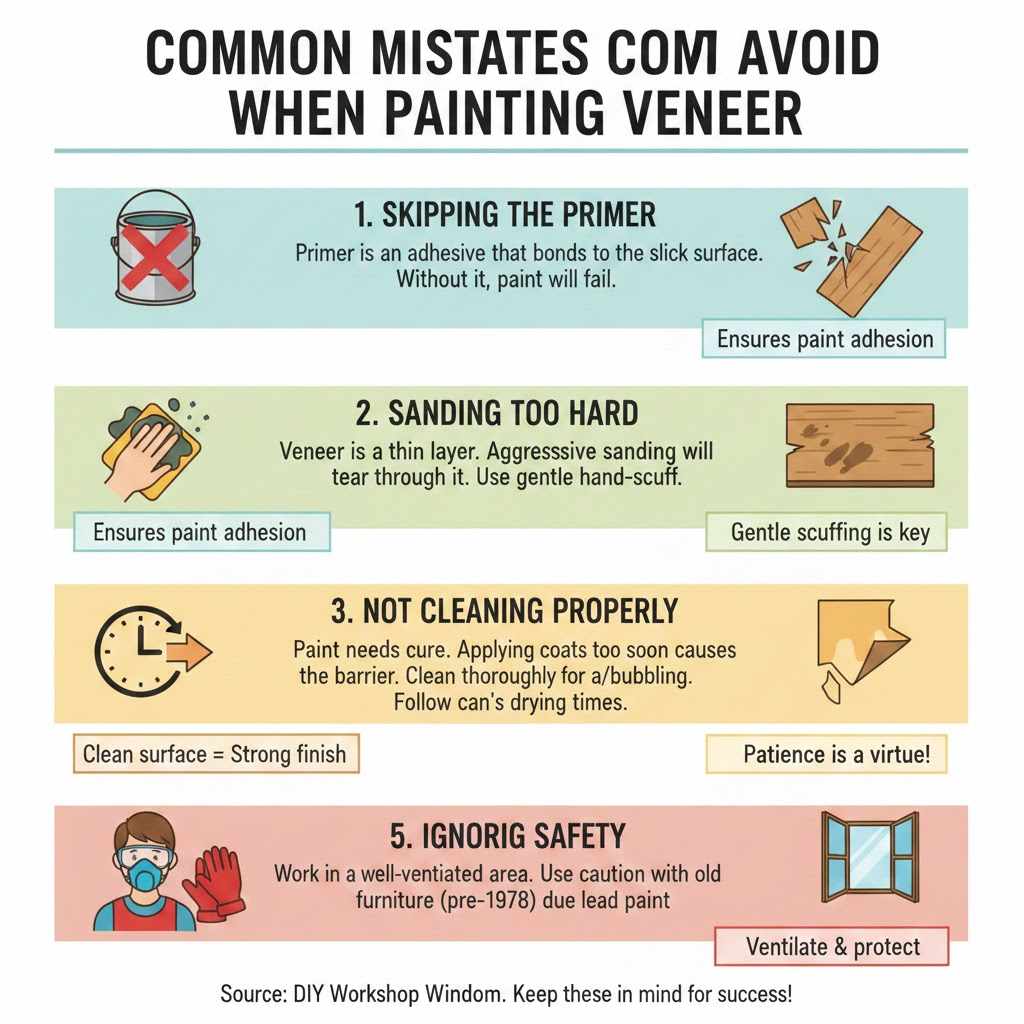
Common Mistakes to Avoid When Painting Veneer
I’ve seen a few projects go wrong over the years, and it’s almost always due to one of these simple, avoidable mistakes. Keep these in mind to ensure your success.
- Skipping the Primer. I can’t say this enough: primer is not just a base coat of paint. It’s an adhesive that chemically bonds to the slick surface, creating a perfect foundation for your paint. If you skip it, your paint will almost certainly fail.
- Sanding Too Hard. Remember, you’re not refinishing a solid oak floor! You’re working with a very thin layer of wood. Aggressive sanding with a power sander or coarse sandpaper will tear right through it. A gentle scuff by hand is all you need.
- Not Cleaning Properly. Any residue left on the surface—from furniture polish, hand oils, or dust—will create a barrier between the furniture and your primer. Your finish will only be as strong as its weakest point.
- Rushing Between Coats. Paint needs time to cure, not just feel dry to the touch. Applying your next coat too soon can cause the layers underneath to peel or bubble. Follow the recommended drying times on the can. Patience is a virtue in the workshop!
- Ignoring Safety. Always work in a well-ventilated area, especially when using shellac or oil-based products. If you’re working on a very old piece of furniture (pre-1978), it’s important to follow safe painting practices as it may have been finished with lead-based paint.
Frequently Asked Questions (FAQ)
Do I absolutely have to sand veneer before painting?
Yes, but it’s more of a “scuff” than a full sanding. A light pass with fine-grit sandpaper (120-150 grit) is essential. This quick step removes the gloss and creates a microscopic texture that helps the primer grip the surface for a long-lasting bond.
What is the best primer for veneer furniture?
A shellac-based primer like Zinsser B-I-N is often considered the gold standard because it sticks to virtually any surface and blocks stains. However, a high-quality water-based bonding primer like INSL-X Stix or Kilz Adhesion is also an excellent, lower-odor choice for most projects.
Can I use chalk paint on veneer without sanding or priming?
While many chalk paint brands claim no prep is needed, for a durable, long-lasting finish on slick veneer, I highly recommend you still clean and scuff sand. At a minimum, use a bonding primer. Skipping prep might look fine at first, but it is much more likely to scratch and chip over time.
How can I tell if my furniture is veneer or solid wood?
Look at the edges. On solid wood, the grain pattern on the top surface will flow consistently over the edge. On veneer, you’ll often see a thin line and a different grain pattern (or no grain at all) on the edge. You can also look underneath the piece, where the unfinished wood might be more obvious.
How do you fix peeling veneer before painting?
It’s an easy fix! Carefully lift the peeling section and use a small brush or toothpick to apply a thin layer of wood glue underneath. Press it down firmly, wipe away any excess glue with a damp rag, and then clamp it flat with a piece of scrap wood to distribute the pressure. Let it dry completely before sanding and painting.
Will the paint on my veneer furniture last a long time?
Yes, if you follow the steps in this guide! Proper cleaning, scuff sanding, a quality bonding primer, and a protective top coat are the secrets to a durable finish that will last for many years, even on high-use furniture.
Can I paint laminate furniture the same way as wood veneer?
Yes, the process is virtually identical. Laminate is even more slick and non-porous than wood veneer, so cleaning, scuff sanding, and using a strong bonding primer are absolutely critical for success.
Your Beautifully Transformed Furniture Awaits!
See? Painting wood veneer isn’t some impossible task reserved only for the pros. It’s a completely achievable DIY project that can bring new life to old, tired furniture. By taking the time to prepare the surface correctly, you are setting yourself up for a beautiful and incredibly durable result.
You’ve learned what veneer is, why it needs special care, and the exact step-by-step process to get it right. You have the tools, the knowledge, and a foolproof plan. That dated dresser, tired nightstand, or worn-out coffee table is just waiting for its second chance. So go ahead, pick out a color you love, and get started. You’ll be amazed at what you can accomplish with a little bit of paint and a whole lot of confidence. Happy painting!