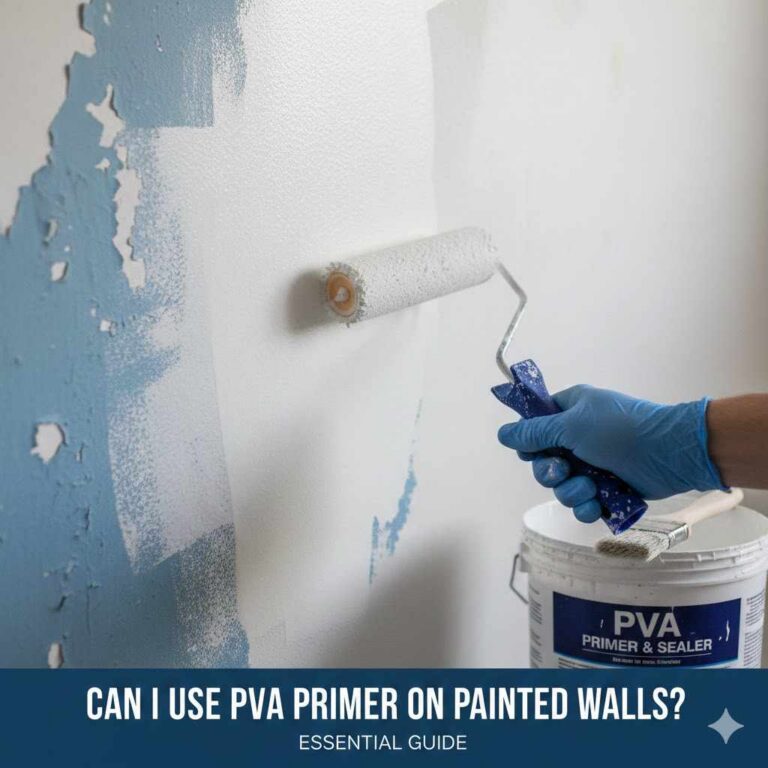
Can I Use Drywall Primer On Wood? Essential Guide
Yes, you can technically use drywall primer on wood, but it’s generally not recommended for lasting results. Drywall primers lack the binding power and stain-blocking needed for porous wood surfaces, leading to poor adhesion, bubbling, and finish failure later. For best practice, use a dedicated wood primer or shellac-based product first.
Hello there! I’m Md Meraj, and I know how frustrating it feels to stare at a half-finished project, wondering if you can substitute one can of paint primer for another. You’ve got a can of drywall primer handy, you need to prep that wooden cabinet or new shelving, and the question pops up: “Can I use drywall primer on wood?” It seems like an easy swap, right? Both are primers! However, wood and drywall are very different materials, and what works perfectly for one often fails miserably on the other.
Using the wrong primer can cause headaches like peeling paint and stubborn knots bleeding through later. Don’t worry! We’ll clear up this common confusion right now. I’ll walk you through exactly why it’s usually a bad idea and what simple, affordable primers you should reach for instead to ensure your wooden projects look fantastic for years. Let’s dive into the workshop basics and get this right the first time.
Understanding the Basics: Primer is Primer is Not the Same
When we talk about priming, we often think of paint sticking better. That’s true, but primers have specific jobs depending on the surface. Think of primer as the glue between your surface (substrate) and your topcoat paint.
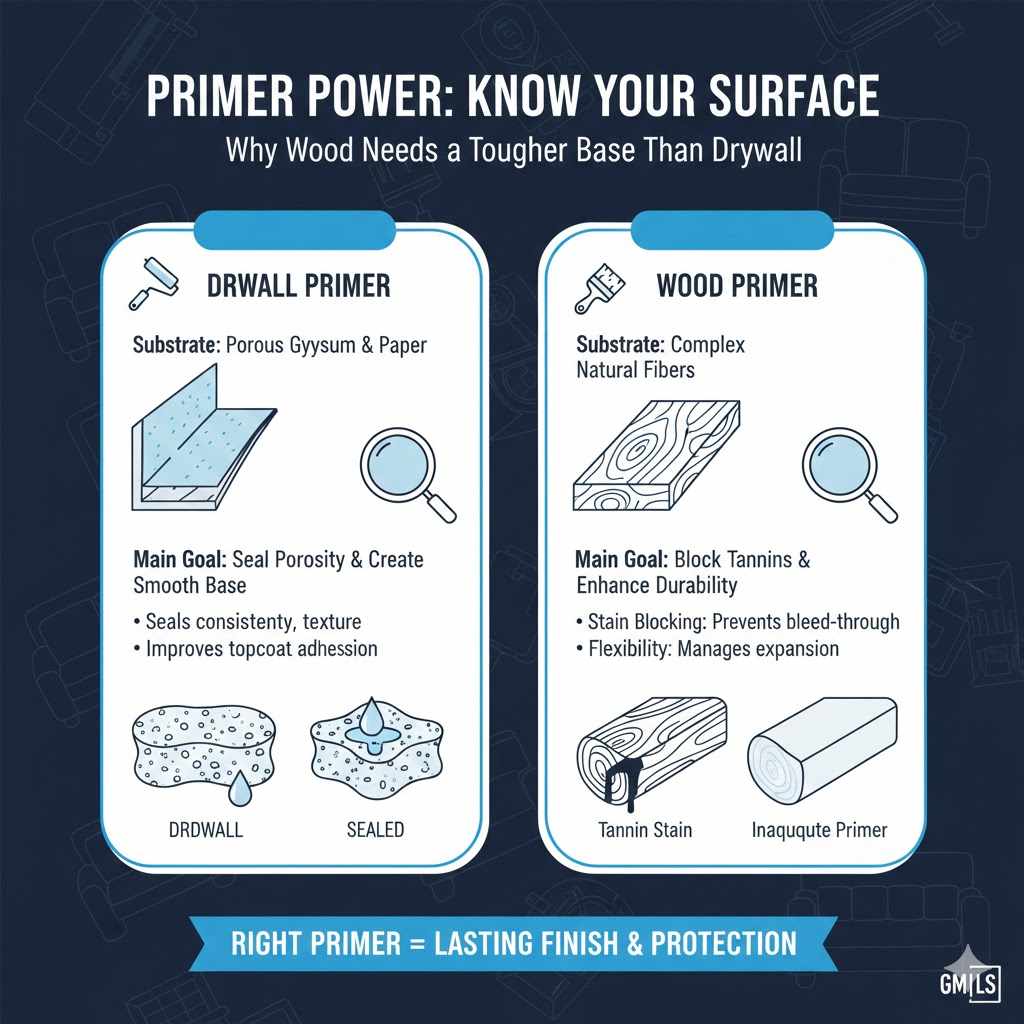
Drywall, made mostly of gypsum and paper, is very porous but relatively uniform. Its main primer needs are to seal that porosity and provide a smooth base for paint.
Wood, on the other hand, is a living, breathing material full of tannins, resins, sap, and varying grain textures. It expands and contracts with humidity changes. This complexity demands a much tougher primer.
The Big Question: Can I Use Drywall Primer on Wood?
The simplest answer, as a mentor who values craftsmanship, is: Technically yes, but practically, no—you shouldn’t if you want long-lasting results.
While you can brush drywall primer onto wood, it’s like wearing sneakers to go hiking; they might work for a short walk, but they aren’t built for the rugged terrain ahead. Here’s why drywall primer often falls short on wood:
Reason 1: Lack of Stain-Blocking Power
This is the most crucial difference. Wood naturally contains oily compounds (tannins and resins). These compounds are notorious for bleeding through standard interior paint. Think of pine knots—those areas often show dark circles even through two coats of colored paint!
Drywall Primer: Usually formulated as a “sealer/primer” for porous drywall. It seals the surface to stop paint from soaking in unevenly. It generally has very little or zero actual stain-blocking agents needed to trap wood oils.
Wood Primer (Primer for Wood): Specifically engineered with resins or specialized chemicals (like shellac or powerful alkyds) designed to chemically seal these tannins away so they never reach your topcoat.
If you use drywall primer on stained wood, expect those dark spots to reappear within days or weeks.
Reason 2: Adhesion and Flexibility Issues
Wood moves. As temperatures and humidity shift, wood swells and shrinks.
Drywall Primer: Generally dries hard and brittle, designed for rigid surfaces like plastered walls. It doesn’t have the necessary flexibility.
Wood Primer: Formulated to bond tightly yet remain slightly flexible, allowing it to expand and contract with the wood grain without cracking or peeling away. When drywall primer dries on wood, any slight movement can cause it to crack or delaminate from the surface.
Reason 3: Porosity Mismatch
While wood is porous, it’s a different kind of porous than drywall. Drywall primer soaks deep into gypsum board for a tight mechanical bond. On smoother milled wood, or dense hardwoods, it might just sit on the surface weakly, resulting in poor mechanical adhesion—leading to peeling down the road.
When Is It Okay to Use It? The Rare Exception
Are there any scenarios where using drywall primer on wood might be acceptable? Maybe, but only if you are extremely careful about surface preparation and expectation management.
- Sealing Pre-Sealed Wood: If the wood piece has already been sealed with several coats of high-quality enamel paint or varnish and you are just lightly scuffing it for a refresh coat, the original finish is doing most of the sealing work. The drywall primer acts mainly as a bonding layer.
- For Temporary Projects: If this is an indoor utility shelf you plan to replace next year, or something that will never be subject to much wear or humidity variation, you might get away with it.
- Very Dense Hardwood: On extremely dense hardwoods like maple or oak where natural oils are less active, it might adhere temporarily better than on soft woods like pine.
Even in these cases, I strongly advise against it. You’re saving five minutes now but potentially sacrificing hours of refinishing later. For durable, quality work—the kind we aim for in woodworking—use the right tool for the job.
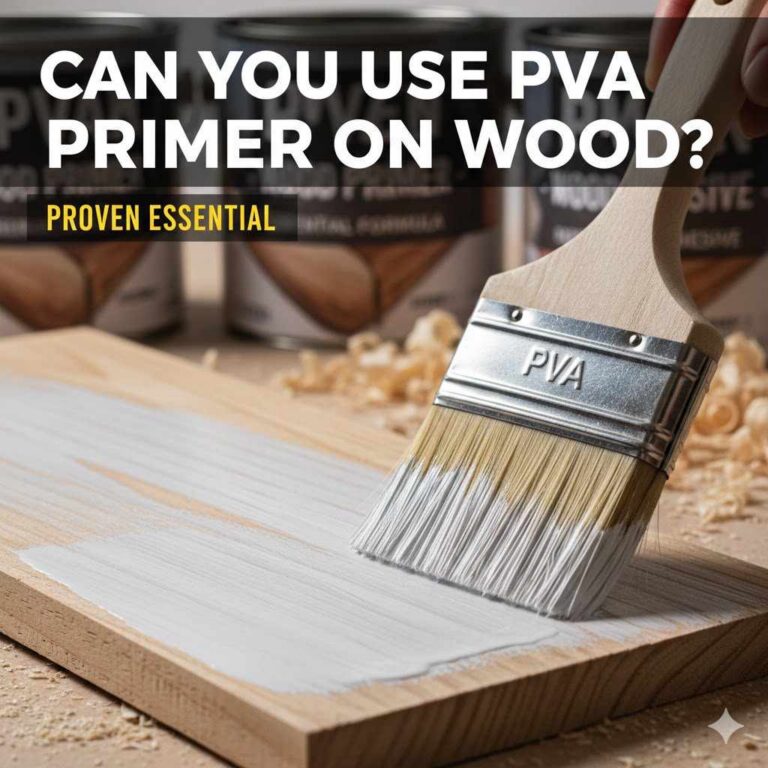
The Right Primer for Wood: The Mentor-Approved Choices
When preparing wood for painting, we have three main goals: block stains, promote adhesion, and ensure flexibility. Here are the primer types I always keep stocked in the workshop for wood projects.
Oil-Based Alkyd Primers
These have been the industry standard for decades, and for good reason. They offer excellent adhesion and superb stain blocking for most interior woods.
Pros: Fantastic adhesion, excellent stain and odor sealing (great for cabinets used near kitchens), and tough finish.
Cons: Strong fumes (requires excellent ventilation), longer dry times, and cleanup requires mineral spirits. They can also sometimes slightly obscure fine wood grain details due to their viscosity.
Shellac-Based Primers (The Heavy Hitter)
If you have severe bleed-through issues (like heavy knots on pine or water stains), shellac is your go-to solution. It is an incredible, fast-drying universal sealer.
Pros: Dries incredibly fast, seals almost everything (smoke, water stains, heavy tannins), and adheres strongly to many surfaces.
Cons: Shellac thinner is denatured alcohol (requires careful handling), the fumes are sharp (though less toxic than some solvents), and it is usually the most expensive option upfront.
Water-Based Wood Primers (The Modern Option)
Modern latex primers formulated specifically for wood have improved dramatically. They offer a great balance of fast cleanup, low odor, and reasonable stain control for less troublesome woods.
Pros: Low odor, fast recoat times, easy soap and water cleanup. Modern versions offer decent flexibility.
Cons: Stain-blocking power is usually weaker than oil or shellac; often not suitable for very knotty pine or exotic woods prone to bleeding. Make sure the can explicitly says “for Wood.”
| Primer Type | Best For | Stain Blocking | Cleanup |
|---|---|---|---|
| Drywall Primer (General Use) | Gypsum Board, lightly primed surfaces | Poor to None | Water |
| Oil/Alkyd Wood Primer | General cabinets, trim, medium tannin woods | Very Good | Mineral Spirits |
| Shellac-Based Primer | Heavy stains, knots, fast jobs | Excellent | Denatured Alcohol |
| Dedicated Water-Based Wood Primer | Low-tannin woods, low-odor needs | Good (for light issues) | Water |
Prep is Everything: How to Prime Wood the Right Way
No matter which dedicated wood primer you choose, success starts long before you open the can. Poor preparation ruins the best primer. Here is my simple, reliable method for prepping wood surfaces for any quality paint job. Remember, sanding and cleaning is where the longevity lives!
Tools and Materials You’ll Need
Before we start applying that great wood primer, gather these supplies:
Appropriate Wood Primer (Oil, Shellac, or dedicated Water-Based Wood Primer)
Fine-grit sandpaper (150 to 220 grit)
Medium-grit sanding sponge (for contours)
Tack cloths or lint-free rags
Degreaser or TSP substitute (trisodium phosphate substitute)
Paintbrush appropriate for your primer type (natural bristles for oil/shellac, synthetic for latex)
Drop cloths and personal safety gear (gloves, good ventilation mask if using oil/shellac).
Step-by-Step Wood Priming Guide
Follow these steps closely for a beautiful, durable finish. We’ll treat this process as if we are preparing a piece of furniture or door trim.
- Clean Thoroughly: Wood surfaces gather grime, dust, and grease—especially cabinets or old furniture. You must remove all residue. Use a solution like TSP substitute or a good quality degreaser. Wipe down the entire surface completely. Rinse with clean water if using strong chemicals, and allow the wood to dry 100%—patience is key here!
- Sand for Tooth (Adhesion): Lightly scuff the entire surface using 180-grit or 220-grit sandpaper. The goal here is not to strip the wood, but to give the primer “tooth” or micro-scratches to grab onto. If you are painting over a glossy finish, you must sand it dull. Pay special attention to any existing varnish or finish. If the surface is already smooth, use a sanding sponge to ease sharp edges and remove any mill glaze on new lumber.
- Remove Sanding Dust: This step is often rushed, leading to gritty topcoats! Use a vacuum if possible, and then follow up immediately with a tack cloth. Wring out the tack cloth slightly so it’s not overly sticky, and wipe every surface until you pick up zero dust.
- Spot-Treat Heavy Knots or Stains (Optional but Recommended): If you see any amber spots on pine, or areas where sap is oozing, wipe those areas down with a bit of denatured alcohol, or briefly touch those specific spots with straight shellac using a small artist’s brush. Let this dry completely. This adds a bonus layer of protection right where you need it most.
- Apply the Wood Primer:
- Stir your chosen wood primer thoroughly. Do not shake, as this introduces bubbles that are hard to remove.
- Use long, even strokes. Work relatively quickly, especially if using shellac or oil primer, as they dry fast.
- Apply a thin, even coat. It’s always better to do two thin coats than one thick, gloppy coat. Thick coats tend to show brush marks and are more prone to peeling later.
- Ensure you work primer into any recessed areas or corners.
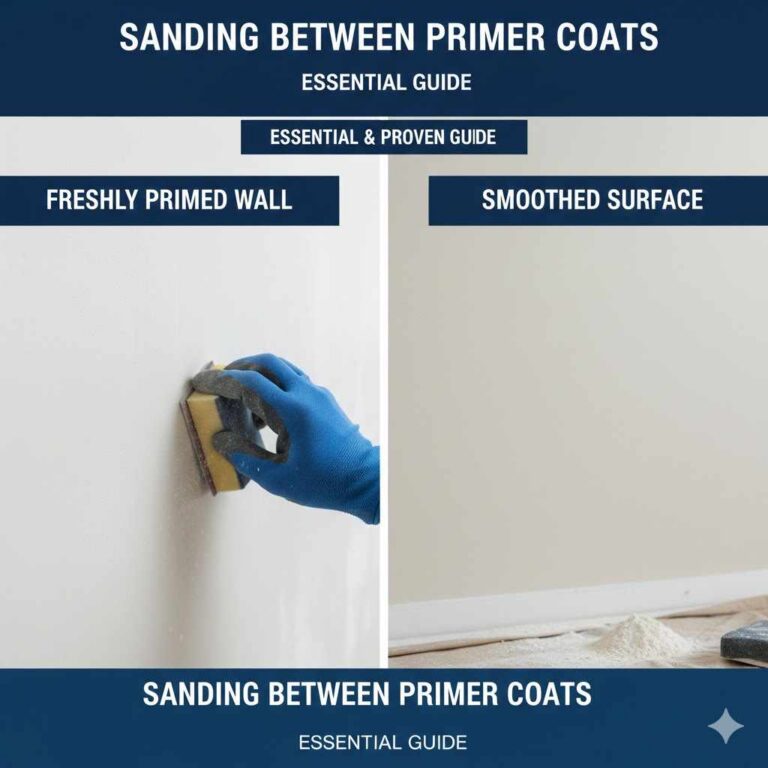
- Dry Time and Sanding: Follow the manufacturer’s directions for drying time—this varies widely! Oil and shellac primers dry hard relatively quickly (often within an hour or two), while latex takes longer to fully cure. Once completely dry, sand the primed surface lightly with 220-grit or a fine sanding sponge. This step knocks down any raised grain or dust nibs trapped in the primer.
- Final Cleaning and Topcoat: Vacuum and wipe down with a final tack cloth to remove sanding dust. Now, and only now, is your wood ready for high-quality topcoat paint.
Common Primer Pitfalls and How to Avoid Them
Even with the best intentions, mistakes happen. Here are the traps beginners often fall into when priming wood, which can usually be avoided by steering clear of that drywall primer can!
The Yellowing Issue (Oil Primer)
Older alkyd (oil-based) primers sometimes yellow over time, especially in areas that receive low light. While this usually doesn’t affect durability, it can ruin a bright white paint job.
The Fix: Use a modern, high-quality “non-yellowing” alkyd primer, or switch to a premium water-based primer formulated for cabinetry if you absolutely must have a pure white undercoat.
Grain Raising with Water-Based Products
When you put water onto raw wood, the fibers swell up, making the wood feel fuzzy after the first coat dries. This is called grain raising.
The Fix: This is why step 6 (sanding after the first coat) is essential. If using a water-based primer on bare wood, give the wood a pre-dampening “wash” with a wet rag first, let it dry completely, sand off the raised fibers, and then apply your first coat of primer. This pre-raises the grain so the primer doesn’t do the hard work and make the surface rough. For more information on managing wood surface conditions, resources like those provided by organizations focused on building science often have good guidelines regarding moisture management in wood construction. (Source check on wood movement research often points toward U.S. Forest Service data, which emphasizes moisture effects.)
The Bleeding Nightmare from Pine Knots
This happens when you skip proper stain blocking. You paint a beautiful yellow cabinet only to see a dark ring forming around every single knot two days later.
The Fix: If using pine, commit to either an oil-based primer or, preferably, a shellac-based primer. Don’t try to cheat this step; the tannins in pine are extremely active.
Beginner Safety and Cleanup Notes
As your woodworking mentor, I must stress safety first. When you switch from the low-odor drywall primer environment to oil or shellac primers, your safety steps need to increase.
Safety First Checklist:
- Ventilation: Ensure excellent airflow. Open windows and use fans that exhaust air outside if working indoors with solvents or oil paints.
- Respirators: For oil-based or shellac primers, wear a proper respirator rated for organic vapors, not just a dust mask. Dust masks only stop particles, not chemical fumes.
- Storage and Disposal: Never throw oil or solvent-soaked rags directly into the trash. They can spontaneously combust. Lay them flat outside to dry, or soak them in a metal container filled with water before disposal according to local regulations.
Cleanup Tips:
If you used a latex primer, clean brushes and spills immediately with warm, soapy water. If you used an oil-based primer, clean your brushes thoroughly with mineral spirits. Rinse the brushes well afterward with soap and water, reshape the bristles, and hang them to dry. Good brush care keeps them ready for the next job!

FAQ: Drywall Primer on Wood – The Quick Answers
Q1: Will drywall primer eventually peel off wood?
A: Yes, it is highly likely to peel or flake off over time, especially if the wood experiences temperature or humidity fluctuations, because drywall primer lacks the necessary flexibility and deep bonding required for wood.
Q2: Can I use it on bare wood or only over old paint?
A: It adheres slightly better over an existing durable paint film (which acts as a sealer) than directly onto bare, unfinished wood. On bare wood, its failure is almost guaranteed due to poor sealing against wood oils.
Q3: What is the best cheapest primer for a knotty pine project?
A: While shellac is best, it can be expensive. The most cost-effective reliable option is usually a high-quality oil-based alkyd primer, which you can often find sold in smaller cans specifically for spot-treating.
Q4: How long will drywall primer last on wood before I see problems?
A: This depends on the environment. In a very climate-stable, low-traffic area, it might last a year or two. In a high-humidity bathroom or sunny window trim, you might see bubbling or staining in just a few months.
Q5: Can I paint over drywall primer on wood now if I already applied it?
A: If it is totally dry and hasn’t started peeling, you can paint over it with a high-quality topcoat, but you are still locking in the eventual failure point. If you are worried about staining (especially knots), consider applying one thin coat of shellac over the existing drywall primer before adding your final topcoat. This might salvage the job!
Q6: Is it safe to use oil primer indoors for a beginner?
A: It is safe if you prioritize ventilation. Oil primers have strong Volatile Organic Compounds (VOCs). Use them only in extremely well-ventilated areas, or stick to the dedicated water-based wood primers if you are new to solvent-based products.
Conclusion: Choose the Right Start for Your Finish
I hope this clears up the mystery surrounding that half-used can of drywall primer! As a woodworker, I always encourage taking the slightly longer, more deliberate route when prepping surfaces. When we are working with wood, we are honoring the material by understanding its nature—it breathes, it moves, and it has oils that need careful management.
Can you technically put drywall primer on wood? Sure. But are you setting yourself up for frustration when your beautiful paint job inevitably bubbles, cracks, or reveals that stubborn knot stain six months from now? Absolutely.
My advice from the workshop bench is firm: Invest in a dedicated wood primer. A quality oil-based alkyd or a fast-acting shellac primer costs only a little more but offers unbeatable adhesion and the stain-blocking security that your final paint job deserves.
Take the time to clean, sand lightly, and use the right sealer. Do that, and you’ll have a craftsmanship result that lasts, proving to yourself that with the right guidance, anyone can achieve professional-level finishes at home. Now grab that wood primer, and get back to crafting!