How to Paint Over Oil Stained Wood: Easy Steps & Tips
To paint over oil-stained wood, first clean the surface thoroughly to remove grease and dirt. Then apply a high-quality primer designed for oil-based surfaces before painting.
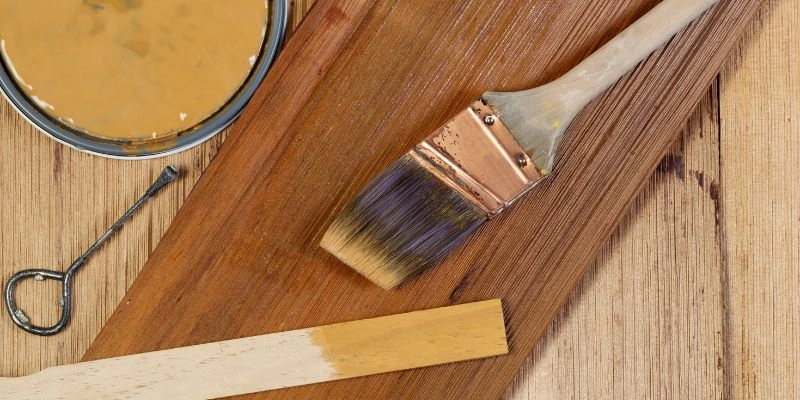
Painting over oil-stained wood can seem daunting, but it’s a manageable task with the right approach. Oil stains can prevent paint from adhering properly, leading to peeling and uneven finishes. Preparing the surface is crucial for a successful paint job.
Clean the wood to eliminate any residue and apply an appropriate primer to create a strong bond. Choosing the right paint will also enhance durability and appearance. Whether updating furniture or refinishing cabinets, following these steps ensures a beautiful, long-lasting finish. With careful preparation, you can transform your oil-stained wood into a vibrant, refreshed surface.
Introduction To Oil Stained Wood Challenges
Oil stained wood can be tricky to work with. Oil stains often prevent paint from sticking well. They can also change the wood’s color, leading to uneven finishes.
Common issues include bleeding, where the stain seeps through the new paint. Adhesion problems arise because the oil creates a slippery surface. Fading can happen, making the wood look old and worn.
Painting over oil stained wood has many benefits. It can refresh the appearance of old furniture. A new coat of paint can protect the wood from damage. This process also allows for creative expression with different colors.
| Benefit | Description |
|---|---|
| Refresh Appearance | Gives old furniture a new look. |
| Protection | Protects wood from wear and tear. |
| Creative Expression | Allows for colorful updates. |
Preparation Is Key
Start by gathering necessary materials. You will need a cleaning solution, rags, and sandpaper. A scrub brush can help remove tough stains.
First, remove dust and debris from the wood. Use a dry rag or cloth for this. Then, apply the cleaning solution to the stained area. Scrub gently to lift the oil.
After cleaning, allow the surface to dry completely. This step is very important for proper adhesion. Once dry, lightly sand the area to create a smooth surface.
Ensure to wipe away any dust from sanding. A clean surface helps the paint stick better. Follow these steps to prepare your wood for painting.
Choosing The Right Primer
Choosing the right primer is essential for painting over oil-stained wood. Oil-based primers work well for this task. They block stains and adhere strongly. Water-based primers are easier to clean up, but may not seal stains effectively.
Here are some of the best primers for oil-stained wood:
| Primer Type | Best Use |
|---|---|
| Oil-Based Primer | Blocks stains, great adhesion |
| Shellac Primer | Fast drying, excellent stain blocking |
| Water-Based Primer | Easy clean-up, low odor |
Always read the label for proper application. Choosing the right primer can make a big difference.
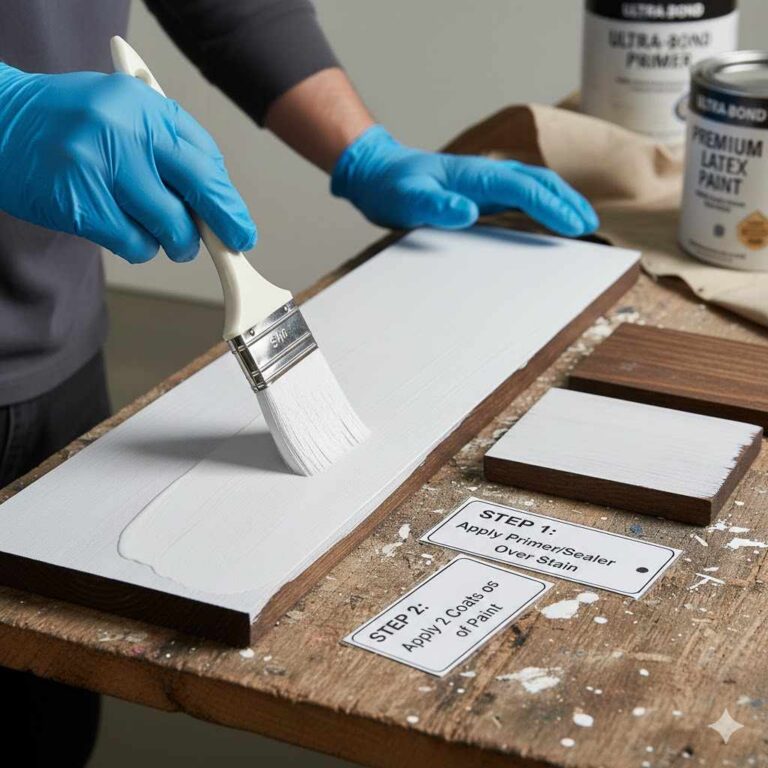
Applying Primer Effectively
Applying primer is key for a smooth finish. Use a high-quality primer to seal the oil stains. This helps the paint stick better. Brush or roll the primer evenly on the wood. Make sure to cover all areas well.
Let the primer dry completely before painting. This usually takes about 2 to 4 hours. Check the manufacturer’s instructions for specific drying times. If the wood still shows stains, apply an additional coat of primer.
After the primer dries, sand lightly for a smooth surface. This step ensures the paint adheres well. Follow with your chosen paint for a lasting finish.
Selecting The Paint
Selecting the right paint is crucial for oil-stained wood. Acrylic and latex paints work well. They bond better to surfaces compared to oil-based paints. Chalk paint is another good choice. It provides a matte finish and adheres to various surfaces. Milk paint can also be used for a unique look.
Color selection plays a key role in your project. Light colors can brighten a space. Dark colors add depth and drama. Consider using neutral tones for a classic feel. Test a small area first to see how it looks. Remember to choose a color that matches your decor.
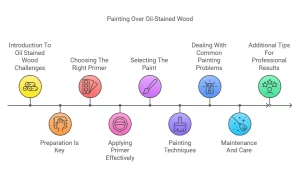
Painting Techniques
Choosing between a brush and a roller can affect your final look. A brush gives you more control for detailed areas. Use a roller for larger flat surfaces. Both tools can achieve great results.
To achieve a smooth finish, start by preparing the surface. Sand the wood lightly to remove any imperfections. Clean off dust before painting. Apply a primer to help the paint stick better.
Use even strokes with the brush or roller. Avoid overloading the brush or roller with paint. This prevents drips and uneven areas. Let each coat dry completely before adding another.
Dealing With Common Painting Problems
To avoid streaks and drips, prepare the wood properly. Start by cleaning the surface with a degreaser. Sand the area lightly to create a smooth base. Use a high-quality paintbrush or roller for even application.
Apply thin coats of paint. Let each layer dry completely before adding another coat. This prevents any unwanted textures.
For touching up imperfections, use a small brush. Match the paint color carefully. Apply a tiny amount to the affected area. Feather the edges to blend it in. This will help in achieving a flawless finish.
Maintenance And Care
To keep your painted wood looking great, protect it carefully. Use coasters under drinks to prevent rings. Avoid placing hot items directly on the surface. Regularly dust the area with a soft cloth to keep it clean. For spills, wipe them up immediately with a damp cloth.
Use a mild soap and water solution for deeper cleaning. Do not use harsh chemicals, as they can damage the paint. Reapply a clear topcoat every few years for extra protection. This helps maintain the finish and keeps it looking fresh.
Inspect the paint regularly for any chipping or wear. Touch up the paint as needed to prevent further damage. Following these steps will ensure your new paint job lasts.
Additional Tips For Professional Results
Using painter’s tape helps achieve clean edges. Apply the tape along the edges of surfaces you want to protect. Press it firmly to avoid paint seeping underneath. Remove the tape while the paint is still wet for the best results.
Timing your project is important for a smooth finish. Choose a day with low humidity and mild temperatures. This helps the paint dry evenly. Avoid painting during the hottest part of the day. Wait at least 24 hours before applying a second coat.
Frequently Asked Questions
How Do I Prepare Oil-stained Wood For Painting?
To prepare oil-stained wood for painting, start by cleaning the surface with a degreaser. Next, lightly sand the area to remove any gloss. Then, apply a primer designed for oily surfaces. This ensures better adhesion for the paint and helps to seal the oil stains effectively.
Can I Paint Over Oil-based Finishes?
Yes, you can paint over oil-based finishes, but preparation is key. Clean the surface thoroughly and sand it lightly to promote adhesion. Using a suitable primer is essential to block any oil bleed-through. After priming, you can apply your chosen paint for a smooth finish.
What Type Of Paint Works Best On Oil-stained Wood?
For oil-stained wood, use high-quality latex or acrylic paint. These paints provide better adhesion and durability on previously oiled surfaces. Always apply a primer first to prevent oil stains from seeping through. This combination will yield a long-lasting and attractive finish.
Is Sanding Necessary Before Painting Over Oil Stains?
Yes, sanding is necessary before painting over oil stains. It helps remove the glossy finish and allows the primer to adhere properly. Additionally, sanding can smooth out any imperfections on the surface. This step is crucial for achieving a professional-looking result.
Conclusion
Successfully painting over oil-stained wood can transform your space. Follow the steps outlined to ensure a smooth finish. Prep work is crucial for adhesion and durability. With the right techniques, you’ll achieve a professional look. Enjoy your refreshed wood surfaces and feel proud of your DIY accomplishment.
Happy painting!