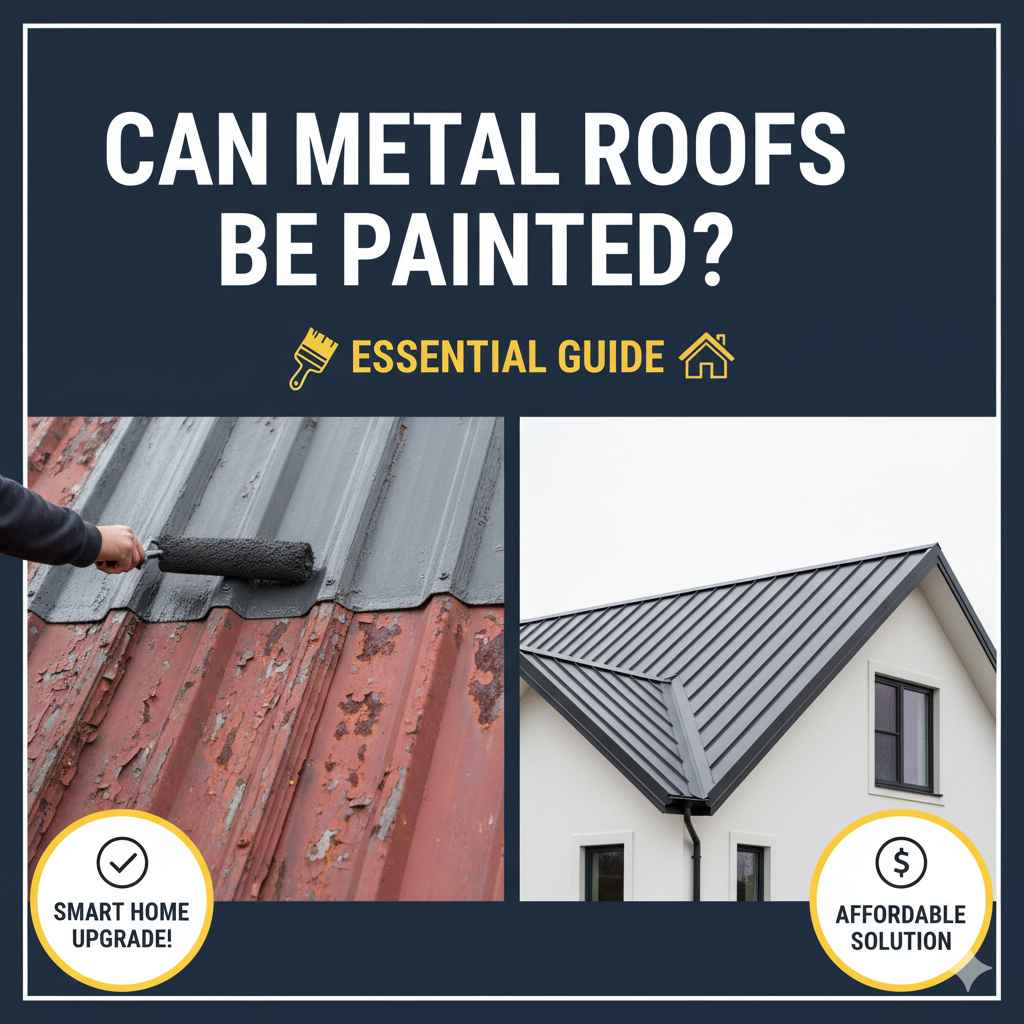
Can Metal Roofs Be Painted: Essential Guide
Yes, metal roofs can absolutely be painted! With the right preparation and materials, painting your metal roof can refresh its look, protect it from the elements, and even improve its energy efficiency. This guide will walk you through everything you need to know to tackle this project with confidence.
Ever looked up at your metal roof and wished it had a bit more personality? Or maybe it’s starting to show its age with some fading or rust spots. You’re not alone! Many homeowners wonder if their metal roof is a blank canvas or a permanent fixture of its current color. The good news is, it’s definitely the former! Painting a metal roof is a common and surprisingly achievable DIY project that can make a big difference. Forget the worry; this guide is here to break down exactly how to do it, step-by-step, making it easy and safe for anyone.
We’ll cover the essential prep work, the best paints to use, and the techniques to get a beautiful, long-lasting finish. Ready to give your home’s crown a stunning makeover? Let’s dive in!
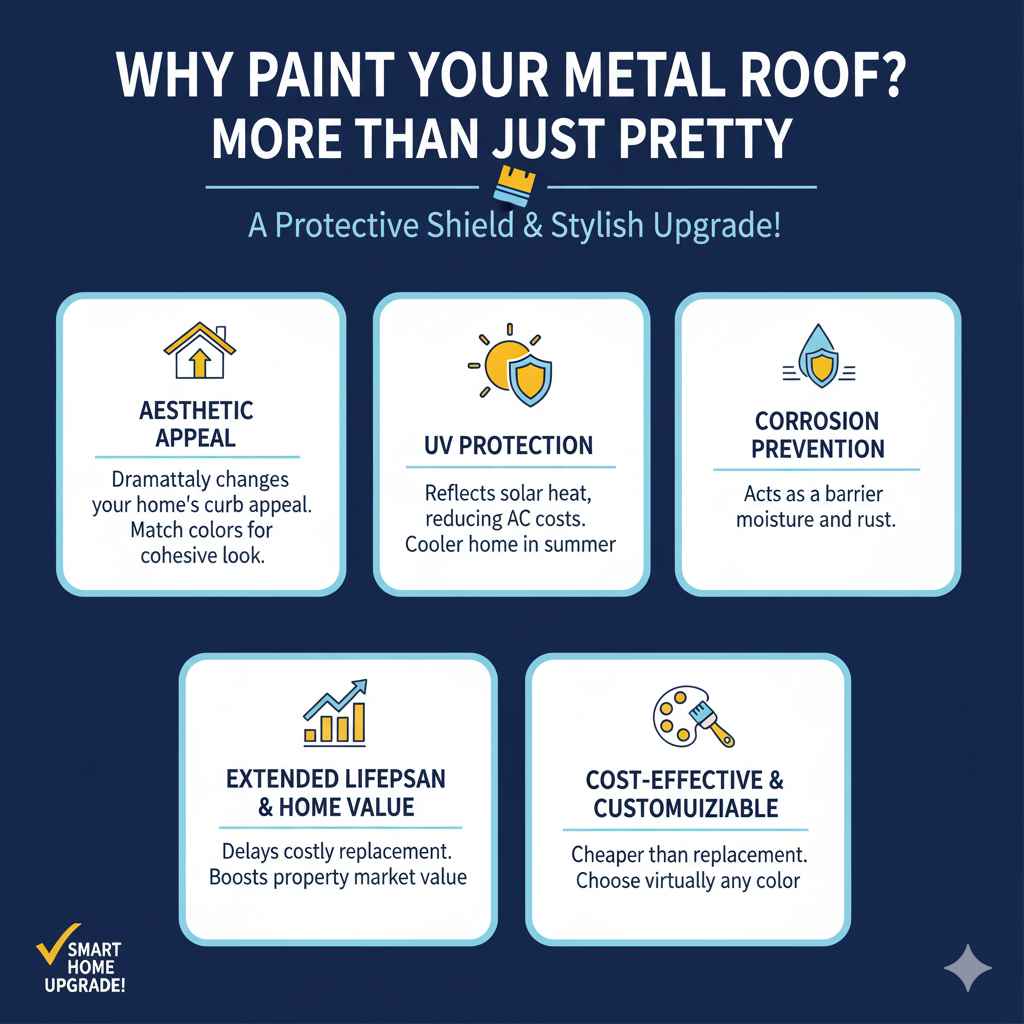
Why Paint Your Metal Roof? More Than Just Pretty
Painting your metal roof isn’t just about picking a new color, although that’s a big part of the appeal! It offers several practical benefits that can save you money and hassle down the line. Think of it as a protective shield with a stylish upgrade.
- Aesthetic Appeal: This is often the biggest driver. A fresh coat of paint can dramatically change your home’s curb appeal, making it look newer and more attractive. You can match your roof to your home’s siding, trim, or landscape, creating a cohesive look.
- UV Protection: Metal roofs, especially lighter colors, reflect solar radiant heat. Painting your roof with a light-colored, reflective paint can significantly reduce the amount of heat absorbed by your home. This means less reliance on your air conditioning during hot months, leading to lower energy bills. The U.S. Department of Energy highlights the benefits of cool roofs, many of which are achieved through reflective coatings.
- Corrosion Prevention: Metal is susceptible to rust and corrosion, especially in humid or coastal environments. A good quality exterior paint acts as a barrier, protecting the metal from moisture and preventing rust from forming or spreading.
- Extended Lifespan: By protecting the metal from the elements and preventing rust, painting can help extend the overall lifespan of your metal roof, delaying the need for a costly replacement.
- Increased Home Value: A well-maintained and attractive home exterior, including a freshly painted roof, can boost your property’s market value.
Is Your Metal Roof Ready for a Makeover?
Before you grab a paintbrush, it’s important to assess your roof’s condition. Not all metal roofs are ideal candidates for painting. Here’s what to look for:
- Type of Metal: Most common metal roofing materials like steel, aluminum, and copper can be painted. However, some older galvanized steel roofs might have coatings that require special preparation.
- Condition: The roof should be structurally sound, with no significant rust perforations, dents, or loose panels. Minor surface rust is usually manageable, but significant deterioration might mean painting isn’t the best solution.
- Existing Coating: If your roof has a factory-applied paint finish (like Kynar 500 or SMP), it’s usually very durable and well-suited for repainting. If it’s bare metal or has an unknown coating, testing is crucial.
If you have significant rust or damage, it’s best to consult with a roofing professional before proceeding. They can assess if repairs are needed first.
The Essential Steps to Painting Your Metal Roof
Painting a metal roof is like preparing any surface for a great finish – it’s all about the prep work! Rushing this stage is the fastest way to ensure your paint job doesn’t last. But don’t worry, we’ll tackle it together, step by step.
Step 1: Safety First! Gear Up Properly
Working on a roof can be dangerous, so safety is paramount. Always prioritize your well-being. Consider hiring professionals if you’re uncomfortable with heights.
- Sturdy Ladder: Ensure your ladder is in good condition and properly secured.
- Non-Slip Footwear: Wear shoes with excellent grip.
- Harness: If available and you’re trained to use it, a safety harness can provide an extra layer of security.
- Gloves and Eye Protection: Essential for handling cleaning solutions and dealing with dust or debris.
- Work with a Buddy: It’s always safer to have someone with you.
- Weather Conditions: Never work on the roof during or immediately after rain, or when it’s excessively windy or hot.
Step 2: Thorough Cleaning is Non-Negotiable
This is arguably the most critical step. The paint needs a clean, sound surface to adhere to. Dirt, grease, chalking residue, mildew, and old flaking paint will all prevent the new paint from sticking.
What You’ll Need for Cleaning:
- Garden hose with a spray nozzle
- Stiff-bristled brush (not wire, which can scratch)
- Bucket
- Mild detergent or a specialized roof cleaner (follow product instructions carefully)
- Optionally, a pressure washer (use with caution on low setting to avoid damaging the metal or forcing water under seams)
Cleaning Process:
- Rinse the Roof: Start by thoroughly rinsing the entire roof to remove loose debris like leaves and dirt.
- Apply Cleaning Solution: Mix your chosen cleaner with water in a bucket according to the manufacturer’s instructions. If using a mildew cleaner, such as a solution of 1 part bleach to 3 parts water, apply it carefully, avoiding direct contact with plants.
- Scrub Stubborn Areas: Use your stiff-bristled brush to scrub away any stubborn dirt, algae, mildew, or chalking. Pay attention to areas where grime tends to accumulate.
- Rinse, Rinse, Rinse!: This is crucial. Thoroughly rinse all traces of soap and loosened dirt from the roof. Any remaining residue can interfere with paint adhesion. Ensure no cleaning solution is left behind.
- Allow to Dry Completely: The roof must be completely dry before you move on. This can take 24-48 hours depending on the weather. Check for any damp spots, especially around seams and fasteners.
Step 3: Tackle Rust and Damage
If you discovered any rust spots during your inspection, it’s time to deal with them. Surface rust can often be treated, but deep rust might require professional assessment.
What You’ll Need for Rust Treatment:
- Wire brush or sandpaper
- Rust converter or primer
- Clean rags
Rust Treatment Process:
- Remove Loose Rust: Use a wire brush or sandpaper to scrub away all loose rust flakes. You want to get down to sound metal.
- Clean the Area: Wipe the treated area with a clean rag to remove dust and debris.
- Apply Rust Converter/Primer: Apply a rust converter or a rust-inhibiting primer specifically designed for metal. This will neutralize any remaining rust and provide a stable base for your paint. Follow the product’s application instructions carefully.
- Allow to Dry: Let the rust treatment dry completely according to the product’s recommendations.
Step 4: Apply a Quality Primer
A good primer is essential for ensuring your paint adheres well and lasts. It creates a uniform surface and helps the topcoat perform its best.
What You’ll Need for Priming:
A high-quality exterior metal primer. Look for one that is:
- Specifically formulated for metal roofing.
- Compatible with your chosen topcoat paint.
- Corrosion-inhibiting.
- Easy to apply (brush, roller, or sprayer).
Priming Process:
- Coverage: Apply the primer evenly over the entire roof surface, paying special attention to areas where you treated rust.
- Tools: You can use a high-quality exterior brush for cutting in edges and around fasteners, and a roller (3/8” or 1/2” nap) for larger areas. For larger roofs, a sprayer can significantly speed up the process. Ensure you use a sprayer compatible with primer and your chosen paint.
- Two Coats (Optional but Recommended): For maximum adhesion and corrosion protection, especially on bare metal or previously unpainted surfaces, a second coat of primer can be beneficial.
- Drying Time: Allow the primer to dry thoroughly according to the manufacturer’s instructions. This is crucial before applying the topcoat. Check the primer can for recoat times.
Authority Link Tip: The International Association of Certified Home Inspectors (InterNACHI) offers resources on inspecting various roof types, which can help you identify potential issues before painting.
Step 5: Apply the Topcoat Paint
Now for the fun part – applying the color! Choosing the right paint and applying it correctly are key to a beautiful and durable finish.
Choosing the Right Paint:
Not all paints are created equal, especially for metal roofs. You need a paint that can withstand extreme temperature fluctuations, UV exposure, and the elements.
- Type: Acrylic latex or alkyd (oil-based) paints are commonly used. Acrylic latex is generally more flexible and easier to clean up, while some alkyd formulas offer excellent durability. High-quality exterior elastomeric coatings are also a great option for metal roofs as they are highly flexible and durable.
- Finish: A satin or semi-gloss finish is typically recommended. These finishes are more durable and easier to clean than a flat finish, and less prone to showing imperfections than a high gloss.
- Color: Lighter colors reflect more sunlight, helping to keep your home cooler. This is often referred to as a “cool roof” coating.
- Adhesion and Durability: Look for paints specifically labeled for exterior metal surfaces.
A great choice for metal roofs is a paint system that includes both a compatible primer and topcoat designed for metal. Many manufacturers offer these integrated systems. For example, Sherwin-Williams and Benjamin Moore both have excellent lines of exterior metal paints.
Application Process:
- Check Weather: Apply paint on a day with mild temperatures (ideally between 50°F and 85°F or 10°C and 29°C), low humidity, and no chance of rain for at least 24-48 hours. Avoid direct, hot sun which can dry the paint too quickly.
- Mix the Paint: Stir the paint thoroughly before and during application to ensure consistent color and consistency.
- Application Method:
- Spraying: This is often the fastest and most efficient method for large areas, providing a smooth, even finish. Use a sprayer designed for exterior paints and follow the manufacturer’s guidelines for technique and number of coats. You’ll need a spray tip appropriate for the paint viscosity.
- Rolling: Use a high-quality roller cover (3/8” or 1/2” nap) suitable for smooth surfaces. Work in manageable sections, maintaining a wet edge to avoid lap marks.
- Brushing: Use an angled brush for edges, seams, and around fasteners.
- Apply in Thin, Even Coats: It’s better to apply two thin coats than one thick coat. This ensures better adhesion, even coverage, and a more durable finish.
- Recoat Times: Allow the first coat to dry according to the manufacturer’s recommendations before applying the second coat. Rushing this step can lead to peeling and premature failure of the paint job.
Step 6: Allow for Proper Curing
Once the final coat is applied, resist the temptation to walk on or disturb the roof. Even though the paint will be dry to the touch relatively quickly, it takes time to fully cure and harden. Check the paint can for specific curing times, which can be several days to weeks.
Choosing the Right Paint Products: A Quick Guide
Selecting the correct paint and primer system is crucial for longevity. Here’s a general overview of what to look for:
| Product Type | Key Features for Metal Roofs | Application Notes |
|---|---|---|
| Primer (Metal Specific) | Adhesion promoter, corrosion inhibitor, rust blocking properties. Should be compatible with the topcoat. Often acrylic latex or alkyd-based. | Apply a thin, even coat after cleaning and rust treatment. Allow full drying before topcoat. |
| Topcoat Paint (Exterior Metal) | High durability, UV resistance, flexibility to handle expansion/contraction. Acrylic latex, alkyd enamel, or elastomeric coatings are good options. Low VOC (Volatile Organic Compound) options are environmentally friendlier. | Apply 1-2 thin, even coats for best results. Ensure recoat times are followed. |
| “Cool Roof” or Reflective Coatings | Specifically formulated to reflect solar radiation. Available in many colors, but lighter colors are more effective. Often acrylic-based with special reflective pigments. | Meets ENERGY STAR® criteria. Can significantly reduce roof surface temperature. Ensure it’s suitable for metal roofs. |
Authority Link Tip: For information on the reflectivity and emissivity of roofing materials, check out the U.S. Environmental Protection Agency’s (EPA) resources on ENERGY STAR certified cool roof products.
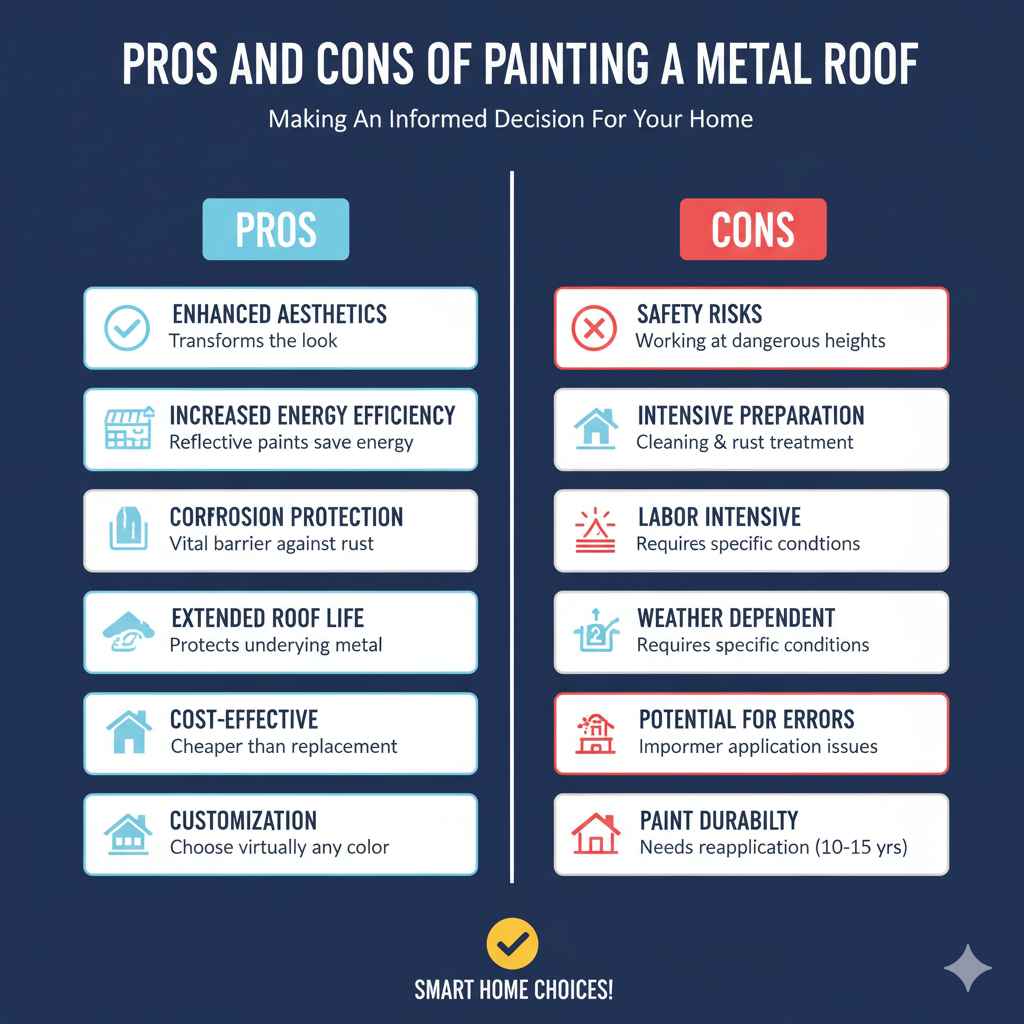
Pros and Cons of Painting a Metal Roof
Like any home improvement project, painting your metal roof has its advantages and disadvantages. Understanding these can help you make an informed decision.
Pros:
- Enhanced Aesthetics: Transforms the look of your home.
- Increased Energy Efficiency: Especially with light-colored, reflective paints.
- Corrosion Protection: Adds a vital barrier against rust.
- Extended Roof Life: Protects the underlying metal.
- Cost-Effective: Cheaper than replacing the roof.
- Customization: Choose virtually any color.
Cons:
- Safety Risks: Working at heights can be dangerous.
- Intensive Preparation: Requires thorough cleaning and rust treatment.
- Labor Intensive: Can be time-consuming.
- Weather Dependent: Requires specific weather conditions for application and curing.
- Potential for Errors: Improper application can lead to premature failure.
- Paint Durability: A paint job won’t last forever and will need reapplication eventually, typically every 10-15 years depending on product and conditions.
Frequently Asked Questions (FAQ)
Can I paint my metal roof myself, or should I hire a professional?
For DIYers with a good understanding of safety protocols and a willingness to do thorough preparation, painting a metal roof is achievable. However, if you’re uncomfortable with heights, lack the necessary tools, or have a large, complex roof, hiring a professional roofing contractor is the safer and often more efficient option.
What is the best time of year to paint a metal roof?
The best time is during milder weather, typically spring or fall, when temperatures are consistently between 50°F and 85°F (10°C and 29°C), humidity is low, and there’s no rain expected for at least 48 hours. Avoid painting in extreme heat, cold, or on windy days.
How long does a painted metal roof last?
With proper preparation and the use of high-quality paints and primers, a painted metal roof can last anywhere from 10 to 15 years, sometimes longer. Factors like climate, the quality of materials used, and the amount of direct sunlight and harsh weather the roof endures will affect its longevity.
What happens if I don’t clean my metal roof properly before painting?
If the roof isn’t cleaned thoroughly, dirt, grease, chalking, or mildew will prevent the new paint from adhering properly. This can lead to peeling, flaking, and premature failure of the paint job, negating the hard work and cost of materials.