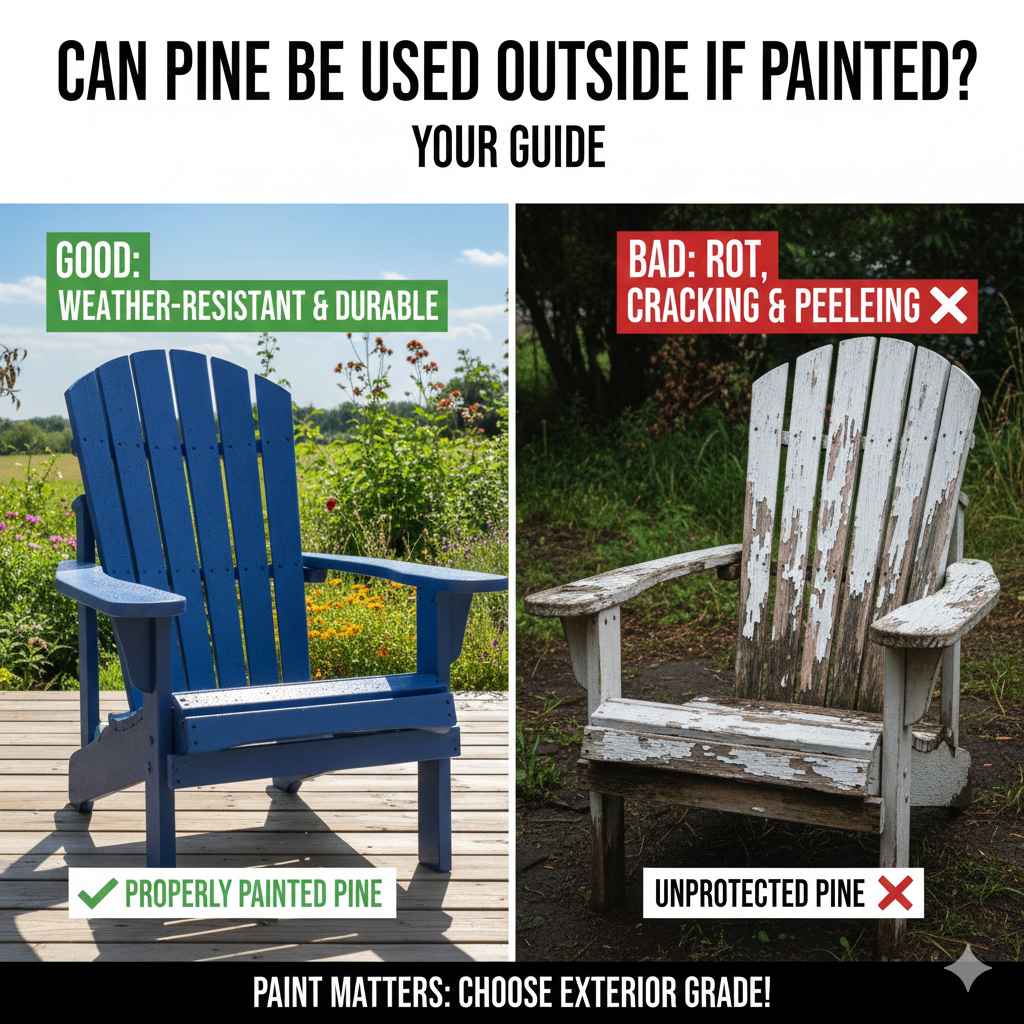
Can Pine Be Used Outside If Painted? Your Guide
Thinking about using pine wood outdoors but wondering, Can Pine Be Used Outside If Painted? It’s a super common question because pine is cheap and easy to find, but it’s also known to be a little tricky. Beginners often worry about how the weather will affect the wood and the paint job. Don’t worry, it’s totally manageable! This post breaks down everything you need to know. We’ll explore the best ways to prepare, paint, and protect pine for outdoor use, ensuring it looks great and lasts a long time. Let’s get started!
Understanding Pine Wood and Its Challenges
Pine is a popular choice for woodworking projects due to its affordability and availability. It’s a softwood, which means it’s generally easier to work with than hardwoods. However, this also means pine is less dense and naturally more susceptible to damage from the elements. Exposure to rain, sun, and temperature changes can cause pine to warp, split, and rot. The key is to prepare the wood properly and protect it with paint and other treatments. Knowing how pine reacts to water and UV rays is key to making it last.
Properties of Pine
Pine comes in several varieties, each with slightly different characteristics. Some common types include Eastern White Pine, Southern Yellow Pine, and Ponderosa Pine. Each type has a slightly different density and grain pattern. The density of the wood affects how well it absorbs paint and how resistant it is to moisture. It is crucial to select the right pine for the specific project and the conditions it will face outdoors.
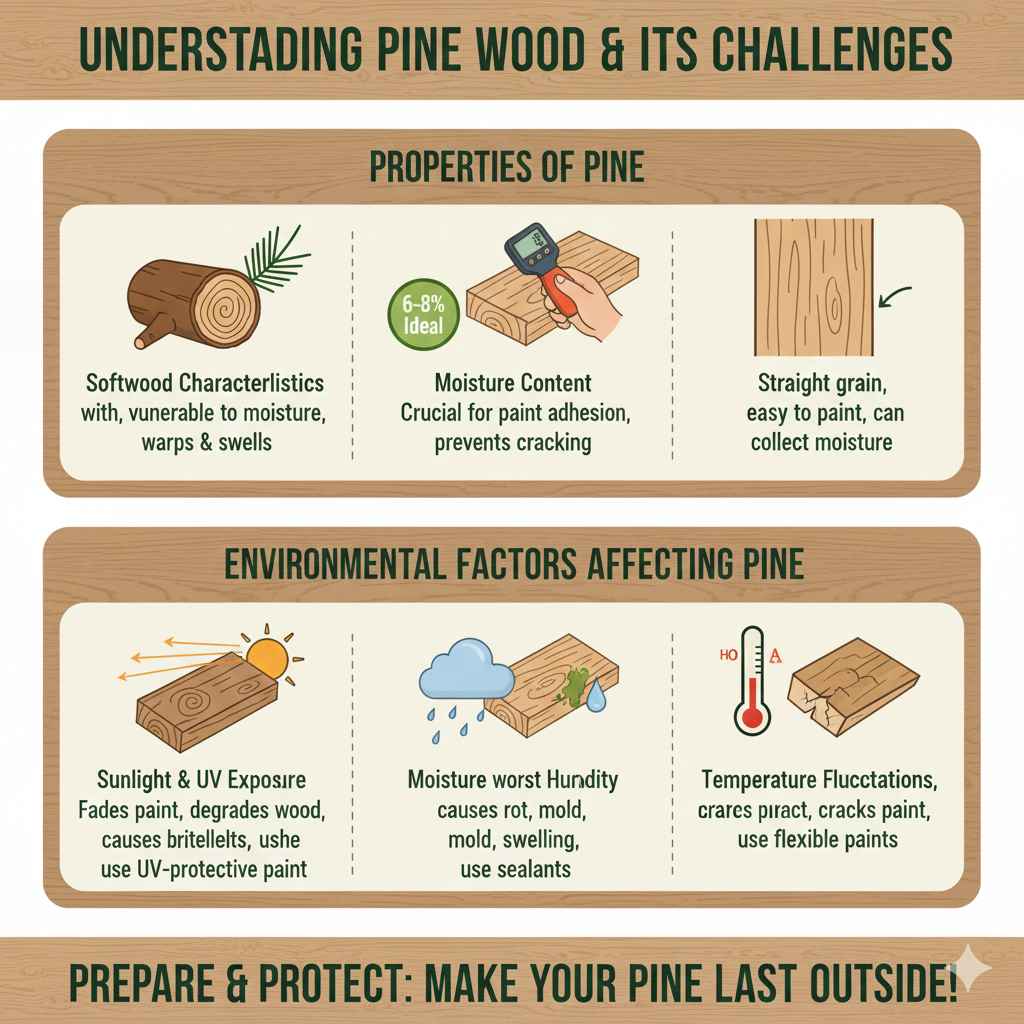
- Softwood Characteristics: As a softwood, pine has an open grain structure. This makes it easier to work with but also more vulnerable to moisture penetration and damage from the elements. The open grain means it can readily absorb water, leading to swelling, shrinking, and eventually, decay.
- Moisture Content: The moisture content of the pine when you buy it is super important. Wood that isn’t dried properly can shrink and crack after it’s been painted. Ideally, the pine should have a moisture content of around 6-8% before painting. This ensures that the paint adheres properly and doesn’t crack as the wood dries.
- Grain Pattern: The grain pattern affects how the paint is absorbed and how well it adheres. Pine’s grain is generally straight, making it relatively easy to paint. However, the grain can also create small crevices where moisture can collect, potentially leading to issues. Proper preparation is essential to seal these areas.
Environmental Factors Affecting Pine
When considering, Can Pine Be Used Outside If Painted?, understand the climate. Outdoor pine projects face different environmental challenges based on location. Sunlight can fade paint and degrade the wood fibers. Rain and humidity promote moisture absorption, leading to rot. Temperature fluctuations cause the wood to expand and contract, potentially cracking the paint. These factors can vary greatly depending on where you live.
- Sunlight and UV Exposure: Sunlight causes paint to fade and degrades the wood fibers. Ultraviolet (UV) radiation from the sun is particularly damaging. Over time, UV rays break down the lignin in the wood, making it brittle and susceptible to cracking. Using paints with UV protection and applying a top coat can help.
- Moisture and Humidity: Moisture is a pine’s worst enemy, accelerating rot. High humidity also increases moisture absorption. Wood absorbs water from rain, dew, and even the air. This moisture can lead to swelling, shrinking, and the growth of mold or mildew, eventually causing the wood to decay.
- Temperature Fluctuations: Changes in temperature cause the wood to expand and contract. This can cause the paint to crack, allowing moisture to penetrate the wood. Extreme temperature variations, especially in regions with hot summers and cold winters, can accelerate this process. Using flexible paints and applying multiple coats can help.
Preparing Pine for Painting Outdoors
The success of your outdoor pine project largely depends on proper preparation. This includes cleaning, sanding, and priming the wood. These steps ensure that the paint adheres properly and provides a durable, long-lasting finish. Skipping any of these steps can compromise the paint job and expose the pine to the elements.
Cleaning and Inspection
Begin by cleaning the pine to remove dirt, grime, and any existing coatings. This step is super important to help the paint stick. Inspect the wood carefully for any damage, such as knots, splits, or areas of rot. Address these issues before painting to ensure a smooth, durable surface. Cleaning and inspection are the first, essential steps in preparing pine for painting outdoors.
- Surface Cleaning: Use a brush and soapy water to remove any dirt, dust, and debris. Rinse the surface thoroughly and let it dry completely. For stubborn stains or mildew, a cleaner designed for wood can be used. Be sure to follow the manufacturer’s instructions.
- Knot Sealing: Pine often has knots, which can bleed resin and create imperfections in the paint job. Seal these knots with a knot sealer or shellac-based primer before applying the primer. This will prevent the resin from seeping through the paint.
- Damage Assessment: Inspect the wood for any damage, such as splits, cracks, or areas of rot. These issues need to be addressed before painting. Fill small cracks with wood filler, and replace any severely damaged pieces.
Sanding and Smoothing
Sanding is a critical step in preparing pine. It creates a smooth surface for the paint to adhere to and removes any imperfections. Use sandpaper of different grits to achieve the best results. Sanding also opens up the wood grain, which improves paint absorption. The result is a much better finish and longer-lasting paint job.
- Choosing Sandpaper: Start with a medium-grit sandpaper (around 120-150 grit) to remove any rough spots or imperfections. Gradually move to a finer grit sandpaper (around 220 grit) to create a smooth surface. Use a sanding block to ensure even pressure.
- Direction of Sanding: Always sand in the direction of the wood grain. This helps to avoid scratches and ensures a smooth finish. Sanding against the grain can create noticeable marks, which can be difficult to cover.
- Dust Removal: After sanding, remove all dust particles with a brush or tack cloth. Any remaining dust can interfere with paint adhesion, resulting in an uneven finish. Make sure the surface is completely clean before moving on to the next step.
Priming for Protection
Priming is an essential step to enhance paint adhesion and protect the wood. Primer seals the wood, creates a barrier against moisture, and provides a uniform surface for the paint. It also helps to prevent the paint from absorbing into the wood, ensuring a more even and durable finish. A good primer is the foundation for a long-lasting outdoor paint job. Primer makes it safe to use pine wood outside after painting.
- Primer Types: Choose an exterior-grade primer specifically designed for wood. Oil-based primers offer excellent moisture resistance and durability, while latex primers are more flexible and easier to clean up. Consider the specific conditions your project will face when choosing a primer.
- Application: Apply the primer evenly, following the manufacturer’s instructions. Use a brush, roller, or sprayer, depending on the project. Allow the primer to dry completely before applying paint. This usually takes a few hours.
- Multiple Coats: For maximum protection, consider applying two coats of primer, especially in areas exposed to harsh weather. This will create a more robust barrier against moisture and UV damage. Make sure the first coat is completely dry before applying the second coat.
Choosing the Right Paint for Outdoor Pine
Selecting the right paint is key to the longevity of your outdoor pine project. Different types of paint have varying levels of durability, weather resistance, and UV protection. Consider the climate, the amount of sun exposure, and the desired finish when choosing a paint. Quality paints are worth the extra cost because they offer better protection and last longer.
Types of Exterior Paints
Several types of exterior paints are available, each with its own advantages and disadvantages. Acrylic latex paints are popular for their flexibility and ease of use. Oil-based paints offer excellent durability and moisture resistance. The choice depends on the specific requirements of the project and personal preference. The paint type matters when figuring out, Can Pine Be Used Outside If Painted?
- Acrylic Latex Paints: These paints are water-based, flexible, and offer good resistance to cracking and peeling. They also dry quickly and are easy to clean up with water. Acrylic latex paints are a good choice for most outdoor projects, especially in areas with moderate weather conditions.
- Oil-Based Paints: Oil-based paints are known for their durability and moisture resistance. They create a hard, durable finish that is highly resistant to weather and wear. However, they take longer to dry and require special solvents for cleaning.
- Alkyd Paints: Alkyd paints are a hybrid of oil-based and latex paints, offering a balance of durability and flexibility. They dry faster than oil-based paints and provide excellent adhesion. Alkyd paints are a good choice when you want the benefits of both types of paint.
Paint Properties to Consider
When choosing paint, consider several properties that affect its performance outdoors. These include UV resistance, moisture resistance, and flexibility. UV resistance is super important to protect the paint from fading and the wood from sun damage. Moisture resistance helps to prevent water from penetrating the wood. Flexibility allows the paint to expand and contract with the wood, reducing the risk of cracking.
- UV Resistance: Look for paints with high UV resistance to protect the color from fading and prevent the wood from being damaged by the sun’s rays. UV-resistant paints contain special pigments and additives that block or absorb UV radiation.
- Moisture Resistance: Choose paints that are highly resistant to moisture to prevent water from penetrating the wood. This is important for preventing rot and maintaining the paint’s appearance. Consider using paints specifically designed for humid climates.
- Flexibility: Select paints with good flexibility. The wood will expand and contract with changes in temperature and humidity. A flexible paint will move with the wood, reducing the risk of cracking and peeling.
Color and Finish Selection
The color and finish of your paint can significantly impact the look and performance of your outdoor project. Darker colors absorb more heat, which can cause the wood to expand and contract more. The finish affects the paint’s durability and the ease of cleaning. Consider both the aesthetic and practical aspects when choosing your paint color and finish. Painting your pine the right color is a key element when figuring out, Can Pine Be Used Outside If Painted?
- Color Choices: Lighter colors reflect more sunlight and are less likely to fade or cause excessive heat buildup. Darker colors may look more stylish but absorb more heat and may require more frequent maintenance. Consider the climate and sun exposure when choosing a color.
- Finish Options: Choose the finish that is right for the project. Glossy finishes are super durable and easy to clean, but they show imperfections more readily. Flat finishes provide a more matte appearance and are good at hiding imperfections. Satin or eggshell finishes offer a good balance of durability and appearance.
- Matching the Environment: Consider the surrounding environment when selecting the color and finish. Choose colors that complement the landscape and match the architectural style of your home or project. Select finishes that provide the required durability for the specific conditions.
Painting Pine Wood Outdoors: A Step-by-Step Guide
Proper painting techniques ensure a smooth, durable finish that protects the pine wood from the elements. This involves preparing the surface, applying multiple coats of paint, and allowing sufficient drying time between coats. Patience and attention to detail are key to achieving a professional-looking result. Follow these steps to maximize the life of your painted pine.
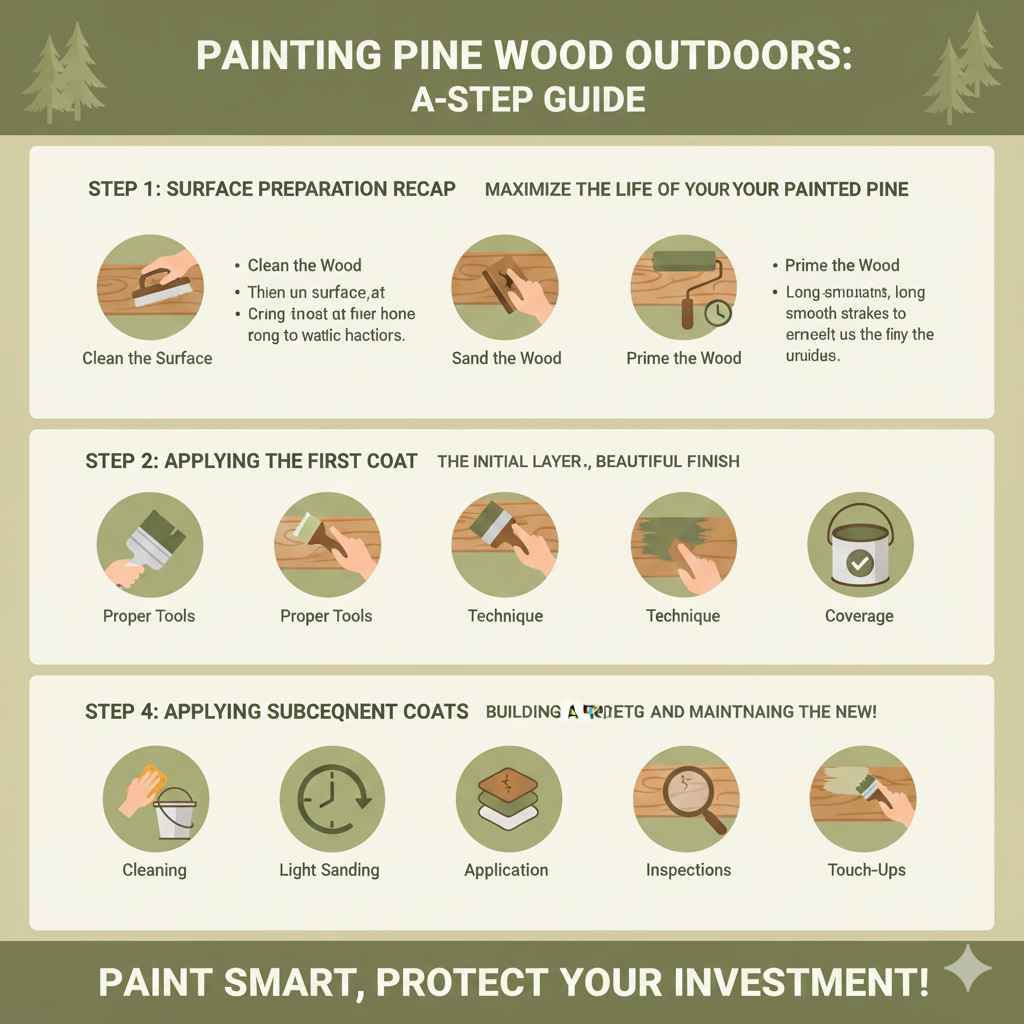
Step 1: Surface Preparation Recap
As mentioned earlier, surface preparation is the foundation for a successful paint job. This involves cleaning, sanding, and priming the wood. These steps ensure that the paint adheres properly and provides a durable, long-lasting finish. Skipping any of these steps can compromise the paint job and expose the pine to the elements. Remember that the more care you take in this stage, the better the final result will be.
- Clean the Surface: Use a brush and soapy water to remove any dirt, dust, and debris. Rinse thoroughly and allow to dry. For stubborn stains, use a wood cleaner.
- Sand the Wood: Start with medium-grit sandpaper (120-150 grit) and move to a finer grit (220 grit) to create a smooth surface. Sand in the direction of the grain.
- Prime the Wood: Apply an exterior-grade primer specifically designed for wood. Use a brush, roller, or sprayer. Let the primer dry completely.
Step 2: Applying the First Coat
Applying the first coat of paint is a critical step in the painting process. It provides the initial layer of protection and color. Ensure that the surface is clean, dry, and primed before beginning. Apply the paint evenly, following the manufacturer’s instructions. A well-applied first coat sets the stage for a durable, beautiful finish.
- Proper Tools: Use high-quality brushes, rollers, or sprayers to ensure an even application. Choose brushes or rollers appropriate for the paint type and the size of the project.
- Technique: Apply the paint evenly, avoiding drips or runs. Use long, smooth strokes in the direction of the wood grain. This helps to achieve a smooth, uniform finish.
- Coverage: Make sure you have good coverage. Don’t worry about complete coverage on the first coat; the second coat will take care of that. Aim to cover the entire surface without any bare spots.
Step 3: Applying Subsequent Coats
Multiple coats of paint provide better protection and a richer color. After the first coat has dried, apply a second coat and, if needed, a third coat. Allow ample drying time between coats to allow the paint to cure properly. Applying subsequent coats creates a much better finish and increases the durability of the paint job. Always follow the manufacturer’s directions for drying times.
- Drying Time: Allow the first coat to dry completely before applying the second coat. This typically takes several hours, but it depends on the paint type and the weather conditions. Check the manufacturer’s instructions for the specific drying time.
- Light Sanding: Lightly sand the surface between coats to remove any imperfections or raised grain. This will ensure a smooth finish. Use fine-grit sandpaper (220 grit) for light sanding.
- Application: Apply the second and third coats using the same techniques as the first coat. Apply each coat evenly and allow it to dry completely. Additional coats can provide a more even and durable finish, especially in high-exposure areas.
Step 4: Protecting and Maintaining the Paint
Maintaining the painted pine is important to ensure its longevity. This involves regular cleaning, inspection, and touch-ups. Regular maintenance will help to keep the wood protected from the elements and maintain its appearance. Routine care will prevent issues from escalating and help maintain the beauty of the project for a long time.
- Cleaning: Clean the painted surface regularly with a brush and soapy water to remove dirt and grime. Avoid using abrasive cleaners or tools that can damage the paint. Rinse thoroughly.
- Inspections: Regularly inspect the painted surface for any signs of damage, such as cracks, peeling, or fading. Address any issues promptly to prevent further damage.
- Touch-Ups: Touch up any areas where the paint is damaged or worn. Use the same paint and color to ensure a consistent appearance. Lightly sand the area before applying the touch-up.
Frequently Asked Questions
Question: Can I paint pine wood without priming it?
Answer: It’s generally not recommended to paint pine wood without priming it. Priming helps the paint adhere better, seals the wood, and provides a more even finish. It also helps to prevent moisture and other issues from damaging the wood.
Question: What’s the best paint for outdoor pine?
Answer: Acrylic latex exterior paints are a good choice for outdoor pine because they are flexible and can withstand weather changes. Oil-based paints are also an option as they’re durable and resist moisture, but require special solvents for cleaning.
Question: How often should I repaint my outdoor pine?
Answer: The frequency of repainting depends on the weather conditions, the amount of sun exposure, and the type of paint used. Generally, you may need to repaint every 3-7 years, but regular inspections and maintenance can extend the lifespan of the paint.
Question: How do I prevent the paint from peeling on outdoor pine?
Answer: Proper preparation, including cleaning, sanding, and priming, is key to preventing peeling. Using a flexible paint and applying multiple coats can also help. Make sure the wood is dry before applying paint and follow the manufacturer’s instructions.
Question: What type of brush should I use for painting pine?
Answer: For oil-based paints, use brushes with natural bristles. For latex paints, synthetic brushes are the best option. Choose brushes appropriate for the size of the project and the type of finish desired (e.g., flat, satin, gloss).
Final Thoughts
So, Can Pine Be Used Outside If Painted? Absolutely! Properly prepared and painted pine can last outdoors, providing a beautiful and functional addition to your space. The key is in the preparation: cleaning, sanding, and priming are your best friends. Then, choose the right exterior-grade paint and apply it carefully, allowing for proper drying between coats. Regular maintenance, including cleaning and occasional touch-ups, will keep your painted pine looking great for years. Remember to choose the right tools and products and follow the instructions carefully. Armed with this information, you can explore outdoor pine projects with confidence. Get painting!