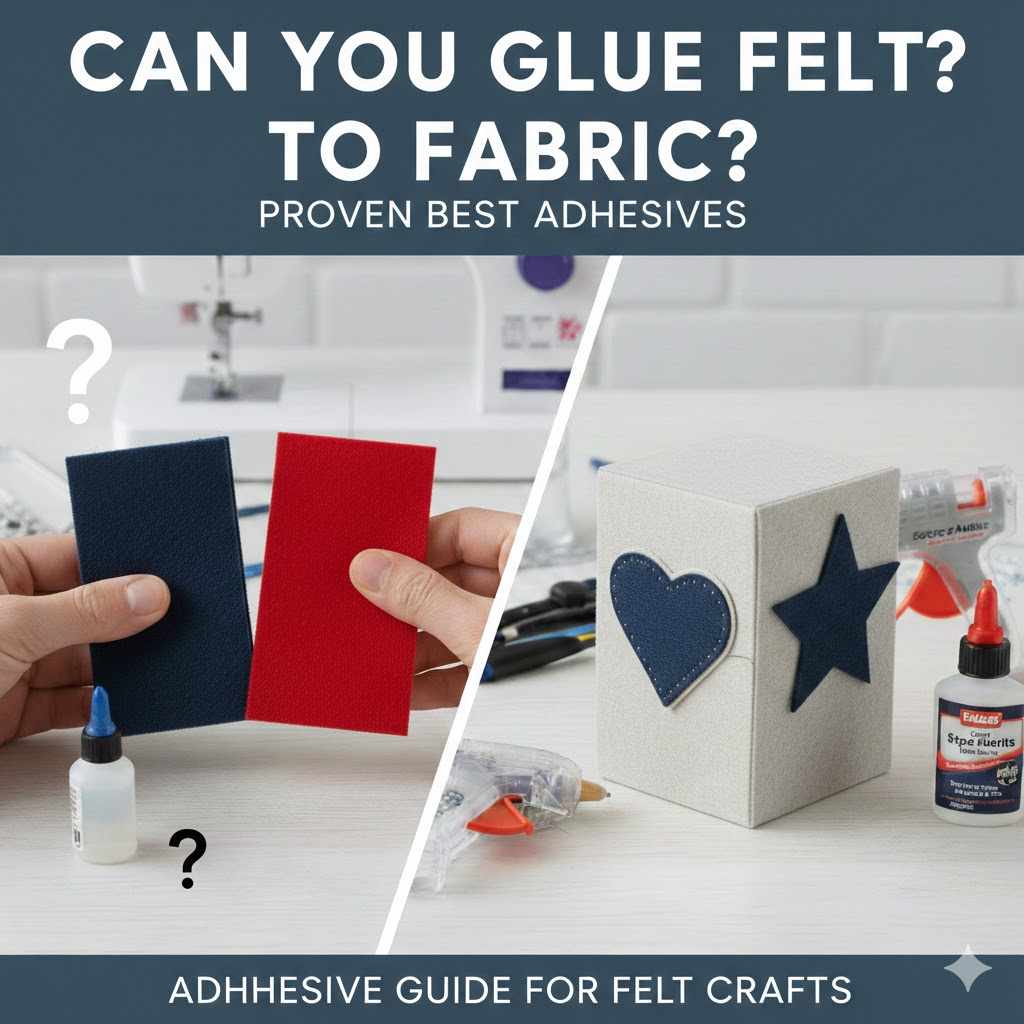
Can You Glue Felt? Proven Best Adhesives
Yes, you absolutely can glue felt! Choosing the right adhesive is key to ensuring your felt crafts, repairs, or DIY projects are strong and look professional. We’ll cover the best glues for felt, from quick fixes to long-lasting bonds, making your next project easy and successful.
When you look at soft, fuzzy felt, you might wonder if glue will ever hold it tight. Woodworking is about solid joins, but crafts use softer materials, too! Felt is notorious for soaking up glue unevenly or resisting a strong bond. It can be frustrating when your carefully cut shapes peel apart after drying. Don’t worry.
Getting a strong, neat glue joint on felt is simple once you know which adhesive to grab from your toolbox. Today, we’re laying out the very best, most beginner-friendly glues that will make your felt stick like magic. Let’s make sure your creations last!
Why Felt Glues Differ: Understanding the Material
Felt is a non-woven fabric, usually made from wool or synthetic fibers (like acrylic or polyester). This structure is the main reason standard glues sometimes fail.
Unlike tightly woven cotton or canvas, felt doesn’t have interlaced threads that glue can grip into. Instead, the fibers are matted together. This porous surface means thinner glues can sink too deep, soaking through and creating a messy, stiff patch on the surface. The goal is to find an adhesive that spreads thinly enough to penetrate the fibers without overwhelming them.
The type of felt matters too. Wool felt usually handles slightly stronger chemicals better, while synthetic felts, like polyester, might react differently to certain solvents. Knowing your felt helps you pick the perfect glue partner!
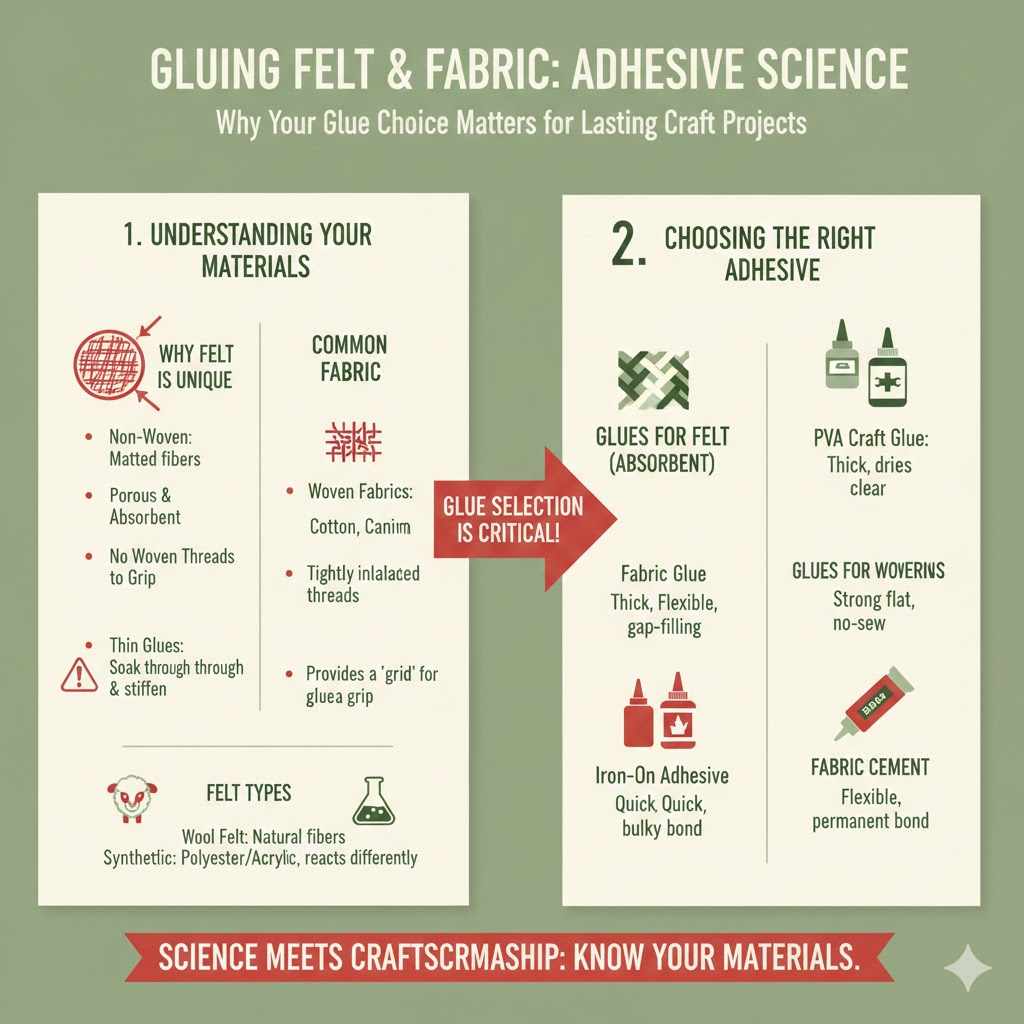
The Best Glues for Sticking Felt: A Beginner’s Guide
When you ask, “can you glue felt,” the answer depends heavily on the glue. Here are the top contenders, broken down by what they do best—from speedy crafts to durable décor.
1. The All-Around Winner: Tacky Glue (Craft Glue)
If you only buy one adhesive for felt, make it high-quality tacky craft glue (often recognizable as Aleene’s Tacky Glue or a similar strong PVA glue). This is a staple in every craft box for a reason.
Why Tacky Glue Works So Well:
- Consistency: It’s thicker than standard school glue, preventing it from immediately soaking through the felt and creating a hard, messy stain.
- Handling Time: It dries relatively slowly, giving you time to adjust the felt placement for a perfect fit.
- Finish: It dries clear, which is essential when working with lighter-colored felts.
Best Uses:
- Layering felt shapes for simple wall hangings.
- Basic applique or simple costume repairs.
- Projects that don’t require waterproofing.
2. The Quick Fix Champion: Hot Glue Gun
For fast, structural bonds in DIY décor, the hot glue gun is hard to beat. It’s practically instant adhesion.
When to Reach for the Hot Glue Gun:
Hot glue is fantastic when you need things to hold immediately, like securing felt to a harder backing, like wood or cardboard (a common need when mounting felt samples or making signs).
- Speed: It cools and hardens almost instantly, letting you move right on to the next step.
- Volume: You can apply a decent bead of glue to fill minor gaps if your felt pieces aren’t cut perfectly.
A Word of Caution for Beginners:
Hot glue can leave noticeable bumps or lumps under thin felt. When working on fine detail, apply glue sparingly. For larger surfaces, use a low-temp gun to prevent scorching the delicate synthetic fibers in some felt types. Always be careful of burns—safety first, always!
3. For Invisible Seams: Fabric Glue (Best for Flexible Items)
If you are using felt for something that needs to move, stretch, or be washed (like soft toys or temporary clothing additions), dedicated fabric glue is your best friend. These glues are designed to remain flexible after drying.
Pros and Cons of Fabric Glue:
| Pros (What it does well) | Cons (Watch out for these) |
|---|---|
| Remains flexible and washable. | Requires clamping or weighting while drying (can take 24 hours). |
| Creates a nearly invisible bond on matching felt colors. | Generally more expensive than craft glue. |
| Ideal for appliqué on clothing. | Some stronger formulas may stain thin, light-colored felt if overapplied. |
4. For Serious Strength (or Attaching Felt to Hard Surfaces): Super Glue and Epoxy
Sometimes, felt needs to be glued to something much tougher, like metal, plastic, or dense wood backing. In these cases, you need adhesives typically associated with construction or repair, not just crafts.
Cyanoacrylate (Super Glue): Use sparingly! Super glues offer incredibly fast, hard bonds. They are great for small, high-stress areas, but because they dry brittle, they are not good for the main body of a soft, pliable felt project. Applying too much will soak through and leave a hard, shiny spot.
Two-Part Epoxy: This is the powerhouse adhesive. If you need a bond that will last for decades or withstand outdoor conditions (like securing felt furniture feet protectors to the bottom of a chair leg), epoxy wins. Follow the mixing instructions exactly; precision is key here. You can learn more about adhesive strengths on resources like The National Institute of Standards and Technology (NIST), which details how different materials bond under stress.
How to Get the Strongest Glue Bond on Felt: Step-by-Step
No matter which adhesive you choose from the list above, the preparation and application method are crucial. A clean surface always leads to a better bond. Follow these simple steps for rock-solid felt adhesion.
Step 1: Prep Your Workstation and Material
A good craftsman always sets up for success. Keep things clean and handy!
- Clean the Felt: Use a lint roller or a piece of masking tape to pick up any loose fibers or dust sitting on the surface where the glue will go. You want the fabric itself, not fuzz, making the connection.
- Protect Your Surface: Lay down wax paper or an old cutting mat. Felt glue is sticky, and we want to keep our workshop bench clean for the next project!
- Pre-Fit: Dry-fit your felt pieces together. Make sure they line up perfectly before any adhesive touches the surface.
Step 2: Applying the Adhesive Correctly
This is where many beginners struggle. Less is truly more when dealing with felt.
- Thin Coat is Best: Apply a very thin, even layer of your chosen glue directly onto one piece of the felt. If using tacky glue or fabric glue, use the tip of the bottle or a small craft stick to spread it thinly across the bonding area.
- Avoid the Edges (Mostly): For very soft or decorative pieces, try to stop just shy of the very edge. Glue that squeezes out at the edges looks messy and is hard to clean once set.
- If Attaching to Wood/Hard Surface: When using hot glue, use quick, controlled dots or small zig-zags instead of one thick layer. This prevents excess glue from spreading outwards.
Step 3: Joining and Curing Time
Patience pays off immensely here. Forcing the bond rarely works as well as letting the chemistry happen naturally.
- Join Promptly: Press the two felt pieces together firmly right after application (especially important with fast-drying glues like Super Glue or hot glue).
- Apply Pressure: Hold the pieces together firmly for the recommended time for that specific glue—usually 30 seconds for hot glue, 1-2 minutes for tacky glue.
- Weight or Clamp: If using slower-drying fabric or tacky glue, place a heavy, flat object (like a book wrapped in plastic wrap or a small clamp) over the glued area. This ensures complete surface contact while it cures.
- Cure Completely: Check the bottle for the “full cure time.” While some glues hold almost instantly, they often reach maximum strength after 12 to 24 hours. Resist testing the strength until this time has passed.
Table: Choosing the Right Glue for Common Felt Projects
To help you decide quickly, here is a reference chart pairing common felt tasks with the best adhesive approach.
| Project Type | Felt Used | Best Adhesive | Drying Time |
|---|---|---|---|
| Felt flower petals or embellishments | Thin Craft Felt | Tacky Craft Glue | Several hours |
| Felt lining inside a wooden craft box | Medium Weight Felt | Hot Glue (Low Temp) | Immediate |
| Costume pieces requiring movement/washing | Polyester Felt | Fabric Glue | 12–24 Hours |
| Felt feet on decorative ornaments | Thick Craft Felt | Super Glue (Micro-dot application) | Minutes |
| Securing felt to plastic or metal | Any Felt Type | Two-Part Epoxy | 24 Hours |
Tips for Gluing Difficult Felt Types
Not all felt is created equal. Wool felt, synthetic felt, and craft foam sheets (which are often mistaken for felt) present unique challenges.
Working with 100% Wool Felt
Wool felt is durable and naturally a bit stiffer. It absorbs moisture differently than synthetic types. If using wet glue (like tacky glue), you might need slightly longer clamping times. However, wool responds very well to solvent-based adhesives (like contact cement, though beginners should exercise caution with solvents). For simplicity, stick to high-quality PVA or fabric glue.
Handling Thin, Delicate Synthetic Felt
Thin polyester or acrylic felt (often used in cheap kits) can be ruined instantly by heavy glue. It’s very thin and lets liquid bleed through quickly, causing stiffness.
- Use the absolute thinnest layer possible.
- Consider using a spray adhesive designed for fabrics, ensuring you apply it lightly from a distance (always in a well-ventilated area, checking safety data, similar to guidance provided by occupational safety resources like NIOSH regarding aerosols).
- Alternatively, switch to temporary fabric fusion tape, which involves ironing thin adhesive webbing between layers.
The Felt vs. Craft Foam Challenge
If you are confusing felt with craft foam (EVA foam), know that foam requires very different adhesives. Craft foam can dissolve under some chemical glues. For foam, use contact cement or specialized foam glue—never use Super Glue unless you want the edges to become brittle and break off.
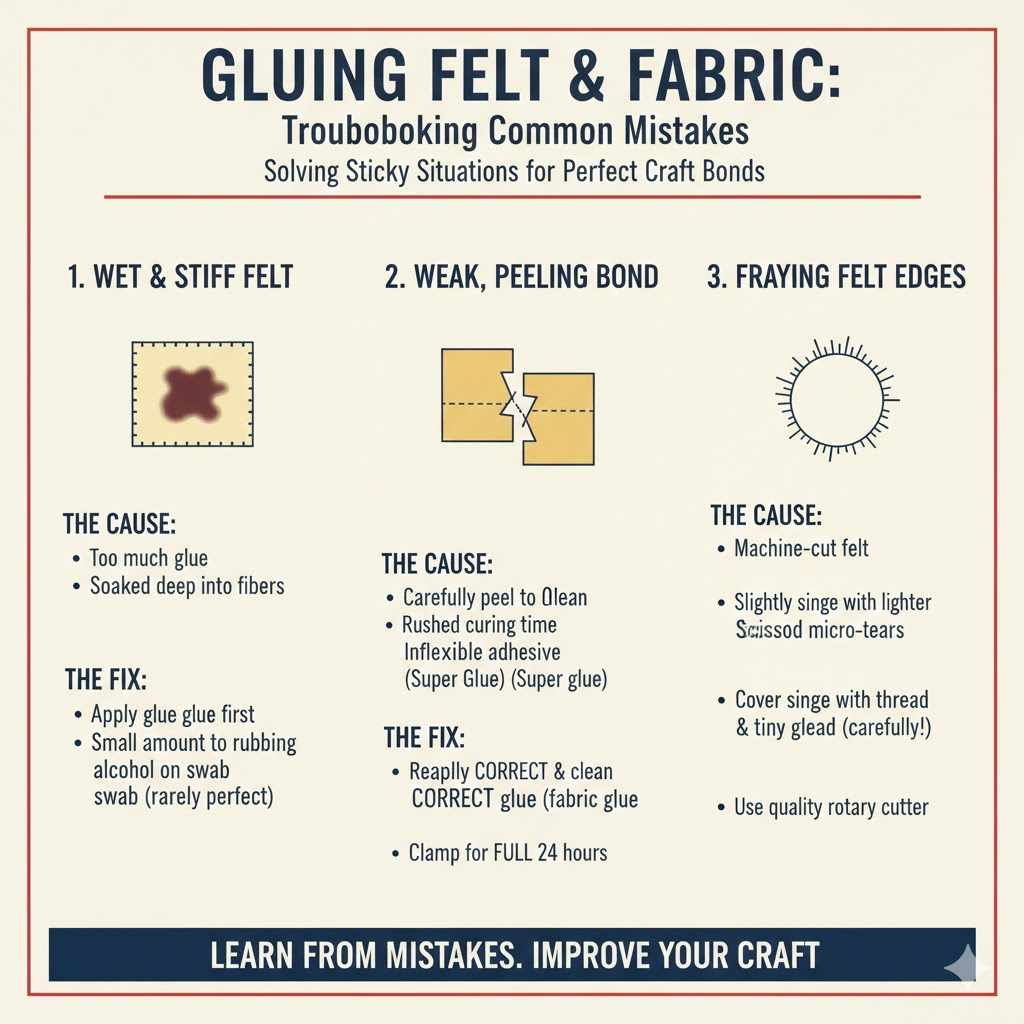
Troubleshooting Common Felt Gluing Mistakes
Even seasoned crafters run into problems. Here are solutions to the three most common sticky situations.
Mistake 1: The Felt Looks Wet or Stiff After Drying
The Cause: You used too much glue, or the glue soaked deep into the fibers.
The Fix: For future attempts, try applying the glue to the other material first (if bonding felt to wood, glue the wood). If you have already stained the felt, there isn’t a perfect fix, but using a very small amount of rubbing alcohol on a cotton swab applied carefully around the edge might help loosen some cured PVA, though this rarely works perfectly.
Mistake 2: The Bond Isn’t Holding Long Term
The Cause: You rushed the curing time, or you used an adhesive that doesn’t maintain flexibility (like brittle Super Glue on a movable piece).
The Fix: For weak bonds, carefully peel the pieces apart (if possible), clean off as much old glue residue as you can, and reapply the correct glue (usually a fabric glue for flexibility). Ensure you clamp or weigh the project down for the full 24-hour cure cycle this time.
Mistake 3: The Felt Edges Are Fraying Before Gluing
The Cause: You used machine-cut felt, or the pressure on the scissors caused micro-tears.
The Fix: If fraying is minor, you can gently use a lighter to quickly singe away the loose threads—do this far away from flammable items and do NOT hold the flame to the fabric! For major fraying, trim the edge slightly differently or try covering the frayed edge with a neat bead of coordinating thread applied with a tiny dot of fabric glue. Good tools make crafting easier; quality rotary cutters minimize fraying significantly.
FAQ: Your Quick Answers About Gluing Felt
Here are some quick, simple answers to the questions most beginners have when first starting to glue felt.
Q1: Can I use wood glue on felt?
A: Yes, wood glue is often just a stronger version of PVA or tacky craft glue. It works well, but like all liquid glues, use it sparingly to avoid soaking and stiffening the felt.
Q2: Is it better to sew felt than glue it?
A: Sewing is always the strongest method, especially for high-wear items. Glue is best for quick, decorative projects or when you are securing felt to a hard backing that sewing won’t penetrate.
Q3: Will my felt project eventually fall apart if I use hot glue?
A: Hot glue provides an instant bond, but it can lose its grip over time, especially if the item is frequently handled or exposed to heat. It’s fine for décor but use liquid fabric glue for things that need long-term flexibility.
Q4: What is the best glue if I need to wash the felt item?
A: Only a dedicated “fabric glue” that specifically states it is washable and flexible should be used if the final item will be machine or hand washed.
Q5: How do I keep felt from sliding around while the glue dries?
A: Use non-slip surfaces like rubber shelf liner beneath your project, or apply gentle clamping pressure. If using tacky glue, ensure the weight you place on top is flat, perhaps a cookie sheet, so the pressure is distributed evenly.
Q6: Can I use craft glue on wool felt instead of synthetic felt?
A: Absolutely. High-quality tacky glues work effectively on both wool and synthetic felts for most indoor craft applications.
Conclusion: You Are Ready to Bond That Felt!
I hope this detailed guide clears up any worry you had about whether or not you can glue felt. As a mentor, I always stress that the right tool—or in this case, the right adhesive—makes the job easy, no matter your skill level.
Remember the golden rules: Pick a glue based on flexibility needs (tacky glue for crafts, fabric glue for wearables, hot glue for speed), and always, always apply thinly. When you take the time to prep your surfaces and allow for proper curing time, you’ll be rewarded with neat, professional-looking bonds that hold strong for years. Now, grab that favorite felt color and get back to creating with confidence. Happy crafting!