Can You Glue Sheetrock to Concrete? Glue vs Furring Strips
Yes, you can glue Sheetrock (drywall) to concrete, but only in a narrow set of conditions: the wall has to be dry, clean, sound and free of paint or sealer. In most basements those conditions are the exception, and that is why the standard method in manufacturer literature is wood or metal furring, not glue.
This guide helps you decide between the three realistic options: adhesive only, wood furring strips anchored with concrete screws, and foam plus Z-furring. You get real spacing numbers, a table showing how much wall depth each one costs you, and a moisture check to run before you buy anything. Drywall is a little outside the usual woodworking scope, but the furring strip method is straight carpentry, so it belongs here.
Short Answer: When Glue Works and When It Does Not
Best Furring Strip Screw Pick
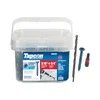 |
Tapcon 3/16 x 1-3/4″ Star Head Blue Climaseal Concrete Screws, 225 Pieces If you take the furring strip route, these are the screws that anchor 1×3 strips to a concrete or block wall. The listing says a drill bit and driver bit are included.
|
Adhesive-only works best on a dry, bare, roughly flat interior masonry wall in a conditioned space, where you want to lose as little floor area as possible and do not need wiring or insulation behind the board. It works poorly on a basement wall that has ever shown dampness, on painted or sealed concrete, on a wall that is out of plane by more than the adhesive can bridge, or anywhere you want to hang heavy loads.
One thing most how-to pages skip: in the USG wood-framed systems catalog I read (SA924), the sections on masonry walls describe wood furring strips and Z-furring channels. The adhesive that catalog mentions is drywall stud adhesive applied to framing along with supplementary fasteners, not a glue-only method for bare concrete. So if you go glue-only, you are working outside the standard manufacturer method and leaning on the adhesive maker’s instructions instead. Treat it as a judgment call, not a code-approved default.
The three methods side by side
| Adhesive only | Wood furring strips (1×3) | Z-furring channels with rigid foam | |
|---|---|---|---|
| Wall depth lost (1/2 inch drywall) | About 1/2 inch plus the adhesive bead | About 1-1/4 inches (3/4 inch strip plus 1/2 inch board) | More than the strip method; depends on foam thickness |
| Attachment to the wall | Adhesive bond | Concrete screws through the strips | Narrow flanges of channels fastened to the wall at 24 inches on center (per USG) |
| Board fastening | Adhesive, often with temporary bracing | 1-1/4 inch Type W screws at 16 inches on center (per USG) | Type S screws at 16 inches on center in the field of the panel (per USG) |
| Room for wiring or insulation | None | A 3/4 inch gap; enough for cable in some cases, not for real insulation | Yes, foam sits behind the board |
| Depends on wall being dry | Completely | Yes, but the strips can be pressure-treated or PVC | Yes |
| Holds a shelf or heavy fixture | Poorly without extra blocking | Better; screws grab wood | Needs blocking behind the board |
Depth figures are arithmetic from actual lumber and panel thicknesses (a 1×3 is about 3/4 inch thick, drywall here is 1/2 inch), not measured on a specific job. Add your own adhesive or foam thickness.
Check the Wall Before You Choose a Method
The wall decides the method, so inspect it first.
Moisture
Below-grade masonry can carry moisture even when it looks dry. A common rule-of-thumb check is to tape a square of clear plastic sheeting tightly to the wall on all four sides, leave it for at least a day or two, and see whether droplets form under it or the wall darkens behind it. Either result means moisture is moving through the wall. If you see it, fix the source (grading, gutters, cracks, drainage) before you put anything on the wall. Do not glue drywall over an active moisture problem.
Where water penetration is possible, the USG catalog calls for an asphalt felt strip between furring strips and the wall. Many builders go further and use pressure-treated lumber, PVC trim or metal channel for anything touching the concrete, because a wood strip pressed against a damp wall can stay wet. A GreenBuildingAdvisor discussion of basement furring raised the same concern about trapping moisture in a sealed cavity.
Surface condition
- Paint or sealer: Most adhesives bond poorly to painted or sealed masonry. Scrape or grind it back to bare concrete, or choose furring instead.
- Efflorescence: The white chalky powder means salts are migrating out with moisture. Brush it off dry, and treat it as a warning sign.
- Dust and loose material: A wall that leaves powder on your hand will not hold an adhesive bond. Brush or vacuum it until it is clean and solid.
- Flatness: Lay a straightedge on the wall. Big dips and bumps are a reason to use furring, which you can shim, rather than adhesive, which can only fill so much.
Method 1: Adhesive Only
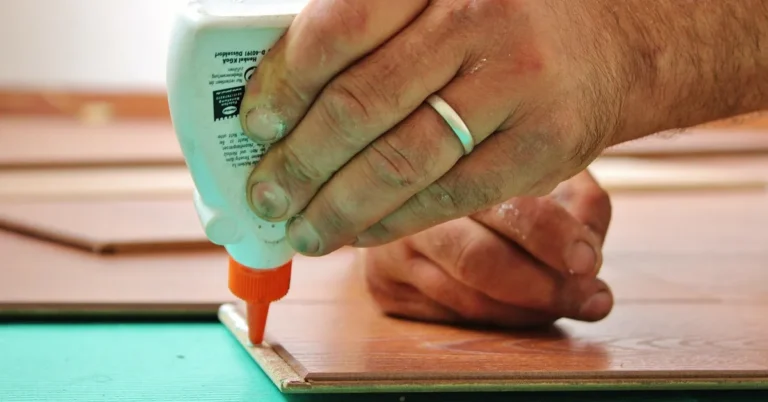
If your wall passes the checks above, this is the fastest method. Use an adhesive whose label specifically lists drywall or gypsum board on masonry or concrete. A general-purpose construction adhesive is not automatically rated for that, so read the cartridge. Our comparison of construction adhesive versus wood glue explains why standard PVA wood glue is the wrong product here.
- Clean the wall to bare, dry, solid masonry and let it dry fully.
- Cut the panels about 1/2 inch short of the floor so the bottom edge stays off any moisture. Cover that gap with baseboard.
- Apply the adhesive to the back of the panel in vertical beads, following the spacing and bead size printed on the adhesive label. Do not guess.
- Press the panel to the wall and brace it as the adhesive maker directs, since a fresh bond will not carry the weight of the board.
- Follow the label for open time and cure time before taping and finishing. Do not tape joints while the panel can still move.
If you need to trim a panel around a corner or window, our guide on whether you can cut Sheetrock with a circular saw covers what works and how to control the dust.
Method 2: Wood Furring Strips Anchored With Concrete Screws
This is the method the manufacturer literature describes for masonry walls, and it is the one to use if the wall is uneven or you want screws holding the board. In the USG catalog, suitable wood furring strips are spaced 16 inches on center and fastened to the masonry, and the panels are then attached with 1-1/4 inch Type W screws spaced 16 inches on center, with the long panel dimension running across the strips.
- Mark vertical strip lines 16 inches on center, and add a strip at each panel edge that lands between them.
- Use pressure-treated or PVC strips where they touch concrete in a basement, and consider an asphalt felt or plastic strip behind them if moisture is a concern.
- Drill pilot holes with a carbide bit of the diameter the concrete screw maker specifies. For Tapcon style 3/16 inch screws that is a 5/32 inch bit. Drill slightly deeper than the screw will go so dust has somewhere to sit.
- Drive the screws through the strips and into the wall until the head is snug and flush. Stop before you strip the hole in the masonry.
- Check the strips with a straightedge and shim any low spots before hanging board.
- Hang the panels across the strips, screw them at 16 inches on center, then tape and finish.
For a deeper look at anchor choices, bit sizes and what works in block versus poured concrete, see our guide on the best way to fasten wood to concrete.
Method 3: Foam and Z-Furring Channels
If the wall is cold and you want insulation, the USG catalog describes standing rigid insulation vertically against the masonry and holding it with Z-furring channels spaced 24 inches on center, with the narrow flanges fastened to the wall at 24 inches on center. The board is then screwed to the channels. This costs the most depth of the three methods but is the only one here that adds a thermal layer. Exposed foam plastic is often required by local code to be covered by a thermal barrier such as drywall, so check your local rules.
Outlets, Baseboards and Heavy Loads
Skipping framing has a cost: nothing solid sits behind the board. USG advises wood blocking around openings and where needed to support fixtures and furnishings. On a glued wall, plan to secure outlet boxes to the masonry itself, and do not count on the board or the adhesive to carry shelves, TVs or cabinets. Fasten those loads through the drywall into the wall or into wood blocking, using anchors rated for the load. Furring strips give you a real fastening surface, which is one more reason they are the better choice for finished living space.
Safety Notes
- Silica dust: Drilling or grinding concrete releases fine dust that contains crystalline silica, which is a lung hazard. Use a respirator rated for fine dust, eye protection and a vacuum or dust shroud on the drill.
- Adhesive fumes: Solvent-based adhesives need airflow. Read the label and open windows or run a fan.
- Power tools: A hammer drill is heavy and can grab. Keep both hands on it and a firm stance. If you are deciding between tools, see hammer drill versus rotary hammer.
Frequently Asked Questions
Can you glue drywall directly to a concrete wall?
Yes, on a dry, clean, sound wall using an adhesive labeled for drywall on masonry. It is not the standard manufacturer method, which uses furring strips or channels, so weigh the trade-offs before choosing it.
Should I use furring strips or adhesive on a basement wall?
Furring strips are the safer choice for most basements because they tolerate uneven walls, give you a screw-and-fasten surface for outlets and trim, and cost about 1-1/4 inches of wall depth with 1/2 inch board. Adhesive costs less depth but depends entirely on a dry, bare, flat wall.
Can you glue drywall to painted concrete?
Usually not reliably. Most adhesives bond poorly to painted or sealed masonry, so remove the paint back to bare concrete or use furring strips instead.
How far apart should furring strips be for drywall on concrete?
USG’s catalog specifies wood furring strips spaced 16 inches on center for masonry walls, with panels fastened using 1-1/4 inch Type W screws at 16 inches on center.
What if the concrete wall is damp?
Do not put drywall on it until the moisture source is fixed. Check with a taped plastic sheet, correct grading or drainage problems, and use rot-resistant furring material if any dampness remains a possibility.
Bottom Line
Glue drywall to concrete only when the wall is dry, bare, flat and clean, and only if you accept that nothing solid sits behind the board. Otherwise use 16 inch on center furring strips with concrete screws, which is the method the manufacturer literature actually describes, and add foam with Z-furring if you also need insulation. In every case, check for moisture first.
Sponsored / affiliate links. As an Amazon Associate I earn from qualifying purchases. I may earn additional commission from eligible campaigns.