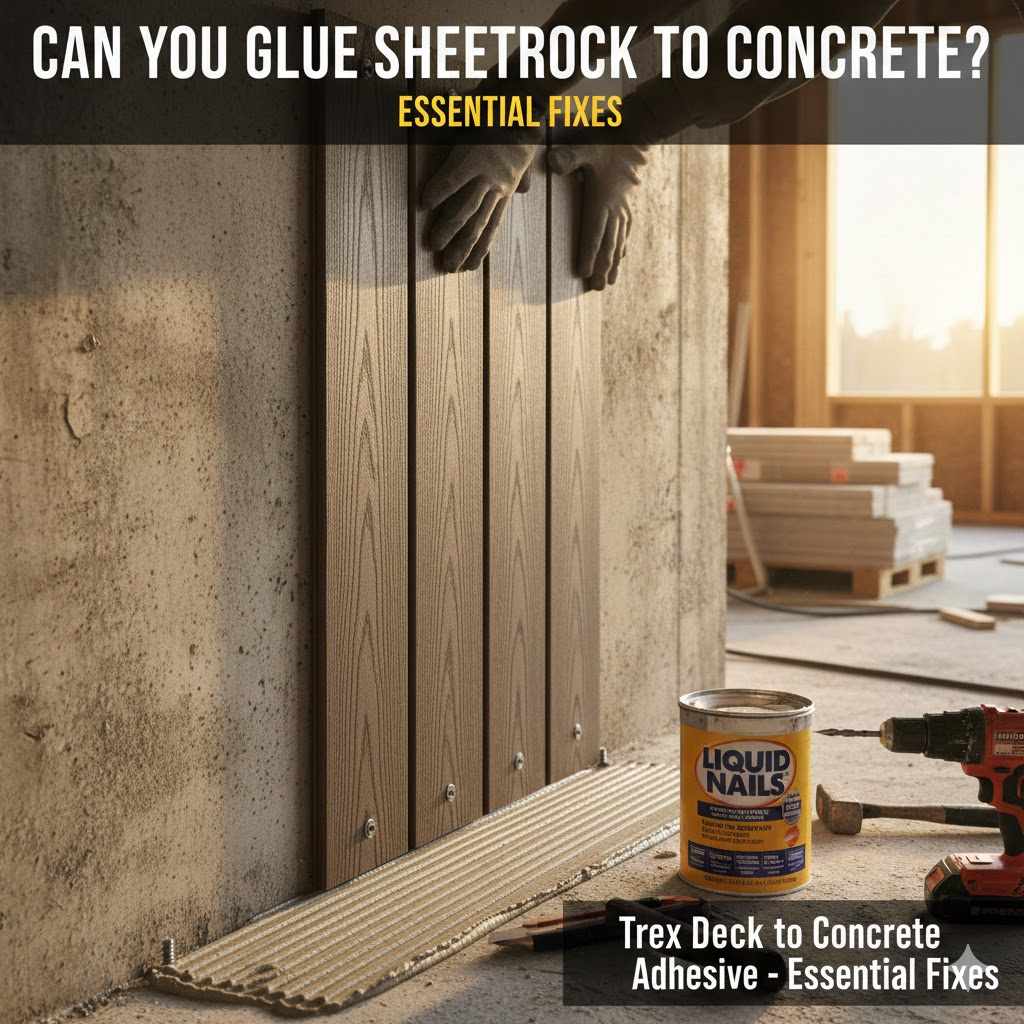
Can You Glue Trex Decking? Proven Essential Fixes
While specialized structural adhesives are used for limited composite trim connections, glue is generally not the approved fastening method for securing standard Trex decking boards to joists. Mechanical fasteners, like screws designed for composite materials, offer the necessary structural integrity and superior, lasting hold for your deck surface.
Hello there! I’m Md Meraj, and if you’ve ever stared at a slightly loose piece of composite decking—maybe a corner lifting in the summer heat—you’ve probably asked the big question: Can you glue Trex decking down?
It’s frustrating when high-tech materials don’t seem to play nice with simple fixes like glue. Trex (and other composite brands) reacts differently than plain wood. Using the wrong adhesive can lead to gaps, failure when temperatures change, or worse—voiding your warranty. That sounds scary, but don’t worry!
This guide is here to clear up the confusion. We will explore exactly when and how an adhesive might be appropriate for small repairs and, most importantly, confirm the right way to keep every board rock-solid for decades. Let’s dive in and get your deck fixed the right way!
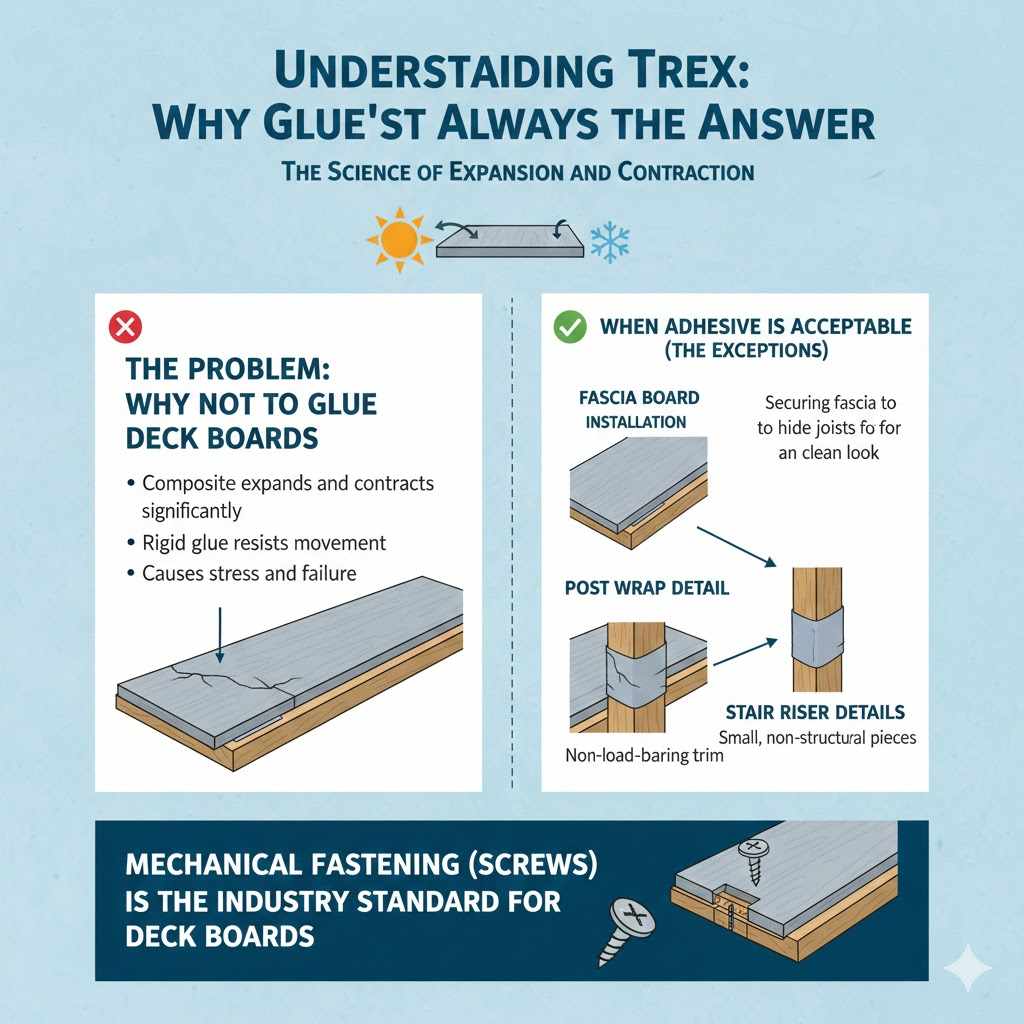
Understanding Trex: Why Glue Isn’t Always the Answer
Trex decking is fantastic stuff. It resists rot, bugs, and harsh weather better than natural wood. However, these benefits come from its unique makeup: a blend of recycled wood fibers and plastic resins. This composite material expands and contracts significantly more than solid lumber as temperatures rise and fall.
The Science of Expansion and Contraction
Think about a black road in the middle of a hot summer day. It gets really soft and pliable, right? Composite decking does something similar, though less dramatically. When the sun heats up your deck boards, they naturally grow slightly longer and wider. At night, or when it gets cold, they shrink back.
If you use standard construction adhesive—even very strong ones—to bond a long Trex board directly to a wood or metal frame, here’s what happens:
- The adhesive sets hard, essentially locking the board in place.
- When the board tries to expand in the heat, the rigid glue resists the movement.
- This internal tension creates stress, leading to the surface cracking, the glue peeling away from the plastic composite, or the fasteners pulling out.
Because of this constant movement, the industry standard—and the method recommended by Trex manufacturers—relies on mechanical fastening. We need to allow the material to move slightly while still keeping it secure. For the main deck surface, this means screws are king.
When is Adhesive Acceptable on a Trex Deck? (The Exceptions)
While we won’t be gluing the main deck boards down to the joists, there are specific, limited applications where a quality structural adhesive is not only allowed but recommended for a flawless finish. These generally involve non-structural connections, primarily dealing with trim, fascia, or post wraps.
1. Fascia Board Installation
Fascia boards wrap around the outer edge of your deck structure to hide the joists. While they can be screwed, many professionals use adhesive for a cleaner look, as screws on the visible edges can be unsightly. In this case, you often glue the fascia board to the existing frame or railing components.
2. Post and Stair Wrap Details
If you are wrapping wooden posts with Trex sleeves or covering stair risers, these small, often non-load-bearing pieces can be excellent candidates for adhesive. They don’t span long distances, so the expansion/contraction movement is minimal compared to a 16-foot deck board.
3. Securing Minor Trim Pieces
Tiny end caps or specialized composite trim pieces might require a dab of specialized glue to lock them into place, often to prevent rattling or to create a perfectly mitered corner where fasteners are difficult or impossible to use neatly.
The Best “Glue” for Trex: Selecting the Right Adhesive
If your project falls into those approved trimming categories, choosing the correct product is vital. You cannot grab just any Gorilla Glue or basic wood glue. Composite materials require a specific chemical bond.
Essential Adhesive Types for Composite Materials
When looking for an adhesive, the key word is structural. You are looking for products engineered to bond plastic, vinyl, or mixed-material composites. Always check the label to confirm it explicitly states it works on composite decking materials.
| Adhesive Type | Best Used For | Why It Works |
|---|---|---|
| Polyurethane (PU) Construction Adhesive | Fascia attachment, securing trims, low-movement areas. | Offers strong grab while maintaining some flexibility to handle minor shifts. |
| Specific Composite Decking Adhesives (e.g., those marketed for hidden fastener systems) | Small surface areas where bonding composite to composite is needed. | Chemically formulated to grab both the polymer and filler in Trex. |
Pro Tip: Always apply a bead of adhesive according to the manufacturer’s temperature guidelines. Applying sticky goo when it’s freezing outside or blistering hot can seriously compromise the bond strength before it even cures!
Step-by-Step Guide: Fixing Decking That Needs Gluing (Trims & Small Repairs)
If you are dealing with a loose piece of trim or a very small section that needs bonding, follow these steps carefully. Remember, this assumes you have confirmed the adhesive is safe for your Trex product line.
Tools You Will Need:
- The appropriate structural adhesive (as discussed above).
- Caulking gun (if using a cartridge).
- Clean rags and a mild soap/water solution or rubbing alcohol.
- Clamps, heavy weights, or securing blocks.
- Safety glasses and gloves.
The Bonding Process:
- Prepare the Surface: This is the most critical step for any adhesive bond! You must remove all dirt, grease, mold spores, and loose debris. Use a mild detergent wash and let the area dry completely. For extra strong adhesion on composite surfaces, gently scuff the contact areas with fine-grit sandpaper (like 120-grit). Wipe down the dusty surfaces thoroughly with a cloth dampened with rubbing alcohol.
- Test Fit: Apply the piece without glue first to ensure it fits snugly where it needs to go. Mark reference lines if necessary.
- Apply Adhesive: Using your caulking gun, apply a continuous, unbroken bead of adhesive to one of the surfaces. Do not over-apply; a heavy bead is harder to clamp and risks squeezing out excessively. For flat surfaces, apply the bead in a zig-zag or S-pattern to ensure full contact.
- Mate the Pieces: Quickly bring the two surfaces together. Press them firmly to ensure the glue spreads out completely between the two parts.
- Clamp and Cure: Because composite glue needs time to set, you must clamp or weigh down the glued area securely. For trim, use band clamps or bracing blocks. For fascia, you might need weighted boards resting on the piece. Check your adhesive’s technical data sheet, but expect curing times to range from 12 to 48 hours before the clamps can be removed and the deck is safe to walk on again.
- Clean Up: Immediately wipe away any squeeze-out with a damp cloth before the adhesive hardens completely. Cured adhesive is extremely difficult to remove from the textured surface of Trex.
The Real Fix: How to Secure Loose Trex Decking Boards (The Screw Method)
Now that we’ve covered where glue might work, let’s focus on the majority of home repair situations: A standard deck board is lifting between the joists, or a gap is appearing. For this, we must use the appropriate mechanical fastener.
Using the correct specialized fasteners prevents future movement problems that glue would certainly cause. For beginners, the secret to a flawless, screw-free-looking deck is using a hidden fastener system, which works wonders with composite boards like Trex.
Choosing the Right Fasteners for Composite Decking
Regular galvanized screws designed for pressure-treated lumber are not ideal for composites. The chemicals in PT lumber can sometimes corrode regular steel, and standard wood screws don’t always have the correct head type or thread design to grip the plastic/wood blend securely.
Essential Screw Features for Trex:
- Corrosion Resistance: They must be made of stainless steel or specifically coated (often ceramic-coated) to resist moisture and chemical reactions.
- Recessed Head: They need a head that sits slightly below the surface, allowing the composite material to “swallow” the head slightly, creating a tidy appearance.
- Cutting Tip: Specialized composite screws have sharper tips that cut through the tough material without forcing the composite fibers apart, preventing stress cracks.
Method 1: The Face Screw (The Quick Fix)
If you are fixing an immediate safety hazard or only one or two boards, the quickest way is face-screwing. This is less pretty but highly effective and structurally sound.
Face Screwing Steps:
- Locate Joists: Find the underlying support joists. You must screw into the joist beneath the loose board. If the gap is in the middle of the board span, you may need to add a mid-span support joist first!
- Select Screws: Use quality, specialized composite deck screws that match the color of your Trex as closely as possible.
- Pre-Drill (Optional but Recommended): Although many specialized screws claim to be “self-drilling,” pre-drilling a pilot hole through the Trex board and slightly into the joist prevents cracking, especially near board ends. Use a countersink bit designed for composites to ensure the head sinks perfectly flush or slightly below the surface.
- Drive the Screw: Drive the screw straight down using a variable-speed drill. Stop immediately when the head is flush or just below the surface. Never overdrive composite screws, as this will create an unsightly divot over time as the material loosens around the screw.
- Filling (Optional Aesthetic Step): For a cleaner look, you can purchase specialized composite repair putty (not glue) in colors matching your decking. This putty is often slightly flexible and used to fill the screw head for a near-invisible finish.
Method 2: Hidden Fasteners (The Professional Method)
Trex boards often come with grooved edges specifically designed for hidden fastening clips. This is the absolute best way to install or re-secure decking because it hides the screws completely, allows for movement, and provides lateral support across the entire board span.
Trex offers proprietary clips, but other brands work too. If you are working with a pre-existing deck that was face-screwed and now needs a repair board replaced, you can sometimes use adjustable hidden clips or specialized screw-down hidden clips that anchor through the edge.
How Hidden Fasteners Work:
- The clip hooks into the groove on the side of the decking board.
- The base of the clip is attached (usually by screws) to the side of the underlying joist.
- When the next board goes down, the clip is sandwiched between the two boards, holding them tightly together without visible fasteners on the surface.
If you need to install these on an existing deck where the joists are exposed (like replacing a board), the process is similar to face-screwing, but you attach the clip system to the joist edge first, and then slide the new board over the clips before securing the clips down to the joist structure.
To ensure your fasteners are compatible and perform as expected under load, it is always a good idea to reference installation guides directly from Trex. They offer detailed documentation, such as the guidelines found on sites like the Building Science Corporation, which often detail material tolerances and best practices for fasteners used with materials like those manufactured by Trex, providing structurally sound methods for builders.
Troubleshooting Common Deck Repair Scenarios
Even when you use the right product, things can go sideways. Here are a few common scenarios where people often mistake a mechanical failure for an adhesive failure, and how to fix them safely.
Scenario A: The Board “Pops Up” After Fastening
If you screwed down a board and it slowly lifted back up, even though the screw seems tight in the joist, this points directly to insufficient material hold. The screw is tight in the wood joist, but the soft composite around the screw head is yielding.
- The Fix: Back the screw out. If the hole in the Trex board is widened or stripped, you cannot use that hole again. You must shift the board slightly, find an un-stressed spot, and drive a new fastener through that spot into the joist. Alternatively, drill a slightly wider pilot hole, clean it out, and use a slightly longer, specialized composite screw that engages more deeply with the underlying wood.
Scenario B: Gaps Between Boards Getting Too Wide
This is expansion and contraction working naturally, especially if the deck was installed without enough spacing between the boards during the original build. Since we cannot glue it to hold it closed, we must adjust the fastening method.
- The Fix: If you used hidden clips, remove the board, check the clips for damage, and reattach them. Then, use a spacer block between the boards during re-installation to maintain the correct gap for seasonal changes. If you face-screwed, you may need to carefully back out the fasteners, slightly nudge the board tighter (use heat gently if needed to encourage slight shrinking), and then re-drive the screws into fresh pilot holes.
Scenario C: Repairing Cracked Composite (Non-Structural)
Sometimes, an end cap or a piece of railing might have a clean, thin crack running across it, perhaps from impact, not temperature. Here, a specialized adhesive is the correct route.
- The Fix: Use the recommended Polyurethane construction adhesive. Apply a very thin bead into the crack. Clamp the pieces tightly together (as described in the gluing section) and use weights or clamps for at least 24 hours. This creates a strong internal bridge across the crack.
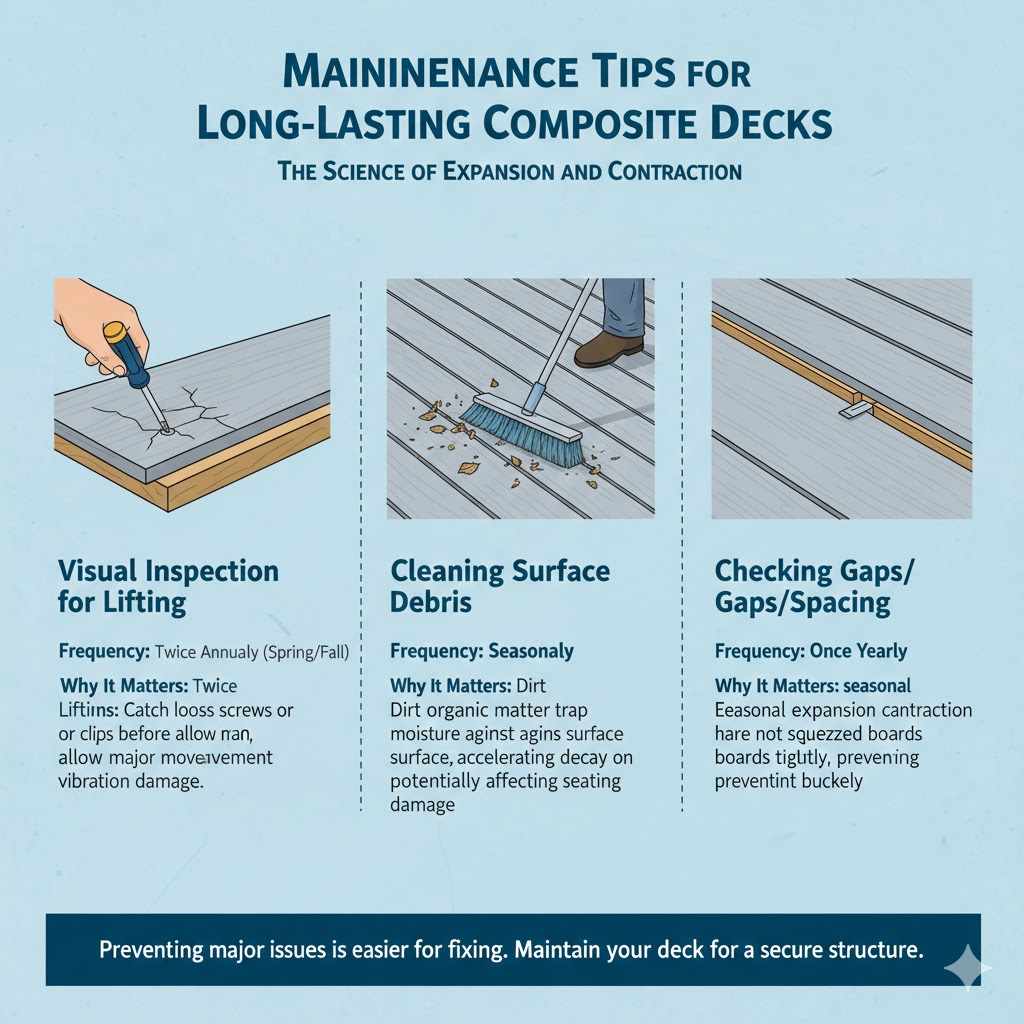
Maintenance Tips for Long-Lasting Composite Decks
Preventing major issues is always easier than fixing them later. Good maintenance helps ensure your deck structure remains tight and secure, whether you rely on screws or small adhesive applications.
| Maintenance Task | Frequency | Why It Matters for Fastening |
|---|---|---|
| Visual Inspection for Lifting | Twice Annually (Spring/Fall) | Catch loose screws or clips before they allow major movement or vibration damage. |
| Cleaning Surface Debris | Seasonally | Dirt and organic matter trap moisture against the board surface, accelerating decay on the subframe and potentially affecting fastener seating. |
| Checking Gaps/Spacing | Once Yearly | Ensures seasonal expansion/contraction has not squeezed the boards too tightly, preventing buckling. |
FAQ: Gluing and Fastening Trex Decking
Q1: If I use standard wood glue on Trex, will it hold forever?
A: No, standard wood glue or silicone caulk will likely fail quickly. Trex’s surface material (the plastic/polymer cap) does not absorb porous glues well. The material movement will easily break the weak bond created by non-specialized adhesives.
Q2: Can I glue a completely warped Trex board back into shape?
A: A severely warped board should typically be replaced, not glued. Glue cannot overcome the significant structural stress causing the warp. If the warp is very minor, replacing it with specialized fasteners is safer than trying to force it straight with adhesive pressure.
Q3: Is it okay to use plastic/vinyl cement on my Trex deck?
A: You must check the packaging carefully. While some specific deck adhesives are engineered for this, using generic PVC or vinyl cement can chemically eat away at or soften the protective surface layer (the cap) of your Trex, leading to discoloration or surface failure.
Q4: My contractor used glue on my new deck surface. Should I be worried?
A: Yes, you should ask them immediately why they used adhesive for the primary board-to-joist connection. If they only used glue between the decking and underlying pressure-treated lumber joists, it risks delamination due to movement. Always confirm if the board is only glued or if they also used screws spaced correctly.
A: If the clip is loose on the joist, remove the adjacent board slightly, re-secure the clip properly with approved fasteners into the joist, and re-secure the decking board over it. If the clip itself is cracked, replace the clip entirely and secure it into a new pilot hole in the joist.
Q6: Do I need to seal the cut ends of Trex boards after installation?
A: Trex recommends applying a bead of their approved sealant or high-quality polyurethane sealant to the exposed ends of the core material if you cut the boards during installation (especially common for rail or picture-frame borders). This prevents moisture from seeping into the internal wood fibers.
Conclusion: Confidence in Your Deck Structure
When it comes to “Can you glue Trex decking?” the answer boils down to precision. For securing those essential decking boards directly to the frame where load bearing is happening, forget the glue bottle! Rely instead on high-quality, purpose-built composite screws or hidden clip systems. These mechanical fasteners respect the natural expansion and contraction of the material, ensuring your deck stays level, silent, and safe for years to come.
Glue earns its place only on the cosmetic side jobs—fascia trimming, securing small end caps, or repairing minor cracks—and even then, only use the heavy-duty structural adhesives specified for composite plastics. By understanding the material science, you build confidence not just in this one repair, but in every DIY project you tackle. Go ahead, grab those specialized screws, and know that your repair will last as long as the deck itself. Happy building!