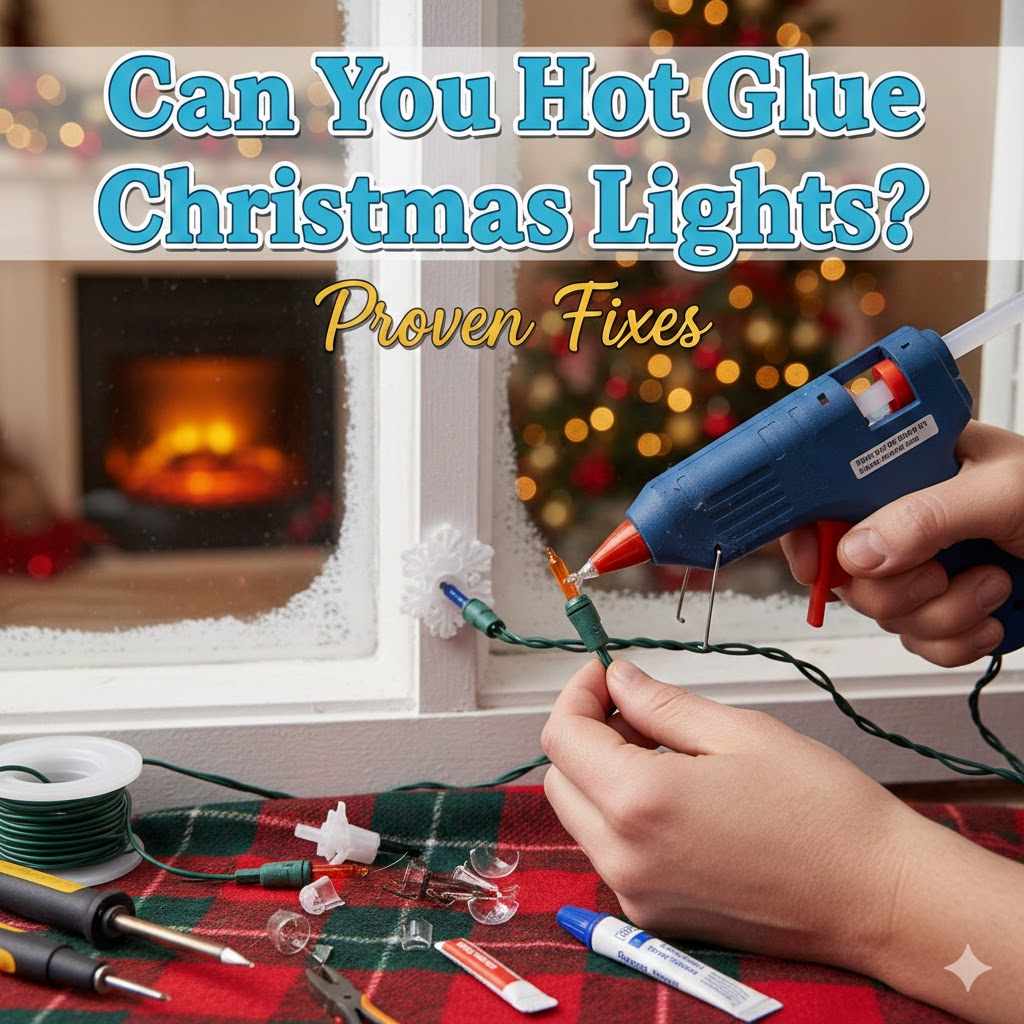
Can You Hot Glue Christmas Lights? Proven Fixes
Yes, you can generally use hot glue to attach Christmas lights, but only for temporary, low-heat applications on safe surfaces like wood or cardboard. For long-term outdoor use or near delicate finishes, hot glue is not the best choice due to potential melting, poor adhesion when wet, and fire risk if it touches hot bulbs.
Putting up holiday lights should be fun, not frustrating! We’ve all been there—staring at tangled wires and searching for a sticky solution that actually holds them up. You might be thinking, “Can you hot glue Christmas lights?” It’s a super common question because a glue gun is quick and readily available in most workshops. However, using hot glue improperly can lead to melted bulbs, sticky messes, or lights falling down right when guests arrive.
Don’t worry! I’m Md Meraj, and I want to walk you through exactly when hot glue works, when it fails spectacularly, and the proven, safer alternatives you can use. We’ll make sure your display looks sharp and stays put all season long.
Why Hot Glue Seems Like a Good Idea (and When It Is)
When you’re inside, maybe decorating a mantelpiece or framing a wooden sign for the holidays, the hot glue gun feels like a DIY superhero’s tool. It dries fast and bonds surprisingly well to many porous materials. But there’s a crucial difference between gluing fabric onto plywood and sticking lights near an exterior window.
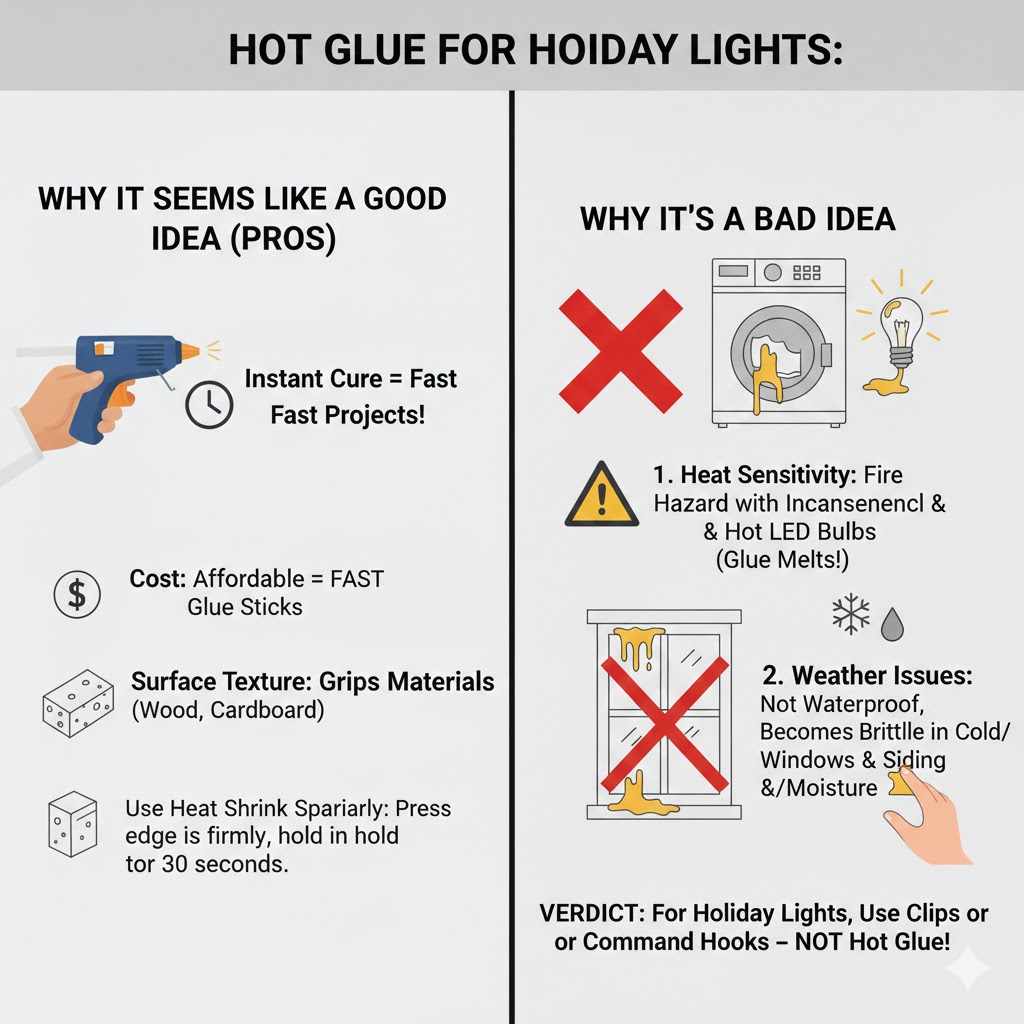
The Pros and Cons of Using Hot Glue for Lights
For beginners, knowing the trade-offs is the first step toward a great result. Hot glue offers speed, but that speed comes with limitations.
- Speed: Hot glue sets in seconds. This is much faster than craft glues or adhesives that need hours to cure.
- Cost: Glue sticks are very affordable and you likely already own a glue gun.
- Surface Texture: It adheres well to rougher, porous surfaces like unpainted wood, cardboard, or rough plastic where other tapes might peel.
However, the downsides often outweigh the benefits when dealing with electrical components:
- Heat Sensitivity: This is the biggest danger. Incandescent bulbs get very hot. If the glue touches a lit bulb, it will melt, potentially dripping onto the bulb or even dripping near flammable materials, creating a fire hazard. Even some modern LEDs generate noticeable warmth.
- Weather Issues: Outdoor moisture and temperature swings cause hot glue to become brittle and lose its grip quickly. It simply isn’t waterproof.
- Removal Mess: Hot glue leaves behind gummy, stringy residue that is notoriously difficult to clean off permanent fixtures like siding or window frames.
The Golden Rule: Temperature and Surface Matter Most
Before you grab that glue gun, let’s establish where it is safe to use and where you absolutely should not.
Safe Use Cases for Hot Glue and Lights (Indoor Only)
If you are securing LED lights that generate very little heat to a craft project or an interior surface that will never be near a heat source, hot glue can work perfectly fine. Think of temporary, non-load-bearing decorations.
- Craft Projects: Attaching light strings around a homemade wreath base (burlap or wire).
- Cardboard/Poster Board Displays: If you are building an indoor holiday scene.
- Temporary Wood Accents: Gluing lights into the groove of a painted wooden sign kept indoors.
When to Avoid Hot Glue Immediately
If any of these apply, put the glue gun down and pick up an alternative solution. Safety first, always!
| Scenario | Why Hot Glue Fails |
|---|---|
| Outdoor installations (Siding, brick, gutters) | Moisture, UV rays, and temperature swings cause failure. |
| Incandescent Bulbs (Hot surface contact) | Melting risk, leading to fixture failure or fire danger. |
| Smooth, Non-Porous Surfaces (Vinyl siding, metal) | Poor adhesion; the glue often peels off easily when cold. |
| Permanent Fixtures | Difficult removal leaves significant, sticky residue. |
Step-by-Step Guide: Applying Hot Glue Safely (For Approved Indoor Uses)
If you’ve determined your indoor project fits the low-heat criteria, following these steps ensures you get the cleanest, safest bond possible.
Tools You Will Need:
- Low-temperature glue gun (Recommended for plastic light casings)
- Standard glue sticks
- Small wooden craft stick or craft utensil (for spreading/securing)
- Rubbing alcohol or mineral spirits (for cleanup)
The Hot Glue Application Process:
- Prepare the Surface: Clean the area where the light wire will rest. For wood, this means brushing off dust. If gluing near painted surfaces, ensure the paint is fully cured and in good condition.
- Prep the Wire: Keep the light strand unplugged until all gluing is complete. If you are using older, multi-wire strands, avoid placing glue directly on the wires themselves; target the insulation jacket.
- Use Small Amounts: The biggest mistake is globs of glue. Heat transfer happens fast. Apply a small dab of glue directly to the surface (like the frame you are decorating), not onto the wire itself. Less is truly more here.
- Place and Press Gently: Immediately (within 2-3 seconds), place the wire onto the dab of glue. Press down gently with your finger (use a finger cot or the back of a spoon if the glue is still very hot for safety!). Hold for only 10–15 seconds until it sets.
- Avoid Bulb Proximity: Ensure the glue spot is at least an inch away from any actual light bulb or LED node.
- Test After Cooling: Let the entire glued section cool completely before plugging the lights in. Once plugged in, watch closely for 10 minutes to ensure no melting or smoking occurs before walking away.
Remember, for anything on the outside of your home, like securing lights to the eaves or deck railing, skip the hot glue. Electrical codes and best practices for exterior decoration recommend specific, durable fasteners designed to handle the elements.
Proven Fixes: The Best Ways to Secure Christmas Lights (Outdoor & Permanent)
For most people asking if they can hot glue lights, the answer they truly need is, “What is the best, easiest way to secure these lights outside?” Here are the workshop-tested methods I rely on every year to keep my exterior displays tidy and safe. These methods are far superior to relying on meltable glue when dealing with weather and voltage.
Method 1: The Power of Plastic Clips (The Go-To Solution)
Plastic light clips are cheap, effective, and designed for the job. They offer excellent adhesion without direct contact with the light casing itself, preventing heat damage and water intrusion. These are available in specific shapes for roofing, siding, and gutters.
Types of Professional Light Clips:
- All-Purpose Shingle Clips: These hook securely under asphalt shingles without poking holes.
- Gutter Clips: Designed specifically to hook onto the lip of a standard gutter system.
- J-Hooks/Straps: Ideal for wrapping around larger outdoor elements like porch columns or tree limbs, offering flexibility.
When using clips, make sure they are rated for the size of the light cord (e.g., C6, C9, or mini-lights). Placing a clip roughly every 12 to 18 inches provides robust support. You can learn more about proper outdoor lighting standards from resources focused on electrical safety, like those provided by the National Fire Protection Association (NFPA) standards for holiday wiring when considering long-term installations.
Method 2: Specialized Weatherproof Adhesives (For Hard-to-Clip Surfaces)
If you absolutely cannot use clips (perhaps you are mounting lights onto stucco, concrete, or a smooth painted surface), you need an adhesive designed for exterior construction. These look like super-strong glue but are actually specialized polymers or silicones that remain flexible and waterproof through temperature extremes.
Top Adhesive Recommendations:
- Silicone Caulk (Clear Exterior Grade): While slower to set (usually requiring clamps or tape overnight), it remains flexible and waterproof for years. Apply a small bead, press the wire in, and let it cure fully (check product instructions, often 24 hours) before applying power.
- Construction Grade Adhesive (e.g., PL Premium or Liquid Nails Exterior): These offer industrial-strength grip but can sometimes be overkill and leave tough residue if not used carefully. Use only a tiny dot behind the wire insulation, away from the bulbs.
Method 3: The Woodworker’s Secret Weapon—Staples (When Attaching to Wood Structures)
If you are attaching lights to a wooden structure, like a fence post, shed trim, or a wooden planter box, use specific fasteners made for low-voltage wire. Never use a standard metal or electrical staple directly on the wire insulation, as the metal sharp edges can easily cut the wire when the wood expands or contracts.
The correct tool is a plastic-insulated cable staple (or low-voltage staple). These have a smooth, wide plastic channel that protects the wire inside. Use a manual staple gun or a low-power electric tacker specifically designed for this size.
Quick Comparison of Fastener Types
| Fastener Type | Best Surface | Durability |
|---|---|---|
| Plastic Light Clips | Gutters, Shingles, Vinyl Siding | Excellent (Easy Removal) |
| Exterior Silicone Adhesive | Stucco, Metal, Smooth Trim | Very Good (Permanent) |
| Insulated Cable Staples | Wood Fences, Trim Boards | Excellent (Requires Power Tool) |
| Hot Glue | Indoor crafts/cardboard only | Poor Outdoors/Heat |
Dealing with Straggling Wires: Techniques for Neatness
The real beauty of a professional-looking display comes from tight, neat wire runs. This is where adhesive hacks usually come into play, but we need robust methods.
Using Wire Ties or Twine
If you are wrapping lights around structural elements like porch posts or trees, resist the urge to wrap the wire too tightly. Instead, use these gentle methods:
- Velcro Wire Ties: These are fantastic because they are reusable, gentle on the wire insulation, and offer a strong hold for wrapping around railings or posts.
- Natural Jute or Hemp Twine: For a rustic look, use natural twine. Loop the twine around the wire and the support structure, tying a simple knot that won’t pull tight enough to crush the wire insulation. This blends nicely on wood.
Concealing Wires on the Ground
If your lights run across grass or sidewalks, never just rely on glue or tape. The best approach involves creating a temporary, safe pathway.
- Wire Covers/Ramps: Heavy-duty rubber or plastic cable ramps cover the lights as they cross walkways. These protect the wires from foot traffic and cars, which is vital for electrical safety.
- Temporary Burying (For Very Short Runs): On lawn areas, you can carefully use a dull garden trowel to lift a shallow 1-inch trough, lay the wire in it, and gently cover it back over. Never leave wires exposed where they can be damaged by mowing equipment.
Safety First: Heat, Wiring, and Power Management
As a fellow DIYer, the most important lesson I’ve learned is that cutting corners on safety measures means paying for repairs (or worse) later. Holiday lights introduce thousands of extra watts into your home’s electrical system, so proper mounting matters.
Understanding Heat Output
This is the core reason hot glue is dangerous around incandescent bulbs:
Incandescent lights create light by heating a filament until it glows. The surface temperature near the bulb socket can reach over 300°F (150°C). Hot glue melts around 140–180°F (60–82°C). If hot glue contacts that filament or the surrounding plastic housing, it melts immediately, risking wire exposure or dripping onto flammable surfaces like dry foliage or shingles. LEDs, on the other hand, run much cooler—usually only warm to the touch—making them inherently safer to mount with marginally effective adhesives like a low-temp hot glue.
Check Your Connections
Whether you glue, clip, or staple your lights, always inspect the connections before plugging them in.
- Ensure every plug connection is snug and secure.
- Do not use tape (electrical or masking) to secure plugs together; only use approved, UL-rated outdoor connection boxes or weatherproof tape sleeves designed for holiday wiring.
- Always plug exterior lights into a Ground Fault Circuit Interrupter (GFCI) outlet, which is standard on all modern outdoor receptacles, to prevent shocks in wet conditions. For more on residential electrical safety, organizations like the U.S. Consumer Product Safety Commission (CPSC) offer reliable guidelines.
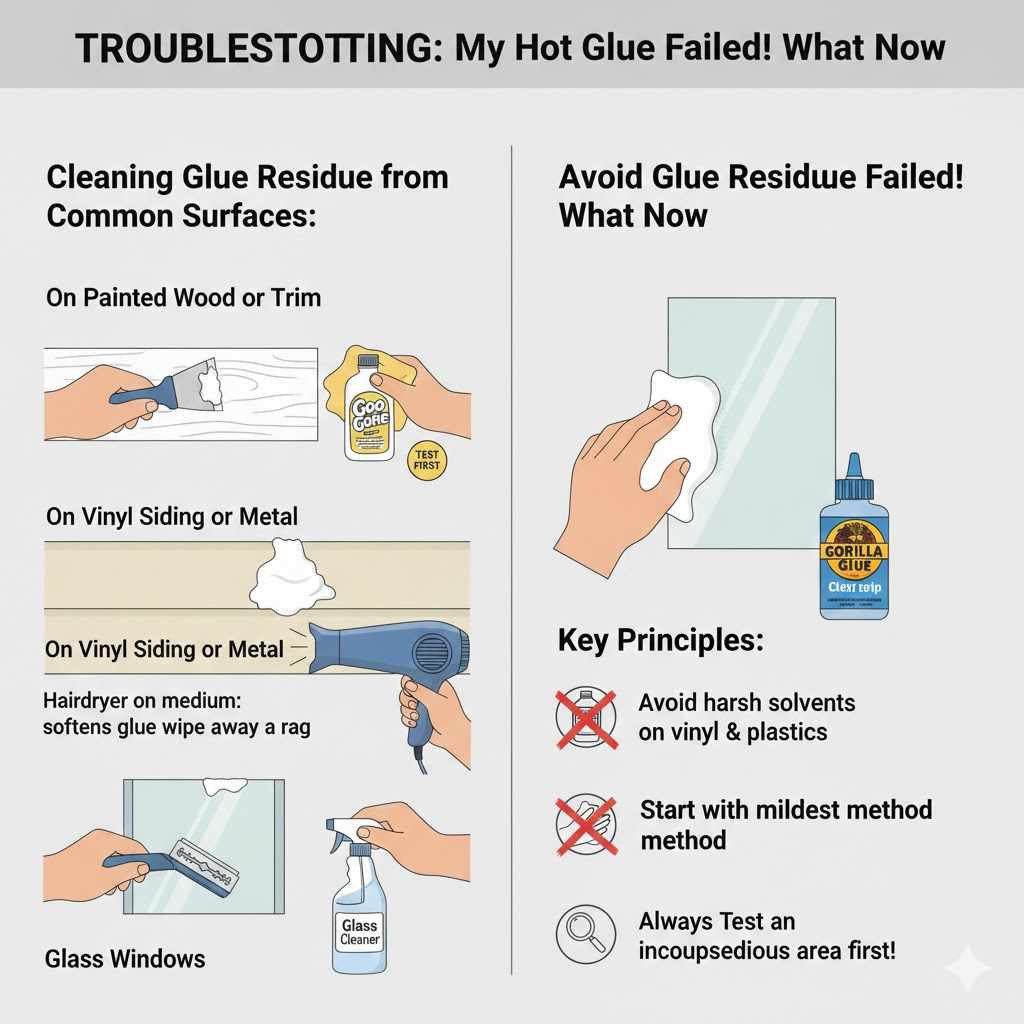
Troubleshooting: My Hot Glue Failed! What Now?
If you already tried hot glue outside and now you have messy, hardened blobs stuck to your house, don’t panic. We can clean this up together!
Cleaning Glue Residue from Common Surfaces:
The key is to soften the glue without damaging the paint or siding underneath. Start with the mildest method first.
- On Painted Wood or Trim: Gently scrape off the bulk with a plastic putty knife or an old credit card edge. For the residue, try applying a small amount of mineral spirits or Goo Gone on a soft cloth and rubbing gently in a circular motion. Test an inconspicuous area first!
- On Vinyl Siding or Metal: Never use harsh solvents on vinyl, as they can cause clouding or etching. A hairdryer set on medium works wonders. Heat the glue blob gently until it becomes soft and tacky, then wipe it away with a soft rag. The high heat of a hairdryer won’t reach melting temperature for the underlying material as fast as a glue gun does, but it softens the glue enough to pull it off.
- On Glass Windows: Scrape very gently with a plastic razor blade or razor blade scraper held at a shallow angle (about 20 degrees). Follow up with glass cleaner.
FAQ: Beginner Questions About Gluing Christmas Lights
Q1: Will hot glue burn my siding if I use it outside?
A: Not usually the glue itself, but the bulb near the glue might. Hot glue has a low melting point. If the glue softens and drips onto a very hot incandescent bulb or onto dry flammable material, it creates a potential risk. Stick to certified outdoor fasteners for exterior walls.
Q2: Is it safe to glue lights onto metal poles?
A: It is safe for the light wire itself, but the bond is usually weak. Metal gets very cold in winter, causing standard hot glue to instantly become brittle and fail. Use specialty weatherproof adhesives or metal-rated plastic ties instead.
Q3: What’s the best type of glue if I must use glue indoors?
A: If you need super-fast setting indoors, use a low-temperature craft glue gun. This melts the glue at a lower temperature than a standard gun, significantly reducing the chance of melting delicate light wire casings.
Q4: Can I use electrical tape instead of hot glue?
A: For very short temporary fixes, maybe, but it’s not recommended. Standard electrical tape stiffens when cold and may peel off paint or siding when you remove it, taking some finish with it. Use specialized plastic clips for outdoors.
Q5: How far apart should I space the fasteners for exterior lights?
A: For mini-lights, aim for one fastener (clip or staple) every 12 inches for a tight, professional look. For larger C7 or C9 bulbs, space them closer, about 8 to 10 inches apart, especially around corners.
Q6: Are LED lights safe to attach with hot glue even outside?
A: No. While LEDs produce far less heat, outdoor elements like rain, ice, and UV exposure will break down the hot glue bond within weeks, causing the lights to fall regardless of bulb type.
Conclusion: Choosing Durability Over Speed
When tackling holiday decorating, remember that durability always trumps immediate speed. While the allure of the hot glue gun is undeniable—it’s fast, easy, and right there on the bench—it’s simply not engineered for the outdoor rigors of holding electrical wiring through rain, cold, and temperature swings.
For indoor, non-heated craft projects, feel free to embrace that hot glue gun! It’s quick and easy for your interior accents. But the moment those lights venture outside, upgrade your method. Invest a few dollars in proper plastic light clips, insulated staples for wood, or weather-rated construction adhesive.
These solutions ensure your display stays beautiful, safe, and intact until it’s time to take them down in January. You’ve got this! Enjoy the process, work safely, and let’s light up the neighborhood with sturdy, well-placed decorations this year.