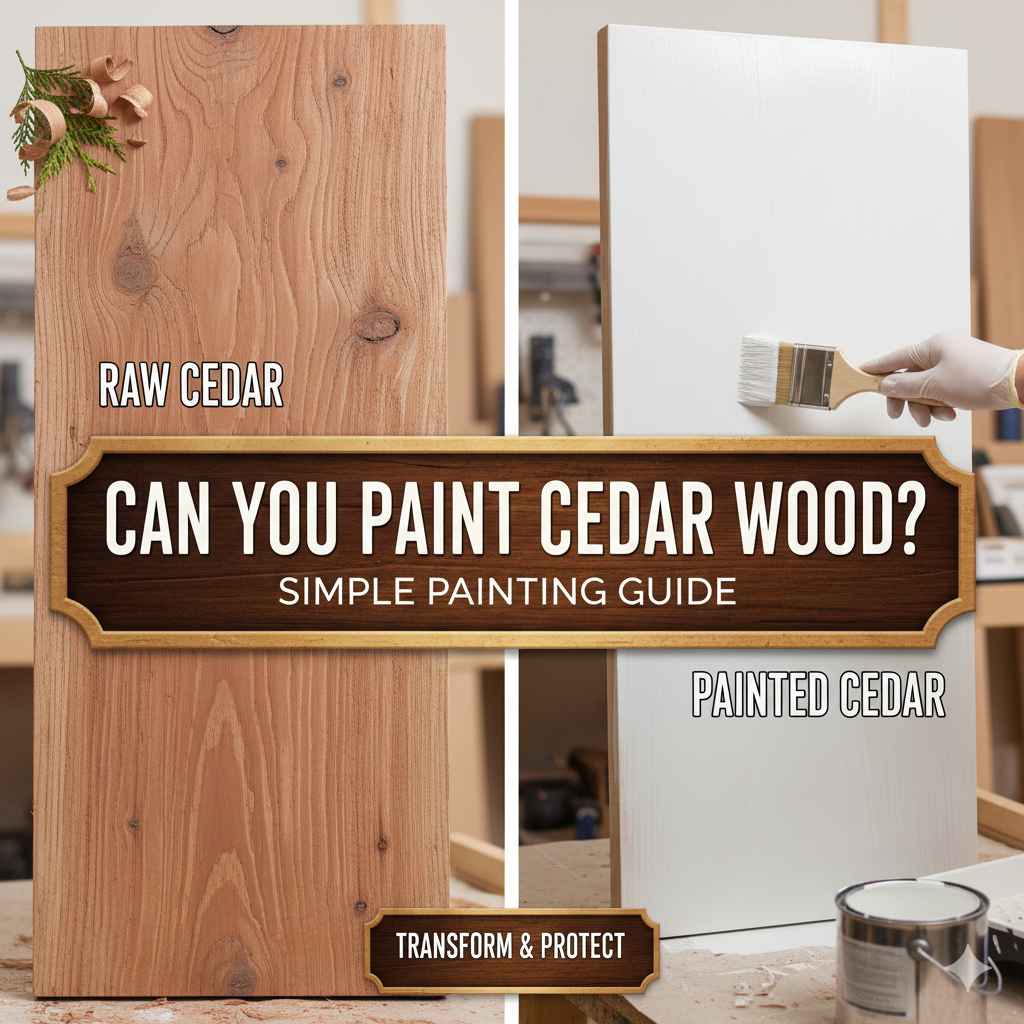
Can You Paint Cedar Wood? Simple Painting Guide
Thinking about painting cedar wood can feel a little tricky at first. Many people wonder, “Can You Paint Cedar Wood? Complete Guide” and worry about the best approach. Don’t stress! Painting cedar is totally doable, and we’re here to help you get great results. This guide will make everything easy, walking you through each step. Get ready to discover everything you need to know about painting cedar wood.
Is Painting Cedar Wood Possible and Worth It?
You might be asking if painting cedar is even a good idea, or if it will be a waste of time. The answer is yes, you absolutely can paint cedar wood, and it can be a fantastic choice for many reasons. Cedar is naturally beautiful, known for its warm tones and lovely grain, but painting it allows you to customize the color to match your style. Painting cedar can also help to protect it from the elements, especially sunlight, moisture, and pests, extending its lifespan.
Sometimes, the natural color isn’t the right fit. Perhaps you want to match your siding to the color of your trim. Or maybe the natural color has faded and you want to bring your wood back to life. With the right techniques and preparation, painting cedar can be a rewarding project that elevates the look and durability of your wood.
Advantages of Painting Cedar Wood
Painting cedar offers several benefits. It’s a great way to personalize the wood and protect it.
Enhanced Aesthetics: Painting cedar lets you choose any color, allowing you to match your home’s exterior to your personal taste. You can create a uniform look, coordinate with your surroundings, or simply refresh faded cedar. A fresh coat of paint brightens the wood, improving your curb appeal and making your home look well-maintained.
The visual impact is significant. Painting lets you make a statement with your home’s design. If the natural look of cedar doesn’t suit your style, painting gives you the freedom to express yourself. Choosing the right colors and finishes can also highlight the architectural features of your home, making it stand out in a unique and appealing way.
Increased Protection: Paint acts as a shield, preventing damage from weather elements like rain, sun, and snow. It adds a protective layer that helps resist rot, insects, and other problems. Cedar is durable on its own, but paint boosts its resilience. This can prevent warping, cracking, and other damage, ultimately saving you money on maintenance and repairs.
This protection is important to prevent moisture from getting into the wood and causing issues like mold and mildew growth. UV rays from the sun can also fade and degrade the wood over time, which paint can prevent. The lifespan of your cedar structures increases dramatically when they’re properly painted and maintained.
Extended Lifespan: By safeguarding against the elements, paint extends the life of cedar structures. Preventing issues like rot and insect damage keeps the wood strong for longer. A well-painted cedar fence, siding, or deck can last many years with proper care. This is a cost-effective way to preserve the investment in your cedar surfaces.
This long-term durability is a significant benefit. Less frequent replacements mean less work, cost, and disruption. A paint job can transform a cedar surface that appears old and worn into something that looks new and sturdy. Regular maintenance like repainting will keep everything looking fantastic and ensure the wood continues to function as intended.
Drawbacks to Consider
While painting cedar has numerous advantages, there are some things you should know.
Preparation is Key: Proper prep work is essential, and this can be time-consuming. You must clean the wood, remove old coatings, sand the surface, and ensure it’s smooth. Without this prep, paint may not stick well and could peel or chip. This stage often requires more effort than the actual painting process.
Skipping this step will hurt the final outcome. The result could be an uneven finish that doesn’t last, making the entire project seem less worthwhile. Good prep guarantees the paint adheres well, resulting in a smooth, beautiful, and long-lasting finish. Plan your time accordingly.
Potential for Peeling: If the surface isn’t properly prepped or the wrong type of paint is used, the paint might peel. Cedar can be naturally oily, which can interfere with paint adhesion. This peeling issue may require touch-ups or complete repainting.
This is something that can cause more work and potentially increase the cost. Using a primer designed for cedar and following the manufacturer’s directions can help avoid problems. Regular maintenance, such as cleaning and touch-ups, can also help to keep everything looking great and prevent problems.
Maintenance Required: Painted cedar does need maintenance. Over time, paint can fade, crack, or peel due to exposure to the elements. You might need to repaint every few years to maintain the appearance and protective qualities. Regular cleaning and inspections are also necessary to keep the cedar in good condition.
This includes regular inspections for any signs of damage and making sure to address them promptly. Proper care helps preserve the paint job and stops problems from getting worse. Although cedar is durable, the paint will only be as strong as the care given. The payoff is a long-lasting, beautiful surface.

Preparing Cedar Wood for Painting
Before you even think about picking up a paintbrush, preparing the cedar is the most important step for getting the best results. Proper preparation ensures that the paint adheres well and creates a long-lasting, beautiful finish. If you rush through this, the paint will likely peel, crack, or bubble. That is why taking the time to do this the right way is essential. This can take a little extra time, but it’s definitely worth it.
Cleaning the Cedar Surface
Cleaning cedar is the initial step in ensuring a successful paint job. You’re removing dirt, mildew, and anything that can get in the way of the paint’s grip. It makes the surface more receptive to paint and helps create a clean, smooth base.
Remove Dirt and Debris: Begin by brushing away any loose dirt, leaves, or debris. This helps you get a better view of the surface and makes the cleaning process more effective. You can use a broom, brush, or even a leaf blower to remove this easily.
This also makes the rest of the cleaning more effective. A cleaner surface means the cleaning solution can do its job. A clean surface is also essential for sanding later on.
Use a Mildew Remover: If you see any mold or mildew, it’s essential to get rid of it. You can purchase a specialized mildew remover from any hardware store. Follow the instructions on the product label. This step prevents mildew from growing under the paint, which could cause damage.
Mildew can spread quickly, causing the paint to bubble or peel. Eliminating mildew now will keep your cedar looking good. Always wear protective gloves and eye protection when working with mildew removers.
Wash with Soap and Water: Wash the cedar with soapy water. Mix a mild soap, like dish soap, with water. Use a soft brush to scrub the wood, removing any remaining dirt or grime. Rinse everything well with clean water to remove soap residue.
This step ensures that all of the cleaning products are gone, leaving a clean surface ready for the next steps. Remove all the soap, or it can interfere with the paint adhesion. Allow the cedar to dry completely before going further.
Sanding the Cedar
Sanding is a crucial part of the process. It helps to smooth the surface, creating an even texture for the paint to grip. It also gets rid of any imperfections and prepares the cedar for a beautiful finish. Be careful about sanding too much, as cedar is a soft wood.
Select the Right Sandpaper: Use sandpaper that’s appropriate for wood. Medium-grit sandpaper (around 120-150 grit) is usually a good choice for cedar. This will effectively remove imperfections without damaging the wood. Make sure your sandpaper is for exterior use.
Start with a lower grit to remove any imperfections, but be sure not to sand so much that you remove the cedar’s natural texture. When you’re all done, use a higher grit for the smoothest possible finish.
Sand with the Grain: Sanding with the grain ensures the sanding marks blend into the wood. Start on a corner and apply even pressure. This technique prevents scratches and ensures a uniform surface. Avoid going against the grain, as this could damage the wood.
This will give you the most consistent results and prepare the wood for painting. Sanding with the grain prevents scratches that might show through the paint. Work in even strokes to ensure consistent results.
Remove Dust: After sanding, you must remove all dust. You can use a tack cloth, a vacuum, or a brush to ensure the surface is clean. All this dust must be gone, as it will affect paint adhesion.
This guarantees the paint can stick properly and create a smooth finish. If dust remains, it can create bumps. Cleaning up the dust is one of the most important things to do before priming.
Priming the Cedar Wood
Priming cedar is a critical step, but is sometimes overlooked. Primer creates a bond between the cedar and the paint, helping the paint to adhere properly. It seals the wood, which ensures even paint coverage and a better finish. A high-quality primer will prevent the paint from peeling and create a surface that is ready for the topcoat.
Choose the Right Primer: Use a primer that is specifically made for exterior use. Look for an oil-based primer or a high-quality acrylic primer. These are designed to adhere well to wood and provide a good base for the paint. If you’re unsure, ask at your local hardware store.
Choosing the right primer is crucial for a successful painting job. Oil-based primers are great for their sealing qualities, but they can take a while to dry. Acrylic primers dry faster and are also durable. Make sure you get the right primer for the job.
Apply the Primer Evenly: Use a brush, roller, or sprayer to apply the primer. Make sure to apply an even coat and avoid drips or runs. The primer must cover the entire surface of the cedar. This will help the paint adhere and prevent problems like peeling.
The goal is to provide a consistent base for the topcoat. If the primer is uneven, the finish will also appear uneven. Check for drips and runs, and smooth them out while the primer is still wet. This ensures that the paint will look fantastic.
Let It Dry Properly: Allow the primer to dry completely before moving on to the next step. Drying times vary depending on the product and weather. Read the manufacturer’s directions on the primer label. Don’t rush this step, as it’s key for the paint’s ability to adhere to the wood.
Rushing the drying time can cause all sorts of issues, such as poor adhesion. Drying times are usually listed on the product label. Make sure the surface is dry before painting. This step ensures that the paint is able to stick to the wood.
Painting Cedar Wood: A Step-by-Step Guide
Once your cedar is prepared, it is time to paint. Following the right steps guarantees a beautiful, long-lasting finish. Getting the right tools and products makes the job easier and improves the end result. Make sure you take your time and follow these instructions.
Selecting the Right Paint
Choosing the correct paint is critical to the longevity and look of your project. Select paints designed for outdoor use and specifically created for wood. Paint quality and type will affect how well the paint looks and how long it lasts.
Consider Paint Types: Exterior paints come in different types, like acrylic latex and oil-based paints. Acrylic latex paints are popular for their flexibility, durability, and low odor, making them simple to use. Oil-based paints offer excellent coverage and create a hard, durable finish, but can take longer to dry and have a stronger odor.
Think about your skill level and how much time you have. Acrylic latex paint may be easier for beginners. Oil-based paints are a great choice if you want a more durable finish. Ask at the local paint store to help choose.
Choose the Right Finish: Paint finishes include flat, satin, semi-gloss, and gloss. Flat finishes have a non-reflective surface and are good for hiding imperfections. Satin and semi-gloss finishes offer some sheen and are easier to clean. Gloss finishes are highly reflective and very durable.
The finish affects the appearance and how well it stands up to wear. The finish should complement your style and the cedar’s location. Think about foot traffic, the weather, and how easy it needs to be to clean.
Color Selection: Select a color that complements your home’s design and the look you want to achieve. Lighter colors can make a space feel larger, while darker colors can provide a dramatic effect. Consider how the color will look in different lighting conditions.
The color selection can affect the mood of your space. Consider what you want to achieve. If you have any questions, use a color swatch, and look at the wood in natural light before making a final decision.
Applying the Paint
Applying the paint correctly is critical for getting a flawless finish. Using the right tools and techniques will ensure the paint adheres well and looks great. Take your time, focus on even coverage, and follow the manufacturer’s instructions for the best results. A well-painted surface looks great for years and adds to the value of your property.
Gather Your Tools: You will need paintbrushes, rollers, paint trays, and extension poles. Select high-quality brushes and rollers for the best results. Make sure you have drop cloths to protect surfaces. Also, have painter’s tape to protect trim and adjacent surfaces.
Having the right tools makes the process easier and helps you achieve a professional finish. Select tools that are the right size for the areas you are painting. For instance, smaller brushes will be useful for detailed areas, while rollers are better for larger surfaces.
Apply the First Coat: Start by brushing the paint on the edges and trim. Then use a roller for larger areas. Apply the paint evenly, following the grain of the wood. This will help the paint bond and create a consistent finish.
Focus on smooth, even coats. Avoid applying the paint too thick. Applying too much paint can cause drips, runs, and a less attractive finish. Read the paint’s instructions for the best results.
Apply a Second Coat: Once the first coat is dry, apply a second coat. This will add extra color and protection. It’s often required for complete coverage and a smooth look. Use the same method as before, applying a thin, even layer.
Check the manufacturer’s directions for dry times. Apply the second coat when the first is completely dry. This will give you the best finish. Let the second coat dry completely before you enjoy the final result.
Ensuring Proper Drying and Curing
After you apply the paint, letting it dry and fully cure is essential for its final appearance and durability. The drying process is when the paint dries to the touch, and curing is when the paint hardens and reaches its maximum strength and resistance to the elements. During this time, the paint undergoes chemical changes that impact how well it performs.
Follow Drying Times: Always follow the paint manufacturer’s drying time recommendations. These times can vary depending on the type of paint, humidity, and temperature. Make sure the first coat is completely dry before adding a second coat.
The drying time is the length of time it takes for the paint to dry to the touch. The paint will be very sensitive during this period and may get damaged if it is touched or exposed to rain, wind, or dust. The proper dry time is critical to paint performance.
Control the Environment: Try to keep the work area dry, clean, and at a consistent temperature during the drying and curing process. Protect the painted surfaces from rain, direct sunlight, and extreme temperatures. Adequate ventilation is also key to proper drying.
Controlling the environment can greatly improve the outcome. If possible, paint on a day with moderate temperatures and low humidity. If painting outside, keep an eye on the weather and cover the painted surfaces if rain is expected. Proper airflow will also help the paint to dry and cure correctly.
Allow for Full Curing: Curing is when the paint hardens. Curing takes longer than drying. Some paints can take several weeks to fully cure. Avoid touching or putting anything on the painted surfaces until the paint is fully cured.
Fully cured paint is stronger and more resistant to scratches, fading, and other types of damage. During this time, the paint undergoes a chemical process that strengthens its structure and enhances its performance. Make sure to give the paint plenty of time to cure. This step will help the paint last longer and look its best.
Common Problems and Solutions
Painting cedar can have some issues. Being aware of these issues and knowing how to fix them will help you get better results. From paint not sticking to bubbles and peeling, here’s how to deal with problems that might come up.
Paint Peeling or Blistering
Paint peeling or blistering is one of the most common issues. The finish lifts from the wood, resulting in an uneven, unattractive surface. Usually, this happens when the surface wasn’t prepared properly or if the paint wasn’t applied correctly. Addressing this problem early can prevent further damage and help keep your cedar looking good.
- Cause: Poor surface preparation, moisture, or applying paint over an existing finish that is failing.
- Solution:
- Scrape off the loose paint.
- Sand the surface to remove any remaining paint and create a smooth surface.
- Clean the area thoroughly to get rid of dust and debris.
- Prime the surface with a primer designed for cedar.
- Apply two coats of high-quality exterior paint.
Cracking
Cracking appears as fine lines in the paint that may worsen over time. This is usually caused by the paint drying too fast, using the wrong type of paint, or the movement of the wood over time. Early intervention can stop the cracking from becoming bigger problems.
- Cause: The wrong type of paint, paint that has aged too long, or wood movement.
- Solution:
- Scrape away any loose or peeling paint.
- Sand the surface to smooth out the cracks and ensure a consistent surface.
- Prime the wood.
- Use a flexible, high-quality exterior paint.
Paint Fading or Discoloration
Paint fading or discoloration happens when the paint loses its color. This is usually due to UV exposure, weather, or poor paint quality. Dealing with it early will keep your cedar looking vibrant and protect it. Regular cleaning and repainting are important parts of maintenance.
- Cause: UV exposure, the quality of the paint, or environmental factors.
- Solution:
- Wash the surface to remove any dirt or mildew.
- Sand the area to smooth out the surface.
- Prime the surface.
- Apply a high-quality exterior paint with UV protection.

Frequently Asked Questions
Question: Do I need to prime cedar before painting?
Answer: Yes, priming cedar is highly recommended. It helps the paint adhere better, seals the wood, and provides a more even finish.
Question: What type of paint is best for cedar?
Answer: Exterior-grade acrylic latex or oil-based paints are great choices for cedar. They’re designed to withstand weather and protect the wood.
Question: How often should I repaint cedar?
Answer: This depends on the climate and paint quality, but typically every 5-10 years. Regularly inspect your cedar for wear and tear.
Question: Can I paint cedar that has already been painted?
Answer: Yes, but you must prep the surface first. This includes cleaning, sanding, and priming to ensure the new paint adheres properly.
Question: What’s the best way to clean cedar before painting?
Answer: Wash the cedar with a mild soap and water solution, then rinse thoroughly. Remove any dirt, mildew, and debris before painting.
Final Thoughts
So, Can You Paint Cedar Wood? Complete Guide provides all you need. Painting cedar can boost your home’s appearance and give it long-lasting protection. Remember to prep the surface thoroughly by cleaning, sanding, and priming. Pick the right exterior paint and apply it in even coats for best results. This will make your cedar surfaces look great for years. Following these steps might take a bit of effort, but the finished product will be worth it. If you take your time, get the right tools, and follow the steps, you’ll be well on your way to enjoying a beautifully painted cedar surface that enhances your property’s value. Happy painting!