How to Make Cedar Posts Last Longer (Gravel Beats Concrete)
Cedar fence posts last 15-30 years on average, but concrete backfill can cut that lifespan by more than half compared to a properly drained gravel footing. Posts almost always rot at the ground line first, and a soft, spongy base means the whole post needs replacing, not just a patch. This guide covers gravel-vs-concrete backfill, end-grain sealing with Anchorseal or copper naphthenate, and how choosing heartwood over sapwood changes how long a post survives.

Why Cedar Posts Rot at the Ground Line First
Best End-Grain Sealer Pick
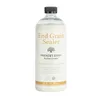
Preservation Solutions End Grain Sealer 32oz – $24.95
A wax-emulsion sealer built specifically for the cut end grain this guide’s next section says needs sealing first — water wicks up through end grain far faster than through the sides of the post.
- Best for: the buried cut end of a new cedar post before it goes in the hole
- Why we picked it: purpose-built wax formula, not a general-purpose stain or sealer
- Main drawback: clear finish only — won’t tint or match existing stain color
Compare more cedar post preservation options
 Copper Naphthenate Pick Wolman WOODLIFE CopperCoat, Quart – $20.98
|
 Re-Treatment Kit Post Proservative Fence Repair Kit – $88.28
|
 Annual Maintenance Pick Ready Seal Natural Light Oak, 1 Gal – $40.98
|
As an Amazon Associate we earn from qualifying purchases.
Cedar heartwood contains natural oils (thujaplicins) that resist decay fungi and wood-boring insects, which is why cedar is a popular fence and post material in the first place. That resistance lives mostly in the heartwood, though — the pale sapwood ring around the outside of the log has little of it, so two posts cut from the same tree can rot at very different rates depending on how much sapwood each one carries.
Ground level is where rot starts first because it’s the one spot on the post that stays consistently damp while still getting enough oxygen to feed decay fungi — the wood a few inches underground is usually too wet and oxygen-starved for fungi to thrive, and the wood well above grade dries out between rains. For a broader look at how moisture damage develops across cedar surfaces, not just posts, see our guide on preventing cedar rot.
📊 Red cedar fence posts average 15–20 years of service life in direct ground contact — Source: Virginia Cooperative Extension data, via Mother Earth News
Gravel or Concrete Backfill: Which Makes a Post Last Longer?
Gravel backfill makes a cedar post last longer than solid concrete, because crushed stone lets water drain away from the buried wood instead of holding it against the post. A concrete footing does the opposite: it can trap moisture right where the post needs to stay driest, which is why Fine Homebuilding’s own contractor guidance leads with crushed stone as the default, not concrete.
| Backfill Method | Drainage | Best For |
|---|---|---|
| Crushed stone / gravel | Best — water drains freely past the post | Most residential fence posts; easiest to reset later |
| Solid concrete footing | Poor — moisture collects at the wood/concrete seam | Gate posts and corners needing maximum wind resistance |
| Gravel base + concrete collar | Good — stone under the post, concrete only at the surface | A compromise when a post needs both rigidity and drainage |
If a post absolutely must go in concrete for structural reasons, slope the top of the footing so it sheds water away from the post instead of pooling around it, and seal the end grain first (next section) — that one step matters more in concrete than in gravel, since concrete gives the wood nowhere to dry out between rains.
How to Seal the End Grain Before You Set the Post
Water wicks up through the cut end grain of a post far more readily than through its sides, which is why the end grain — not the surface — is the first place to treat. Fine Homebuilding’s editorial adviser Mike Guertin recommends a three-part approach: seal the end grain, wrap the buried section, and backfill with stone. Used together, it’s a belt-and-suspenders combination that extends post life by years beyond any single step alone.
- Overdig the hole: dig at least 6 inches deeper than the post needs, so there’s room for a stone base under the post.
- Seal the cut end grain: soak the buried end in a copper naphthenate preservative, or coat it with a waxy end sealer such as Anchorseal.
- Wrap the buried section: apply self-adhering membrane (plastic-surfaced window flashing tape or roof underlayment) from a couple of inches above the grade line down to the bottom of the post, then warm the wrap with a heat gun so it shrinks tight against the wood.
- Backfill with crushed stone: use gravel, not the native soil you dug out, so water keeps draining away from the post instead of sitting against it.
- Slope the surface: crown the grade around the post so rainwater runs off instead of pooling at the base.
“You can’t stop the cedar from rotting, but you can delay the decay… incorporate all three methods on the posts for a belt-and-suspenders approach that will extend the life of the posts by many years.”
Choosing the right preservative matters as much as the technique — see our guide to cedar wood preservatives for how the different formulas compare beyond what’s covered here.
Choosing a Cedar Post That’s Built to Last
Heartwood is the darker, reddish-brown wood at the center of the log, dense with the natural oils that give cedar its rot resistance. Sapwood is the pale outer ring just under the bark, and it has almost none of that protection — it behaves more like an untreated softwood once it’s buried. A post cut mostly from heartwood will outlast one with a wide band of sapwood running down one side, even though both are labeled “cedar” on the same lumber rack.
At the yard, look at the cut end of each post: heartwood should make up most of the cross-section, with only a thin pale sapwood ring at the outside edge. Reject posts with a wide sapwood band, visible cracks radiating from the center, or soft spots you can dent with a thumbnail. A tight, straight grain with few knots also resists warping better once the post is in the ground.
For how cedar’s rot resistance actually compares to other species over time, our breakdown of whether and how fast cedar wood rots covers the mechanism in more depth than fits here.
Moisture and Drainage After Installation
Once a post is set, keeping water moving away from it matters as much as how it was installed. Slope the ground around the base so runoff drains away rather than collecting at the post, and keep mulch or dense groundcover pulled back a few inches so the base can dry between rains. Cedar isn’t waterproof — it just resists water damage longer than most softwoods, and that advantage disappears if the post sits in standing water.
Check the base every few months for dampness that lingers longer than the surrounding soil, a sign the drainage isn’t working as intended. For posts on a slope or in heavy clay soil, a short gravel-filled drainage trench leading away from the hole can carry water off before it ever reaches the buried wood.
Stain and Sealant Maintenance Schedule
A UV-blocking stain or clear sealant reapplied every 1–3 years protects the above-ground portion of the post from sun and rain, while the buried section relies on the end-grain seal and membrane wrap covered above. Treating cedar on a set schedule, rather than only when it looks weathered, catches UV damage before it turns into cracking that lets water in. Avoid staining in cold or freezing weather — the finish won’t cure properly and will need redoing sooner.
Protecting Cedar Posts From Insects and Rodents
Seal any cracks or gaps in the post’s surface promptly — open cracks give insects an easy entry point and let moisture in at the same time. A wire mesh collar around the base deters rodents from gnawing at ground level, and keeping the surrounding area free of mulch piles or debris removes the cover pests prefer. Inspect posts every few months for small entry holes, sawdust-like frass, or soft spots, since catching an infestation early is far cheaper than replacing a structurally compromised post.
Frequently Asked Questions
How long do cedar fence posts last in the ground?
Red cedar posts average 15–20 years in direct ground contact, according to Virginia Cooperative Extension data, and can reach 25–30 years with good drainage, end-grain sealing, and a membrane wrap. Posts in consistently damp soil with no protection can fail in well under 15 years.
Does gravel or concrete make a cedar post last longer?
Gravel backfill makes a post last longer than solid concrete, because crushed stone drains water away from the buried wood while concrete can hold moisture against it. Use gravel for most fence posts, and reserve concrete for gate posts or corners that need extra wind resistance.
Do you need to treat cedar posts before installing them?
Yes for the buried section. Cedar’s natural oils resist rot better than most softwoods, but they’re concentrated in the heartwood and aren’t enough on their own for wood held in constant ground contact. Sealing the end grain and wrapping the buried portion meaningfully extends the post’s service life.
How do you seal the end grain of a cedar post?
Soak the cut end in a copper naphthenate preservative, or coat it with a waxy end sealer such as Anchorseal, before the post goes in the hole. End grain absorbs water far faster than the sides of the post, so this one step protects the point where rot is most likely to start.
Should you use heartwood or sapwood for fence posts?
Choose posts cut mostly from heartwood. It contains the natural oils responsible for cedar’s rot resistance, while sapwood has almost none and decays at close to the rate of an untreated softwood once buried.
Conclusion
A cedar post’s lifespan comes down to a handful of decisions made before and during installation: heartwood over sapwood, gravel over concrete, and a sealed, wrapped end grain instead of bare wood in the ground. None of these steps is expensive or difficult on its own, but combined they’re the difference between a post that needs replacing in a decade and one that outlasts the rest of the fence. For the wider picture on keeping wood structures healthy long-term, see our wood care and protection guide.
Sponsored / affiliate links. As an Amazon Associate I earn from qualifying purchases. I may earn additional commission from eligible campaigns.