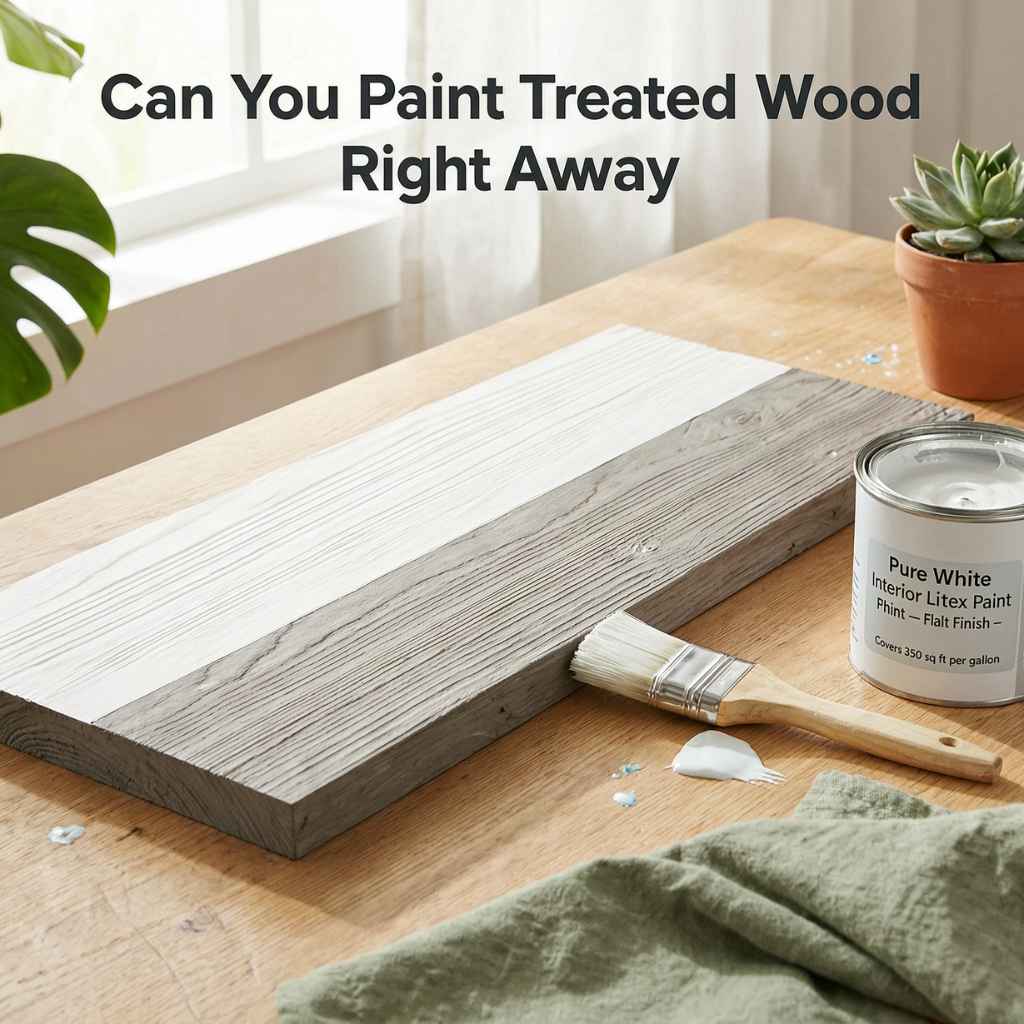
Can You Paint Treated Wood Right Away
Many folks wonder, Can You Paint Treated Wood Right Away? It can feel a bit tricky because treated wood has special stuff added to keep it safe from bugs and rot. This can sometimes make paint not stick very well if you’re not careful. But don’t worry, getting it ready to paint is much simpler than you might think.
We’ll walk through it step by step so you can get your project looking great. Next, we’ll look at why waiting can be a good idea and how to tell when your wood is ready for a fresh coat of color.
When Can You Paint Treated Wood
This section talks about the best time to paint treated wood. We will cover how to know if your wood is dry enough and what signs to look for. This is a key step to make sure your paint job lasts a long time and looks good.
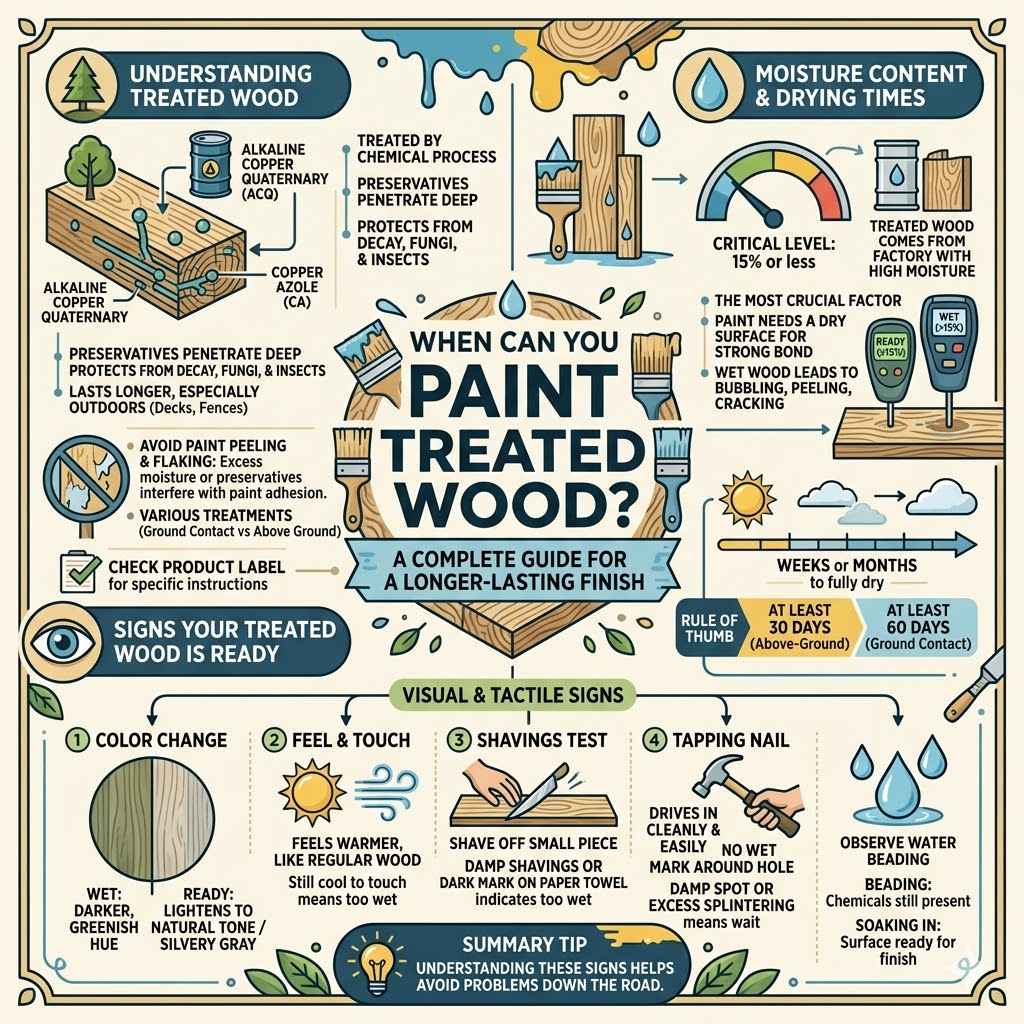
Understanding these signs helps avoid problems down the road.
The Science Behind Treated Wood
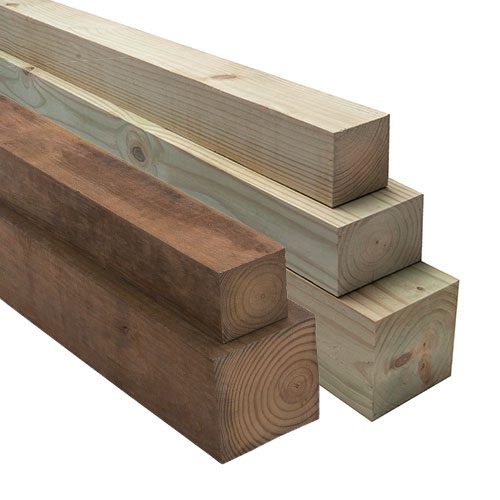
Treated wood is wood that has been preserved by a chemical process. This process helps protect the wood from decay, fungi, and insects. The chemicals used, like alkaline copper quaternary (ACQ) or copper azole (CA), are forced deep into the wood fibers.
This makes the wood last much longer, especially when used outdoors. These treatments are essential for decks, fences, and other structures exposed to the elements.
Before painting treated wood, it’s important to understand what makes it different from regular lumber. The preservatives in treated wood can affect how paint adheres to the surface. If the wood is too wet or the preservatives haven’t had enough time to leach out, paint might peel or flake.
This is why knowing the right time to paint is so important for a good finish.
There are different types of wood treatments. Some are designed for ground contact, while others are for above-ground use. The level of treatment can also vary.
This means that the drying and preparation times can differ. Always check the product label for specific instructions related to painting or staining.
Moisture Content and Drying Times
The most crucial factor in deciding when you can paint treated wood is its moisture content. Treated wood often comes from the factory with a high moisture level. The chemicals used in the treatment process also add moisture.
Paint needs a dry surface to stick to properly. If the wood is still wet, the paint will have trouble forming a strong bond. It can lead to bubbling, peeling, or cracking of the paint film.
For best results, treated wood should have a moisture content of 15% or less before painting. This level ensures that the wood is dry enough for paint to adhere effectively. Different wood types and climates can affect drying times.
Even in warm, dry weather, it can take weeks or even months for the moisture to fully escape the wood.
You can check the moisture content of the wood using a moisture meter. These devices are readily available at hardware stores. Insert the probes into the wood surface to get a reading.
This is a more reliable method than just guessing or relying on touch. A reading of 15% or below is a good indicator that the wood is ready for painting.
If you don’t have a moisture meter, a common rule of thumb is to wait. Wait for at least 30 days for above-ground applications. For wood in direct contact with the ground, it is often recommended to wait 60 days or even longer.
This waiting period allows the excess moisture and some of the surface treatment chemicals to naturally evaporate or leach out of the wood.
Signs Your Treated Wood Is Ready
There are several visual and tactile signs that indicate your treated wood is ready for painting. One of the most common signs is a change in color. Untreated wood is often lighter in color.
Treated wood, especially when wet, can look darker or have a greenish hue. As it dries, it will usually lighten to a more natural wood tone, often a silvery gray if left unfinished. This color change is a good initial indicator.
Another sign is the feel of the wood. When wood is still wet, it will feel cool to the touch, even on a warm day. As it dries, it will feel warmer and more like regular wood.
You can also try the “shavings test.” Shave off a small piece of wood from an inconspicuous area. If the shavings feel damp or leave a dark mark on a paper towel, the wood is likely still too wet.
A practical test involves tapping a nail into the wood. If the nail drives in easily and cleanly without leaving a wet mark around the hole, the wood is probably dry enough. If the wood splinters excessively or the nail leaves a damp spot, it needs more time to dry out.
Observing how water beads up on the surface can also be helpful. If water beads up, there might still be a lot of residual treatment chemicals. If water soaks in quickly, it’s a better sign that the surface is ready for a finish.
Preparing Treated Wood For Painting
Once you’ve determined your treated wood is dry enough, the next important step is preparing the surface for paint. This involves cleaning the wood and ensuring it’s smooth. A clean, smooth surface is key for paint to stick well.
These steps might seem like extra work, but they make a big difference in how your paint job looks and how long it lasts. Skipping this part can lead to a messy finish.
Cleaning the Wood Surface
Before you apply any paint, the treated wood must be thoroughly cleaned. Over time, wood can accumulate dirt, grime, mildew, algae, and sap. These substances can prevent paint from adhering properly.
A clean surface is essential for good paint adhesion, ensuring your finish lasts and looks professional. This is especially important for outdoor projects where the wood is exposed to the elements.
For routine cleaning, a solution of mild detergent and water is often sufficient. Use a stiff brush or broom to scrub the wood. Work in the direction of the wood grain.
After scrubbing, rinse the wood thoroughly with clean water. Ensure all soap residue is washed away, as leftover soap can also interfere with paint adhesion. Allow the wood to dry completely after washing.
For tougher stains or mildew, you might need a stronger cleaning solution. Many hardware stores sell specialized wood cleaners or deck cleaners. These products often contain mildewcides and cleaning agents designed to tackle stubborn grime.
Follow the product instructions carefully. Some cleaners may require a specific dwell time before scrubbing and rinsing. Always test the cleaner on a small, hidden area first to ensure it doesn’t damage the wood.
Another effective cleaning method is using a pressure washer. However, this must be done with extreme caution. A pressure washer set too high can damage the wood fibers, causing the surface to become fuzzy or even splintered.
Use a low-pressure setting and a wide-angle nozzle. Keep the nozzle moving constantly to avoid concentrating the water pressure on one spot. Always start with the lowest pressure setting and increase it only if necessary.
Sanding for a Smooth Finish
Sanding treated wood is vital for creating a smooth surface that paint can easily grip. Even if the wood looks clean, there might be rough spots, splinters, or a slight fuzziness from previous cleaning or exposure. Sanding helps to level these imperfections and provides a better “tooth” for the paint to adhere to.
This step is critical for a professional-looking and long-lasting paint job.
Start with a medium-grit sandpaper, such as 80-grit or 100-grit, to remove any rough patches or splinters. Sand in the direction of the wood grain. This prevents visible scratch marks that could show through the paint.
If the wood is very rough, you might need to start with a coarser grit, like 60-grit, but be sure to follow up with finer grits to smooth the surface.
After using the medium-grit sandpaper, move to a finer grit, such as 150-grit or 220-grit. This finer sanding will further smooth the surface, making it ready for primer and paint. A smoother surface will result in a much nicer finish once painted.
It also helps prevent future issues like paint chipping or peeling.
Once you have finished sanding, it’s essential to remove all the dust. Use a vacuum cleaner with a brush attachment or a damp cloth to wipe down the entire surface. Ensure no dust remains, as dust particles can also interfere with paint adhesion and create an uneven finish.
A clean, smooth surface is now ready for the next steps.
Choosing the Right Primer
Using the correct primer on treated wood is one of the most important steps for a successful paint job. Primers act as a bridge between the wood surface and the topcoat of paint. They help the paint adhere better, provide a uniform color, and can block any stains or tannins from bleeding through the paint.
For treated wood, it’s crucial to select a primer specifically designed for this purpose.
Look for an oil-based or stain-blocking primer. These types of primers are excellent at sealing the surface and preventing issues. Treated wood can sometimes contain chemicals that might react with water-based paints, causing them to fail.
Oil-based primers are generally more effective at forming a barrier against these potential reactions. They also provide superior adhesion to difficult surfaces like treated wood.
A stain-blocking primer is particularly useful if you notice any discoloration or potential tannin bleed from the wood. Tannins are natural compounds found in wood that can leach out and discolor paint. A good stain-blocking primer will prevent these natural wood compounds from migrating into your paint layers.
This ensures that your paint color remains true and consistent over time.
When applying primer, follow the same rules as painting: apply thin, even coats. Ensure complete coverage of the wood surface. Allow the primer to dry thoroughly according to the manufacturer’s instructions.
Most oil-based primers require longer drying times than latex primers. Proper drying of the primer is essential for the topcoat to adhere correctly. Once the primer is dry, you may want to lightly sand it with a fine-grit sandpaper (around 220-grit) to create an even smoother surface for your paint.
Painting Treated Wood The Right Way
Now that your treated wood is prepared, it’s time to paint. Choosing the right paint and applying it correctly will ensure a beautiful and lasting finish. We’ll discuss the best types of paint to use and the techniques that give the best results.
Following these steps will help your painted treated wood look great for years to come.
Selecting the Best Paint Types
When painting treated wood, it’s important to use high-quality exterior paint. These paints are formulated to withstand the elements, including sun, rain, and temperature changes. For treated wood, latex or acrylic-based exterior paints are generally recommended, especially over a compatible oil-based primer.
These paints offer good durability, flexibility, and resistance to cracking and peeling.
Ensure the paint you choose is specifically designed for exterior use. Exterior paints have additives that make them resistant to UV rays, mildew, and fading. A satin, semi-gloss, or gloss finish is usually more durable and easier to clean than a flat finish, especially for surfaces like decks and fences.
The smoother surface of glossier paints also helps water run off more easily.
Avoid using oil-based paints as a topcoat directly on treated wood unless specifically recommended by the paint manufacturer and after using a compatible oil-based primer. While oil-based primers are excellent, latex or acrylic topcoats offer better flexibility and are less prone to cracking as the wood expands and contracts with changes in humidity and temperature. If you choose an oil-based primer, always check that your intended topcoat is compatible with it.
Consider the color of your paint as well. Lighter colors tend to absorb less heat from the sun, which can help reduce expansion and contraction of the wood. Darker colors can absorb more heat, potentially leading to increased wear and tear over time.
For very hot climates, lighter colors are often a better choice for longevity.
Application Techniques for Longevity
Applying paint to treated wood requires patience and attention to detail for the best results. Always apply paint in thin, even coats rather than one thick coat. Thick coats are more prone to chipping, cracking, and peeling, especially on a material that can expand and contract.
Two thin coats will generally provide better coverage and durability than a single heavy coat.
Use a high-quality paintbrush or a roller designed for exterior use. For larger areas like decks or fences, a sprayer can be an option, but it requires careful masking of surrounding areas. Whichever application method you choose, maintain a consistent speed and pressure.
This ensures an even finish and avoids lap marks, which are visible lines where one stroke of paint ends and another begins.
Work with the wood grain whenever possible. Brush strokes should follow the direction of the wood grain. This helps the paint lay down smoothly and blend seamlessly.
If you are painting vertical surfaces, start at the top and work your way down. For horizontal surfaces like decks, paint in the direction of the planks.
Allow adequate drying time between coats. The paint manufacturer will specify the recoat time. Do not rush this process.
Painting over paint that has not fully dried can cause issues like wrinkling or improper adhesion. Check the temperature and humidity conditions; painting in extreme heat or humidity can affect the drying process and the final finish.
Common Mistakes to Avoid
One of the most common mistakes is painting treated wood before it’s completely dry. As we’ve discussed, this is a primary reason for paint failure. Always test for moisture content or wait the recommended drying period.
Rushing this step will likely lead to peeling and bubbling paint, requiring you to start the process over.
Another mistake is not properly cleaning or preparing the surface. Skipping steps like sanding or failing to remove dirt, mildew, or old finishes can result in poor adhesion. Paint needs a clean, slightly textured surface to bond to.
A surface that is too smooth or still has contaminants will not hold paint well. Therefore, thorough cleaning and sanding are non-negotiable.
Using the wrong type of primer or paint is also a frequent error. Not all primers are suitable for treated wood, and using a water-based primer when an oil-based one is needed can lead to problems. Similarly, using interior paint outdoors will cause it to degrade quickly.
Always choose products specifically designed for exterior use and for treated wood applications.
Finally, applying paint in unfavorable weather conditions is a mistake. Painting in direct, hot sunlight can cause the paint to dry too quickly on the surface, creating lap marks and an uneven finish. Very cold or humid conditions can slow drying and affect the paint’s ability to cure properly.
Always check the weather forecast and paint manufacturer’s recommendations for optimal application conditions.
Alternatives To Painting Treated Wood
While painting is a popular choice, there are other ways to finish treated wood that can offer protection and a beautiful look. Sometimes, these alternatives might be even better suited to the nature of treated wood. They can also provide a different aesthetic than a painted finish.
Exploring these options can help you achieve the look you want for your project.
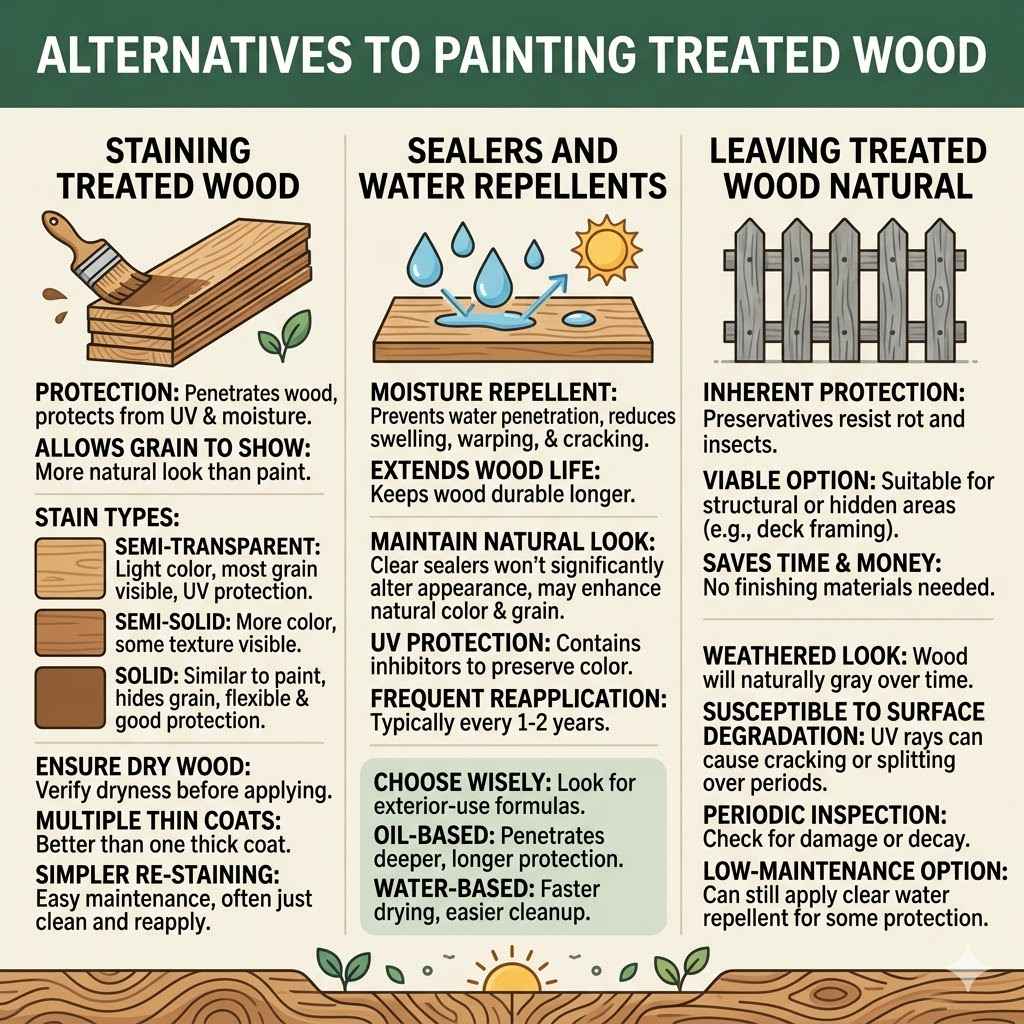
Staining Treated Wood
Staining is a very popular alternative to painting for treated wood. Stains penetrate the wood rather than forming a surface film, which can be advantageous for treated wood. They offer protection from UV rays and moisture while allowing the natural grain of the wood to show through.
This creates a more natural look compared to a solid painted finish.
There are various types of stains, including semi-transparent, semi-solid, and solid stains. Semi-transparent stains allow the most wood grain to show, offering light color and UV protection. Semi-solid stains offer more color and coverage but still allow some wood texture to be visible.
Solid stains are similar to paint in their coverage, effectively hiding the wood grain, but they still offer good protection and are more flexible than paint.
When staining treated wood, it’s still essential to ensure the wood is dry and clean. Some stains can be applied to damp wood, but check the product label. Always test the stain on an inconspicuous area first to see how it looks and absorbs.
Like paint, multiple thin coats are often better than one thick coat for even coverage and durability.
Stains typically require reapplication more often than paint, especially on horizontal surfaces like decks that see heavy foot traffic and constant exposure to the elements. However, re-staining is often a simpler process than repainting, as it usually involves just cleaning and applying new stain without extensive scraping or sanding.
Sealers and Water Repellents
For those who want to maintain the natural look of the wood and simply protect it, clear sealers or water repellents are excellent options. These products are designed to repel water and prevent moisture from penetrating the wood. This helps to reduce swelling, warping, and cracking, extending the life of the wood.
Clear sealers also offer some protection against UV damage from the sun, which can cause wood to turn gray and deteriorate over time. Many sealers contain UV inhibitors that help to preserve the wood’s natural color. They are easy to apply, often with a brush, roller, or sprayer, and typically dry quickly.
The main advantage of sealers is that they don’t alter the appearance of the wood significantly. They often enhance the natural color and grain. However, they do not offer the same level of protection against wear and tear as stains or paints.
They also typically need to be reapplied more frequently, usually every one to two years, depending on the product and environmental conditions.
When choosing a sealer, look for one that is specifically formulated for exterior use and for the type of wood you are working with. Some sealers are oil-based, while others are water-based. Oil-based sealers tend to penetrate deeper into the wood and may offer longer-lasting protection, but they can also have stronger odors and longer drying times.
Water-based sealers are easier to clean up and dry faster.
Leaving Treated Wood Natural
In many cases, treated wood is designed to be left unfinished. The preservatives within the wood provide sufficient protection against rot and insects for many years. If the wood is used in an application where aesthetics are not the primary concern, such as framing in a deck or the hidden structure of a fence, leaving it natural is a perfectly viable option.
Over time, unfinished treated wood will naturally weather to a silvery-gray color. This is a common and accepted look for many outdoor projects. While it might not have the vibrant color of a painted finish or the rich tone of a stain, it still offers excellent durability and longevity due to the wood treatment.
This approach saves time and money on finishing materials.
However, leaving wood natural means it is still susceptible to surface-level degradation from UV rays and can absorb moisture, which might lead to minor cracking or splitting over extended periods. If you choose this route, it’s still a good idea to periodically inspect the wood for any signs of significant damage or decay. For structures where appearance is important, this unfinished look might not be ideal.
Some people choose to apply a clear water repellent periodically even if they are leaving the wood natural. This can help to reduce moisture absorption and keep the wood looking a bit cleaner and less prone to surface weathering. It’s a low-maintenance way to add a bit of protection without changing the wood’s appearance significantly.
Frequently Asked Questions
Question: How long does treated wood need to dry before painting?
Answer: Treated wood typically needs to dry for at least 30 days for above-ground use and 60 days or more for ground contact before painting. Using a moisture meter to ensure the content is 15% or less is the most reliable method.
Question: Can I paint over mildew on treated wood?
Answer: No, you should never paint over mildew. You must thoroughly clean the wood to remove all mildew and algae, then let it dry completely before painting.
Question: Does treated wood need a special primer?
Answer: Yes, it is highly recommended to use an oil-based or stain-blocking primer specifically designed for exterior applications and compatible with treated wood to ensure good adhesion and prevent issues.
Question: Will paint chip off treated wood if I don’t wait long enough?
Answer: Yes, painting treated wood that is still too wet is a common cause of paint chipping, peeling, and bubbling. The moisture interferes with the paint’s ability to bond to the wood.
Question: Can I use any exterior paint on treated wood?
Answer: While you can use exterior paint, it’s best to use high-quality latex or acrylic exterior paints over a proper primer. Always check the compatibility with your primer and follow manufacturer recommendations.
Wrap Up
So, Can You Paint Treated Wood Right Away? The answer is generally no. Treated wood needs time to dry and for some of its moisture content and surface treatment chemicals to dissipate. Preparing it by cleaning and priming is essential for a durable finish.
Choosing the right paint and applying it correctly will ensure your painted treated wood looks great and lasts for years.