When Can You Stain Pressure Treated Lumber? (Wait Time + Tests)
Pressure-treated lumber needs to reach ≤15% moisture content before you apply any stain — typically 3–6 months after installation in moderate climates. Fresh PT wood arrives at 35–75% moisture, and staining too soon causes peeling, blistering, and mold within weeks. The exception: if you buy kiln-dried after treatment (KDAT) lumber, it may be ready immediately. Before starting, confirm readiness with a moisture meter or the water bead test.
Quick Answer
Wait 3–6 months before staining pressure-treated lumber in moderate climates — or 6–8 weeks in hot, dry conditions. The wood must reach ≤15% moisture content. Test readiness: sprinkle water on the surface — if it soaks in within 10 minutes, it’s ready to stain.
Introduction To Pressure Treated Lumber
Pressure treated lumber is wood that has been chemically treated. This process makes it resistant to insects and decay. Homeowners often use it for outdoor projects. It is ideal for decks, fences, and landscaping. Understanding this type of wood helps in maintenance and care.
Characteristics Of Pressure Treated Wood
- Durability: Lasts longer than untreated wood.
- Resistance: Resists rot, fungi, and termites.
- Color: Usually green or brown due to chemicals.
- Weight: Heavier than untreated wood.
These characteristics make pressure treated wood a popular choice. Many homeowners prefer it for outdoor use. Its longevity saves money in the long run.
Importance Of Staining Pressure Treated Lumber
Staining pressure treated lumber is essential for several reasons:
- Protection: Stain acts as a barrier against moisture.
- Aesthetic Appeal: Enhances the wood’s natural beauty.
- Prevention: Helps prevent cracking and warping.
- Longevity: Extends the life of the wood.
Applying stain improves the overall look and durability. It is crucial to wait before staining. This ensures the wood absorbs the stain properly. Staining also helps maintain the wood’s integrity.

Understanding The Staining Process
Staining pressure treated lumber can enhance its beauty and longevity. However, proper timing and technique are crucial for the best results. This section explores the basics of wood staining and highlights special considerations for pressure treated wood.
Basics Of Wood Staining
Wood staining is a process that adds color and protects wood surfaces. Here are key points about the staining process:
- Purpose: Stains protect wood from moisture and UV rays.
- Types: There are oil-based and water-based stains.
- Application: Use brushes or sprayers for even coverage.
- Drying Time: Drying varies based on stain type and weather.
Special Considerations For Pressure Treated Wood
Pressure treated wood requires special attention during the staining process. Here are important factors to consider:
| Factor | Description |
|---|---|
| Wait Time | Allow at least 3-6 months before staining. |
| Moisture Content | Ensure wood is dry before applying stain. |
| Type of Stain | Choose a stain compatible with treated wood. |
| Test First | Always test the stain on a small area. |
Following these guidelines helps achieve a beautiful, long-lasting finish on your pressure treated lumber.
The Right Time To Stain
Staining pressure-treated lumber at the right time is crucial. Proper timing ensures the best results and longevity. Two main factors affect the timing: moisture content and seasonal conditions. Understanding these factors helps achieve a beautiful finish.
Moisture Content And Its Impact
Moisture content plays a significant role in staining. High moisture levels can prevent the stain from adhering properly. Ideal moisture content for staining is below 15%. Use a moisture meter to measure your lumber’s moisture level. For a full breakdown of wait times by lumber type and climate, check our detailed staining wait-time guide.
- Too Wet: Stain won’t adhere well.
- Just Right: Stain absorbs evenly.
- Too Dry: Stain may not penetrate deeply.
Wait for a dry period to ensure proper moisture levels. If you stain too soon, you may need to redo the project.
Seasonal Timing For Staining Projects
Seasonal conditions affect the best time to stain. Each season has its pros and cons.
| Season | Pros | Cons |
|---|---|---|
| Spring | Warm temperatures, low humidity | Frequent rain can delay projects |
| Summer | Long days for quick drying | High humidity may affect adhesion |
| Fall | Cooler temps, lower humidity | Shorter days may slow drying |
| Winter | Low humidity, good for drying | Cold can slow curing time |
Choose a time with stable, dry weather for the best results. Planning ahead ensures your project lasts for years.
Preparing The Wood For Staining
Properly preparing pressure treated lumber ensures a beautiful finish. Staining enhances the wood’s appearance and extends its life. Follow these steps to achieve great results.
Cleaning And Surface Preparation
Cleaning the surface is essential for effective staining. Dirt, dust, and debris can affect adhesion. Follow these steps for proper cleaning:
- Use a stiff broom to remove loose debris.
- Wash the lumber with a mixture of water and mild detergent.
- Rinse thoroughly with clean water.
- Allow the wood to dry completely before proceeding.
Surface preparation also includes sanding. Sanding smooths rough areas. Use 80-grit sandpaper for best results. This helps the stain absorb evenly.
Pre-stain Treatments And Their Benefits
Pre-stain treatments enhance the wood’s appearance. They help the stain penetrate better. Consider these options:
| Treatment Type | Benefits |
|---|---|
| Wood Conditioner | Promotes even stain absorption. |
| Sealant | Protects wood from moisture. |
| Stain Blocker | Prevents tannin bleed. |
Use a pre-stain treatment for better results. These treatments ensure long-lasting color. Follow the manufacturer’s instructions for application.
Choosing The Right Stain
Selecting the right stain for pressure-treated wood for pressure treated lumber is vital. The right choice enhances the wood’s natural beauty. It also protects against moisture and UV damage. Knowing the types of stains available helps in making an informed decision.
★ Recommended Product
Oil-Based Stain for Pressure-Treated Lumber
An oil-based penetrating stain bonds deeply with pressure-treated wood fiber, resists UV fade and moisture, and lasts 2–3 years on horizontal surfaces like decks and fences.
- Penetrates deeper than film-forming stains
- Compatible with ACQ and CA treated lumber
- UV blockers protect against greying and fading
As an Amazon Associate we earn from qualifying purchases.
Types Of Stains Suitable For Pressure Treated Lumber
Different types of stains work better with pressure treated lumber. Here are the main options:
- Oil-Based Stains: These penetrate deeply and provide long-lasting protection. Compare oil-based vs water-based stains to find the right formula for your project.
- Water-Based Stains: Quick-drying and eco-friendly, they are easier to clean up.
- Transparent Stains: They enhance the wood’s natural look while providing some protection.
- Solid Stains: These cover the wood, offering a paint-like finish with high durability.
Color Selection And Test Patches
Choosing the right color for your stain is essential. Here’s how to find the perfect shade:
- Start with a color wheel to see available hues.
- Consider the look you want for your outdoor space.
- Apply test patches on scrap lumber or a small area.
Test patches help visualize how the stain looks on your wood. Check the color in different lighting conditions. Always wait for the stain to dry before making a final decision.
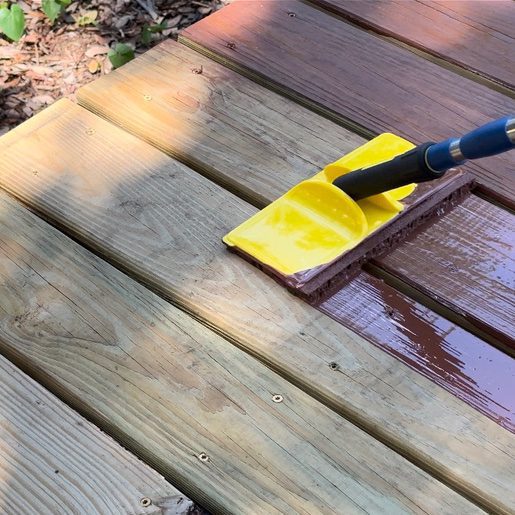
Application Techniques For Best Results
Staining pressure-treated lumber requires the right techniques. Proper application ensures a long-lasting, beautiful finish. Follow these tips for the best results.
Tools And Methods For Even Application
Select the right tools to achieve a smooth finish. Use quality brushes, rollers, or sprayers. Each method has unique benefits.
| Tool | Best For | Notes |
|---|---|---|
| Brush | Detail work | Great for corners and edges |
| Roller | Large surfaces | Fast application, even coverage |
| Sprayer | Complex shapes | Quick, but requires skill |
Follow these methods for even application:
- Clean the surface thoroughly.
- Apply a wood conditioner if needed.
- Test stain on a small area.
- Use even strokes to apply stain.
- Watch for pooling and wipe it off.
Dealing With Common Staining Challenges
Staining pressure-treated lumber can present challenges. Address these common issues for a better finish.
- Uneven Color: Mix stain well before use. Test on scrap wood.
- Puddling: Avoid using too much product. Wipe excess promptly.
- Fading: Apply a protective topcoat after staining.
- Peeling: Ensure wood is dry before applying stain.
Follow these tips to avoid problems:
- Check weather conditions before staining.
- Wait at least 6 months after treatment.
- Always follow manufacturer instructions.
Maintenance After Staining
Keeping your pressure-treated lumber looking great requires regular maintenance. Proper upkeep ensures that the stain lasts longer and protects the wood. Follow these tips to maintain your stained lumber effectively.
Regular Upkeep For Long-lasting Results
Regular maintenance is key to preserving the beauty of stained lumber. Here are some essential tasks:
- Clean the Surface: Use a soft brush or cloth.
- Remove Debris: Clear leaves and dirt regularly.
- Check for Damage: Look for cracks or peeling.
- Wash with Mild Soap: This helps remove dirt and grime.
Perform these tasks at least twice a year. This will keep your lumber in top shape.
When To Reapply Stain
Knowing when to reapply stain is crucial for protection. Here are some signs that it’s time:
- Color fading or dullness
- Water does not bead on the surface
- Visible wear and tear
- Cracking or peeling of the stain
Typically, reapplication occurs every 2–3 years. For lasting results, also consider sealing the wood after staining with a clear UV-resistant sealant. However, it may vary based on weather conditions.
Use high-quality stain products for better results. Follow the manufacturer’s instructions for best practices.
| Maintenance Task | Frequency |
|---|---|
| Surface Cleaning | Every 6 months |
| Stain Reapplication | Every 2-3 years |
With proper maintenance, your pressure-treated lumber will look stunning for years.
Safety And Environmental Considerations
Using pressure-treated lumber requires attention to safety and environmental factors. Staining this wood can enhance its appearance and durability. Proper precautions ensure a safe working environment and minimal environmental impact.
Personal Protective Equipment
Wearing the right gear is crucial while staining pressure-treated lumber. Here are some essential items:
- Gloves: Protect your hands from chemicals.
- Safety goggles: Shield your eyes from splashes.
- Mask or respirator: Prevent inhalation of harmful fumes.
- Long sleeves and pants: Cover skin to avoid irritation.
Ensure your equipment meets safety standards. Check for any specific guidelines related to the stain you are using.
Eco-friendly Disposal Of Stain Materials
Disposing of stain materials correctly protects the environment. Follow these steps:
- Check local regulations on hazardous waste.
- Use up leftover stain when possible.
- Store unused stain in a sealed container.
- Take empty containers to a designated disposal site.
Recycling options may also be available. Always choose eco-friendly stains to minimize harm.
By following these guidelines, you help ensure a safer environment for everyone.

Frequently Asked Questions
When Is The Best Time To Stain Pressure Treated Lumber?
The best time to stain pressure treated lumber is after it has dried sufficiently. This typically takes about 3 to 6 months. You can test by sprinkling water on the wood. If the water beads up, it’s still too wet to stain.
Can You Stain Pressure Treated Wood Immediately?
Staining pressure treated wood immediately is not recommended. Newly treated lumber contains moisture and chemicals that prevent proper absorption. Waiting a few months allows the wood to dry and ensures better stain adhesion and longevity.
What Type Of Stain Is Best For Pressure Treated Lumber?
Oil-based stains are typically best for pressure treated lumber. They penetrate deeply and provide durable protection. Water-based stains can also work, but they may require more frequent reapplication. Always check the manufacturer’s recommendations for the best results.
How Do I Prepare Pressure Treated Wood For Staining?
To prepare pressure treated wood for staining, clean the surface first. Use a wood cleaner to remove dirt and mildew. Allow the wood to dry completely before applying the stain. Sand any rough spots for a smooth finish.
4 Ways To Test If Pressure-Treated Wood Is Ready To Stain
Rather than relying on the calendar alone, use one or more of these readiness tests before applying stain to pressure-treated lumber. Test multiple spots — ends, middle, and any shaded areas dry at different rates.
- Water Bead Test: Sprinkle a few drops of water on the surface. If it beads up and sits for 5+ minutes without soaking in, the wood is still too wet. If water absorbs within 2–3 minutes, it’s ready.
- Moisture Meter: Insert the probes into the wood surface. A reading of 15% or below means the wood is ready to stain. This is the most accurate method.
- Fingernail Scratch Test: Press a fingernail firmly into the wood. If the surface feels soft or spongy, excess moisture is still present. A hard, firm surface indicates adequate drying.
- Visual Check: Dry pressure-treated lumber loses most of its original green or brown chemical tint and develops small surface checks (hairline cracks along the grain). These are normal and don’t affect structural integrity.
What Happens If You Stain Pressure Treated Wood Too Soon?
Staining pressure-treated wood before it reaches 15% moisture content causes the stain to sit on the surface rather than penetrating the wood fibers. The finish will peel, blister, or flake within one season — often within weeks in summer heat. The only fix is to strip the failed stain, wait for the wood to dry properly, and re-apply. This costs more time and money than simply waiting in the first place.
What Moisture Content Does Pressure Treated Wood Need Before Staining?
Pressure-treated lumber needs to reach 15% moisture content or lower before staining. Fresh pressure-treated lumber arrives from the supplier at 35–75% moisture content due to the treatment process. A moisture meter gives you an exact reading. Readings above 15% mean you should wait longer; readings at 12–15% are ideal for most penetrating stains.
Can You Use A Moisture Meter On Pressure Treated Wood?
Yes — a pin-type moisture meter works well on pressure-treated lumber. Insert the pins into the wood face (not the end grain, which reads higher). Take readings at multiple points since treated lumber doesn’t dry uniformly. The chemical treatment does not significantly affect moisture meter readings. Look for a consistent reading of 15% or below across all test spots before staining.
Conclusion
Choosing the right time to stain pressure treated lumber is essential for achieving the best results. Wait at least 3-6 months after installation for optimal absorption. Remember, proper preparation and timing ensure your project lasts longer and looks great. Protect your investment by following these guidelines for staining your lumber effectively.