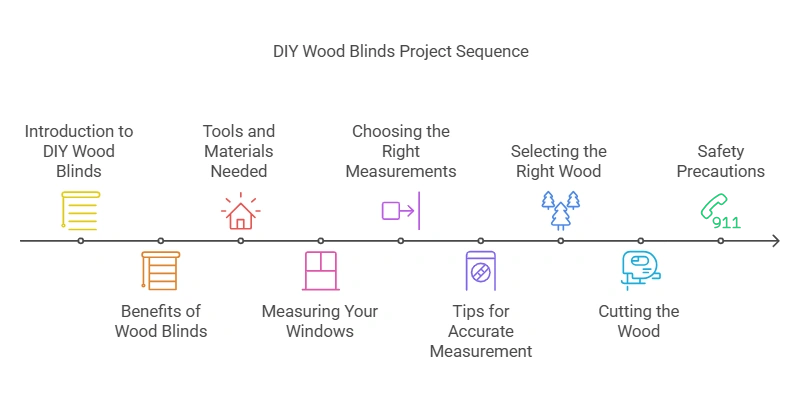
DIY Wood Blinds: Transform Your Home with Easy Steps
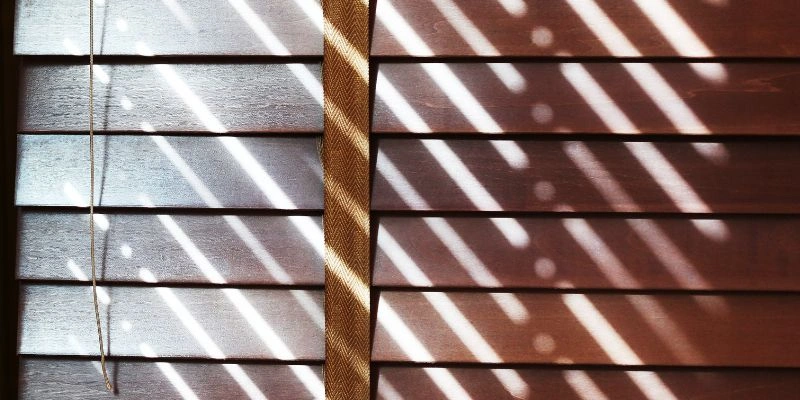
Wood blinds add charm and warmth to any room. They offer privacy and light control.
Thinking about making your own wood blinds? It’s easier than you might think. DIY wood blinds can save you money and give your home a personal touch. You can customize the size, color, and style to fit your needs. This project is perfect for those who enjoy hands-on activities and want to enhance their living space.
In this guide, we will walk you through the steps to create beautiful wood blinds. We’ll cover the tools you need, the materials to use, and detailed instructions. Ready to get started? Let’s dive into the world of DIY wood blinds and transform your windows!
Introduction To DIY Wood Blinds
Have you ever thought about making your own wood blinds? It can be a fun and rewarding project. DIY wood blinds add a touch of elegance to your home. They are also customizable and budget-friendly. Let’s dive into the world of DIY wood blinds.
Benefits Of Wood Blinds
Wood blinds offer many advantages. They provide a natural and warm look. Wood blinds also offer excellent light control. They can be adjusted to let in just the right amount of light. Additionally, wood blinds are durable and long-lasting. They can withstand wear and tear, making them a great investment. Furthermore, wood blinds can help with insulation. They can keep your home cool in summer and warm in winter. Lastly, wood blinds are easy to maintain. A simple wipe with a damp cloth is usually enough to keep them clean.
Tools And Materials Needed
Before starting your DIY wood blinds project, gather the necessary tools and materials. You will need measuring tape and a saw. You will also need sandpaper and a drill. Don’t forget wood glue and screws. For the blinds themselves, you will need wooden slats. You can buy these or cut them from larger pieces of wood. Stain or paint will give your blinds a finished look. Finally, you will need string and a cord lock for the lifting mechanism.

Measuring Your Windows
Measuring your windows correctly is crucial for perfect DIY wood blinds. Accurate measurements ensure the blinds fit well and look great. Here’s how to measure your windows properly.
Choosing The Right Measurements
First, decide if you want inside or outside mount blinds. Inside mounts fit within the window frame. Outside mounts cover the frame and extend beyond. Both types have their own benefits. Choose what suits your space best.
Tips For Accurate Measurement
Use a steel tape measure for best results. For inside mounts, measure the width at the top, middle, and bottom. Use the smallest measurement. Measure the height at the left, middle, and right. Use the largest measurement.
For outside mounts, measure the width of the area you want to cover. Add extra width to block light gaps. Measure the height from the top of the window to the desired length. Write down all measurements clearly. Double-check each one to avoid mistakes.
Selecting The Right Wood
Choosing the right wood for your DIY wood blinds is an essential step in ensuring they look great and last long. Whether you’re a seasoned DIYer or a beginner, understanding the different types of wood and factors to consider can be a game-changer. Let’s dive into the details to help you make an informed decision.
Types Of Wood
When it comes to DIY wood blinds, not all woods are created equal. Here are some popular options:
- Basswood: Light, easy to work with, and has a fine grain. It’s perfect for painting or staining.
- Oak: Strong and durable, with a prominent grain. Ideal for a rustic look.
- Cherry: Smooth texture and rich color. It darkens beautifully over time.
- Pine: Affordable and widely available. It’s a softer wood, so handle with care.
Factors To Consider
Now that you know the types of wood, let’s look at the factors you need to consider:
- Durability: Are you looking for something long-lasting? Oak and Cherry are excellent choices.
- Cost: If budget is a concern, Pine or Basswood can be a great alternative.
- Appearance: Think about the final look you want. Do you prefer a natural grain or a painted finish?
- Workability: Some woods are easier to cut and shape. Basswood is great for beginners.
Remember, the right wood will depend on your personal preferences and the specific needs of your project. Happy crafting!
Have you ever had a DIY project go off the rails because you didn’t pick the right material? Trust me, I’ve been there. Once, I chose Pine for an outdoor project, and let’s just say it didn’t end well. Learn from my mistakes and choose wisely!
Cutting The Wood
When it comes to crafting your own wood blinds, one of the crucial steps is cutting the wood. This might seem a bit intimidating at first, but with the right tools and guidance, it’s a task you can handle with confidence. Let’s dive into the details, ensuring you’re well-prepared to create beautiful and functional blinds for your home.
Safety Precautions
Before you start cutting, it’s important to prioritize safety. Working with wood and power tools can be dangerous if proper precautions aren’t taken. Here are some essential tips to keep in mind:
- Wear Safety Gear: Always wear safety glasses to protect your eyes from dust and wood particles. A dust mask can also be helpful to avoid inhaling sawdust.
- Check Your Tools: Ensure that all your tools are in good working condition. Sharp blades and properly functioning equipment will make the process smoother and safer.
- Clear Workspace: Make sure your workspace is clean and free of any obstacles. This will help prevent accidents and give you enough room to maneuver.
- Use Clamps: Secure your wood with clamps to keep it steady while cutting. This not only ensures precision but also keeps your hands safe.
Step-by-step Cutting Guide
Now that you’re geared up and your workspace is ready, it’s time to cut the wood. Follow these simple steps to achieve precise and clean cuts:
- Measure Twice, Cut Once: Carefully measure the dimensions needed for your blinds. Double-check your measurements to avoid any mistakes.
- Mark the Wood: Use a pencil to mark the cutting lines on the wood. A straight edge or a ruler can help you draw accurate lines.
- Set Up the Saw: Adjust your saw blade to the appropriate depth for your wood thickness. If you’re using a circular saw, ensure the blade is sharp and correctly installed.
- Make the Cut: Slowly guide the saw along the marked line, keeping your hands clear of the blade. Let the saw do the work; don’t force it through the wood.
- Sand the Edges: After cutting, sand the edges of the wood to smooth out any rough spots. This will give your blinds a polished, professional look.
Cutting wood for your DIY blinds doesn’t have to be a daunting task. With careful planning and attention to detail, you can achieve great results. Remember, safety first and take your time to ensure each cut is precise. Ready to take on the challenge? Your custom wood blinds are just a few steps away!
Assembling The Blinds
Assembling DIY wood blinds can seem challenging. But it’s a rewarding project. You’ll need basic tools and patience. This guide will break down the process. Let’s dive into assembling the blinds.
Connecting The Slats
Start by laying out all slats. Ensure they are clean and smooth. Take the first slat and place it on a flat surface. Align the second slat next to it. Use a strong adhesive or screws to connect them. Repeat this process with all slats. Make sure each slat is firmly attached. This will create a sturdy base for your blinds.
Attaching The Hardware
After connecting the slats, it’s time to attach the hardware. Gather all necessary hardware pieces. These include brackets, screws, and the headrail. Begin with the brackets. Secure them to the top corners of the window frame. Use a level to ensure they are even. Next, attach the headrail to the brackets. Make sure it snaps into place. Finally, install the control mechanism. This allows you to adjust the blinds. Follow the manufacturer’s instructions for this step.
Your DIY wood blinds are now assembled. Enjoy the beauty and function they bring to your space.
Staining And Finishing
Staining and finishing your DIY wood blinds can transform a plain piece of wood into a stunning focal point in your room. The right stain can enhance the natural beauty of the wood, while a good finish can protect your blinds from wear and tear. In this section, we’ll delve into the process of staining and finishing, ensuring your DIY project looks professional and lasts for years.
Choosing The Right Stain
Choosing the right stain is like picking the perfect outfit—it can make or break your project. There are various types of stains available, each offering different effects:
- Oil-based stains: These are popular for their durability and rich finish. They penetrate deep into the wood, highlighting the grain.
- Water-based stains: These are easier to clean up and have less odor. They dry faster and are available in a wide range of colors.
- Gel stains: These are thicker and provide a more even color, especially useful for vertical surfaces like blinds.
When selecting a stain, consider the type of wood you’re working with and the look you want to achieve. For instance, oak and cherry wood benefit from oil-based stains, while pine and maple might work better with gel stains.
Application Techniques
Applying stain to your wood blinds is an art. Here’s a step-by-step guide to get you started:
- Prepare the wood: Sand the wood to a smooth finish, starting with a coarse grit and moving to a finer grit sandpaper.
- Test the stain: Always test the stain on a small, hidden area of the wood. This ensures you’re happy with the color before committing to the entire piece.
- Apply the stain: Use a clean cloth or brush to apply the stain in the direction of the wood grain. Wipe off any excess stain with a rag after a few minutes.
- Let it dry: Allow the stain to dry completely. This can take several hours, depending on the type of stain used.
- Apply additional coats: For a deeper color, apply additional coats. Ensure each coat is dry before applying the next.
- Remember, patience is key. Rushing through the staining process can lead to uneven color and a less professional finish.
| Stain Type | Pros | Cons |
|---|---|---|
| Oil-based | Durable, rich finish | Longer drying time, strong odor |
| Water-based | Quick drying, easy cleanup | Can raise wood grain, less penetration |
| Gel | Even color, good for vertical surfaces | Thicker consistency, harder to spread |
With the right stain and careful application, your DIY wood blinds will look stunning and last for years. So, why not give it a try? You’ll be surprised at how a simple stain can elevate the look of your blinds and your space!
Installing The Blinds
So, you’ve got your DIY wood blinds and you’re ready to install them. Don’t worry, it’s simpler than you think. Installing wood blinds can be a fun project, and with a little patience, you’ll have them up in no time. Let’s dive into the process of getting those beautiful blinds mounted and looking perfect.
Mounting Options
Before you start, you need to decide how you want to mount your blinds. There are two main options:
- Inside Mount: This means the blinds will fit inside the window frame. It’s great for a clean, built-in look.
- Outside Mount: Here, the blinds are mounted outside the window frame, covering part of the wall. This is perfect if you want to make the window look larger or hide unattractive trim.
Each option has its perks, so consider what works best for your space.
Installation Steps
Once you’ve chosen your mounting style, it’s time to get down to business. Follow these steps:
- Measure: Accurate measurements are crucial. For an inside mount, measure the width and height inside the window frame. For an outside mount, measure the area you want to cover.
- Mark the Brackets: Hold the brackets up to the window frame or wall and mark where the screws will go. Use a pencil for this.
- Drill Pilot Holes: Drill small pilot holes where you marked the bracket positions. This makes it easier to screw in the brackets.
- Attach the Brackets: Screw the brackets into place. Make sure they are secure and level.
- Install the Headrail: Clip the headrail of the blinds into the brackets. You might need to press down firmly until you hear a click.
- Attach the Valance: If your blinds come with a valance (a decorative piece that covers the headrail), attach it now. Usually, it snaps or clips on.
- Test the Blinds: Lower and raise the blinds a few times to ensure they operate smoothly. Adjust any cords or wands if necessary.
And there you have it! With these steps, your wood blinds should be up and running, ready to provide shade and style to your room.
Installing DIY wood blinds doesn’t require a professional. With a bit of time and effort, you can achieve a polished look that enhances your home. Remember, if I can do it, so can you!
Maintenance Tips
Maintaining your DIY wood blinds is crucial for their longevity and appearance. Proper care ensures they stay beautiful and functional for years. Follow these maintenance tips to keep your wood blinds in top shape.
Cleaning Your Wood Blinds
Dust your wood blinds regularly. Use a soft cloth or a feather duster. Avoid water or harsh chemicals. These can damage the wood finish. For deeper cleaning, use a wood cleaner. Apply it with a soft cloth. Wipe gently to remove dirt and grime.
Always dry your blinds immediately after cleaning. Moisture can cause warping or discoloration. Keep your blinds looking fresh and new with regular cleaning.
Preventing Damage
Keep your wood blinds away from direct sunlight. Prolonged exposure can fade the wood. Use curtains or shades to protect them. Also, avoid placing them near heat sources. Heat can cause the wood to warp or crack.
Handle your blinds with care. Open and close them gently. Avoid tugging or pulling forcefully. This prevents damage to the cords and slats.
Check the hardware regularly. Tighten any loose screws or brackets. This ensures your blinds stay securely in place. Proper maintenance prevents costly repairs or replacements.
Troubleshooting Common Issues
So, you’ve decided to give your home a charming, rustic touch with DIY wood blinds. They look fantastic, don’t they? But sometimes, those beautiful blinds can be a bit tricky. Maybe they’re not hanging evenly, or the mechanism feels off. Don’t worry, you’re not alone! Let’s dive into some common issues and how to troubleshoot them.
Fixing Uneven Blinds
Ever noticed your wood blinds looking a bit lopsided? It’s a common problem, and luckily, it’s not too hard to fix. Here’s a simple step-by-step guide:
- Check the Brackets: Ensure that the mounting brackets are level. Use a spirit level to check and adjust if necessary.
- Adjust the Cord: Sometimes, the cords can get tangled or uneven. Pull the cords gently to even out the slats.
- Look at the Slats: Make sure the slats themselves are positioned correctly. They can sometimes shift out of place.
- Secure the Bottom Rail: The bottom rail should be level. If it’s not, adjust it by moving the cords within the rail.
Still not even? You might need to reinstall the blinds, ensuring everything is perfectly aligned. It’s a bit of a hassle, but the result is worth it!
Adjusting The Mechanism
Is the mechanism not working smoothly? Maybe the blinds won’t go up or down as they should. Here are some quick fixes:
- Lubricate the Mechanism: Use a silicone spray to lubricate the moving parts. This can help if the blinds are sticking.
- Check the Cords: Make sure the cords are not frayed or tangled. Replace any damaged cords.
- Inspect the Tilt Mechanism: If the tilt mechanism isn’t working, it might be jammed. Gently manipulate the tilt rod to free it.
If you find the mechanism is beyond simple fixes, consider consulting the manufacturer’s guide or reaching out to customer support. Sometimes, a little professional advice can go a long way.
So there you have it! Troubleshooting your DIY wood blinds doesn’t have to be a daunting task. With these tips, you’ll have those blinds looking and working perfectly in no time. Happy DIY-ing!
Frequently Asked Questions
What Is The Best Wood For Blinds?
Basswood is the best wood for blinds. It is lightweight, durable, and offers a smooth finish. Basswood also provides excellent insulation and is easy to paint or stain, enhancing home decor.
How To Make Your Own Blinds From Scratch?
To make your own blinds, measure your window, choose fabric, cut to size, sew hems, and attach hardware.
What Is The Trend In Blinds In 2024?
Blinds in 2024 feature smart technology, sustainable materials, and minimalist designs. Neutral colors and natural textures are trending.
Can You Cut Faux Wood Blinds Yourself?
Yes, you can cut faux wood blinds yourself. Use a fine-tooth saw and measure accurately. Ensure to sand the edges for a smooth finish.
Conclusion
Creating DIY wood blinds can be a rewarding project. They add a personal touch to your home. Plus, they offer privacy and style. The process is simple and can save money. With basic tools, anyone can do it. So, give it a try! Your efforts will pay off.
Enjoy your new, custom wood blinds. They will look great and last long. Happy crafting!