How to Sand Small Grooves: Match the Tool to the Groove’s Shape
Sanding a small groove badly is easy to spot: a rounded-over corner where the wall should stay crisp, a flat spot in what should be a smooth curve, or one side of the groove shinier than the other from uneven pressure. Almost every one of those mistakes traces back to the same cause – using a tool shaped nothing like the groove itself. A flat sanding block does great work on a flat panel and poor work inside a curved juice groove. A round dowel wrapped in sandpaper is perfect for that curved groove and the wrong choice for the crisp corners of a square dado. This guide walks through matching the tool’s shape to the groove’s actual profile, plus the grit, technique, and safety steps that go with it.
Why “Just Grab a Detail Sander” Doesn’t Always Work
Most sanding advice offers one universal fix: grab a detail sander, an oscillating tool, or a rotary tool with a sanding drum, and go over the groove until it looks smooth. That’s not wrong, but it’s incomplete. A detail sander’s triangular pad is flat. Pushed into a rounded groove, the pad’s corners ride high on the curve while the center never touches the bottom – so you end up polishing the edges and leaving the deepest part of the groove untouched. The opposite problem shows up in square or rectangular grooves, like a dado or a rabbet: a round sanding accessory rounds over corners that were supposed to stay crisp, and it shows the moment you apply stain. The detail most “how to sand grooves” guides skip is starting from the groove’s cross-section shape, not from whichever sander happens to be sitting on the bench.
Best Multi-Profile Groove Sanding Pick
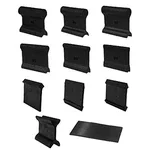 |
POWERTEC 21 Profile Sander Contour Grip Set – $18.99 Instead of shop-making a dowel or flat stick for every groove shape, this set gives you 21 pre-made profiles – round, flat, and angled – so you can match the tool to the groove in seconds.
|
Match the Sanding Tool to the Groove’s Actual Profile
Once you look at grooves by shape instead of by size, the right tool becomes obvious.
Round-bottomed grooves – the kind used for juice grooves in cutting boards, drip channels, or decorative coves – need a tool that’s also round. Wrap fine-grit sandpaper tightly around a wooden dowel sized close to the groove’s own diameter, and roll it slightly as you pull it along the groove so the curve gets even contact instead of just the high points.
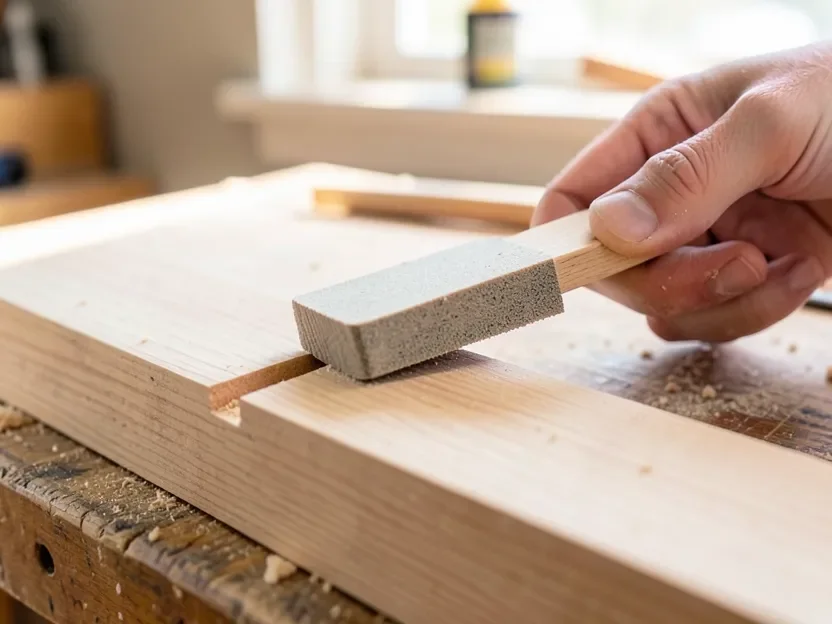
Square and rectangular grooves – a dado for a shelf, a groove for a drawer bottom, a rabbet along an edge – need flat pressure that stays flat. A stiff, flat stick with sandpaper wrapped around it, or a folded piece of sandpaper backed by a thin scrap of wood (some woodworkers use an old putty knife as the backer for extra rigidity), keeps the abrasive in full contact with both walls and the bottom without rounding the corners over.
V-grooves get their own trick: fold a sheet of sandpaper in half, press a crisp, hard crease into it, and run that crease along the V. Both angled faces get sanded at once, and the crease holds its shape far better than a loose sheet would.
This is the piece most generic guides leave out – they’ll tell you to “use fine sandpaper” or “try a detail sander” without ever mentioning that the groove’s shape, not its size, is what should decide the tool.
Choosing the Right Grit for the Groove
Grit selection works the same for grooves as it does for flat surfaces – start coarse enough to fix the problem, then step down gradually so you’re not skipping grits and leaving fine scratches behind.
| Grit Range | Best Use in a Groove |
|---|---|
| 60-80 | Removing tool marks, saw burn, or deep gouges before shaping the groove further |
| 120-150 | General smoothing once the groove’s shape is already correct |
| 220-320 | Final pass before staining or finishing |
Softer woods like pine or poplar tear out easily in a tight groove, so it’s worth starting one grit finer than you would on oak or maple. Always finish by sanding in the direction the groove runs, not across it – cross-grain scratches inside a groove are much harder to hide than they are on an open flat surface, since there’s no room to blend them out with a wider pass.
Tools Worth Keeping On Hand for Groove Work
A short shop kit covers nearly every groove shape you’ll run into:
- Dowel-wrapped sandpaper – the go-to for round or curved grooves; keep a few dowel diameters on hand since one size won’t fit every groove.
- A flat sanding stick or folded, backed sandpaper – for square and rectangular grooves, where flat contact matters more than reach.
- A manufactured profile/contour sanding grip set – essentially a set of pre-shaped versions of the dowel-and-stick trick, with several curved and angled profiles built in so you’re not always making one from scratch.
- A detail or “mouse” sander with a narrow, pointed attachment – useful for wider, shallower grooves where a power tool can still fit without riding on its corners; not a good substitute for a narrow, deep groove.
- A shop-made sanding stick shaped to one specific groove profile – worth cutting if you’re sanding the same joint repeatedly across many identical parts, like drawer sides on a production run.
Step-by-Step: Sanding a Rounded Groove (Like a Juice Groove)
- Measure the groove’s width and pick a dowel that’s close to that diameter – slightly undersized is better than oversized, since the sandpaper wrap adds thickness.
- Cut a strip of sandpaper long enough to wrap around the dowel one full turn, and secure it with tape at the seam so it doesn’t unwind mid-stroke.
- Insert the wrapped end into the groove and roll it gently as you pull it along the length, keeping consistent light pressure rather than pressing hard in one spot.
- Work in the direction of the groove, checking often, and switch to a fresh section of sandpaper once the current one loads up with dust.
- Step down through grits (see the table above) and finish with a light pass at 220-320 grit before cleaning out the dust.
Step-by-Step: Sanding a Square or Rectangular Groove
- Cut a stick or scrap of wood slightly narrower than the groove, with square, flat edges.
- Wrap sandpaper around the stick’s edge, or fold a sheet over a thin backer like a putty knife, so the abrasive stays flat against the groove’s walls.
- Slide the tool along the groove’s full length in one direction, keeping it flat rather than tilting it into the corners.
- Check the corners specifically – they’re the easiest spot to accidentally round over. Ease off pressure near them if you see rounding starting.
- Finish with a fine grit and wipe the groove out with a dry brush or compressed air, since dust collects at the bottom of a square groove more than a curved one.
Safety and Workspace Setup
Wear safety glasses and a dust mask any time you’re sanding, even by hand – fine wood dust from a small groove is easy to underestimate since there’s less visible dust cloud than sanding a wide panel. If you’re using a power tool for a wider groove, add hearing protection too.
Work in a well-ventilated area and keep a shop vacuum or dust collector nearby. Good, direct lighting angled across the groove (not straight down into it) makes it much easier to spot low spots, since raking light shows surface irregularities that overhead light hides.
To reduce dust while sanding, keep a vacuum nozzle positioned close to the groove as you work rather than cleaning up only at the end – it’s far easier to control dust before it settles into the surrounding grain than to remove it afterward.
Cleaning Up and Finishing After Sanding
Once the groove is smooth, clear out every trace of dust before moving on to a finish. A stiff brush or compressed air gets sanding dust out of the bottom of the groove better than a cloth alone, which tends to just push dust around on flat surfaces without reaching into the corner. Follow up with a vacuum, then a tack cloth or a slightly damp (not wet) cloth on the surrounding wood.
Picking the right sandpaper grit matters just as much when you’re prepping a groove for a new finish as it does when stripping an old one – too coarse a final grit and stain will pool unevenly in the scratches, especially inside a groove where you can’t sand out the marks with a wide random pattern like you would on an open panel.
Oil-based finishes tend to pool and darken more inside a groove than they do on a flat surface, simply because gravity pulls extra finish into the low point – wipe off excess with a small brush or cotton swab a few minutes after application rather than waiting until it starts to skin over. Water-based finishes are more forgiving here since they level out faster and dry to a thinner film.
Frequently Asked Questions
How Do I Choose Sandpaper for Grooves?
Match the grit to the groove’s condition, not just its size: 60-80 grit for removing tool marks or deep gouges, 120-150 for general smoothing, and 220-320 for a final pass before finishing. Just as important as grit is shape – fine sandpaper wrapped around the wrong-shaped tool still won’t sand a groove evenly, so pick a dowel, stick, or profile grip that matches the groove’s cross-section first.
What Tools Do I Need for Sanding Grooves?
For most small grooves you need sandpaper, a dowel or flat stick to wrap it around, and a way to reach tight spots – a folded sandpaper crease works for V-grooves, and a profile sanding grip set covers several curved and angled shapes at once. A detail sander with a narrow attachment can help on wider, shallower grooves, but it’s not a substitute for a hand tool shaped to match a narrow groove’s profile.
How Can I Sand Intricate or Curved Grooves?
For curved or intricate grooves, wrap fine-grit sandpaper around a dowel sized close to the groove’s diameter and roll it slightly as you pull it through, so the curve gets even contact rather than just the high points. Work slowly, check your progress often, and switch to a fresh section of sandpaper once the working section loads up with dust so you’re not just pushing debris around.
Is Sanding Grooves Necessary Before Painting or Staining?
Yes. Unsanded tool marks and rough spots inside a groove show up more clearly once stain or paint highlights the surface texture, not less, since finish tends to pool slightly in low spots and any scratch or gouge becomes more visible. Sand to at least 220 grit, clear out all dust, and let the surface dry completely before applying any finish.
Matching the tool’s shape to the groove’s profile is the one step that separates an even, professional-looking groove from one with rounded corners, flat spots, or uneven sheen. Once you’ve built a small kit covering round, square, and V-shaped profiles, sanding any new groove is mostly a matter of picking the right piece and working carefully.
Sponsored / affiliate links. As an Amazon Associate I earn from qualifying purchases. I may earn additional commission from eligible campaigns.