How to Reinforce a Bed Frame: Fix Sagging, Squeaking & Wobbling
A sagging or creaking bed frame is almost always a loose-joint problem, not a broken frame — tightening hardware, adding corner braces, and a center support beam fixes most cases in under an hour. Skip the center beam on a Queen or King (54″+ wide) and the frame sags within months under normal mattress weight. This guide covers diagnosing the real cause, reinforcing joints and corners, center support, and how much weight a reinforced frame safely holds.
Quick Answer
Most wobbly or creaky bed frames need three fixes: tighten every screw and bolt, add L-brackets or corner gussets at the joints, and install a center support beam on Full-size and larger frames. Center support is non-negotiable on Queen and King beds — without it, the mid-span sags within months under normal mattress weight.
Tools and Materials You’ll Need
Best Bed Frame Reinforcement Pick
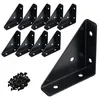
2-9/16″ Corner Brace L Bracket for Wood – 10 Pack
Solid cold-rolled steel corner braces with pre-drilled holes and 50 matching screws included — enough to reinforce every corner of a bed frame in one pass.
- Best for: wobbling or loosening corners on wood or metal bed frames
- Why we picked it: a 10-pack covers a full frame (4 corners plus rail joints) without a second order, and the steel gauge holds up better than the thin stamped brackets sold individually
- Main drawback: pre-drilled holes are fixed-spacing, so they won’t align perfectly on every frame thickness
Compare more bed frame reinforcement options
 Option 1 4-Pack Adjustable Bed Frame Support Legs (8.3″–14.5″)
|
 Option 2 Prime-Line 241947 Bed Frame Rail Clamp Kit, 1 In. Frame (2 Pack) – $11.49
|
 Option 3 12-Set Bed Frame Hardware Connector Kit
|
As an Amazon Associate we earn from qualifying purchases.
- Screwdriver (Phillips and flathead) or drill/driver
- Adjustable wrench or socket set (for bolted metal frames)
- Corner braces or L-brackets (steel, not plastic)
- Wood glue and 2–4 bar or pipe clamps
- 2×4 or 2×6 lumber for a center support beam, if your frame doesn’t have one
- Measuring tape and a pencil
- 3-inch wood screws or structural screws (not drywall screws — they shear under lateral load)
What’s Actually Wrong With Your Bed Frame?
Before you buy anything, match the symptom to the cause below. Most frames have exactly one of these problems, and fixing the wrong one wastes a trip to the hardware store.
| Symptom | Likely Cause | Fix | Cost / Time |
|---|---|---|---|
| Creaks or squeaks when you shift weight | Loose hardware or wood-on-wood friction at a joint | Tighten every screw and bolt; wax or soap the joint | $0–10 / 15–20 min |
| Frame rocks side to side | Loose corner joints, uneven legs, or an uneven floor | Add corner braces; shim or pad the legs | $10–25 / 30–45 min |
| Mattress sags in the middle | No center support on Full-size and up, or a broken beam | Install a center beam with a floor leg | $20–50 / 45–60 min |
| Slats shift, crack, or drop through | Slats spaced too far apart or too thin for the mattress | Re-space slats under 3″ apart; swap cracked ones | $15–40 / 30–60 min |
| Frame flexes or racks out of square | Weak corner joints with no diagonal bracing | Add diagonal corner blocks or metal gussets | $15–30 / 30–45 min |
Costs and times are typical DIY ranges based on standard hardware pricing and the reinforcement steps below — your frame’s condition may vary.
Assess Your Bed Frame First
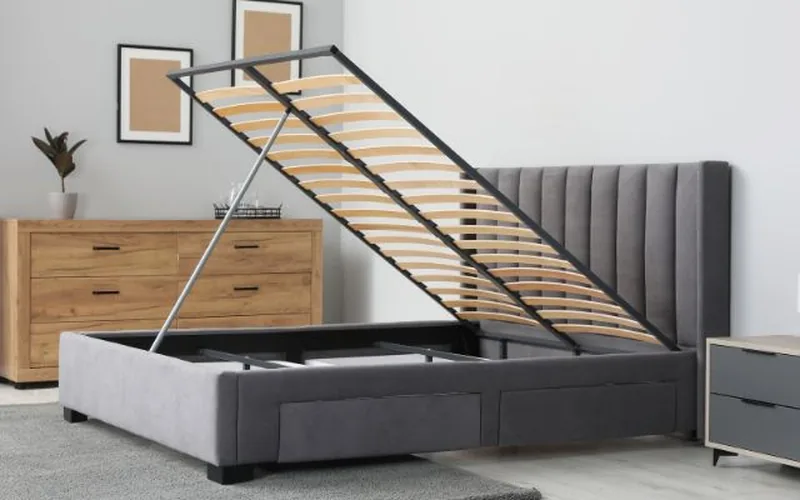
Remove the mattress and box spring so you can see and reach every joint. Press down on each corner and rock the frame gently — any movement points to a loose connection there.
- Inspect the headboard and footboard for visible cracks, splits, or splintered wood at the joints.
- Check every joint where side rails meet the headboard and footboard, and where the center beam meets the rails.
- Test all hardware — try to turn every screw and bolt by hand before reaching for a tool; anything that turns easily is loose.
- Listen for the noise while a second person shifts their weight on the mattress — this pinpoints which joint is actually creaking, since sound travels along the frame.
Reinforce the Joints and Corners
Joints are where nearly every bed frame problem starts, and the fix depends on the joint type. For hardware connections, start by tightening; for wood-to-wood joints, add glue before hardware.
Tighten and Upgrade the Hardware
Go around the entire frame with a screwdriver or wrench and tighten every screw, bolt, and nut. If a screw hole has worn out (the screw spins without biting), remove the screw, pack the hole with wood glue and toothpicks or a golf tee, let it cure, then re-drive the screw into the solid plug.
Add Corner Braces or Gussets
Triangular corner gussets outperform plain L-brackets for this job — an L-bracket lets the joint flex along its open diagonal, while a triangular gusset ties both sides of the corner into one rigid unit. Position the brace across the inside corner, mark the screw holes, drill pilot holes so the wood doesn’t split, then drive the screws.
- Identify the loose or wobbly corner.
- Hold the brace against the inside corner and mark the screw holes.
- Drill pilot holes slightly smaller than the screw diameter.
- Screw the brace into both sides of the joint, snug but not overtightened — stripping the hole defeats the point.
Glue and Clamp Wooden Joints
For a wooden frame with a loose mortise-and-tenon or dowel joint, glue does more structural work than hardware alone. Apply wood glue to the joint, clamp it firmly, wipe off squeeze-out immediately, and leave the clamp on for the glue’s full cure time — check the label, since clamp time varies by glue type and isn’t the same as the working time. Removing the clamp early is the single most common reason a glued joint fails again within weeks.
Add a Center Support Beam (Full, Queen, and King Frames)
Mid-frame sagging almost always means a missing or broken center support — and it’s the single most common structural gap on Full-size and larger frames, since not every frame ships with one. Use the chart below to check whether your bed actually needs it.
| Bed Size | Frame Width | Center Support Needed? | Recommended Beam |
|---|---|---|---|
| Twin / Twin XL | 38–39″ | Usually not required | Standard side rails are enough |
| Full / Double | 54″ | Recommended | 2×4 beam + 1 center leg |
| Queen | 60″ | Required by most mattress warranties | 2×6 beam + 1–2 center legs |
| King / Cal King | 76–80″ | Required | 2×6 beam + 2–3 center legs |
To add one: cut a 2×4 (Full) or 2×6 (Queen/King) to run from the inside of the headboard to the inside of the footboard. Attach angle brackets at both ends so the beam sits flush with the top of the side rails, then add one adjustable-height leg at the center for Full and Queen, or two to three evenly spaced legs for King. If you’re building this support from scratch rather than retrofitting an existing frame, our guide on building a center support for a bed frame covers the full cut list.
Strengthen the Side Rails and Slats
Side rails carry weight along their length, and slats are usually the first thing to crack or shift once a rail flexes. Two fixes cover almost every case.
Re-Space and Reinforce the Slats
Keep slats no more than 3 inches apart center-to-center — most mattress warranties specify this exact spacing, and wider gaps are the leading cause of foam and hybrid mattresses failing early or slats snapping under normal weight. Screw each slat down at both ends instead of letting it float loose in a bracket; a floating slat is what causes the sharp cracking sound some frames make when someone sits down hard. For slat-specific fixes beyond spacing — a center support beam, sistering weak boards, or a plywood deck — see our full guide on how to make bed slats stronger.
Add a Plywood Support Layer
For a frame with thin or widely-spaced slats, a ¾-inch plywood sheet cut to fit inside the rails and laid over the slats spreads the load evenly and stops individual slats from bowing. This isn’t a permanent fix for a genuinely broken frame, but it buys time and works well under a box spring or a firm mattress.
Add Metal Angle Brackets at the Rail Corners
Where side rails meet the headboard and footboard, a metal angle bracket at each corner stops the rail-to-post connection from working loose over time. Remove any stripped screws first, position the bracket, drill pilot holes, and drive screws long enough to bite into solid wood without poking through the far side.

Secure the Headboard and Footboard
Loose headboard or footboard connections show up as movement at the head or foot of the bed even after the rails and center are solid. Remove the mattress, inspect the fasteners connecting the headboard/footboard to the frame, and replace any that are worn, bent, or stripped. Align the pre-drilled holes, insert new bolts or screws, and tighten firmly — but stop at snug. Overtightening into wood strips the hole and creates the exact looseness you’re trying to fix.
How Much Weight Can a Reinforced Bed Frame Hold?
Weight ratings vary by manufacturer, but published capacities for intact, properly-assembled frames generally fall in these ranges:
- Twin: roughly 250–300 lbs
- Full: roughly 400–450 lbs
- Queen: roughly 600–700 lbs with center support installed
- King / Cal King: roughly 700–1,000+ lbs with center support and multiple legs
These figures assume the frame is fully reinforced — a Queen frame missing its center beam commonly fails well below its rated capacity, since the middle third of the frame is unsupported. If you’ve added a heavier mattress than the frame originally shipped with, check the manufacturer’s weight rating before assuming reinforcement alone solves it; some frames need upgraded legs, not just tighter joints.
Reassemble and Test the Frame
- Recheck every fastener: go around the entire frame a second time and confirm nothing loosened during the reinforcement work itself.
- Shake test: grip the frame at a top corner and rock it firmly. Any remaining play means that specific joint needs another pass.
- Weight test: sit on the edge of the frame, then lie down and shift your weight side to side, listening for new creaks that indicate a joint you missed.
- Center check: press down firmly on the middle of the frame (with slats/plywood in place) — it should feel as solid as the corners, not spongy.
If a specific spot still moves after retightening, it usually means the screw hole itself is worn out rather than the screw being loose — go back to the wood-glue-and-toothpick fix above rather than just driving a longer screw into the same worn hole.
Keep It That Way: Maintenance
Check every screw and bolt every six months — roughly when you rotate your mattress. Catching a loose connection at that stage takes five minutes with a screwdriver; letting it run for a year usually means a worn-out hole that needs the glue-and-plug repair instead of a quick tighten.
“In the shop, the bed frames that come back squeaking within a year almost always have plain L-brackets in the corners instead of triangular gussets. The L-shape still lets the joint flex along its open diagonal; the triangle ties both sides into one rigid piece and doesn’t.”
Frequently Asked Questions
How can I reinforce my bed frame to hold more weight?
Add a center support beam with at least one floor leg (required on Full-size and up), replace any thin or cracked slats with slats spaced under 3 inches apart, and reinforce every corner joint with a triangular gusset instead of a plain L-bracket. Together these three fixes raise a frame’s effective capacity closer to its rated maximum instead of failing well under it.
How do you stabilize a wobbly bed frame?
Start by tightening every screw and bolt on the frame, since loose hardware causes most wobble. If movement remains, add corner braces at each joint and check that all four legs sit flat — use felt pads or shims under any leg that doesn’t touch the floor evenly. A frame that still rocks after both steps usually has a worn screw hole that needs to be glued and re-plugged rather than just tightened again.
How do you add more support to a metal bed frame?
Use a bed frame rail clamp kit sized to your rail tubing (commonly 1 inch or 1-1/4 inch) to tighten loose rail-to-corner connections without drilling, and add a center support leg if the frame doesn’t already have one. For a deeper look at loose or bent metal frames specifically, see our guide to stabilizing a metal bed frame.
How do I keep my bed frame from breaking?
Check hardware every six months, keep the mattress and box spring within the frame’s rated weight, and don’t skip the center support on a Full-size frame or larger. Avoid jumping or sitting hard on the edge repeatedly, since edge impacts stress the corner joints more than the frame’s rated load-bearing capacity accounts for.
Do I need a center support beam for a Queen bed frame?
Yes. A Queen frame spans 60 inches, and most mattress manufacturers void the warranty without center support at that width. Without it, the middle third of the frame carries weight unsupported and typically starts sagging within months of normal use.
Conclusion
Most bed frame problems come down to one of three things: loose hardware, a missing center support, or joints that were never braced in the first place. Work through the diagnostic table, fix the specific joint or beam that’s actually causing the symptom, and test the frame under real weight before you call it done — a five-minute check now saves a re-drilled, re-glued repair in six months.
Sponsored / affiliate links. As an Amazon Associate I earn from qualifying purchases. I may earn additional commission from eligible campaigns.