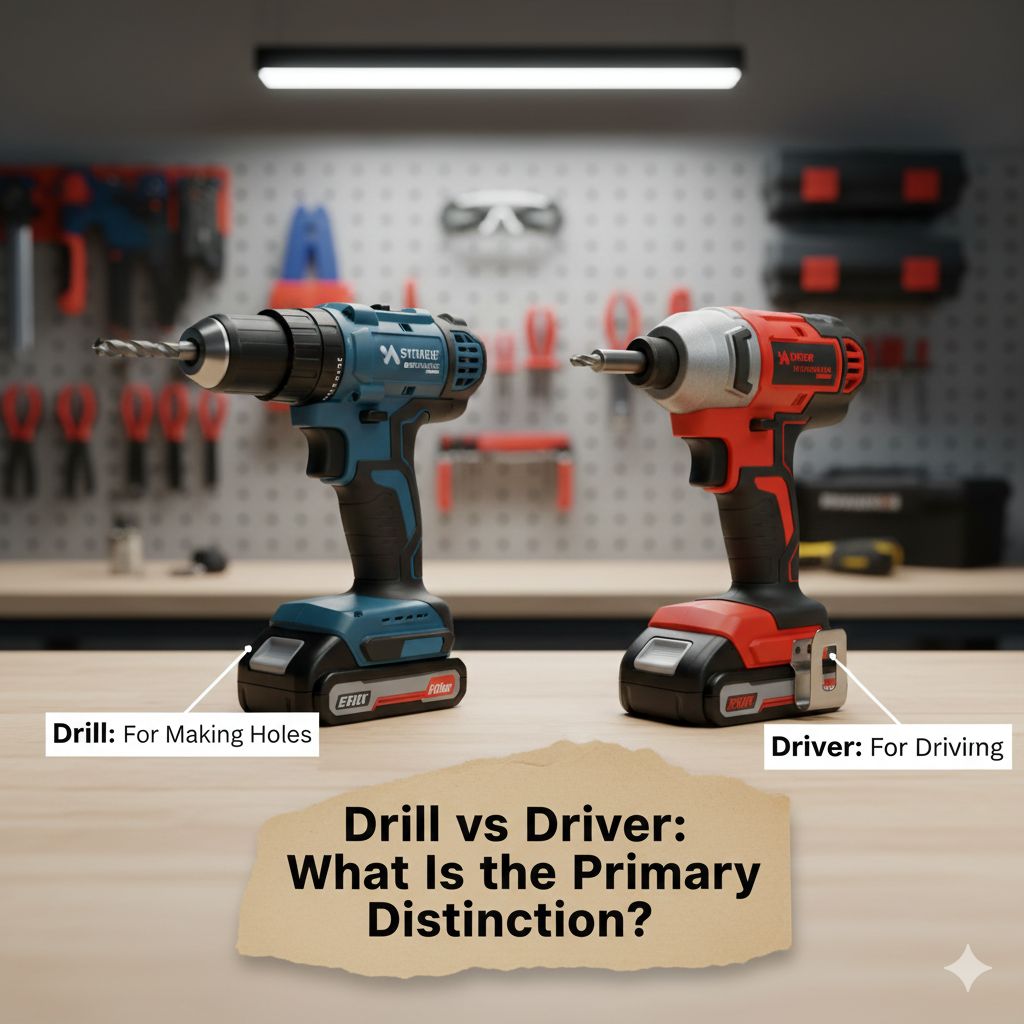
Drill vs Driver: What Is the Primary Distinction?
Figuring out the difference between a Drill vs Driver: What’s the Difference? is something lots of people find tricky when they’re first getting into home improvement or working on projects. Both tools look kind of similar and they both spin, right? This can be confusing. But don’t worry, it’s simpler than you might think! This post will help you sort it all out. We’ll explore the main differences step by step so you’ll know exactly which tool to use for any job. Let’s get started!
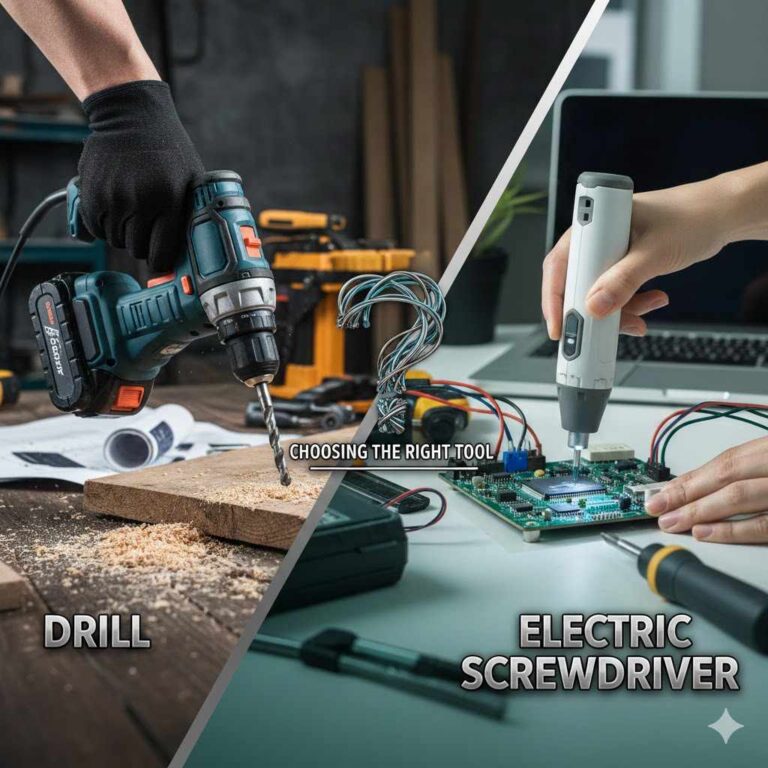
What Do They Do? Exploring the Basics
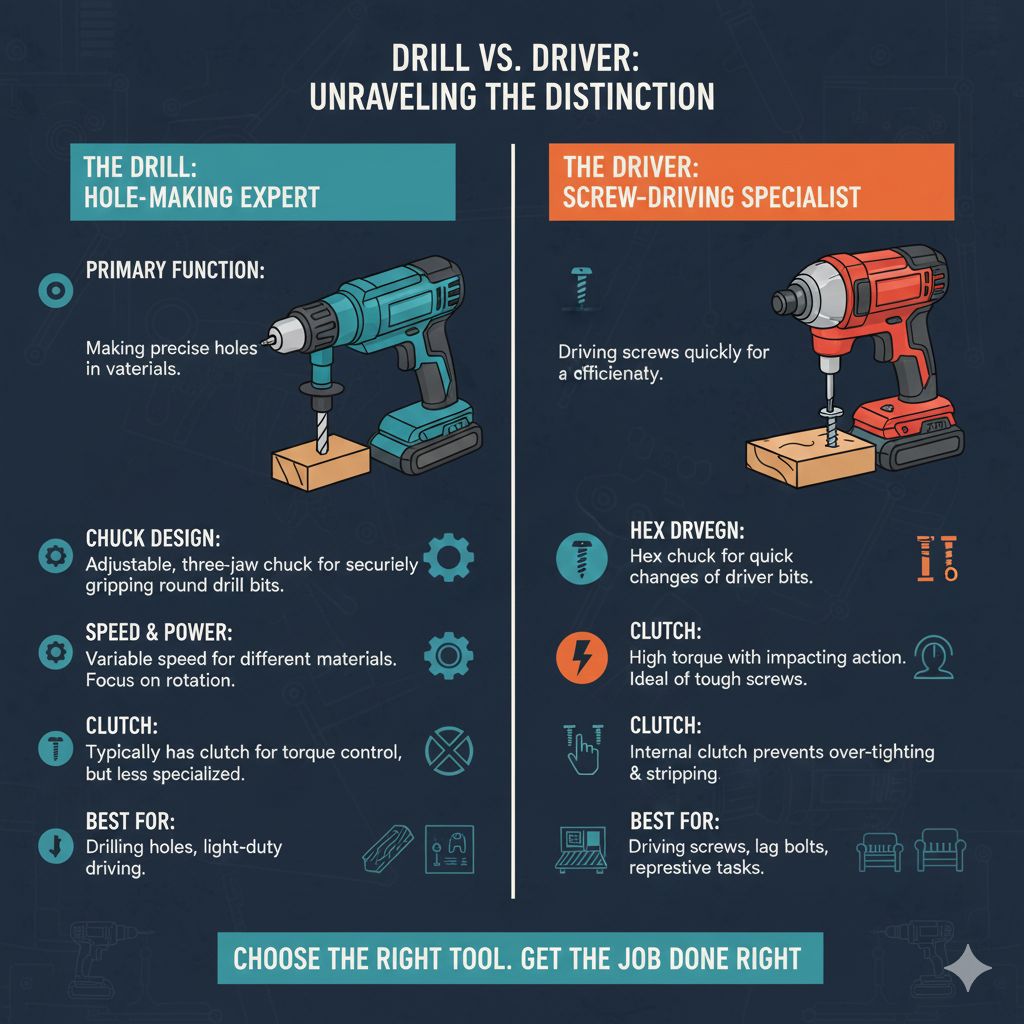
At their heart, both drills and drivers are power tools used to make holes or tighten screws. They are both incredibly useful, making projects around the house much simpler and faster. The main difference lies in their specific functions and how they’re built to achieve those tasks. A drill is typically designed for making holes in various materials, while a driver specializes in driving screws. The key distinction often lies in the clutch, torque, and chuck mechanism.
The Drill’s Main Job: Making Holes
Drills are your go-to tool when you need to create a hole. They can bore through wood, metal, plastic, and other surfaces. The drill’s chuck, which holds the drill bit, is designed to firmly grip the bit, allowing for consistent rotation and force. You often find drills with adjustable speeds that can be varied according to the project. They can also often be used for driving screws, but they are not the best choice, especially for larger jobs.
- Hole-Making: Drills excel at making holes of various sizes. They use drill bits that come in a variety of types, sized for different jobs.
- Chuck Design: The drill’s chuck is made to grip drill bits securely. This helps when drilling into hard materials, where a strong grip is required.
- Speed and Power Settings: Many drills have speed settings, allowing the user to select the perfect speed for each material.
The Driver’s Main Job: Driving Screws
A driver is specifically designed for driving screws into materials. They often have a special clutch, which helps prevent you from stripping screws or damaging the material. This lets you apply the right amount of force without overtightening. The design of a driver lets you work quickly, saving time on large projects involving numerous screws.
- Screw Driving Specialist: Drivers are the best choice for driving screws, as their design provides optimal control.
- Clutch Mechanism: Drivers have a clutch that prevents overtightening, protecting both the screw and the material you’re working with.
- Torque Control: Drivers allow you to adjust the torque (rotational force), making it easier to control how tightly a screw is driven in.
Drill vs Driver: Key Differences
The difference between a drill and a driver can sometimes be subtle, but they’re important. They differ in a few key ways that make them suitable for different types of jobs. These differences primarily involve their internal mechanisms, such as clutch settings and the type of chuck they employ. Considering these differences when choosing a tool ensures that you get the best outcome for your project.
Clutch vs No Clutch
One of the clearest distinctions is the clutch. Drivers often have a clutch, which is a mechanism that allows you to control the amount of torque applied to the screw. When the screw is fully driven, the clutch will “slip”, preventing the screw from being overtightened. The clutch isn’t standard on drills, making them more suitable for tasks where consistent rotational force is required, such as drilling holes. This simple feature makes drivers much better for jobs where you are driving multiple screws.
- Clutch in Drivers: Drivers have a clutch to manage torque.
- No Clutch in Drills: Drills usually don’t have a clutch.
- Function: Clutches prevent stripping screws, while drills provide consistent force.
Chuck Types
The chuck is what holds the drill bit or the screwdriver bit in place. Drills often have a keyed chuck or a keyless chuck. Both are designed to securely grip drill bits so that they don’t slip while drilling. Drivers often have a hex chuck, which is designed to quickly swap screwdriver bits. Choosing the correct type of chuck ensures the tool can perform at its best.
- Drill Chucks: Drills use a chuck to hold drill bits securely.
- Driver Chucks: Drivers generally use a hex chuck for quick bit changes.
- Purpose: Chucks in drills are designed for secure hole drilling, while those in drivers are made for screw driving.
Torque Settings
Torque is the rotational force that a tool puts out. Drivers usually offer adjustable torque settings that allow you to customize how much force is applied to a screw. This is helpful to avoid stripping the screw or damaging the material. Drills usually offer speed settings, which control the rate at which the bit spins. The right setting is key for effective and damage-free work.
- Driver Torque Settings: Drivers have torque settings for precision.
- Drill Speed Settings: Drills have speed settings to adjust the rate of rotation.
- Impact: Torque controls screw tightness, and speed controls drilling pace.
Exploring the Uses of Both Tools
Knowing when to use a drill versus a driver can improve your productivity and the quality of your work. Each tool has certain tasks it is best suited for. Understanding how to apply each tool can make completing projects less challenging.
When to Use a Drill
Drills are perfect when you need to make holes in wood, metal, plastic, or even brick. They provide consistent rotational force, which is necessary for drilling. When you are putting together furniture, hanging pictures, or even doing basic construction, a drill can be the right choice. Knowing what drill bit to use is another key element. If you’re tackling a project where you need a clean, precise hole, reach for your drill.
- Hole Creation: Ideal for drilling holes of various sizes.
- Material Compatibility: Works well on wood, metal, plastic, and other materials.
- Typical Projects: Use it for assembling furniture and general construction.
When to Use a Driver
Drivers are at their best when it comes to driving screws, especially when you need to do many of them. They are fantastic for projects like building decks, assembling furniture, and putting together cabinets. The clutch prevents screws from being driven in too deeply and potentially damaging the material. If you need to quickly and efficiently fasten pieces together with screws, a driver is the tool to pick.
- Screw Driving: Designed specifically for driving screws.
- Torque Control: Adjustable torque settings provide precision.
- Common Applications: Great for building decks, assembling furniture, and cabinet assembly.
Choosing the Right Tool for the Job
Making the right choice between a drill and a driver ensures your projects are successful and efficient. Several factors can help you make the correct decision, including the specific task and the material you’re working with. By keeping these elements in mind, you can choose the best tool to make the job easier and improve the final result.
Project Type Matters
Consider the project at hand. If the project requires making holes, then a drill is the go-to tool. If it needs screws, a driver is usually the better choice. Some projects, such as building a shed, may require both drilling holes and driving screws, so you may need both tools.
- Hole-centric Projects: Use a drill for making holes.
- Screw-centric Projects: Use a driver for driving screws.
- Mixed Projects: You may need both tools for more complex tasks.
Material Matters Too
The material also influences tool selection. Wood and softer materials are usually suitable for using drivers, while metal often requires a drill. When working with delicate materials, the clutch on the driver can protect against damage. Be sure to consider both the project and the material to make the best choice.
- Wood and Soft Materials: Drivers work best for these materials.
- Metal and Hard Materials: Drills are more suitable.
- Delicate Materials: Drivers with adjustable clutches are recommended.
Power Considerations: Corded vs. Cordless
Both drills and drivers are available in corded and cordless versions. Corded tools provide continuous power and are well-suited for heavy-duty tasks where consistent operation is needed. Cordless tools offer convenience and portability, making them ideal for jobs in locations where there is no power. The right choice depends on your needs.
- Corded Tools: Best for continuous, high-power tasks.
- Cordless Tools: Offer flexibility and portability.
- Consider the Job: Assess the power needs and the job location to select the appropriate tool.
Real-Life Examples and Scenarios
Let’s consider some real-life scenarios and explore how the choice between a drill and a driver can affect the outcome. These cases demonstrate the practical use of each tool, showing how it improves the efficiency and effectiveness of the task.
Building a Deck
Scenario: You are building a wooden deck. This involves making holes for the deck supports and driving in many screws to secure the decking boards.
Solution: In this situation, you would use a drill to create pilot holes for the deck posts and any other areas that require a pilot hole. Then, you’d switch to a driver to attach the deck boards. The driver’s clutch would prevent over-driving the screws and damaging the wood. This approach will guarantee a strong, beautiful deck.
Assembling Flat-Pack Furniture
Scenario: You’re putting together flat-pack furniture. It comes with many screws, and you want to ensure the furniture is assembled quickly.
Solution: The best tool here is a driver. It has the clutch and a bit holder, making it simple to drive in many screws in a short time. You can adjust the torque to ensure the screws are tight but not so tight that they strip the material. Using a driver can dramatically speed up the assembly process.
Hanging a Picture
Scenario: You are hanging a picture on your wall.
Solution: Start by using a drill to make a pilot hole. Then, you can use the driver to drive the screw that will hold the picture. This will guarantee a secure and damage-free hanging.
Advanced Insights and Tips
Beyond the basics, there are a few extra tips and things to remember. Knowing these elements can further improve your use of each tool. The more you know, the better your project results will be.
Understanding Drill Bits and Driver Bits
The type of drill bit or driver bit you use is just as important as the tool itself. There are various bits for drills, each designed for different materials. Likewise, driver bits come in a variety of styles for different screw heads. It’s important to select the correct bit for the job to make sure the work is effective and doesn’t damage the material.
- Drill Bits: Designed for making holes in various materials.
- Driver Bits: Specifically designed to match screw heads.
- Importance: Picking the correct bit is essential for an effective and damage-free result.
Maintenance and Safety
Maintaining your drill and driver and adhering to safety protocols is essential. Regularly check your tools for damage, keep them clean, and store them properly. Always wear safety glasses when using power tools, and avoid loose clothing or jewelry. Using the tools in a safe way and keeping them maintained will increase their lifespan and make sure they operate efficiently.
- Tool Care: Keep your tools clean and store them properly.
- Safety Gear: Always wear eye protection and other safety equipment.
- Best Practice: Regular maintenance and caution can improve safety and prolong the tool’s life.
When to Use a Drill/Driver Combo
Some tools combine the functions of both a drill and a driver. They often have a drill setting and a driver setting. This can be great if you have limited space or want a versatile tool. However, remember that these combo tools may not perform as well as dedicated tools. Consider your specific needs when deciding if this type of tool is the right choice for your project.
- Combination Tools: Some tools combine drill and driver functions.
- Versatility: Great for limited space or smaller tasks.
- Trade-off: These can be less efficient than dedicated tools.
Frequently Asked Questions
Question: Can I use a drill to drive screws?
Answer: Yes, you can. However, a driver is the better tool for driving screws because of its clutch, which prevents overtightening and stripping the screws. While a drill can drive screws, it may not offer the precision and control you need, especially for many screws.
Question: Can I use a driver to drill holes?
Answer: It’s possible to use a driver to drill small holes, but it’s not the ideal tool for the job. A drill is specifically designed to create holes, with features like a secure chuck and speed settings that make the process more efficient and accurate. Using a driver for drilling may not produce the best results and could damage the material.
Question: What’s the main difference in torque between a drill and a driver?
Answer: Drills generally provide consistent torque for drilling. Drivers offer adjustable torque settings for controlling how tightly a screw is driven. The clutch in drivers allows you to set the torque to prevent stripping screws, which is not usually a feature on drills.
Question: Why do drivers have a clutch?
Answer: Drivers have a clutch to manage the force applied to the screw. The clutch allows you to control how tight the screw is driven, preventing overtightening and damage to the material. When the screw is fully driven, the clutch slips, stopping further rotation.
Question: Which tool is better for assembling flat-pack furniture?
Answer: A driver is the better tool for assembling flat-pack furniture. It is designed to quickly and efficiently drive screws, thanks to its clutch for torque control and the bit holder for fast bit changes. This makes the assembly process quicker and easier, while also reducing the chance of stripping screws.
Final Thoughts
So, we’ve explored the difference between a Drill vs Driver: What’s the Difference?. It’s about knowing which tool works best for a particular task. A drill is your go-to for making holes, offering the power and precision to create clean openings. The driver shines when you need to drive screws, providing the control and clutch function that prevents damage. Picking the right tool for the job will not only make your projects go more smoothly but also improve the end results.
Now, next time you’re about to start a project, remember the key differences. Consider the task, the material, and the expected outcome. With the right tools and a little practice, you’ll feel confident tackling any project. Don’t hesitate to experiment and practice. Happy building!