How Many Coats: Genius Polyurethane Hardwood Floor Secrets
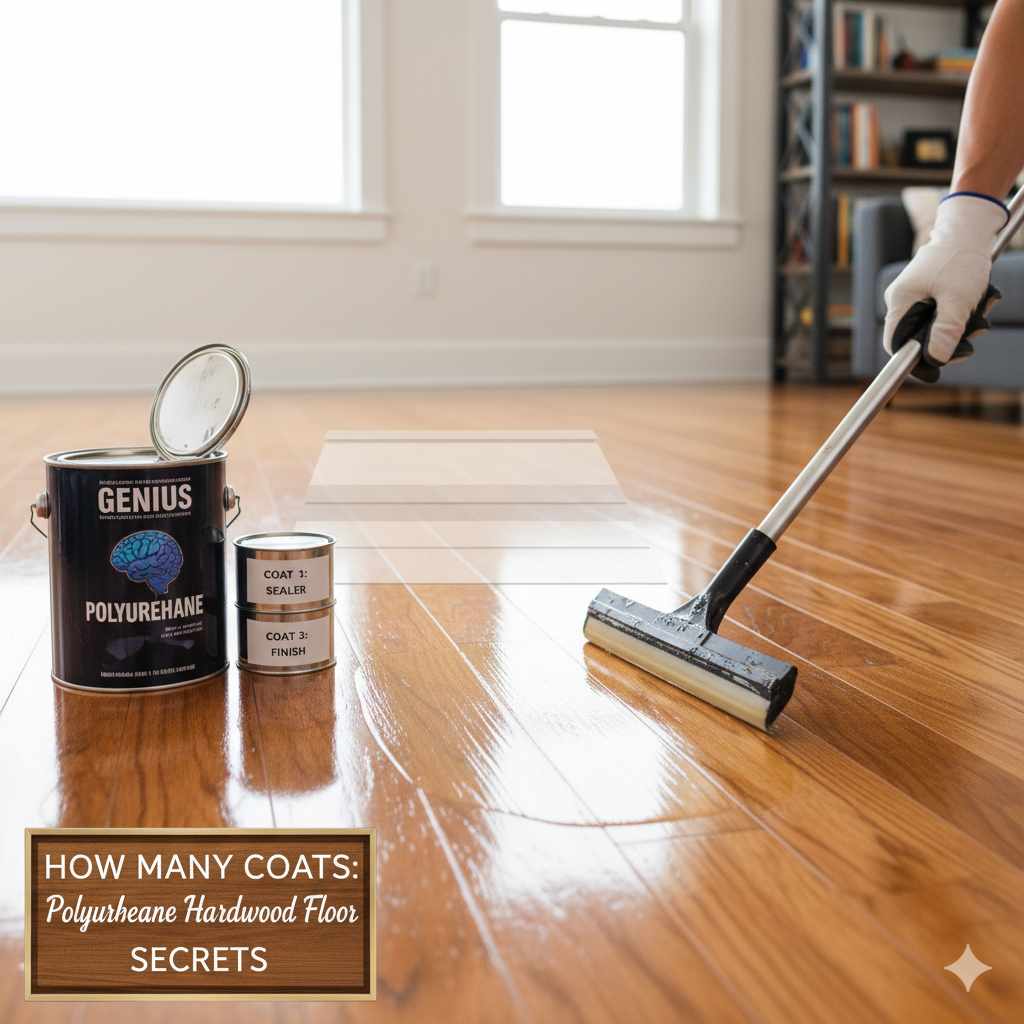
For a durable, beautiful polyurethane finish on your hardwood floors, plan for 3-4 coats. This number offers the best balance of protection, appearance, and longevity for most DIY projects. Applying too few coats risks premature wear, while excessive coats might lead to a gummy finish. We’ll guide you through the secrets to getting it just right!
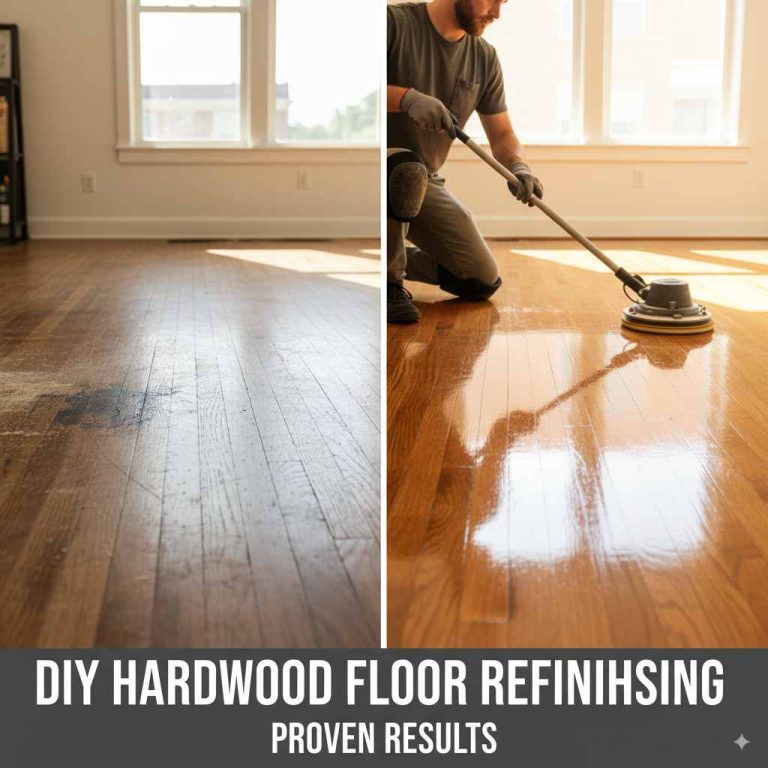
Are you ready to give your hardwood floors a fresh, protective glow with polyurethane? It’s a fantastic way to enhance their beauty andGUARD them against daily wear and tear. But a big question often pops up for DIYers: “How many coats of polyurethane should I apply?” Get this wrong, and you might end up with floors that scratch too easily or look… well, a bit off. It’s a common source of worry, but don’t fret! I’m here to share some simple, proven secrets to help you nail the perfect number of coats, making your floors look fantastic and last for years. Let’s dive into how to get that professional-looking finish right in your own home!
The Magic Number: Understanding Polyurethane Coats for Hardwood Floors
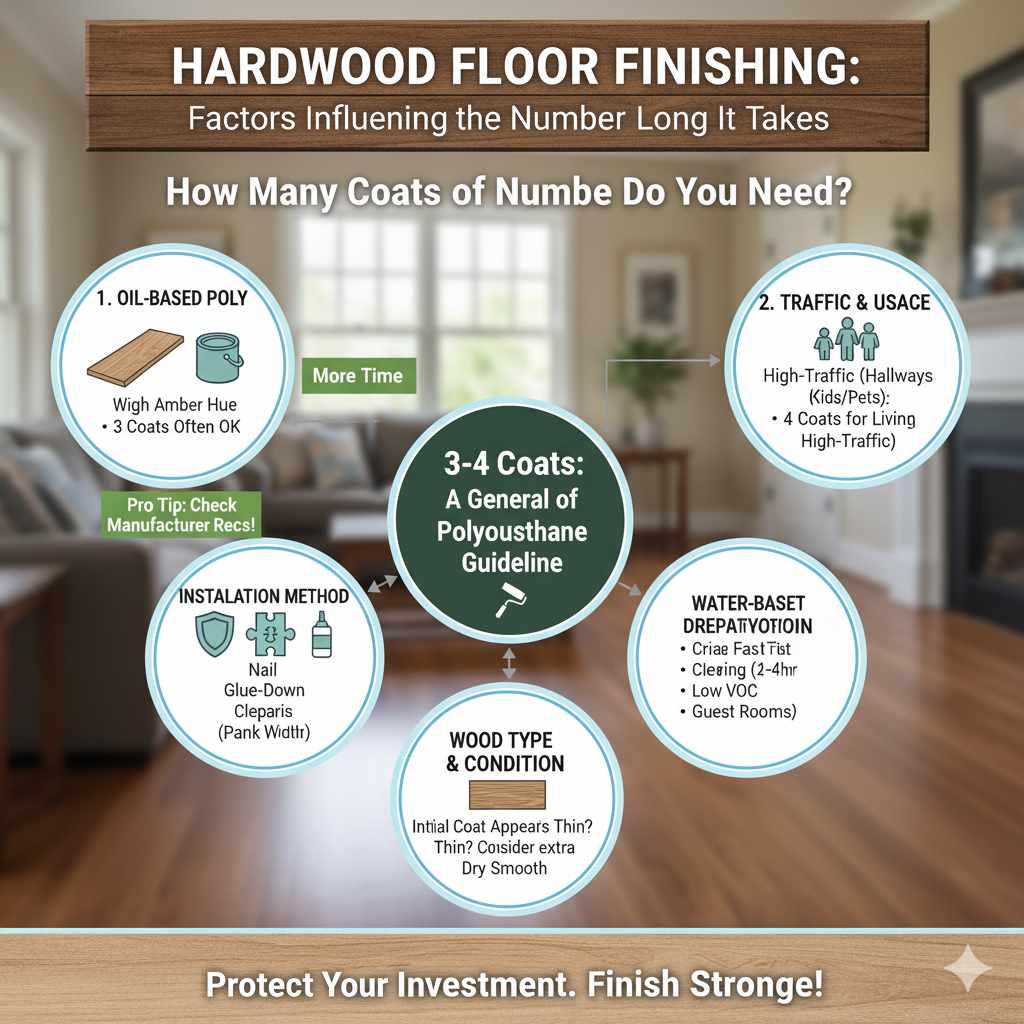
When it comes to polyurethane on hardwood floors, there isn’t a single “one size fits all” answer. However, for most homeowners and DIY enthusiasts, the sweet spot is generally 3 to 4 coats. This range provides a robust protective barrier without being excessive. Think of each coat as adding a layer of armor for your beautiful wood.
Why this number? Each coat of polyurethane serves a purpose:
- Protection: The primary job of polyurethane is to shield your wood from moisture, spills, scuffs, and everyday traffic. More coats mean better protection.
- Build & Depth: Multiple coats build up a smooth, even surface that enhances the wood’s natural grain and color, giving it a rich, lustrous appearance.
- Durability: A properly applied multi-coat system will last much longer, meaning you won’t have to refinish your floors as often.
Applying fewer than 3 coats often leaves the floor vulnerable. You might see scratches and wear marks appear much sooner. On the other hand, going overboard with 5 or more coats can sometimes lead to a finish that feels thick, gummy, or might even yellow over time, especially with oil-based polyurethanes. So, 3-4 coats is our target for a winning formula!
Factors Influencing the Number of Coats
While 3-4 coats are a great guideline, a few factors might nudge you to adjust slightly. Understanding these will help you make the best decision for your specific project.
1. Type of Polyurethane
There are two main types of polyurethane you’ll encounter for wood floors:
- Oil-Based Polyurethane: This is a classic choice known for its durability and amber hue it imparts to the wood, giving it a warm, traditional look. It’s very hard and resistant to wear. However, it has a strong odor, requires mineral spirits for cleanup, and dries slower, typically needing 24 hours between coats. Because of its inherent toughness, 3 coats are often sufficient for excellent protection.
- Water-Based Polyurethane: These finishes are clear and don’t yellow over time, preserving the natural color of your wood. They dry much faster (usually 2-4 hours between coats), have low VOCs (Volatile Organic Compounds), and clean up with water. While modern water-based polys are very durable, older formulations were less so. To achieve the same level of protection as oil-based, you might lean towards 4 coats of a water-based product, especially in high-traffic areas.
Pro Tip: Always check the manufacturer’s recommendations on the can! They often provide specific guidance on the number of coats for best results.
2. Traffic & Usage
Consider how much use your floors will get. High-traffic areas like hallways, entryways, and living rooms benefit from more robust protection. Rooms with less foot traffic, such as guest bedrooms, might be perfectly fine with 3 coats.
For:
- High-Traffic Areas: Aim for 4 coats, especially if you have kids or pets.
- Medium-Traffic Areas: 3 coats are usually adequate.
- Low-Traffic Areas: 3 coats are typically fine, but 2 might suffice if you’re using a very high-quality product and want to maintain a lighter look. However, 3 is generally recommended for long-term durability.
3. The Wood Type and Condition
Porous woods or floors that have been heavily sanded and are very dry might absorb the first coat of polyurethane more readily. In such cases, a “prime” coat that seems to soak in is normal. You might consider an extra coat if your wood is exceptionally thirsty or if the initial coat appears thin and unevenly absorbed. Ensure your wood is properly prepared – clean, dry, and smooth – as this is crucial for adhesion and a good finish.
The Polyurethane Application Process: Secrets to Success
Applying polyurethane correctly is just as important as knowing how many coats to use. Here’s a breakdown of the process, focusing on beginner-friendly tips:
Step 1: Preparation is Key!
This step is NON-NEGOTIABLE for a professional finish. Think of it as building a strong foundation for your paint.
- Clean Thoroughly: Vacuum all dust and debris. Wipe down the floors with a tack cloth or a slightly damp (not wet!) microfiber cloth to pick up any remaining fine dust.
- Ensure Proper Ventilation: Open windows and doors, and consider using fans to circulate air. Proper ventilation is crucial for drying and for your safety, especially with oil-based polyurethanes. A good rule of thumb is to have a steady, gentle breeze.
- Check the Temperature & Humidity: Polyurethane applies best and dries properly in moderate temperatures (typically 65-75°F or 18-24°C) and low humidity. Avoid applying in extreme heat, cold, or when humidity is very high, as this can affect drying and curing. For more detailed environmental recommendations, you can consult resources like the U.S. Environmental Protection Agency (EPA) on volatile organic compounds.
Step 2: Stir, Don’t Shake!
Whether you’re using oil-based or water-based polyurethane, it’s crucial to gently stir the product before and during application. Shaking the can will introduce air bubbles, which can lead to a bubbly, uneven finish on your floor. Use a clean stirring stick and stir slowly and thoroughly to mix the contents without frothing.
Step 3: Apply the First Coat
Use a high-quality applicator – a lambswool applicator, a synthetic pad applicator, or a good-quality brush designed for finishes. Work in small sections.
- Direction: Always brush or roll with the grain of the wood.
- Evenness: Apply a thin, even coat. Avoid puddles or heavy buildup. It’s better to have too little and add another thin coat than too much.
- Coverage: Aim for consistent coverage across the entire floor.
Step 4: Drying Time
This is where patience pays off! Follow the manufacturer’s recommended drying time religiously. This is typically 24 hours for oil-based and 2-4 hours for water-based. Rushing this step can cause the coats to not adhere properly, leading to peeling or bubbling.
Step 5: Light Sanding Between Coats
This is a SECRET weapon for a super smooth finish! After each coat has dried thoroughly, use very fine-grit sandpaper (220-grit or higher) or a light sanding screen. The goal is NOT to remove the polyurethane, but to lightly scuff the surface. This helps the next coat adhere better and smooths out any minor imperfections or dust nibs that may have settled.
- Technique: Sand gently and evenly across the entire floor using a sanding block or pole sander.
- Clean Up: After sanding ANY coat, vacuum the dust thoroughly AND wipe down the floor with a tack cloth or a microfiber cloth dampened with mineral spirits (for oil-based) or water (for water-based) to remove all sanding dust. This is critical!
Step 6: Apply Subsequent Coats
Repeat steps 3 through 5 for each subsequent coat. Remember our target: 3 coats for most situations, 4 for high-traffic areas or if you used water-based polyurethane and want maximum durability.
Step 7: The Final Coat & Curing
Apply your final coat with the same care as the others. After the final coat is applied, you’ll need to let it cure. Curing is the process where the polyurethane fully hardens and reaches its maximum durability.
- Light Foot Traffic: Generally, you can walk on the floor in socks after 24-48 hours (check product instructions).
- Heavy Furniture: Wait at least 72 hours, but ideally a week or more, before placing furniture back. Use felt pads on furniture legs to prevent scratches.
- Rugs & Area Mats: Avoid placing rugs for at least a week, as trapped moisture underneath can damage the finish.
- Full Cure: The finish will continue to harden for about 30 days. Be gentle with your newly finished floors during this period to ensure maximum longevity.
Table: Recommended Coats of Polyurethane Based on Factors
Here’s a handy table to help you decide on the number of coats, summarizing the key considerations:
| Factor | Typical Recommendation | Notes |
|---|---|---|
| Base Recommendation (DIY) | 3-4 coats | Good balance of protection, appearance, and effort. |
| Oil-Based Polyurethane | 3 coats | Naturally very durable; provides a warm amber tone. |
| Water-Based Polyurethane | 4 coats | Drier clear finish; often requires an extra coat for comparable wear resistance. |
| High-Traffic Areas (Hallways, Entryways, Kitchens) | 4 coats | Essential for longevity in heavily used spaces. |
| Medium-Traffic Areas (Living Rooms, Dining Rooms) | 3 coats | Sufficient for most residential use. |
| Low-Traffic Areas (Guest Bedrooms, Offices not heavily used) | 3 coats | 3 coats ensure longevity, though 2 might suffice if using premium product & very minimalUse. |
| Porous or Dry Wood | Consider 4 coats | First coat may absorb heavily; watch for evenness. |
Choosing the Right Polyurethane: Oil vs. Water – A Quick Look
Deciding between oil-based and water-based polyurethane is a big part of the process. Here’s a quick comparison to help you choose:
Oil-Based Polyurethane
- Pros:
- Exceptional durability and scratch resistance.
- Provides a warm, amber tone that deepens the wood’s color (can be a pro or con depending on desired look).
- Generally more forgiving for beginners due to slower drying time.
- Cons:
- Strong fumes (high VOCs) require excellent ventilation and respiratory protection (consider a respirator approved for organic vapors).
- Requires mineral spirits for cleanup.
- Longer drying times between coats (typically 24 hours).
- Can yellow over time, especially with multiple coats.
Water-Based Polyurethane
- Pros:
- Low odor and low VOCs, making it more environmentally friendly and safer for indoor application.
- Dries clear, preserving the natural look of the wood.
- Fast drying times (typically 2-4 hours between coats).
- Easy cleanup with soap and water.
- Cons:
- Can be less durable than oil-based if not a high-quality product (though modern formulas are excellent).
- May require more coats for equivalent protection.
- Can sometimes raise the wood grain, though proper sanding minimizes this.
- Can be trickier to apply without leaving lap marks due to fast drying time.
Many professionals today opt for high-performance water-based polyurethanes for their speed and low odor, especially in occupied homes. For a robust DIY project, either can work brilliantly. For a truly in-depth understanding of wood finishing products, consulting technical guides from organizations like the Woodworking Network can provide valuable insights into product performance.
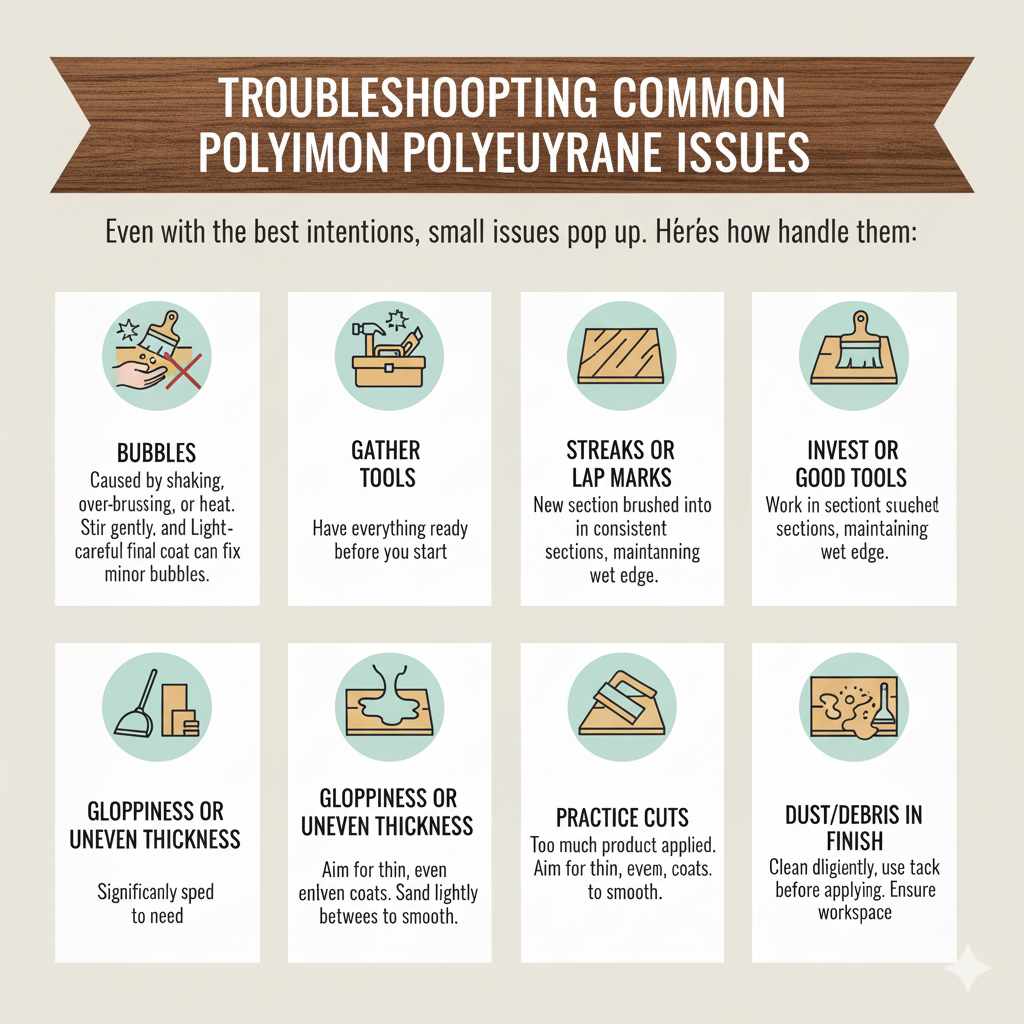
Troubleshooting Common Polyurethane Issues
Even with the best intentions, small issues can pop up. Here’s how to handle them:
- Bubbles: Usually caused by shaking the can, over-brushing, or applying in too warm conditions. Gentle stirring and proper application technique are key. If minor bubbles appear after drying, light sanding and a final careful coat can often fix it.
- Streaks or Lap Marks: Occur when a new section is brushed into a partially dried section. Work in consistent, manageable sections, always working towards an already finished, wet edge.
- Gloppiness or Uneven Thickness: Usually means too much product was applied. Always aim for thin, even coats. Light sanding between coats will smooth out thicker spots.
- Dust/Debris in Finish: This is unavoidable to some extent. Diligent cleaning after sanding and before each coat, along with a tack cloth just before applying poly, helps immensely. A well-ventilated, clean workspace is your best defense.
Frequently Asked Questions (FAQ)
Q1: How long does polyurethane take to fully cure on hardwood floors?
A1: While floors are safe for light foot traffic in 24-48 hours and furniture can be replaced after about a week, polyurethane takes about 30 days to reach its full hardness and cure. Be extra gentle during this full cure period.
Q2: Can I apply a different brand of polyurethane for each coat?
A2: It’s best to stick with the same brand and product line for all coats. Different brands might have slightly different formulations, which could lead to adhesion problems or an inconsistent finish.
Q3: Do I need to sand between every single coat of polyurethane?
A3: Yes, lightly sanding (with very fine grit) and cleaning between coats is highly recommended. It creates a better surface for adhesion and ensures a smoother, more professional-looking finish.
Q4: How do I know if my floor is ready for another coat?
A4: Your floor should be dry to the touch and hard enough that you can lightly sand it without it feeling gummy or soft. Always wait for the manufacturer’s minimum drying time, and preferably a bit longer if humidity is high.
Q5: What happens if I only apply two coats of polyurethane?
A5: Two coats typically offer minimal protection for hardwood floors. They will likely show wear and tear much faster, especially in busy areas. Three coats are generally considered the minimum for decent durability.
Q6: Is it okay to use a roller for polyurethane, or should I use a brush?
A6: High-quality foam rollers or lambswool applicators are excellent for applying polyurethane evenly and quickly over large areas. Brushes are good for corners and edges. For beginners, a good applicator pad designed for finishes is often easier to obtain an even coat with.
Conclusion: Your Hardwood Floors Deserve the Best
Mastering the art of polyurethane application is within your reach! By understanding that aiming for 3 to 4 coats is generally your best bet for durable, beautiful hardwood floors, you’re already ahead of the game. Remember to tailor this number based on whether you’re using oil-based or water-based polyurethane, and the expected traffic in each room.
The secret sauce isn’t just the number of coats, but the care you put into preparation, application, and the crucial sanding and cleaning steps between each layer. Be patient, work methodically, and always prioritize safety by ensuring good ventilation. With these tips and secrets, you’ll achieve a finish that not only protects your investment but also brings out the natural charm and warmth of your hardwood floors for years to come. Happy finishing!