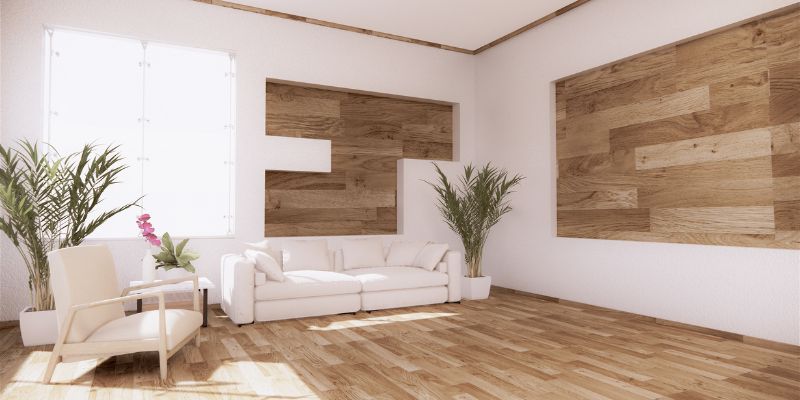
Grey Whitewash Hardwood Floors: A Timeless Choice for Your Home
Hey there! If you’re thinking about giving your home a fresh, stylish look, let me tell you about grey whitewash hardwood floors. I’ve spent years exploring home design trends, and this one has stolen my heart. It’s the perfect blend of modern and rustic, bringing a soft, airy vibe to any space. Whether you’re renovating your living room or sprucing up a cozy bedroom, grey whitewashed floors can transform your home. In this article, I’ll walk you through everything I’ve learned about this stunning flooring option, from what it is to how to care for it. Let’s dive in!
What Are Grey Whitewash Hardwood Floors?
When I first heard about grey whitewash hardwood floors, I was curious about what made them so special. Simply put, grey whitewashing is a finishing technique that gives hardwood a light, weathered look with a hint of grey. It’s like the wood has been kissed by the sea, with a soft, muted tone that feels both calming and sophisticated. Unlike traditional staining, whitewashing involves applying a translucent wash that lets the wood’s natural grain shine through. The grey hue adds a modern twist, making it versatile for all kinds of home styles.
I’ve seen these floors in cozy cottages and sleek urban lofts, and they always look amazing. The process starts with sanding the wood to open its pores, then applying a grey-whitewash mixture. This can be done with paint, stain, or a specialized whitewash product. The result? A floor that feels timeless yet fresh, with a texture that invites you to run your fingers over it.
Why Choose Grey Whitewash Hardwood Floors?
Let me share why I’m such a fan of these floors. First, they’re incredibly versatile. Whether your home leans toward farmhouse charm or minimalist chic, grey whitewash floors fit right in. They brighten up small spaces, making them feel larger, and add warmth to bigger rooms. I’ve noticed they pair beautifully with bold furniture or soft neutrals, giving you endless decorating options.
Another reason I love them is their ability to hide imperfections. If you’ve got pets or kids (like I do!), you know floors take a beating. The light, distressed look of grey whitewash camouflages scratches and scuffs better than darker finishes. Plus, they’re forgiving when it comes to dust or pet hair, which is a lifesaver for busy households.
Finally, these floors are eco-friendly if you choose sustainable wood and non-toxic finishes. I’ve always cared about making environmentally conscious choices, and knowing my flooring can be kind to the planet feels good.
Benefits of Grey Whitewash Hardwood Floors
Let’s break down the perks of these floors. I’ve put together a quick table to show you why they’re such a great choice:
| Benefit | Why It Matters |
|---|---|
| Aesthetic Appeal | The soft grey tones create a calming, stylish vibe that suits any decor. |
| Durability | Hardwood is tough, and the whitewash finish hides wear and tear. |
| Versatility | Works in any room—living rooms, kitchens, bedrooms, you name it. |
| Easy Maintenance | Dust and dirt don’t show as much, making cleaning a breeze. |
| Eco-Friendly Options | Sustainable wood and non-toxic finishes are available. |
| Increases Home Value | Buyers love the modern yet timeless look of these floors. |
I’ve found these benefits make grey whitewash floors a practical and beautiful choice. When I installed them in my dining room, I was amazed at how they elevated the space without breaking the bank. They’re an investment that pays off in both style and function.
How to Achieve the Perfect Grey Whitewash Look
Now, let’s talk about how to get that perfect grey whitewash look. I’ve tried this process myself, and while it’s not rocket science, it does take some care. Here’s what I’ve learned:
Start with the right wood. Oak, maple, and pine are great choices because they take the whitewash well. I used oak in my home, and the grain really pops. Sand the floor thoroughly to remove old finishes and open the wood’s pores. This step is key for an even finish.
Next, choose your whitewash product. I’ve experimented with both paint-based and stain-based washes. Paint gives a more opaque look, while stain keeps things subtle. Mix in a grey pigment to get that soft, ashy tone. Apply the wash with a brush or cloth, working in small sections. I like to wipe off excess wash to let the wood grain show through.
Once the wash dries, seal it with a clear polyurethane topcoat. I went with a matte finish to keep the natural vibe, but satin works if you want a slight sheen. Apply at least two coats for durability. Trust me, this step makes your floors last longer and protects them from spills.
Installing Grey Whitewash Hardwood Floors
If you’re wondering about installation, I’ve got you covered. You can go the DIY route or hire a pro, depending on your skills and budget. I tried installing a small section myself, and while it was rewarding, it was also time-consuming. Here’s what you need to know:
For DIY, you’ll need tools like a sander, paintbrushes, and a steady hand. Start by prepping the subfloor—make sure it’s clean and level. Lay the hardwood planks, nailing or gluing them down. Once installed, sand and apply the grey whitewash as I described earlier. It took me a weekend to do a small room, but the result was worth it.
Hiring a professional is easier but pricier. I got quotes ranging from $5 to $10 per square foot, depending on the wood and labor. If you go this route, ask for samples of their whitewash work. I learned the hard way that not all contractors understand the grey tone you’re aiming for.
Maintaining Your Grey Whitewash Floors
I’ll be honest—maintaining these floors is one of the reasons I love them. They’re low-maintenance, but a little care goes a long way. Here’s what I do to keep mine looking fresh:
Sweep or vacuum regularly to remove dust and debris. I use a soft-bristle broom to avoid scratching. For deeper cleaning, I damp-mop with a mild cleaner made for hardwood. Avoid soaking the floor—too much water can damage the wood. I learned this after a mop mishap left my floor looking dull.
If you notice scratches, don’t panic. I’ve touched up small ones with a bit of whitewash and a sealant. For bigger damage, you might need to sand and refinish a section. Every few years, I apply a new topcoat to keep the floors protected and shiny.
Spills happen, especially with kids around. Blot them up quickly to prevent staining. I keep a microfiber cloth handy for accidents. Also, use felt pads under furniture to avoid dents. My coffee table left a mark once, and I wish I’d known about pads sooner.
Design Ideas to Pair with Grey Whitewash Floors
One of my favorite things about grey whitewash floors is how easy they are to decorate around. I’ve tried a few looks in my home, and here are some ideas that worked for me:
For a coastal vibe, pair the floors with navy or aqua accents. I added a blue rug and white linen curtains, and it felt like a beach house. If you prefer modern, go with sleek furniture in black or grey. I’ve seen this look in a friend’s loft, and it’s stunning.
For a cozy farmhouse feel, add warm wood tones and soft textiles. I placed a reclaimed wood dining table on my floors, and it’s now the heart of my home. You can also mix in metallic accents like gold or brass for a touch of elegance. My brass lamp looks amazing against the grey tones.
Don’t be afraid to play with color. I’ve seen bold reds and greens pop against these floors. Just keep the walls neutral to balance things out. A white or light grey wall color works best to keep the space bright.
Cost of Grey Whitewash Hardwood Floors
Let’s talk money. When I first looked into these floors, I was worried about the cost. But after some research, I found they’re surprisingly affordable. Here’s the breakdown:
The cost depends on the wood type, installation, and finish. Basic oak or pine can run $3 to $7 per square foot for materials. If you want premium woods like maple or walnut, expect $8 to $12 per square foot. Installation adds another $3 to $7 per square foot if you hire a pro.
Whitewashing itself is budget-friendly since you’re not using expensive stains. I spent about $100 on supplies for a 200-square-foot room. If you’re hiring out, the whole project might cost $1,500 to $3,000 for a medium-sized room. It’s a solid investment, especially since these floors boost your home’s value.
Common Mistakes to Avoid
I’ve made a few mistakes with these floors, so let me save you some trouble. First, don’t skip sanding. I thought I could get away with a quick sand, but the finish looked uneven. Take your time to prep the wood properly.
Another mistake is using too much whitewash. I went heavy-handed once, and the floor looked more painted than washed. Apply thin layers and wipe off excess for that natural look. Also, don’t forget the topcoat—it’s your floor’s armor against wear.
Finally, test your whitewash mix on a scrap piece of wood. I mixed a shade that was too dark at first, and it didn’t match my vision. Testing saves you from redoing the whole floor.
Grey Whitewash Floors in Different Rooms
I’ve seen these floors work magic in every room. In my living room, they create a bright, welcoming space for guests. The grey tones make my colorful throw pillows pop. In the kitchen, they’re practical since they hide spills well. I added a patterned rug to define the space.
Bedrooms feel serene with grey whitewash floors. I paired mine with soft bedding and a plush rug for a cozy retreat. Even bathrooms can work if you seal the floors properly to handle moisture. I saw a friend’s bathroom with these floors, and it looked like a spa.
Conclusion
After exploring grey whitewash hardwood floors in my own home and beyond, I can say they’re a game-changer. They bring style, durability, and versatility to any space. Whether you’re drawn to their timeless charm or their practical benefits, these floors are worth considering. I love how they’ve transformed my home into a bright, inviting space that reflects my personality. If you’re ready to give your home a fresh look, grey whitewash floors might be your perfect match. Trust me, once you see them in person, you’ll fall in love just like I did.
Frequently Asked Questions
Can I whitewash my existing hardwood floors?
Yes, you can! I’ve done this myself. Sand your floors to remove old finishes, then apply the grey whitewash. Make sure to test the color first and seal it with a topcoat for protection.
How long does it take to whitewash hardwood floors?
For a DIY project, it depends on the room size. My 200-square-foot room took a weekend, including sanding, washing, and sealing. Professionals can often finish in a day or two.
Are grey whitewash floors hard to maintain?
Not at all! I sweep mine weekly and mop with a mild cleaner. They hide dirt well, so you don’t need to clean obsessively. Just avoid excess water and use furniture pads.
Will grey whitewash floors go out of style?
I don’t think so. Their timeless look blends modern and rustic, making them versatile. I’ve seen them in homes for years, and they still feel fresh and stylish.
Can I use grey whitewash floors in a bathroom?
Yes, but you need to seal them well to handle moisture. I’ve seen it done beautifully in a friend’s bathroom. Just be cautious with spills and ventilation.