How Do You White Wash Wood: Easy Techniques for a Rustic Charm
To white wash wood, wipe away excess dirt and debris, then apply a diluted paint mixture to the surface and wipe away any excess. This will create a light, washed-out appearance while still allowing the wood grain to show through.
White washing wood is a simple and effective way to update the look of furniture or surfaces, giving them a rustic or beachy feel. It can be done with various methods, such as using paint and water, paint and a candle, or paint and a scraper.
The choice of paint, whether latex or chalk, can also affect the final result. Additionally, sealing the wood with a clear coat of water-based polyurethane can protect the white washed finish and add a subtle sheen.
Introduction To White Washing Wood
Looking to learn how to white wash wood? Discover different techniques and materials needed to achieve a beautiful whitewashed finish on various types of wood. From mixing water and paint to applying the whitewash paint mixture and wiping away excess, this easy tutorial will guide you through the process.
No sanding required!
The Charm Of Rustic Wood Finishes
Creating a rustic look with white washing wood adds charm and character to any space.
By using this technique, you can achieve a weathered and aged appearance, giving your wood a unique and timeless appeal.
History Of White Washing
White washing wood has been around for centuries, dating back to ancient times when it was used to protect and beautify surfaces.
Originally, white washing was done using lime and water to coat surfaces, providing a simple yet effective way to enhance the look of wood.
Selecting The Right Wood
To whitewash wood, you first need to select the right type of wood. Softwoods like pine and cedar are great choices as they absorb the whitewash better. Mix water and white latex paint in a 1:1 ratio, apply the mixture to the wood, and wipe away any excess with a cloth.
Repeat the process until you achieve your desired level of white-washed effect. Finally, seal the wood with water-based polyurethane for added protection.
Best Wood Types For White Washing
When it comes to white washing wood, selecting the right type of wood is crucial for achieving the desired look. Some wood types are better suited for white washing than others. For instance, softwoods like pine, cedar, and fir are excellent choices for white washing due to their porous nature, which allows the white wash to seep into the wood grain. Hardwoods like oak, maple, and cherry, on the other hand, are less porous and may require more coats of white wash to achieve the same effect.
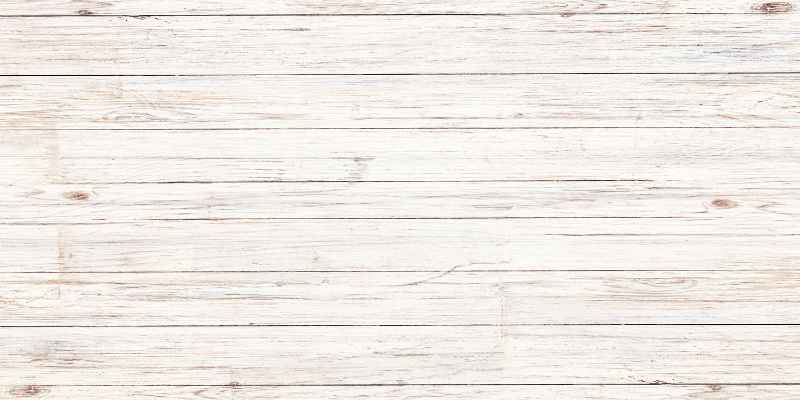
Effects On Different Wood Grains
Different wood grains can also have an impact on the final result of white washing. For example, wood with a prominent grain pattern like oak or ash may have a more pronounced and textured look when white washed, whereas woods with a smoother grain like maple or birch may have a more subtle and uniform appearance.
It is worth noting that the age and condition of the wood can also affect how it takes the white wash. Older or weathered wood may absorb the white wash differently than newer wood, resulting in a more rustic or aged appearance.
Overall, the best approach to selecting the right wood for white washing is to experiment with different types and grain patterns to find the look that best suits your project.
Prepping Your Wood
To white wash wood, start by wiping it clean and sanding it down to create a smooth surface. Mix equal parts water and white latex paint, then apply the mixture to the wood with a brush or rag. Wipe away any excess and allow the wood to dry completely before applying a clear coat of water-based polyurethane for added protection.
To Sand Or Not To Sand?
Before whitewashing your wood, you may wonder if you need to sand it first. The answer is no, sanding is not necessary. Some people do it to help the whitewash adhere better, but it’s not a requirement. However, if your wood has rough spots or splinters, it’s a good idea to sand those areas down to create a smooth surface for the whitewash to adhere to.
Cleaning Wood Surfaces
Before you begin the whitewashing process, it’s important to clean your wood surfaces thoroughly. Use a mixture of warm water and dish soap to remove any dirt, dust, or grime from the wood. Once you’ve cleaned it, rinse it with clean water and let it dry completely.
If your wood has any stains or discolorations, you may need to use a wood cleaner or bleach to remove them. Be sure to follow the instructions carefully and wear gloves and eye protection. Once you’ve cleaned the wood, rinse it thoroughly with clean water and let it dry completely before applying the whitewash.
To Sand Or Not To Sand?
Before whitewashing your wood, you may wonder if you need to sand it first. The answer is no, sanding is not necessary. Some people do it to help the whitewash adhere better, but it’s not a requirement. However, if your wood has rough spots or splinters, it’s a good idea to sand those areas down to create a smooth surface for the whitewash to adhere to.
In conclusion, prepping your wood is an important step in achieving a beautiful whitewashed finish. Cleaning your wood surfaces thoroughly and deciding whether or not to sand are key factors in the process. By following these steps, you’ll be able to create a stunning whitewashed look on any wooden surface.
Materials Needed For White Washing
To white wash wood, you will need materials like water, paint, a paintbrush, and a rag. Mix water and paint, apply the mixture to the wood, then wipe away excess for a beautiful finish.
Choosing Your Paint
When it comes to white washing wood, choosing the right paint is crucial. Opt for latex paint as it provides a smooth finish and is easy to work with. Latex paint also dries quickly, allowing you to complete your white washing project in no time. Additionally, latex paint is readily available in various shades of white, giving you the flexibility to achieve the desired whitewash effect. Remember to select a paint color that complements the overall aesthetic of your space.
Additional Tools And Supplies
In addition to paint, there are a few tools and supplies that you will need to successfully white wash wood. These include:
- A paintbrush or foam brush: Choose a brush with synthetic bristles that can evenly distribute the paint and cover the wood surface.
- A clean cloth: This will be used to wipe away excess paint and create the desired whitewash effect.
- Sandpaper: While sanding is not necessary, it can help smooth the surface of the wood and improve paint adhesion.
- A clear coat of water-based polyurethane: Applying a clear coat after white washing will protect the wood from scratches and add a beautiful sheen.
Having these tools and supplies on hand will ensure that your white washing project goes smoothly and yields professional-looking results.
Mixing Your White Wash Solution
To white wash wood, mix equal parts of water and white latex paint in a container. Stir the solution well to ensure it’s thoroughly combined. This mixture will give your wood a beautiful whitewashed effect when applied.
Ideal Ratios Of Paint To Water
When it comes to mixing a white wash solution, achieving the ideal paint to water ratio is crucial. The perfect balance ensures that the wood gets the desired whitewash effect. Most commonly, a 1:1 ratio of latex paint to water is recommended. This ratio provides a good starting point for achieving a translucent finish, allowing the wood’s natural grain to show through while still getting that coveted white hue.
Alternative Whitewash Mixtures
While the 1:1 ratio is a popular choice, there are alternative mixtures that can be used to achieve different effects. Adjusting the ratio to include more paint than water results in a thicker application that offers greater coverage and opacity. Conversely, adding more water to the mixture creates a more transparent finish, ideal for a subtle whitewash effect that still showcases the wood’s natural characteristics.
The Application Process
White washing wood can lend a charming, rustic appeal to your furniture, walls, or floors. The application process requires careful attention to detail to achieve an even and attractive finish. Here’s a step-by-step guide to mastering the white washing technique.
Step-by-step White Washing Techniques For An Even Coat
- Prepare the Surface:
- Clean the wood thoroughly to remove any dirt, dust, or grease.
- If desired, lightly sand the surface to create a smoother finish.
- Mix the Whitewash Solution:
- Combine water and white latex paint in a 1:1 ratio for a traditional whitewash effect.
- For a more transparent finish, increase the water-to-paint ratio.
- Apply the Whitewash:
- Using a paintbrush or a rag, apply the whitewash mixture in the direction of the wood grain.
- Work in small sections to ensure even coverage.
- Wipe Away Excess:
- After applying the whitewash, gently wipe away any excess with a clean cloth to achieve a consistent finish.
- Repeat the Process:
- If a more opaque finish is desired, apply additional coats of the whitewash, allowing each coat to dry before reapplying.
Creating The Desired Effect
Wiping Technique For Rustic Look
To achieve a rustic look, use a wiping technique by applying white paint diluted with water.
Adding Layers For Depth
For added depth, apply multiple layers of whitewash, allowing each layer to dry before applying the next.
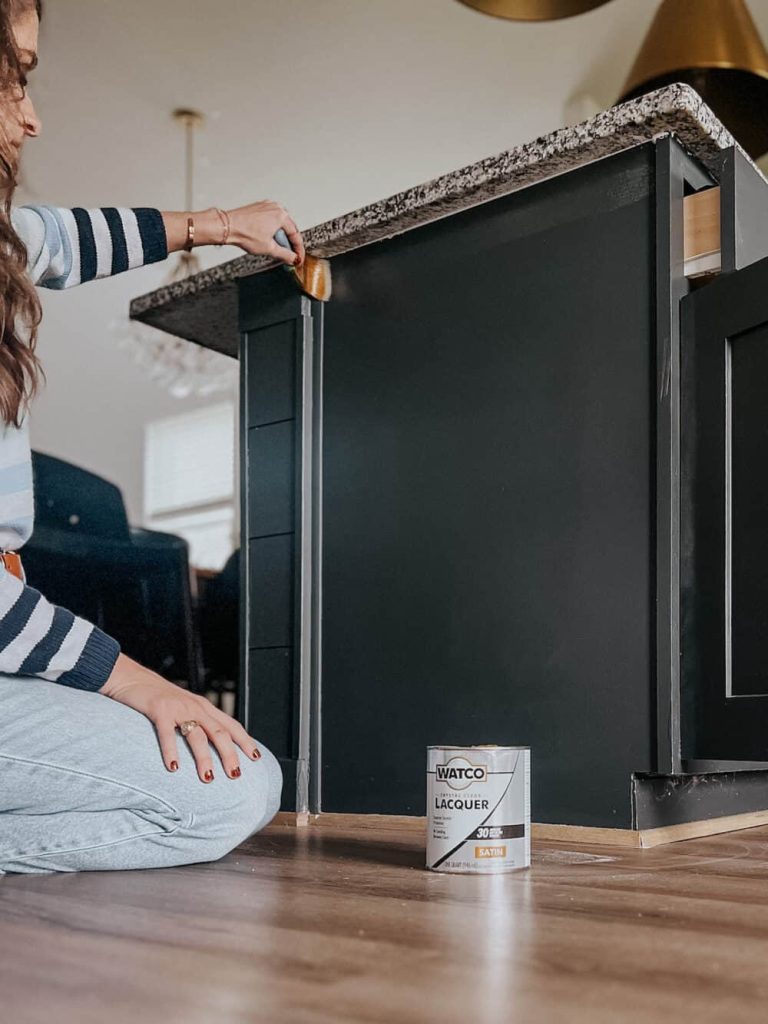
Sealing And Protecting White Washed Wood
After successfully white washing your wood, it’s crucial to seal and protect the finish to ensure longevity and durability. Proper sealing not only enhances the appearance but also guards against damage.
When And How To Seal
Seal white washed wood once the paint is fully dried. Apply a thin, even coat of sealant using a brush or roller. Allow it to dry completely before adding additional coats.
Choosing The Right Sealant
- Opt for water-based polyurethane for a clear protective finish.
- Consider varnish for a glossy look or wax for a more natural finish.
- Ensure the sealant is compatible with the type of paint used for white washing.
Protect your white washed wood by sealing it with the appropriate product to maintain its beauty and prevent damage.
Maintenance And Care
Looking to white wash wood? Here’s a quick and easy tutorial to achieve that desired effect. Start by wiping away excess stain, then apply a layer of grout or a mixture of paint and water. Finish off by sealing the wood with a clear coat of water-based polyurethane for added protection.
Cleaning White Washed Surfaces
To clean white washed surfaces, use a mild soap and water solution.
Touch-up Tips
For touch-ups on white washed wood, lightly sand the area and reapply whitewash.
White washed wood requires minimal maintenance and care. Regular cleaning with a mild soap and water solution helps maintain the finish. Avoid harsh chemicals that can damage the white wash. For touch-ups, lightly sand the area before reapplying the whitewash. This ensures a seamless finish. Remember to protect white washed wood with a clear coat of water-based polyurethane to prevent scratches and maintain its sheen.
Creative White Washing Variations
White washing wood is a versatile technique that can be customized in various creative ways to achieve unique finishes.
Using Colored Tints
- Enhance white wash with colored tints for a subtle hint of color.
- Mix in small amounts of colored pigment to the white wash solution.
- Experiment with different tints to achieve the desired hue.
Combining White Wash With Other Finishes
- Combine white wash with staining for a richer finish.
- Layer white wash over a base stain for a multidimensional look.
- Experiment with different finishes to create a unique effect.
Troubleshooting Common Issues
Learn how to white wash wood with these easy steps. No need to sand before whitewashing – simply mix water and paint together, apply to the wood, and wipe away excess. For a durable finish, seal the wood with a clear coat of water-based polyurethane.
Handling Streaks And Blotches
If you notice streaks or blotches after whitewashing, it could be due to uneven application of the whitewash. To address this, sand the wood lightly to remove the existing finish. Ensure the surface is clean and free of dust before applying the whitewash. Use a high-quality brush to apply the whitewash in long, even strokes, following the natural grain of the wood. Avoid over-brushing, as this can lead to streaks and blotches.
Fixing Uneven Finishes
Uneven finishes can result from inconsistent absorption of the whitewash into the wood. To fix this issue, consider applying a wood conditioner before whitewashing, especially if working with porous wood. This will help create a more uniform surface for the whitewash. Additionally, ensure that each coat of whitewash is applied evenly and allowed to dry thoroughly before applying the next coat. Sanding lightly between coats can also help achieve a more uniform finish.
Inspirational White Wash Projects
Looking for some inspiration for your next white wash wood project? Check out these amazing white wash projects for some real-life examples that will get your creative juices flowing.
Gallery Of White Washed Woodwork
Take a look at these stunning white wash woodwork pieces for ideas on how to incorporate this beautiful technique into your own projects:
Real-life Project Examples
- Whitewashed farmhouse table
- White washed wooden wall paneling
- Distressed white wash dresser
- Whitewashed wooden picture frames
These real-life examples demonstrate the versatility and beauty of white wash wood projects, from furniture to interior decor.
Frequently Asked Questions
What Paint To Use For Whitewashing Wood?
For whitewashing wood, you can use latex paint. Sanding before whitewashing is not necessary, but you can do it for better adherence. To seal the wood, apply a clear coat of water-based polyurethane. Whitewashing is an easy way to update furniture, and you can achieve the desired effect with one coat of paint.
How To Get A White Wash Effect On Wood?
To achieve a white wash effect on wood, follow these steps: 1. Start by wiping away any excess dirt or debris from the wood surface. 2. Mix equal parts of water and latex paint to create your whitewash mixture. 3. Apply the whitewash mixture to the wood using a brush or rag, making sure to cover the entire surface.
4. Allow the whitewash to dry completely. 5. If desired, apply a clear coat of water-based polyurethane to protect the whitewashed wood. Remember, sanding the wood before whitewashing is not necessary, and sealing the wood with polyurethane is optional.
Do You Have To Sand Before Whitewashing?
No, sanding before whitewashing is not necessary. It’s a common practice, but not essential for good adhesion.
Do You Seal Wood After White Washing?
Seal wood after whitewashing with a clear coat of water-based polyurethane for protection and a nice sheen.
Conclusion
To conclude, whitewashing wood is a simple and effective way to update the look of your furniture or decor. By following the proper steps, such as wiping away excess paint mixture and applying multiple coats if desired, you can achieve a beautiful whitewashed finish.
Remember, you don’t have to sand your wood before whitewashing, and sealing the wood with a clear coat of polyurethane can provide added protection and a nice sheen. With these tips, you’ll be able to achieve a stunning white wash effect on your wood.