How Many Coats of Wipe-On Poly Do You Actually Need?
Most advice online says three coats of wipe-on poly is enough – that number comes from brush-on polyurethane, and it’s too low for wipe-on. Because a wiped coat is so much thinner than a brushed one, you typically need 4-6 coats for general furniture and 6-10+ for a tabletop or floor that takes real wear. Here’s why the thinner application changes the math, and how to judge when you’ve actually built enough film.
Why “3 Coats” Is the Wrong Number for Wipe-On Poly
The Original Wipe-On Poly
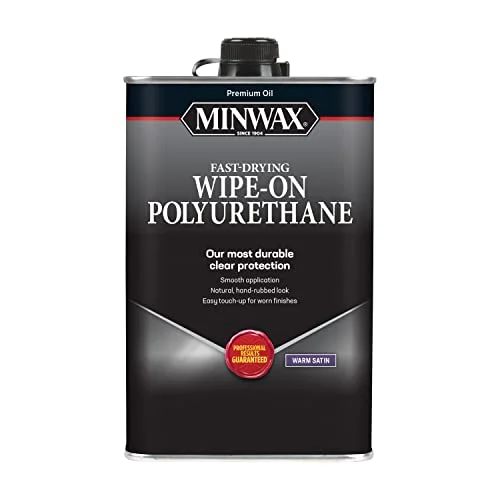 |
Minwax Oil-Based Wipe-On Polyurethane, Satin The product most “wipe-on poly” guides are actually talking about – thin enough to wipe with a cloth, no brush marks.
|
A brushed coat of regular polyurethane lays down roughly 3-4 mils of wet film; a wiped-on coat lays down a fraction of that, since you’re deliberately removing most of the product with the cloth as you apply it. That’s the whole appeal of wipe-on poly – no brush marks, no drips, faster leveling – but it means each coat contributes far less film build. Following brush-on coat counts with a wipe-on product leaves you with a thin, under-protected finish even though you “did what the can said.”
Real Coat Counts by Project Type
| Project | Recommended Coats | Why |
|---|---|---|
| Small decorative items, picture frames | 3-4 | Low wear, appearance matters more than durability |
| General furniture (dressers, chairs) | 4-6 | Moderate handling and occasional contact |
| Tabletops, desks | 6-8 | Frequent contact, spills, and abrasion from daily use |
| Floors | 8-10+ | Constant foot traffic and the highest abrasion of any surface in the home |
Preparing the Surface
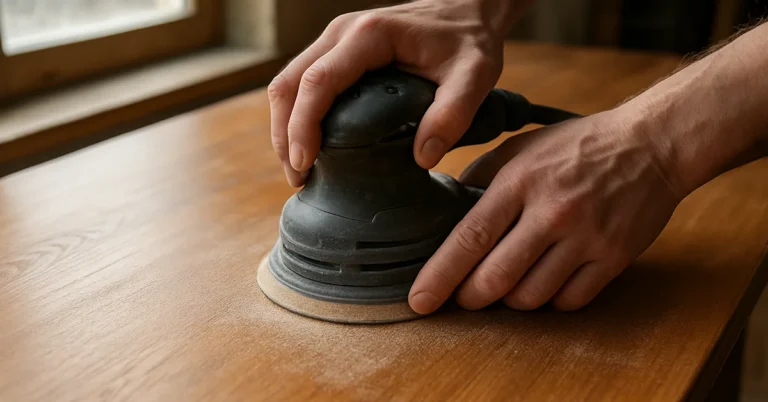
Sand to at least 220-grit in the direction of the grain, then wipe away all dust with a tack cloth or a barely damp lint-free rag. Any dust left on the surface gets sealed under the first coat and shows up as a rough texture in the finish. This matters more with wipe-on poly than with paint or brushed finishes, since the thin film has nothing to hide a trapped particle under. If you’re applying over stain, let the stain dry fully per the can’s instructions (usually 24-48 hours for oil-based stain) before the first poly coat. A quick trick for checking dust-free readiness: run a clean, dry finger lightly across the surface in a dim room and look for reflected light catching on any missed particles.
Applying Each Coat
- Fold a lint-free cotton cloth into a pad and dampen it lightly with the poly – you want the cloth wet, not dripping.
- Wipe with the grain in long, overlapping strokes, applying light pressure to spread the poly thin and even.
- Let each coat dry per the can’s instructions – typically 2-4 hours for oil-based, faster for water-based, longer in humid or cold conditions.
- Once dry (not tacky to the touch), scuff-sand lightly with 320-400 grit to knock down any raised grain or dust nibs.
- Wipe away the sanding dust and repeat until you’ve reached the coat count for your project type above.
How to Tell When You Have Enough Coats
Coat count is a starting guideline, not a hard rule – the actual test is film build. After sanding between a coat, look at the surface under raking light (a light held at a low angle across the surface): if you can still see bare wood grain or dull, unsealed patches, you need more coats. A properly built-up wipe-on poly finish should look uniformly even and slightly glassy across the whole surface before you stop, regardless of whether that took 4 coats or 7 – the raking-light check works on any wood species and any sheen level, which is why it’s more reliable than a fixed number.
Common Mistakes
- Stopping at 3 coats because “that’s what the internet says.” Check the actual film build, not a generic number.
- Applying too thick a coat to speed things up. This causes drips, uneven sheen, and a longer, tackier dry time – thin coats are the entire point of this product.
- Skipping sanding between coats. Each new coat needs a slightly roughened surface to bond to; skipping this step risks the layers delaminating later.
- Shaking the can before use. Stir it instead – shaking introduces bubbles that show up as tiny craters in the dried finish.
Maintenance and Touch-Ups
Dust with a soft, dry cloth and avoid ammonia-based cleaners, which can dull a poly finish over time. Wipe up spills promptly rather than letting them sit. For light scratches, a thin fresh coat of the same wipe-on poly over the scratched area (feathered out beyond the damage) usually blends back in; deeper scratches that reach bare wood need a light sand and a full recoat of that section.
Oil-Based vs. Water-Based Wipe-On Poly
Oil-based wipe-on poly (like the Minwax formula above) dries with a warm amber tone that deepens the look of darker woods like walnut or cherry, but it dries slower and has a stronger odor while curing. Water-based wipe-on poly dries clear, won’t yellow over time, and dries faster between coats, which makes it a better match for light woods like maple or ash where you don’t want any amber cast at all. Water-based formulas also raise the wood grain slightly on the first coat, so plan on an extra light sanding pass after that first application that oil-based doesn’t usually need.
Tools You Actually Need
- Lint-free cotton cloth – old t-shirts or cheesecloth both work; avoid anything with a printed pattern, which can transfer dye into the finish.
- Fine sandpaper – 220-grit for initial surface prep, 320-400 grit for between-coat scuff sanding.
- Tack cloth or damp rag – to remove sanding dust before every coat, including the first.
- Nitrile gloves – oil-based poly is difficult to get off skin and can irritate it with repeated contact.
- A well-ventilated space – especially important for oil-based formulas, which off-gas solvent while curing.
Making Your Own Wipe-On Poly to Save Money
Pre-mixed wipe-on poly costs noticeably more per ounce than regular can polyurethane, and the difference is just dilution – you can thin standard oil-based polyurethane with mineral spirits at roughly a 1:1 ratio to get the same wipeable consistency at a fraction of the cost. This is worth doing for a large project like a floor or a full set of furniture, where the markup on pre-thinned product adds up fast; for a single small project, the convenience of a ready-to-use can is usually worth the extra cost. Homemade wipe-on poly needs the same number of coats as the store-bought version, since you’re diluting the same base product to a similar film thickness.
How Much Poly Do You Need?
A pint of wipe-on poly typically covers 100-125 square feet per coat, since so much of what you apply gets wiped back off. For a project needing 6 coats, that means roughly one pint covers about 16-20 square feet of total finished surface across all coats – a small side table needs far less than that math suggests, but a tabletop or a set of six chairs will burn through more than one pint by the time you hit the full coat count. Buy slightly more than your estimate; a half-finished project waiting on a second can to dry-match the first is a bigger hassle than a partial can left over. Keep the leftover can sealed tightly and stored upright; a well-sealed can of oil-based poly stays usable for a year or more, though it’s worth stirring and checking consistency before a touch-up job months later.
Frequently Asked Questions
How many coats of wipe-on poly are needed?
4-6 coats for general furniture, 6-8 for tabletops and desks, and 8-10+ for floors – more than the “3 coats” often quoted, because wiped coats are much thinner than brushed ones.
How long should I wait between coats of wipe-on poly?
Typically 2-4 hours for oil-based wipe-on poly under normal conditions, longer in cold or humid environments. The surface should feel fully dry, not tacky, before the next coat.
Can you apply wipe-on poly over stain?
Yes – let the stain dry fully (check the can, usually 24-48 hours for oil-based stains) before the first coat of poly.
How do you apply wipe-on poly?
Wipe it on with a lint-free cloth in the direction of the grain, using light pressure and thin, even coats. Let each coat dry, sand lightly between coats, and repeat until the film build looks even under raking light.
Conclusion
Skip the generic “3 coats” advice – it’s a brush-on number applied to a thinner, wipe-on product. Judge by film build under raking light instead, and budget for 4-6 coats on furniture and considerably more on high-wear surfaces like tabletops and floors. The extra time is the actual cost of a wipe-on finish’s biggest advantage: no brush marks and a smoother hand-rubbed look than a brush could ever leave.
Sponsored / affiliate links. As an Amazon Associate I earn from qualifying purchases. I may earn additional commission from eligible campaigns.