How to Polyurethane Pictures on Wood Without Ruining Them
The short answer: print your photo on a laser printer, transfer it with a photo transfer medium, let it dry completely, then seal it with three thin coats of a clear water-based topcoat such as Minwax Polycrylic. Oil-based polyurethane also works, but it can add a slight amber tint over light wood and pale images.
Sealing a picture on wood sounds like one job, but it is really two decisions. First, how did the image get onto the wood: a toner transfer, a glued-on print or a real photograph? Second, will the topcoat leave the colors alone? Most guides skip the first question, and that is where photos usually get ruined, because some inks smear the moment a wet finish touches them. This guide covers both, with figures taken from Minwax and Mod Podge product information.
Best Clear Coat for Photos on Wood
Best Non-Yellowing Photo Topcoat
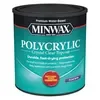 |
Minwax Polycrylic Protective Finish, Clear Satin, 1 Quart A water-based clear topcoat that Minwax describes as non-yellowing and non-ambering, which is what you want over a printed photo and light wood. It cleans up with soap and water.
|
Here is how the two finishes people usually reach for compare, based on Minwax product information:
| Feature | Minwax Polycrylic (water-based) | Minwax Fast-Drying Polyurethane (oil-based) |
|---|---|---|
| Color over light wood and images | Non-yellowing; recommended by Minwax for light wood species | Slight ambering possible over light-colored surfaces; Minwax points to Polycrylic for those |
| Recoat time | About 2 hours | About 3 to 6 hours (varies by data sheet) |
| Coats recommended | 3 | Follow the can |
| Sanding between coats | Very fine (220 grit) after at least 2 hours dry | Fine (220 grit) after 4 to 6 hours dry |
| Cleanup | Soap and water | Mineral spirits |
| Time before normal use | Check the can and allow a full day | 24 hours per Minwax |
The trade-off is simple. Polycrylic keeps a white border, a black-and-white photo or a pastel image looking the way it did going in. Oil-based polyurethane warms the color, which can be flattering on a dark, moody print and disappointing on a pale one. If you are unsure, test both on scrap wood with a scrap of the same print.
For a fuller comparison of finishes, see our guide on Danish oil vs polyurethane, or the wood finishing guide for the bigger picture.
The Overlooked Problem: Your Printer Decides Everything
Here is the myth to drop: printing on glossy photo paper at maximum quality does not help a wood transfer. Mod Podge photo transfer medium is designed for prints from a dry toner printer, meaning a laser printer or photocopier, and the paper is rubbed off afterward, so thin standard paper works best. Inkjet ink is water-based and can smear when a wet product lands on it, and that matters because many common sealers, including Polycrylic, are water-based.
| How the image got on the wood | What to do first | Then seal with |
|---|---|---|
| Laser or copier print, transferred face down with transfer medium | Nothing extra; toner is far more water-tolerant than inkjet ink | Two to three thin coats of Polycrylic or Mod Podge sealer |
| Laser print glued on face up (decoupage) | Coat the paper lightly with the glue or medium, let dry | Thin coats of water-based sealer |
| Inkjet print, transferred or glued | Spray one very light coat of clear acrylic fixative, let dry, then a second light coat | Thin coats of water-based topcoat; test on a scrap first |
| Real photographic print on glossy photo paper | Test on scrap first; glossy coatings can resist glue | Water-based topcoat; keep coats thin |
The fixative step for inkjet prints follows the guidance Plaid, the maker of Mod Podge, gives for inkjet printouts: one very light coat, let it dry, then one more. Spray from a distance and keep the can moving, since a heavy first pass can pool and smear the same ink you are trying to protect.
How to Polyurethane Pictures on Wood Step by Step
Step 1: Prepare the wood
Choose a smooth, light-colored board. Maple, birch and poplar show the image clearly, while a heavy grain like oak can show through and break up fine detail. Sand to 180 to 220 grit, then wipe off every trace of dust with a damp cloth and let the wood dry. Any dust left behind ends up under the image as a bump.
Step 2: Print and transfer the image
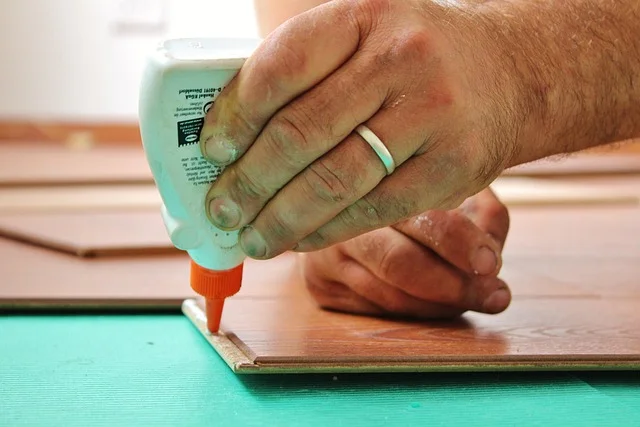
Print on plain paper with a laser printer or take the image to a copy shop. Mirror the image first, because a face-down transfer flips it and any text will read backward otherwise. Trim the print to size, coat its printed side with photo transfer medium until the image is barely visible, then lay it coated side down on the wood and press out air bubbles from the center outward with your fingers or a brayer.
Step 3: Let it dry for a full day
Mod Podge says to leave the transfer to dry for 24 hours. Rushing this step tears the image in step 4, so treat it as non-negotiable.
Step 4: Rub off the paper
Wet the paper with a damp sponge or cloth. Once it is soaked through, rub in small circles with a fingertip. The paper pills up and rolls away while the ink stays in the medium. Let the piece dry, and if a white haze of paper fibers remains, wet it and rub again lightly.
Step 5: Apply thin coats of clear finish
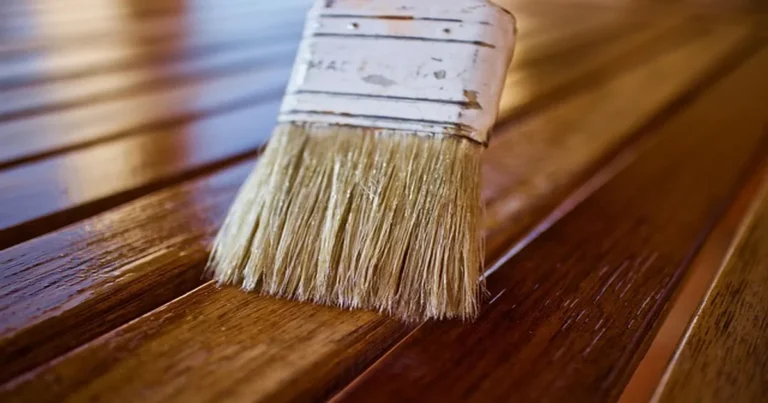
Once the piece is fully dry, brush on a thin coat of Polycrylic with a good synthetic-bristle brush or a foam brush, working in one direction. Do not overwork it and do not go back over a spot that has started to set. Wait about 2 hours, sand very lightly with 220-grit sandpaper, wipe off the dust and repeat. Minwax recommends three coats.
If you are using oil-based polyurethane instead, wait 4 to 6 hours between coats and expect slight warming of the colors. Test that on a scrap of the same print before you commit the real project. Stir the can gently rather than shaking it, since shaking whips in bubbles that dry into the film.
Step 6: Cure before hanging or handling
Give the finished piece at least 24 hours before normal use, which matches the time Minwax states for its polyurethane, and longer if the room is cool or humid. Keep it away from moisture and direct sun while it hardens, and never clean it with harsh chemicals. For a piece that will live near moisture, a durable oil-based topcoat is a sturdier choice than a craft sealer.
Troubleshooting Common Problems
| Problem | Likely cause | Fix |
|---|---|---|
| Ink smears or runs when you brush on the finish | Inkjet print under a water-based finish | Spray a light coat of fixative first, or reprint on a laser printer |
| Image tears when rubbing off the paper | Transfer not dry long enough, or paper too thick | Wait the full 24 hours; use thin paper next time |
| Yellow or amber cast over light images | Oil-based polyurethane on pale wood | Switch to a water-based non-yellowing finish on the next piece |
| White haze on the image | Paper fibers left behind | Wet again and rub lightly before sealing |
| Bubbles in the finish | Shaken can, overbrushing or thick coats | Sand lightly when dry, wipe clean and apply thinner coats |
| Rough or gritty surface | Dust under the finish | Sand lightly with 220 grit, remove dust, recoat |
Finish Tips for Better-Looking Photo Art
- Pick a satin or clear finish. Gloss shows every brush stroke and reflects the room over the photo.
- Seal the edges and the back too, so moisture does not lift the image from the sides.
- Test the whole sequence on scrap: transfer, dry, rub, seal. It takes a couple of days and saves the photo you cannot reprint.
- Keep the finished piece indoors. Polycrylic is labeled for interior wood, so an outdoor sign needs an exterior finish.
If you decorate with sparkle instead of photos, see how to seal glitter on wood.
Frequently Asked Questions
Can I put polyurethane over a printed picture on wood?
Yes, once the print or transfer is completely dry. Laser and copier prints hold up best. Inkjet ink can smear under a wet water-based finish, so spray it with a light coat of clear acrylic fixative first and test on scrap.
Will polyurethane yellow my photo?
Oil-based polyurethane can add a slight amber tint over light surfaces, and Minwax points to its water-based Polycrylic for light wood. Polycrylic is described as non-yellowing.
How many coats of finish do I need over a photo transfer?
Minwax recommends three coats of Polycrylic, with a light 220-grit sanding between coats. Thin coats matter more than the count.
How long should a photo transfer dry before sealing?
Mod Podge says to let the transfer dry for 24 hours before wetting and rubbing off the paper. After the paper is off, let the image dry fully before applying any finish.
Is Polycrylic or polyurethane better for pictures on wood?
For photos on light wood, Polycrylic is the safer pick because it stays clear and cleans up with soap and water. Choose oil-based polyurethane when you want a warmer look or a tougher film on darker projects.
Sponsored / affiliate links. As an Amazon Associate I earn from qualifying purchases. I may earn additional commission from eligible campaigns.