How to Apply Varnish to Wood: Expert Tips for a Flawless Finish
To apply varnish to wood, first prepare the surface by sanding it smooth. Then, use a brush or cloth to evenly apply the varnish.
Varnishing wood enhances its beauty and provides protection against wear and tear. This process not only highlights the natural grain but also adds a layer of durability. Whether you’re working on furniture, cabinetry, or decorative pieces, proper application is essential for a professional finish.
Selecting the right varnish type, such as oil-based or water-based, can impact the final look and drying time. Preparation is crucial; clean and sand the wood to ensure the varnish adheres well. Follow these steps for an impeccable finish that will last for years, keeping your wood projects looking stunning.
Introduction To Varnishing Wood
Varnishing wood is very important for protection. It helps to keep the wood safe from damage. Varnish can also enhance the beauty of the wood. It gives a shiny and smooth finish. This finish makes the wood look more attractive.
There are different types of varnish available. Each type has its own uses and benefits. Some common types include:
| Type of Varnish | Features |
|---|---|
| Oil-based Varnish | Durable, great for high-traffic areas. |
| Water-based Varnish | Quick-drying, low odor, easy to clean. |
| Polyurethane Varnish | Strong, protects against scratches and heat. |
Choosing the right varnish is crucial. It depends on the project and wood type. Always follow the instructions on the label for best results.

Preparing The Wood Surface
Start by cleaning the surface of the wood. Use a damp cloth to remove dirt. Ensure there is no dust or grease left behind. This step is crucial for a good finish.
Next, sanding is essential. Use fine-grit sandpaper for a smooth surface. Sand in the direction of the wood grain. This helps the varnish stick better. After sanding, wipe off the dust with a cloth.
Both cleaning and sanding prepare the wood. These steps ensure the varnish looks great and lasts long.
Choosing The Right Varnish
Choosing the right varnish is essential for your wood projects. Oil-based varnishes offer durability and a rich finish. They take longer to dry but provide excellent protection. Water-based varnishes dry quickly and have low odor. They are easier to clean up with soap and water.
Consider the sheen level for your project. Options include matte, satin, semi-gloss, and gloss. Matte finishes hide imperfections well but offer less durability. Satin finishes provide a soft sheen and are popular for furniture. Semi-gloss and gloss finishes add shine and highlight details.
Think about where the wood will be used. High-traffic areas need more durable finishes. Choose a varnish that fits your needs and style.
Tools And Materials Needed
To apply varnish to wood, certain tools and materials are essential. Gather the following items:
- Varnish: Choose a type suitable for your project.
- Brushes: Use high-quality brushes for smooth application.
- Sandpaper: Fine grit sandpaper helps prepare the wood surface.
- Rags: Use lint-free rags for cleaning up spills.
- Paint Thinner: This is helpful for cleaning brushes.
Safety equipment is crucial for a safe varnishing process. Consider these items:
- Gloves: Protect your hands from chemicals.
- Mask: A mask prevents inhaling fumes.
- Goggles: Protect your eyes from splashes.
Application Techniques
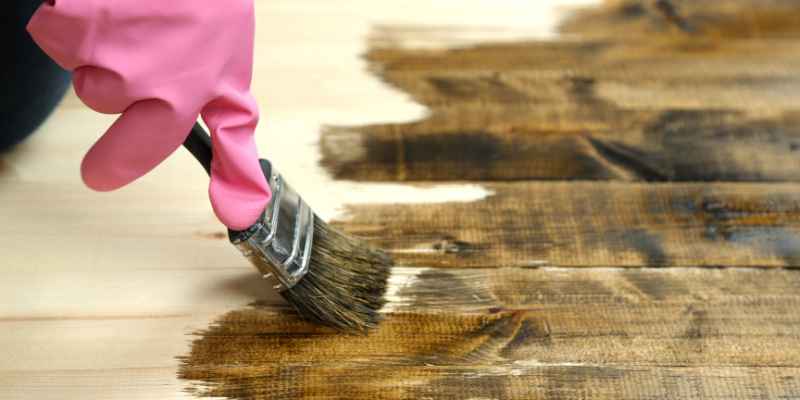
Brushing varnish on wood is a great technique. Use a high-quality brush for the best results. Start by dipping the brush lightly into the varnish. Apply it evenly along the wood grain. Avoid overloading the brush to prevent drips. Work in small sections for better control.
Allow the first coat to dry completely. This usually takes a few hours. Sand the surface lightly with fine-grit sandpaper. This helps the next coat stick better. Clean off the dust before applying another coat.
Apply at least two to three coats for a nice finish. Each layer adds strength and shine. Remember to follow the manufacturer’s instructions for drying times.
Troubleshooting Common Problems
To avoid bubbles and streaks when varnishing, apply thin coats. Use a good quality brush. Work quickly and smoothly to prevent air from trapping. Always stir varnish gently before use.
For fixing drips and runs, wait until the varnish is dry. Sand the area lightly with fine sandpaper. Apply a new thin coat over the area. This helps blend it with the rest.

Caring For Varnished Surfaces
Routine maintenance helps keep varnished surfaces looking great. Dust and dirt can scratch the finish. Use a soft cloth for cleaning. Avoid harsh chemicals that can damage the varnish.
For a quick touch-up, use a mild soap with water. Wipe gently and dry thoroughly. Regular maintenance prevents wear and tear on the surface.
Repairing damaged varnish is important for longevity. Start by cleaning the area with a soft cloth. Lightly sand the damaged spot with fine-grit sandpaper.
Apply a small amount of varnish using a brush. Feather the edges to blend with the surrounding area. Let it dry completely before using the surface again.
Advanced Tips And Tricks
Mixing your own varnish can lead to a perfect finish. Start by choosing the right base. Use a mix of oil-based and water-based varnish for best results. Measure equal parts and stir well. Test the mixture on scrap wood first.
Varnishing intricate woodwork requires patience and skill. Use a fine brush for detailed areas. Apply thin layers to avoid drips. Sand between coats for a smooth finish. Always follow the wood grain while applying.
Keep your workspace clean and dust-free. This helps achieve a flawless look. Allow enough drying time between each coat. Proper ventilation is important when varnishing.
Frequently Asked Questions
How Do I Prepare Wood For Varnishing?
Preparing wood for varnishing involves cleaning and sanding the surface. Start by removing any dust, dirt, or old finish. Use sandpaper to smooth the surface, focusing on rough areas. Ensure the wood is dry before applying varnish. This preparation helps the varnish adhere better and results in a smoother finish.
What Type Of Varnish Should I Use?
Choosing the right varnish depends on your project. For indoor furniture, an oil-based varnish offers durability and a warm finish. Water-based varnishes are great for quick drying and easy cleanup. Consider the wood type and desired finish when selecting varnish for optimal results.
How Many Coats Of Varnish Are Needed?
Typically, two to three coats of varnish are recommended. Each coat enhances protection and finish quality. Allow sufficient drying time between coats, as indicated on the varnish label. Additional coats may be necessary for high-traffic areas or surfaces exposed to moisture.
Can I Apply Varnish With A Brush?
Yes, you can apply varnish with a brush. Use a high-quality, natural bristle brush for best results. Ensure the brush is clean and free from dust. Apply the varnish in thin, even coats to avoid drips and achieve a professional-looking finish.
Conclusion
Applying varnish to wood enhances its beauty and durability. Following the right steps ensures a smooth finish. Always choose the right type of varnish for your project. With patience and care, your woodwork will shine for years. Embrace these techniques to achieve stunning results every time.
Happy varnishing!


