How to Attach Metal Legs to Wood Table: Easy DIY Guide
To attach metal legs to a wood table, align the legs with the table’s corners. Secure them using screws or bolts for stability.
Transforming a wooden table with metal legs can enhance its aesthetic and functionality. This DIY project can give your furniture a modern twist while improving durability. Whether you’re updating an old table or building a new one, attaching metal legs is straightforward.
It’s important to choose the right size and style of legs to complement your table. Proper tools and techniques will ensure a secure fit. This guide will walk you through each step to achieve a professional-looking result. Get ready to elevate your table’s design with just a few simple adjustments!
Introduction To DIY Furniture Making
DIY furniture making is fun and rewarding. Many people choose DIY to save money. Creating your own pieces adds a personal touch. It also helps develop new skills.
Choosing the right materials is crucial. Metal legs add strength and style to a wood table. Look for durable materials that can support weight. Wood should be sturdy and attractive. Select a finish that matches your home decor.
Gather tools like a drill, screws, and a level. Proper tools make the job easier and safer. Always measure carefully before making cuts or drilling holes. This ensures a perfect fit for the metal legs.
Essential Tools For The Job
To attach metal legs to a wood table, having the right tools is key. Here are some basic tools you will need:
- Drill: A power drill makes holes easily.
- Screwdriver: A good screwdriver helps tighten screws.
- Measuring tape: Measure for accurate placement of legs.
- Level: Ensure the table is even with a level.
- Pencil: Mark where to drill.
Don’t forget your safety gear:
- Safety goggles: Protect your eyes from dust and debris.
- Gloves: Keep your hands safe while working.
- Ear protection: Use earplugs if using loud tools.

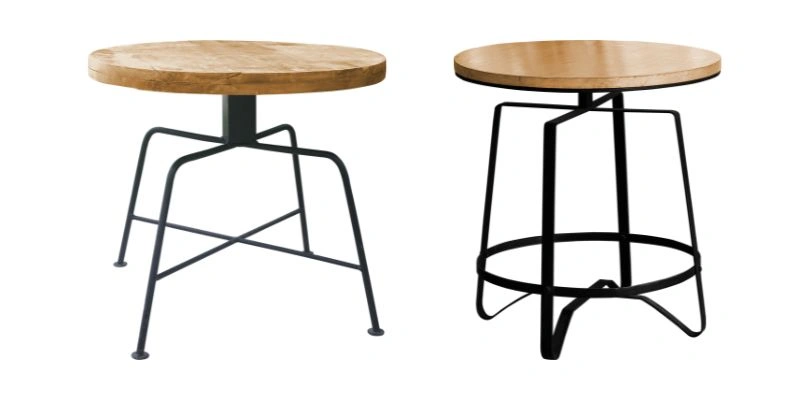
Selecting The Perfect Metal Legs
Choosing the right metal legs can enhance your wood table’s look. Various types of metal legs are available. Each type offers unique benefits and styles.
| Type of Metal Leg | Features |
|---|---|
| Hairpin Legs | Thin and stylish, perfect for modern designs. |
| Industrial Legs | Robust and sturdy, great for rustic themes. |
| Round Legs | Classic design, complements traditional tables. |
Many options exist for buying metal legs. Local hardware stores often carry a variety. Online retailers provide a wider selection and better prices. Websites like Amazon or Etsy are great for unique finds.
Preparing The Wood Tabletop
Start by sanding the wood tabletop. Use medium-grit sandpaper for rough spots. Follow up with fine-grit sandpaper for a smooth finish. This step helps the metal legs adhere better.
Next, apply a suitable wood finish to protect the surface. Choose a stain or sealant that fits your style. Make sure the finish is dry before attaching the legs.
For measuring, use a tape measure to find the correct leg positions. Mark the spots clearly with a pencil. Ensure the legs are evenly spaced for balance.
Double-check all measurements before drilling. This ensures the legs will be straight and sturdy. Accurate marking makes the installation process easier.
Attaching Metal Legs To Wood
Start by using a drill to create pilot holes in the wood. This helps prevent the wood from splitting. Make sure the holes are the right size for your screws.
Next, align the metal legs with the pilot holes. Use a level to ensure they are straight. Then, screw in the legs using a screwdriver or a power drill.
Check that the legs are secure and stable. Tighten the screws as needed to avoid wobbling.
Finishing Touches
Check the stability of your table after attaching metal legs. Gently shake the table. Ensure it doesn’t wobble or move. A stable table is important for safety.
Use a level to confirm that the table is even. Adjust the legs if necessary. This step will help prevent future problems.
Apply a protective coating to the wood surface. This coating guards against scratches and moisture. Choose a finish that matches your decor. Allow the finish to dry completely before use.
Regularly check the legs and joints for tightness. Loose connections can lead to instability. Tighten them as needed to maintain a safe table.
Maintenance And Care
To keep your wood table looking great, regular cleaning is essential. Use a soft cloth to wipe the surface. Avoid harsh chemicals that can damage the wood. A mixture of warm water and mild soap works well.
For minor repairs, check for any loose legs or scratches. Tighten screws if needed to ensure stability. Use wood filler for scratches and sand it smooth. Always match the color of the wood.
Inspiring DIY Table Projects
Creating a unique table can be fun and rewarding. Adding metal legs to a wood table gives it a fresh look. Consider using hairpin legs for a modern style. Rustic legs can bring warmth to your space. Don’t forget to choose a color that matches your decor.
Here are some ideas from the community:
- Repurpose old furniture for a new table.
- Mix and match different leg styles.
- Use paint or stain to customize the wood.
- Incorporate shelves for extra storage.
Get inspired by the creativity around you. Share your projects and learn from others!
Frequently Asked Questions
How Do I Attach Metal Legs To A Wooden Table?
To attach metal legs to a wooden table, start by flipping the table upside down. Align the metal legs with the pre-drilled holes or mark new holes. Use screws to secure the legs firmly. Ensure everything is level before tightening the screws completely for stability.
What Tools Do I Need For This Project?
You’ll need a drill, a screwdriver, and screws suitable for metal legs. A level is also useful to ensure the table sits evenly. Additionally, having a measuring tape can help you position the legs accurately. These tools will make the process smoother and more efficient.
Can I Attach Metal Legs Without Drilling?
Yes, you can attach metal legs without drilling by using adhesive mounting plates. These plates typically have strong adhesive on one side. Simply stick them to the underside of the table and press the legs into place. However, ensure the adhesive is strong enough for stability.
What Type Of Screws Should I Use?
Use screws that are specifically designed for metal and wood. These screws typically have a coarse thread for better grip. Stainless steel or coated screws are ideal to prevent rust. Always check the length to ensure they penetrate adequately without going through the table surface.
Conclusion
Attaching metal legs to a wood table can transform its look and stability. Follow the steps outlined to ensure a secure fit. Proper tools and techniques make all the difference. Enjoy your newly upgraded table that blends style with functionality.
Happy DIY-ing, and may your projects inspire creativity!