How to Build a Wood Fence Using Metal Posts: Easy Step-by-Step Guide
A wood fence with metal posts uses galvanized steel uprights — which won’t rot, warp, or split — to support standard cedar or pressure-treated wood boards. If posts are not set at least 2–3 ft deep in concrete below the frost line, the fence will heave or lean within 2–3 seasons. This guide covers choosing the right metal post type, hole depth and concrete quantities, post spacing, bracket attachment methods, and wood board selection.
See our full guide to woodworking calculators & measurements.
Quick Answer
Set galvanized steel posts 2–3 ft deep in concrete, spaced 8 ft on center (6 ft in windy areas). Use Oz-Post brackets or U-bolt clamp adapters to attach 2×4 rails, then fasten vertical boards with exterior screws. Metal posts resist rot and last 25+ years — cedar or pressure-treated pine are the best wood board choices.
Types of Metal Posts for Wood Fences
Metal fence posts are galvanized steel, aluminum, or powder-coated steel uprights that serve as the structural backbone of a wood fence. Unlike wood posts, they resist rot, pests, and moisture — making them the better long-term choice for posts set directly in soil or concrete.
| Post Type | Common Size | Lifespan | Best For |
|---|---|---|---|
| Round Galvanized Steel | 1-5/8″ or 2-3/8″ OD | 25–40 years | Standard wood privacy fences |
| Square Galvanized Steel | 2″×2″ or 2-1/2″×2-1/2″ | 25–40 years | Modern or contemporary designs |
| Aluminum | 2″×2″ or 3″×3″ | 30–50 years | Coastal or high-moisture areas |
| Powder-Coated Steel | 2″×2″ to 4″×4″ | 20–35 years | Decorative or colored fence designs |
For most DIY wood privacy fences, 2-3/8″ round galvanized steel posts are the standard — they accept standard fence brackets and are available at Home Depot, Lowe's, and Menards. If your fence boards are cedar or pressure-treated pine, use hot-dipped galvanized hardware to prevent rust staining from ACQ preservative contact.
★ Recommended product
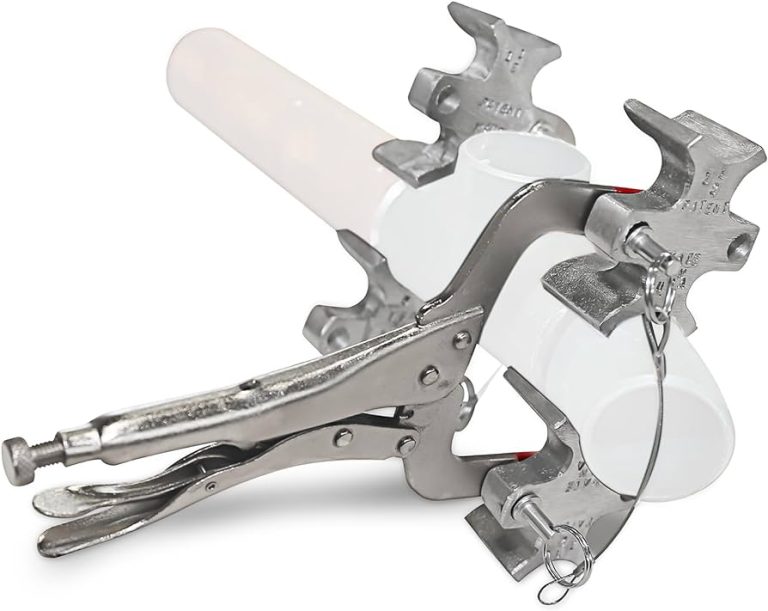
Wood-to-Metal Fence Post Brackets
Clamp-style galvanized brackets that attach 2×4 wood rails to round steel posts — no welding or drilling through metal required.
Check price on Amazon →As an Amazon Associate we earn from qualifying purchases.
Planning Your Fence
Planning your fence is the first step to a strong and lasting wood fence with metal posts. Careful planning saves time and money. It helps avoid mistakes and ensures the fence fits your space perfectly. This stage covers choosing the best spot, measuring correctly, and picking the right materials.
Choosing The Right Location
Select a spot that fits your needs and property rules. Check local laws for fence height and distance rules. Avoid underground wires or pipes before digging. Choose a flat area for easy installation. Make sure the fence won’t block light or views you want to keep.
Measuring And Marking
Measure the length of the area for the fence. Use a tape measure and mark spots for metal posts evenly. Keep posts 6 to 8 feet apart for strong support. Mark the corners and gate locations clearly. Double-check all measurements to avoid errors.
Selecting Materials
Choose metal posts that resist rust and last long. Pick wood that fits your style and withstands weather. Use treated wood for better durability. Get screws and brackets that match metal posts. Good materials make your fence strong and low-maintenance.
Preparing The Site
Preparing the site is the first step to build a wood fence using metal posts. This step ensures a smooth and safe installation. A well-prepared area helps the fence stand strong and look good. It also saves time during the building process.
Clearing The Area
Remove all plants, rocks, and debris from the fence line. Cut any grass or bushes that might block the posts. Clear space helps you see the area clearly. It also makes digging easier and faster.
Locating Underground Utilities
Check for any underground pipes or cables before digging. Contact local utility companies to mark these lines. Avoiding damage to utilities keeps you safe. It also prevents costly repairs and delays.
Gathering Tools And Supplies
Collect all tools and materials needed for the job. This includes metal posts, wood panels, a post hole digger, level, and concrete. Having everything ready avoids trips to the store. It keeps work steady and organized.
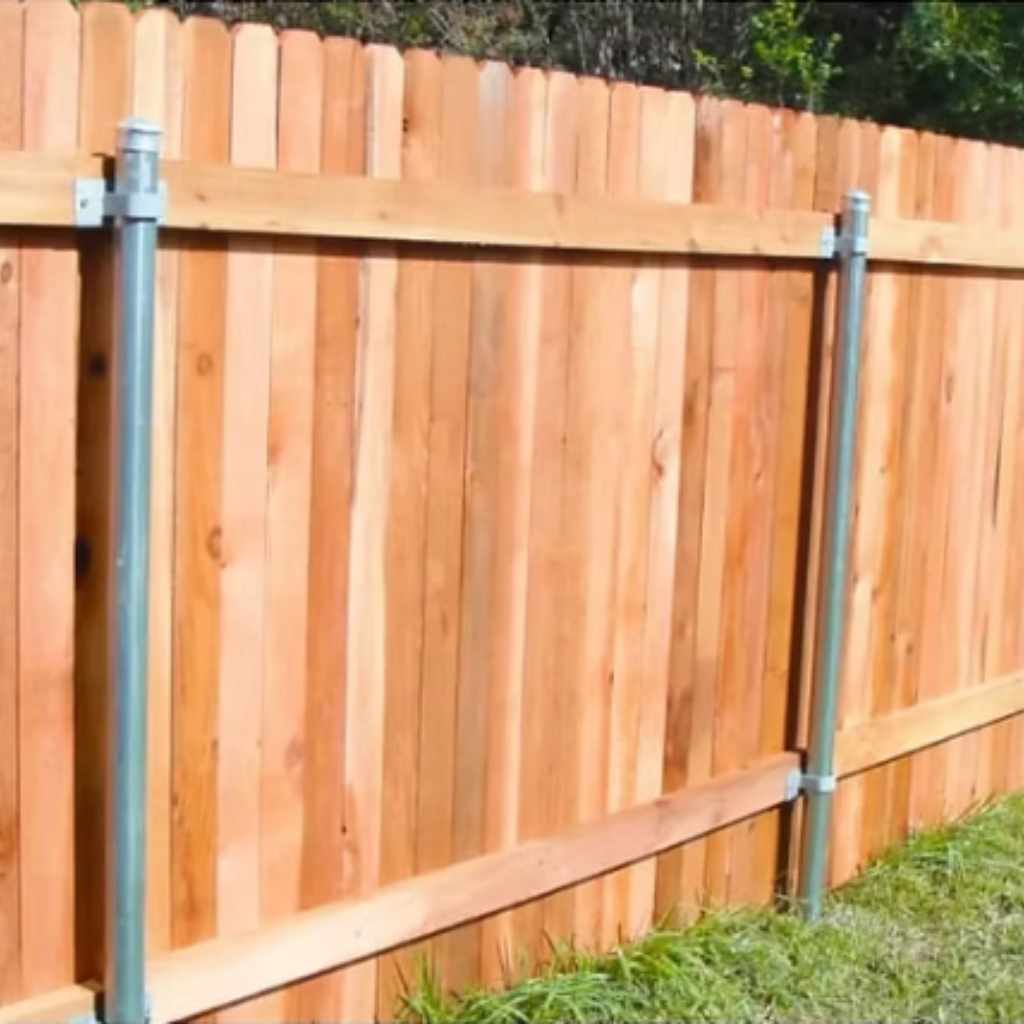
Installing Metal Posts
Installing metal posts is a key step in building a wood fence. Metal posts provide strong support and last longer than wooden posts. Proper installation helps your fence stay straight and stable for years. Follow each step carefully to set the posts correctly.
Digging Post Holes
Start by marking the spots for your metal posts. Use a tape measure to keep holes evenly spaced. Dig holes deep enough to hold the posts firmly. Usually, holes should be about two feet deep. Make the hole wide enough for concrete around the post. Clean the hole from loose dirt before placing the post.
Setting Posts In Concrete
Place the metal post in the center of the hole. Mix concrete according to package instructions. Pour concrete around the post until the hole is full. Tap the post lightly to remove air pockets in concrete. Let the concrete dry and harden for at least 24 hours. This step secures the post firmly in the ground.
📊 Post depth rule of thumb: Bury 1/3 to 1/2 of total post length — a 9-ft post needs a 3-ft hole for a 6-ft fence. In freeze-thaw climates, extend below local frost depth. Use 1–1.5 bags of 50-lb Quikrete per hole (10″ dia × 24″ deep). Source: FenceTrac / concrete industry standards.
Ensuring Proper Alignment
Use a level to check the post is vertical. Adjust the post before the concrete sets. Use string lines to keep posts in a straight line. Check the distance between posts to keep them even. Proper alignment makes the fence look neat and strong. Take time to double-check each post’s position.
Attaching Wood Panels
Attaching wood panels to metal posts creates a strong, lasting fence. This step shapes the fence’s look and strength. Careful choices and proper steps make the fence durable and neat. Follow clear steps to attach wood panels correctly and easily.
Choosing Wood Boards
Select wood boards that resist weather and pests well. Cedar and pressure-treated pine are good choices. Pick straight boards without cracks or knots. Use boards wide and thick enough for privacy and strength.
Cutting To Size
Measure the space between metal posts carefully. Cut each wood board to fit this space exactly. Use a saw with a sharp blade for clean cuts. Smooth rough edges with sandpaper to avoid splinters.
Securing Wood To Metal Posts
Use screws designed for metal and wood to attach panels. Drill pilot holes in wood before screwing to prevent splitting. Space screws evenly along each board for strong hold. Check the panel is level before tightening screws fully.
Finishing Touches
Finishing touches make your wood fence with metal posts look complete and last longer. These final steps improve both function and style. Focus on installing gates, protecting wood, and regular care.
Adding Gates And Hardware
Choose gate sizes that fit your fence openings well. Use strong metal hinges and latches that match your metal posts. Secure hardware tightly to avoid gate sagging. Test gates to open and close smoothly. Proper gates add convenience and security to your fence.
Applying Sealant Or Paint
Apply a wood sealant or paint to protect from weather damage. Sealants prevent water from soaking into the wood. Paint adds color and extra protection. Use a brush or sprayer for even coverage. Allow the finish to dry fully before use. This step extends your fence’s life and keeps it looking fresh.
For pressure-treated fence boards, wait 2–4 weeks before applying stain or exterior sealant — the wood must dry enough for the finish to absorb properly. Do the water droplet test: if water beads, the wood is still too wet.
Maintaining Your Fence
Check your fence regularly for loose hardware or damaged wood. Tighten screws and replace broken parts quickly. Clean dirt and debris off the fence with a mild soap and water. Reapply sealant or paint every few years. Proper maintenance keeps your fence strong and attractive for many years.
Frequently Asked Questions
What Materials Are Needed For Wood Fence With Metal Posts?
You need galvanized steel posts (2-3/8″ OD round, 9–10 ft length), cedar or pressure-treated wood boards, Quikrete concrete (1–1.5 bags per post hole), wood-to-metal fence brackets, exterior screws (hot-dipped galvanized), a post hole digger, 4-ft level, and a drill.
How Do I Install Metal Posts For A Wood Fence?
Dig holes 10″ in diameter and 2–3 ft deep. Place galvanized steel posts plumb in the holes, fill with Quikrete (1–1.5 bags per hole), and allow 24–48 hours to cure. Once set, mount U-bolt clamp brackets or Oz-Post WAP brackets to the posts, attach 2×4 horizontal rails, then screw vertical fence boards to the rails with 1-5/8″ exterior screws.
Can Metal Posts Resist Weather Better Than Wood?
Yes. Galvanized steel posts last 25–40 years in-ground compared to 5–15 years for untreated wood posts. Metal posts resist rot, insects, moisture, and warping entirely. The only maintenance required is checking the galvanized coating every 10–15 years and repainting if rust spots appear. Use hot-dipped galvanized hardware at all connection points with pressure-treated wood to prevent corrosion.
How Deep Should Metal Posts Be Set In The Ground?
Set metal fence posts at least one-third of total length below grade — a 9-ft post needs a 3-ft hole for a 6-ft fence above grade. In freeze-thaw climates, extend the footing below the local frost depth (check your local building code) to prevent heaving. Fill with 1–1.5 bags of 50-lb Quikrete per hole and mound concrete above grade to shed water away from the post base.
How do you attach wood boards to metal fence posts?
Attach wood boards to metal posts using one of three methods: (1) Clamp-style U-bolt adapters — these wrap around the metal post and provide a surface to screw 2×4 horizontal rails into; (2) Oz-Post WAP brackets — galvanized plates that bolt to 2-3/8″ round posts with a flat wing for screwing rails; (3) FenceTrac channel system — an aluminum U-channel that mounts to the post and holds boards vertically without visible hardware. For standard DIY builds, U-bolt clamp adapters are the most affordable and widely available option. Use exterior-rated 1-5/8″ screws to fasten boards to rails, and pre-drill cedar to prevent splitting.
What size metal posts should I use for a wood fence?
For a standard 6-ft privacy fence, use 2-3/8″ OD round galvanized steel posts at 9–10 ft total length (buried 3 ft, leaving 6–7 ft above grade). For heavier wood panels or taller fences (8 ft), step up to 2-7/8″ OD or square 2-1/2″×2-1/2″ posts for additional rigidity. Line posts (between corners) can be lighter; corner and gate posts should always be the heavier gauge to handle lateral stress.
How far apart should metal posts be for a wood fence?
Space metal fence posts 8 feet on center for standard 6-ft privacy panels — this is the industry default and matches most pre-cut fence board lengths. In high-wind areas or on uneven terrain, reduce spacing to 6 feet on center for added rigidity. Gate posts must be spaced precisely to match gate width plus hardware clearance; always measure the gate opening before setting gate posts in concrete.
Do metal fence posts rust where they meet wood boards?
Galvanized steel posts can develop rust staining at contact points when used with pressure-treated lumber containing ACQ (alkaline copper quaternary) preservative — the copper reacts with zinc coating over time. To prevent this, use hot-dipped galvanized or stainless steel hardware at all connection points (brackets, screws, bolts). Do not use standard zinc-plated or black oxide screws — they will rust within 1–2 seasons. Aluminum posts do not have this issue and are the better choice in high-moisture or coastal environments.
Conclusion
Building a wood fence with metal posts is a smart choice. Metal posts last longer and hold wood firmly. Follow each step carefully to get strong support. Use the right tools and materials for best results. Take your time to check every post and board.
This fence will protect your space and look great. Enjoy the satisfaction of a job done well. Keep your fence clean and inspect it often. This simple project can improve your home’s value. You now have the basics to start your fence.