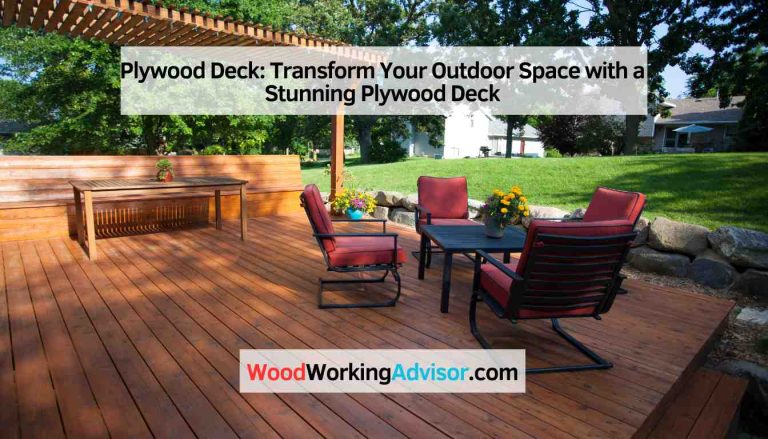
How to Build a Wooden Deck for Beginners
Building a wooden deck sounds like a big project, right? It can seem tough at first, and many people think it’s for experts only. Don’t worry! How to Build a Wooden Deck the Easy Way is totally doable, even if you’re new to this. We’ll break it down step-by-step, making it simple to follow. Get ready to learn how to create your own outdoor space without all the stress. We’ll look at the tools you’ll need, how to plan, and then get into the actual building!
Planning Your Deck: Size, Style, and Spot
The first step in any building project is to plan. This is especially true when learning How to Build a Wooden Deck the Easy Way. Good planning saves you time, money, and headaches. Thinking about size, the style of your deck, and where it will go are essential parts of this process. It sets the groundwork for a solid, enjoyable outdoor area.
Figuring Out the Dimensions
Before you start, decide how big you want your deck to be. Think about what you’ll use it for. Do you want a small space for a grill and a couple of chairs, or a larger area for entertaining? Measure the area where you want the deck. Use a measuring tape to get accurate numbers. Consider the shape of your deck, too. Rectangular decks are the easiest, but you can get creative with curves or angles if you like. The dimensions will impact how much material you’ll need.
- Measure the Space: Use a tape measure to determine the length and width of the desired deck. Accuracy is key at this step.
- Think About Function: Consider how you’ll use the deck. Will it be for dining, lounging, or both? This influences size.
- Check Local Regulations: Look into your local building codes. You might need a permit, and there could be rules about deck height, setbacks from property lines, and other factors.
- Sketch a Basic Plan: Create a simple drawing of your deck, including dimensions and any special features. This will help when buying materials.
A helpful tip is to sketch out your ideas on graph paper. This lets you visualize the deck and helps you figure out the amount of lumber required. For example, if you want a 12×12 foot deck, you’ll need to figure out the square footage to determine how much decking material to buy. Remember to account for any stairs, railings, or built-in benches you’d like to include.
Selecting Deck Styles
Decks can come in different styles. Knowing which style suits your home and needs is important. Each design offers a specific look and feel, so it’s essential to match the deck’s appearance to the house’s architecture and your personal taste. Common styles vary in terms of the layout of the boards, the type of railing used, and whether the deck is raised or at ground level.
- Attached Deck: This deck is joined to the house, often accessed through a door. It’s great for easy access and integration with your home.
- Floating Deck: A floating deck isn’t connected to the house or a permanent structure. It is great for flexibility and ease of installation.
- Multi-Level Deck: These decks have different levels, creating visual interest and adapting to uneven ground.
- Consider Railing Types: Railings add a layer of safety and can enhance the overall look. Some of the railing options are wood, metal, and composite materials.
If you’re unsure, browse online photos for inspiration. Websites and magazines show a wide variety of deck styles. You might find a style you like and then change elements to personalize it. Selecting a style is all about reflecting your tastes and how you intend to utilize your new deck space.
Picking the Perfect Spot
Where your deck goes affects its use and durability. Consider the sun’s position and shade patterns to make sure your deck will be comfortable at different times of the day. Think about how the deck will connect to your house and yard. Ensure there’s enough space for the deck and that the ground is reasonably level or easily prepared. You also want to consider the proximity to your house. This helps determine the best access point and how the deck will blend into the overall design of your home.
- Sun Exposure: Know how the sun hits the spot. Do you want shade in the afternoon or full sun?
- House Access: Make sure the deck is accessible from a door or sliding glass door.
- Ground Conditions: Check the ground for any issues. Is it level? Do you need to build up the ground?
- Privacy: Think about your privacy. Is the area visible to neighbors?
Good positioning can give you a deck that suits your lifestyle. For example, a deck in a shady area will be perfect for relaxing on hot days. A deck with good access to the kitchen is ideal for outdoor dining. A deck at the back of the house is often the most private location. You can evaluate a few spots before settling on the perfect one. Choosing a good spot makes your deck more useful and a place you want to spend time.

Gathering Tools and Materials
Now that you have a plan, it’s time to gather everything you need. This part involves making sure you have the right tools and materials for the job. Having the proper equipment and supplies makes the process smoother. It also helps prevent problems while you are building. Knowing what to get and how to choose it is a key part of How to Build a Wooden Deck the Easy Way.
Essential Tools for Deck Building
The right tools will make the building process easier and more fun. While it might seem like you need a lot of gear, you’ll find that a basic set of tools is all you need to get started. Many of the tools are standard for home projects and you might already own them. Purchasing or borrowing the necessary tools will set you up for success. You will also want to make sure the tools are safe to use. You can also rent larger items at most hardware stores if you do not want to buy them.
- Circular Saw: Used for cutting lumber. Make sure it has a blade suitable for wood.
- Drill/Driver: Essential for drilling holes and driving screws. A cordless drill offers flexibility.
- Level: Crucial for ensuring your deck is flat. Get a good quality level.
- Tape Measure: For accurate measurements. Choose one with a clear, easy-to-read scale.
- Safety Glasses: Protect your eyes from debris and splinters.
- Work Gloves: Protect your hands and improve your grip.
Consider renting a power saw if you’re not ready to buy one. A table saw can be very helpful for making precise cuts. Also, don’t forget safety gear such as work boots, a dust mask, and hearing protection. Proper tool use will make your project safer and more effective.
Selecting Decking Materials
Your choice of materials will affect the deck’s appearance, lifespan, and care requirements. There are several options, each with unique characteristics. From traditional wood to more modern composite materials, you have many options. Thinking about cost, appearance, and how much work you want to do to maintain the deck is very important.
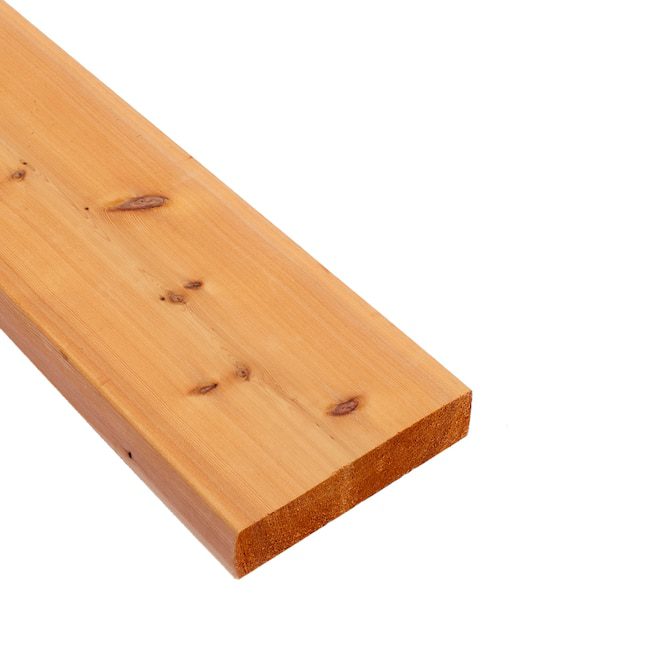
- Pressure-Treated Lumber: This is a popular and affordable choice. It’s treated to resist rot and insects, making it suitable for outdoor use.
- Cedar: Known for its natural beauty and resistance to decay, cedar is a premium option that requires less treatment.
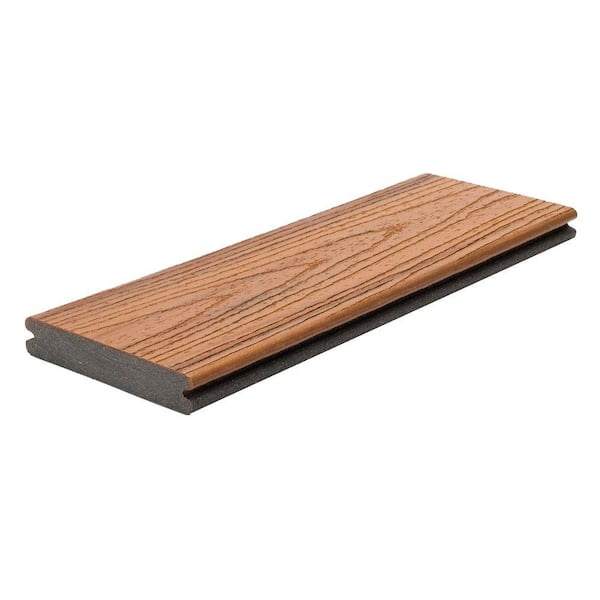
- Composite Decking: Made from a mix of wood fibers and plastic, it’s a low-maintenance option that won’t splinter.
- Fasteners: You will need screws or nails designed for outdoor use. These should be corrosion-resistant.
When picking materials, think about the climate where you live. Some woods hold up better in wet conditions. You should also check the local building codes. Some areas require certain materials. Consider the long-term upkeep and choose materials that fit your lifestyle. For instance, if you want to spend less time on maintenance, composite decking is a good choice.
Making a Material List
Creating a detailed material list is essential for accurate budgeting and to avoid delays. You want to make sure you have everything ready before you start construction. It helps to prevent trips to the store and ensures you don’t overspend. By carefully listing the materials, you can create a smooth and more efficient building experience.
- Lumber Quantities: Based on your deck’s dimensions, figure out how much lumber you need for the frame, joists, and decking.
- Fasteners: Calculate the number of screws or nails you’ll need. Always purchase a few extra.
- Hardware: Don’t forget items like post anchors, brackets, and any other hardware needed for the project.
- Safety Gear: Include safety glasses, gloves, and any other gear you need.
- Calculate the Budget: Price out all the materials. Add a little extra for any unforeseen costs.
After you have made your material list, review it to be sure you have everything you need. Having a complete list allows you to shop around for the best deals. You can compare prices at different stores. This helps you manage the cost of your project. If you are unsure, ask the store for help with your list.
Building Your Deck: The Step-by-Step Guide
Now that you’ve got your plan, tools, and materials, it’s time to build the deck. This step involves putting everything together, from digging the post holes to setting the deck boards. We will break down each step in a logical, easy-to-follow way. It’s a satisfying process to see your project come together. By following these steps, How to Build a Wooden Deck the Easy Way can be achieved, and you can enjoy your new outdoor area.
Setting the Foundation
A good foundation is key to a stable and lasting deck. This is where you prepare the ground and put in the support posts. Proper foundation work is important for preventing the deck from moving or sagging over time. Following safety measures and building codes is also a priority.
- Mark the Footings: Use stakes and string to mark the deck’s perimeter. This helps define the deck’s layout.
- Dig Post Holes: Dig holes for the support posts. The depth depends on your local building codes, but the holes should be below the frost line.
- Install the Posts: Put posts in the holes. Ensure they’re level and plumb. Use concrete to secure them.
- Add Framing: Frame the posts to create a structure.
Using a post hole digger or auger makes the digging easier. Make sure that the posts are the correct size and type. The size and type depend on the size of the deck and the local building codes. When pouring concrete, follow the manufacturer’s instructions. Allow time for the concrete to set before proceeding.
Framing the Deck
Framing creates the basic structure of your deck. This involves attaching the ledger board to your house (if it’s an attached deck) and building the frame around the posts. Careful framing guarantees that your deck is square, level, and strong. When you have correctly built the frame, you get a solid platform for the decking boards.
- Attach the Ledger Board: Attach the ledger board to your house, ensuring it is level and properly fastened.
- Install Joists: Add joists, which are the horizontal supports that the decking boards will attach to. Space them according to your plan.
- Check for Square: Use a square to make sure all corners are exactly 90 degrees. Make adjustments as needed.
- Add Blocking: Blocking is pieces of wood that you put between the joists for added support and to prevent movement.
When attaching the ledger board, make sure you use the proper fasteners. They should be approved for exterior use. Check the local building codes for recommendations. Use shims to level the ledger board if your home is not perfectly straight. Precise measurements and the use of a level are critical in this phase. Take your time to get it right.
Installing Decking Boards
Installing the decking boards is where your deck starts to take shape. This stage involves laying the boards on the frame. It also involves making sure everything is straight and the spacing between the boards is right. Whether you choose wood, composite or another material, the way you place the boards impacts the final appearance and durability of your deck.
- Plan the Layout: Decide on the direction of your deck boards. Consider the pattern you want.
- Start with the Edges: Place the edge boards first. Make sure they are straight and aligned.
- Space the Boards: Maintain consistent spacing between the boards. This allows for expansion and contraction due to weather.
- Fasten the Boards: Use screws or hidden fasteners to secure the decking boards to the joists.
When installing the boards, use a spacer tool to ensure the gap between the boards is uniform. If you are working with wood, use screws designed for outdoor use. For composite decking, follow the manufacturer’s instructions for the best results. You will want to check the boards regularly to make sure that they are straight and in line. This attention to detail will help you create a deck that looks and functions well.
Finishing Touches and Safety
After the main structure is built, it’s time to add the finishing touches. This means installing railings, stairs (if needed), and applying any finishes. Doing this work right will enhance your deck’s appearance and increase its safety. These steps ensure that the deck is not only a functional outdoor space but also one that looks good and is safe for everyone.
Adding Railings
Railings are a crucial safety feature for any raised deck. They not only meet safety regulations but also enhance the look of your deck. Picking the right type of railing is important for the look of your deck. The installation process demands accuracy. Railings give you a sense of security and improve the deck’s aesthetic.
- Choose Railing Style: Pick a style that matches your home. This can be wood, metal, composite or a combination.
- Install the Posts: Attach the railing posts securely to the deck frame. Space them according to safety codes.
- Attach the Rails: Connect the top and bottom rails to the posts. Make sure they are level and secure.
- Add Balusters: Install balusters, which are the vertical pieces between the rails. The spacing must meet local codes.
Always check your local building codes for railing height, spacing, and other requirements. Railings should be sturdy and securely attached. The railings should offer a firm grip and prevent anyone from falling off the deck. For a more modern look, consider cable railings. Choose the style of railing to complement your home’s architecture.
Building Stairs
If your deck is raised, stairs are a must for easy access. Designing and constructing stairs demands careful planning and precision. The height and slope of your stairs must meet local building codes. Properly built stairs ensure the deck is safe and easy to access. Whether you’re a seasoned builder or a beginner, well-made stairs are essential.
- Measure the Rise and Run: Measure the vertical height (rise) and horizontal distance (run) to plan the stairs.
- Calculate the Number of Steps: Divide the total rise by the desired riser height to determine the number of steps.
- Build the Stringers: Cut the stringers (the angled supports) according to your measurements.
- Attach the Treads: Secure the treads (the steps) to the stringers.
Use building codes to determine the proper rise and run of your stairs. Use a level and square to confirm your cuts and measurements. It is important to have a solid foundation for your stairs. You may need to build a small landing area at the base of your stairs. This adds to the safety and functionality of your deck.
Finishing the Deck
Applying the final touches makes your deck look better and protects the materials. Whether it’s staining or sealing, the finishing process gives a polished look. Finishes help protect your deck from weather, rot, and insects. It will extend the life of your deck. Taking the time to finish the deck right ensures you get a beautiful and long-lasting outdoor space.
- Clean the Deck: Before you apply a finish, clean the deck. Remove any dirt, dust, and debris.
- Choose a Finish: Pick a finish that suits your needs. This could be stain, sealer, paint, or a combination.
- Apply the Finish: Use a brush, roller, or sprayer to apply the finish. Follow the manufacturer’s directions.
- Allow Drying Time: Allow the finish to dry fully. This may require multiple coats.
Consider the color and type of the finish you are using. A semi-transparent stain will show the natural wood grain, while a solid stain will provide more color and protection. It’s often necessary to sand the deck before staining. This is especially true if you are using a solid stain or paint. Read the manufacturer’s instructions for drying times. Give the finish enough time to cure. This will ensure your deck is fully protected. Regularly maintaining the finish is critical.
How to Build a Wooden Deck the Easy Way: Common Problems and Solutions
Even with careful planning and execution, problems can sometimes arise. Knowing about these issues beforehand can help you prevent them or find quick solutions. Being able to solve these challenges will help you to have a successful project. Here are some frequent problems and how to get around them while building your deck.
Dealing With Unlevel Ground
Building a deck on uneven ground can be tough. The ground may be sloped, or it may have dips and bumps. This requires special methods to ensure your deck is stable and level. Using these methods will help you fix problems. It will help to guarantee a level, safe, and attractive outdoor space. Addressing these issues early on will improve the success of your project.
- Use Adjustable Posts: If the ground isn’t level, use adjustable deck posts. These let you fine-tune the height of your deck.
- Grade the Ground: Remove or add soil to level the ground. This will provide a solid base for the deck.
- Build a Retaining Wall: In some situations, a small retaining wall can help level the area.
- Use Shims: Shims can fill small gaps and level deck framing. This helps get rid of minor variations.
Before you begin, determine the extent of the slope or unevenness. This helps you to choose the best solution. When grading the ground, be sure to have proper drainage. Using shims is an excellent solution for minor variations. For bigger problems, grading or using adjustable posts might be necessary. It helps to check local building codes for guidance.
Addressing Rot and Decay
Wood is vulnerable to rot and decay, especially in damp conditions. Preventing and solving rot issues is important for a deck’s lifespan. By using rot-resistant materials and taking the right precautions, you can protect your deck. Proper maintenance and rapid responses to any problems will help to keep your deck in good condition.
- Use Pressure-Treated Lumber: This kind of lumber is treated to withstand rot and insect infestations.
- Ensure Proper Drainage: Make sure water drains away from your deck. This prevents it from sitting on the wood.
- Seal the Wood: Use a quality wood sealant to protect the wood from moisture.
- Regular Inspections: Regularly inspect your deck for any signs of rot or decay. This allows for quick intervention.
Make sure the deck is properly ventilated to prevent moisture buildup. Ensure that water doesn’t pool on the surface. If you see any signs of rot, like soft spots, replace the affected wood immediately. Regular cleaning and re-sealing will also help protect your deck from the elements. Prevention is always the easiest solution.
Handling Expansion and Contraction
Wood expands and contracts with changes in temperature and humidity. Dealing with this movement is critical to avoid problems like warping, cracking, and gapping. Taking account of these factors helps make a deck that is durable and lasts. This will also guarantee that your deck looks good for a long time.
- Proper Spacing: Leave the correct gap between decking boards to allow for expansion and contraction.
- Use the Right Fasteners: Use screws that can move with the wood.
- Choose Stable Wood: Some types of wood are less prone to expansion and contraction.
- Acclimatize the Wood: Before installing the decking, let the wood sit on-site for a few days.
The spacing between boards will vary depending on the wood type and climate conditions. Check the manufacturer’s directions for the best spacing. Regularly inspecting the deck and making any needed adjustments will guarantee it stays in good condition. Consider using composite decking, which generally expands and contracts less than wood.

Frequently Asked Questions
Question: What’s the best wood for a deck?
Answer: Pressure-treated lumber is popular and affordable, while cedar offers natural beauty and resistance to decay.
Question: Do I need a permit to build a deck?
Answer: Yes, in most cases. Check with your local building department for regulations and permit requirements.
Question: How much space should I leave between deck boards?
Answer: Generally, leave a gap of 1/8 to 1/4 inch between boards to allow for expansion and contraction.
Question: How long does it take to build a deck?
Answer: The time depends on the deck’s size and your skill level. A small deck can be built in a weekend, while larger ones take more time.
Question: How often do I need to maintain my deck?
Answer: Wood decks need cleaning and sealing every 1-3 years. Composite decks need less maintenance, typically cleaning a couple times a year.
Final Thoughts
Building a wooden deck can be a rewarding project. The process requires planning, careful execution, and a bit of patience. Starting with the right tools, gathering quality materials, and following a step-by-step approach will ensure success. Remember the steps – planning the spot, gathering what you need, putting the frame together, and adding the finishing touches. Always prioritize safety and follow local building codes. By dealing with common problems and knowing about maintenance, you’re setting yourself up for a long-lasting deck. So explore your options, and get ready to enjoy your outdoor space. Good luck!