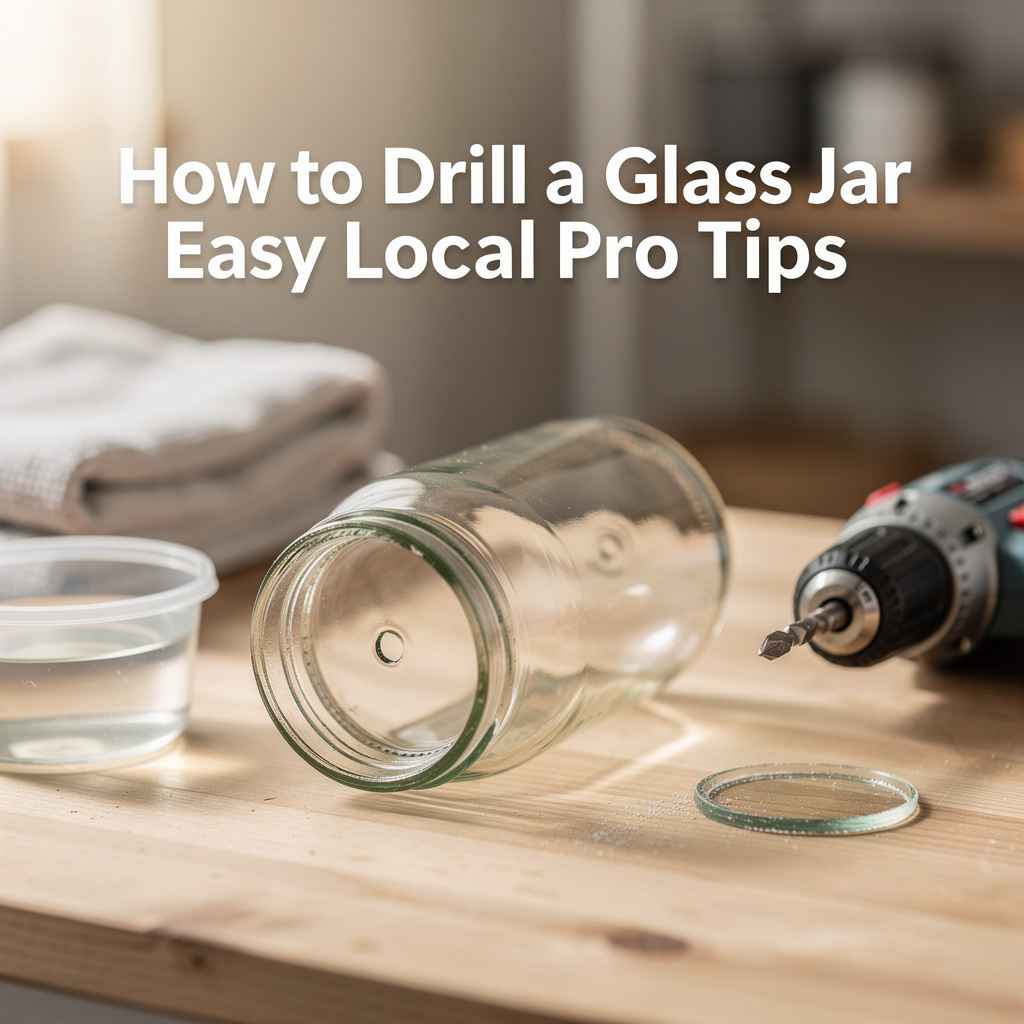
How to Drill a Hole in a Glass Jar: Easy Local Pro Tips
Thinking about drilling a hole in a glass jar might seem a bit tricky, especially if you’re new to DIY projects. Many people worry about the glass breaking or not getting a clean hole. But don’t let that stop you!
How to Drill a Hole in a Glass Jar: Easy Local Pro Tips can be straightforward with the right approach. We’re going to walk through it step by step, making it simple and safe. Get ready to learn how to create that perfect opening you need for your next project.
Drilling a Hole in Glass Jars A Simple Guide
This section focuses on the essential steps and considerations for successfully drilling a hole in a glass jar. We’ll cover the tools you’ll need, how to prepare your workspace, and the fundamental techniques that minimize risk. The goal is to equip beginners with the knowledge to tackle this task confidently, ensuring a good outcome without the common fears associated with working with glass.
Understanding these basics is key to a smooth drilling experience.
Gathering Your Essential Tools
To drill a hole in a glass jar, you’ll need a few specific tools. The most important is a drill, but not just any drill will do. You’ll need a drill with variable speed settings so you can start slow and increase speed as needed.
A diamond drill bit is also crucial. These bits are designed to cut through hard materials like glass and tile. You’ll also want some water for cooling the bit and the glass, safety glasses to protect your eyes, gloves for a better grip and protection, and a soft cloth or towel for cleaning up.
Having all these items ready before you start makes the whole process much easier and safer.
- Drill: A standard corded or cordless drill with adjustable speed is ideal. Avoid hammer drills as they can shatter the glass. Look for a drill that feels comfortable and stable in your hand, offering good control over speed.
- Diamond Drill Bits: These are specifically made for drilling into glass, ceramic, and stone. They have a diamond-coated tip that grinds away at the material rather than cutting it. Sizes vary, so choose one appropriate for the hole size you need.
- Water Source: A spray bottle filled with water or a small cup of water is essential for keeping the drill bit and the glass cool. This prevents overheating, which can cause the glass to crack.
- Safety Gear: Always wear safety glasses or goggles to protect your eyes from flying glass shards. Gloves can provide a better grip and protect your hands.
- Masking Tape: Applying masking tape to the area where you plan to drill can help prevent the drill bit from slipping and can reduce chipping.
- Marker: A marker helps you precisely mark the spot where the hole will be drilled.
Preparing Your Workspace Safely
Setting up your workspace properly is vital for safety and success. You want a stable surface that won’t move while you’re drilling. A non-slip mat or a damp cloth under the jar can help keep it from sliding.
Make sure there’s good lighting so you can clearly see what you’re doing. Clear away any clutter that could get in your way or cause a hazard. It’s also a good idea to have a sturdy container, like a bucket or a large bowl, nearby to catch water and glass dust.
This keeps your area clean and manageable.
- Stable Surface: Ensure the jar is placed on a flat, sturdy surface. A workbench or a solid table works well.
- Non-Slip Mat: Use a non-slip mat, a damp towel, or even some silicone caulk spread thinly on the surface beneath the jar to prevent it from moving.
- Adequate Lighting: Good lighting is crucial for accuracy and safety. You need to see your marks and the drill bit clearly.
- Clear Area: Remove any unnecessary items from your workspace to avoid tripping or knocking things over.
- Water Containment: Prepare a way to manage water. A shallow dish placed under the drilling area or a small bucket can catch excess water and glass dust.
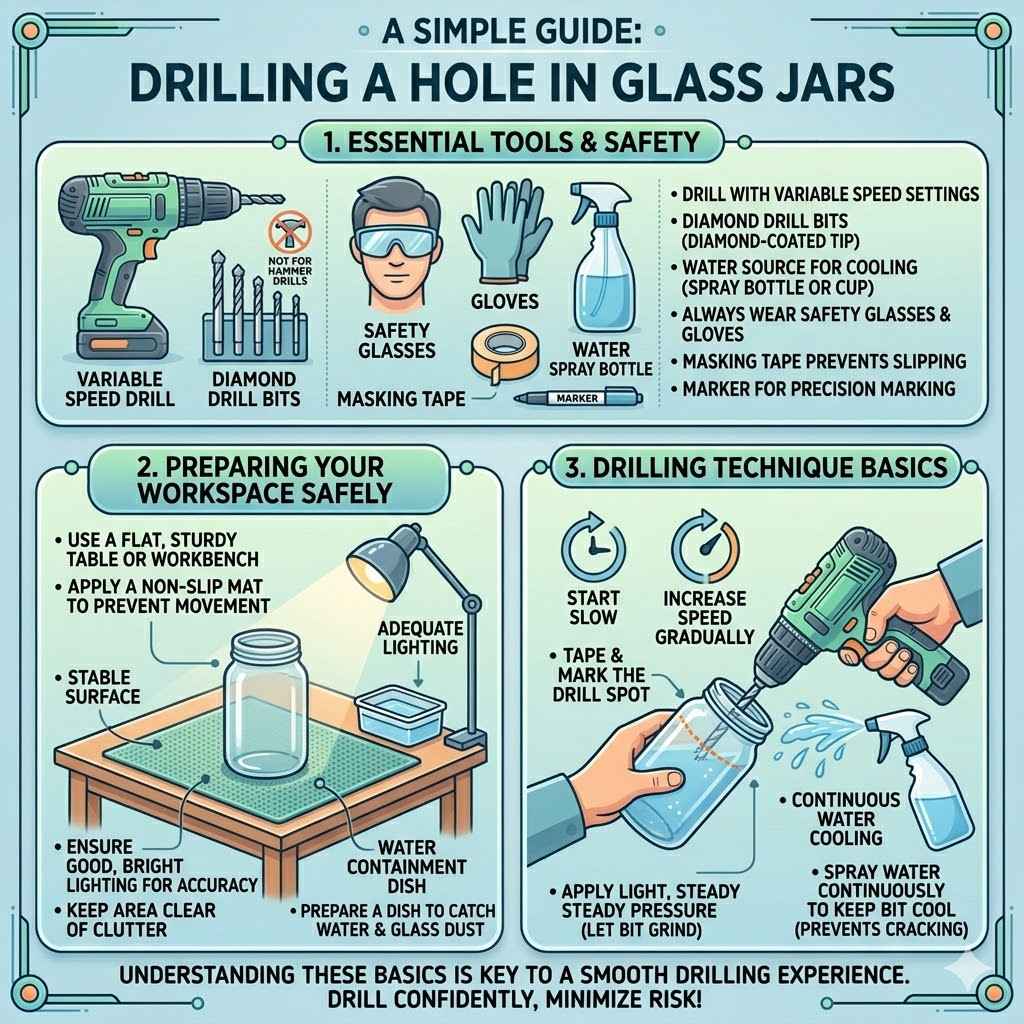
Mastering the Drilling Technique
This part delves into the actual process of drilling the hole. We will break down the techniques used by professionals to ensure a clean, smooth hole with minimal risk of breakage. This includes how to start the drill, maintain consistent pressure, and manage the cooling process effectively.
Following these steps precisely is what separates a successful attempt from a frustrating one.
Starting the Drill Bit
The initial contact between the drill bit and the glass is the most critical moment. You want to start very slowly. This prevents the bit from skipping across the surface.
Applying a small amount of water to the spot you intend to drill before you begin is helpful. You can also use masking tape over the spot; this gives the bit something to grip.
Begin with the drill at its lowest speed setting. Hold the drill straight up and down, perpendicular to the glass surface. Gently apply pressure.
Don’t force the drill. Let the diamond bit do the work. You’ll feel it start to bite into the glass.
Once you’ve made a small indentation, you can proceed with the rest of the drilling.
Maintaining Consistent Pressure and Cooling
As you drill, maintaining steady, light pressure is key. Too much pressure will generate heat and can cause the glass to crack. Too little pressure means the drill bit won’t cut effectively, and you’ll end up with dust instead of a hole.
The goal is a consistent, gentle grinding action.
Cooling is just as important as pressure. Keep the area around the drill bit wet throughout the process. You can do this by periodically spraying water on the spot or by having a small stream of water flow onto the bit.
This dissipates heat, which is the main enemy of glass drilling. A constantly cool bit and glass will significantly reduce the chance of breakage.
A common technique is to drill for about 30 seconds, then stop, add more water, and let the bit and glass cool down for a bit. Repeat this cycle. This patient approach is far more effective than trying to rush the process.
Drilling Through the Glass
Once you have established a small dimple and are drilling steadily, continue the process. Keep the drill at a consistent, slow speed. Periodically lift the drill bit slightly to allow water to get under the bit and flush out glass dust.
This also helps prevent overheating.
Listen to the sound of the drill. A smooth, consistent sound indicates you are drilling well. If the sound changes significantly, or if you feel excessive vibration, stop immediately.
Check your cooling and pressure.
As you approach the other side of the glass, ease up on the pressure even more. You want to avoid the drill bit suddenly plunging through, which can cause chipping or a rough exit hole.
When the drill bit is about to break through the other side, reduce your speed and pressure to almost nothing. This allows the bit to finish the hole smoothly without causing damage to the edges.
Troubleshooting Common Issues
Even with careful preparation, sometimes things don’t go perfectly. This section offers solutions to common problems you might encounter when drilling glass jars. We’ll cover what to do if the drill bit slips, how to handle overheating, and what steps to take if you notice a small crack appearing.
Having these tips ready can save your project and your jar.
What to Do If the Drill Bit Slips
If your drill bit slips, don’t panic. The first step is to stop drilling immediately. If you were using masking tape, it might have shifted or come loose.
If the slip was minor and you haven’t started cutting deeply, you can reapply tape firmly to the area. Use a fresh piece of tape for better adhesion.
Mark your intended hole location again very carefully. Ensure the jar is completely stable and won’t move. You might consider using a small jig or clamp to hold the drill bit steady for the first few seconds of drilling, especially if you’re working on a curved surface.
Starting with a very shallow pilot hole can also help guide the bit and prevent slips.
Dealing with Overheating
Overheating is a major cause of glass cracking. If you notice the glass or the drill bit getting too hot, stop drilling at once. Increase the amount of water you’re using.
Make sure you are constantly applying water to the drilling area. Sometimes, it’s best to let the entire jar cool down for several minutes before continuing.
This is where patience is your best friend. Drilling through glass takes time, and rushing the process by not cooling it enough is a sure way to invite disaster. Ensure the water is reaching the tip of the drill bit and the glass surface directly where you are drilling.
A slow, steady drip of water can be more effective than just spraying.
Handling Minor Chips and Cracks
If you notice a small chip or crack forming around the drilled hole, stop immediately. Small chips might be unavoidable, especially around the edges. You can try to smooth these out gently with fine-grit sandpaper (used wet) or a diamond file once the hole is complete.
However, if a significant crack appears, the jar might be compromised. For many DIY projects, a minor chip might be acceptable. If the crack is large or looks like it could spread, it may be safer to discard the jar and start with a new one.
Inspect the entire jar for stress fractures before continuing.
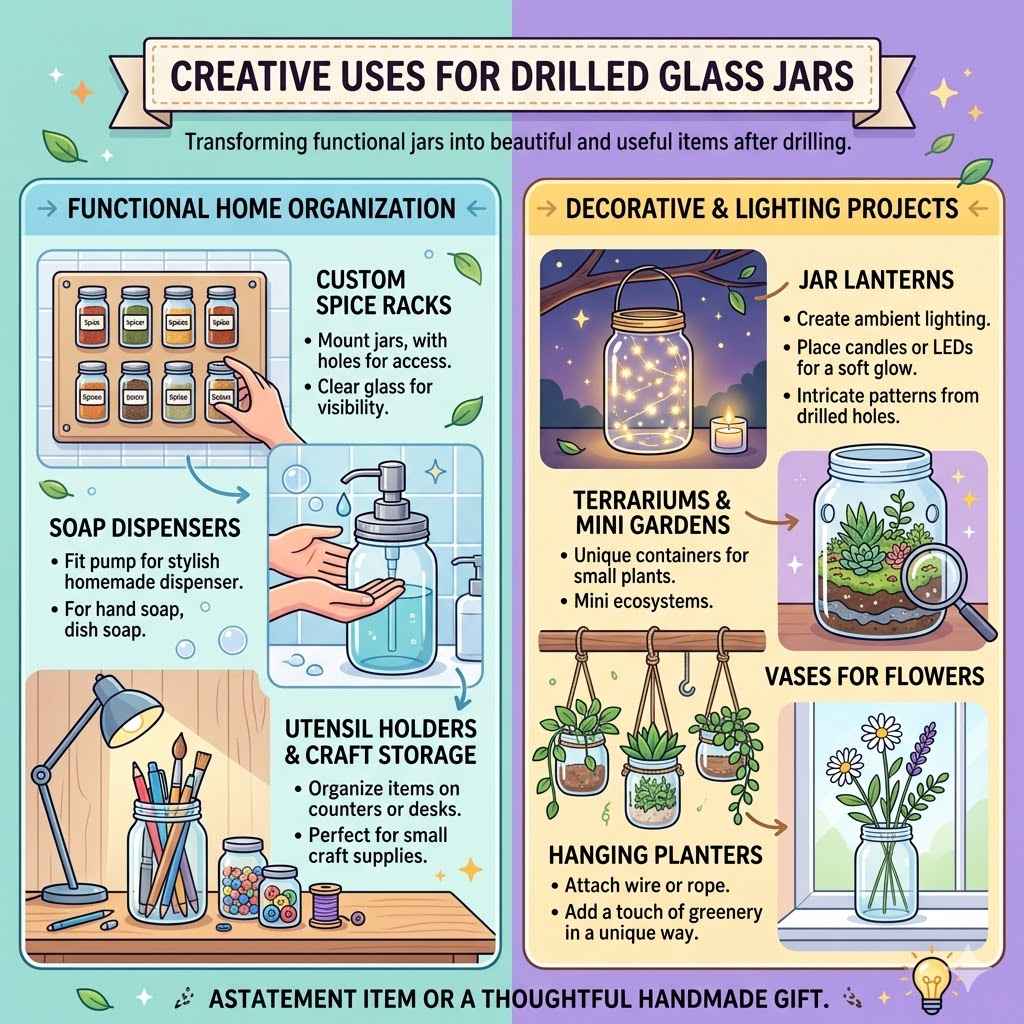
Creative Uses for Drilled Glass Jars
Once you’ve successfully drilled your glass jar, the possibilities are endless. This section explores various creative ways to use your newly modified jar. From practical home organization to unique decorative pieces, your drilled jar can become a statement item in your home or a thoughtful handmade gift.
Functional Home Organization
Drilled glass jars are fantastic for organization. Imagine creating a custom spice rack with jars that hang neatly. Or perhaps a set of soap dispensers for your bathroom, using a pump mechanism fitted through the hole.
They can also be used as holders for pens, brushes, or tools on your desk or workbench.
For kitchen use, a drilled jar can become a functional dispenser for items like dish soap, hand sanitizer, or even dry goods. You can mount them under cabinets or on walls for a clutter-free look. The clear glass allows you to see what’s inside, making it easy to keep track of your supplies.
- Custom Spice Racks: Mount jars to a board or shelf, with holes allowing access to spices.
- Soap Dispensers: Fit a pump mechanism through the drilled hole for a stylish, homemade dispenser.
- Utensil Holders: Use larger jars on kitchen counters or desks to keep items organized and accessible.
- Storage for Craft Supplies: Perfect for beads, buttons, or other small craft items, keeping them tidy and visible.
Decorative and Lighting Projects
Beyond organization, drilled jars make beautiful decorative items. They can be transformed into unique candle holders, terrariums, or even simple vases. If you drill multiple holes, you can create intricate lanterns that cast beautiful patterns of light.
Consider making a hanging planter by threading wire or twine through holes near the rim. This adds a touch of greenery to your space in a unique way. For evening ambiance, a drilled jar with a tea light inside can create a lovely glow.
- Jar Lanterns: Create ambient lighting by placing candles or LED lights inside drilled jars for a soft glow.
- Terrariums and Mini Gardens: Use jars with larger holes as unique containers for small plants or succulents.
- Hanging Planters: Attach wire or rope through drilled holes to create charming hanging plant containers.
- Vases for Flowers: A simple drilled jar can serve as an elegant, minimalist vase for single stems or small bouquets.
Frequently Asked Questions
Question: Can I use a regular drill bit on glass?
Answer: No, it is not recommended to use regular drill bits on glass. They are too hard and can easily shatter the glass or overheat quickly. You need special diamond-tipped drill bits designed for hard materials like glass and tile.
Question: What is the best way to keep the glass cool while drilling?
Answer: The best way to keep the glass cool is to continuously supply water to the drilling area. You can use a spray bottle to mist the area or have a slow drip of water from a cup. This prevents the glass from overheating and cracking.
Question: How much pressure should I apply when drilling glass?
Answer: Apply very light and steady pressure. You should let the diamond drill bit do the work. Forcing the drill will create excess heat and increase the risk of the glass breaking.
Question: What if the glass jar is very thin?
Answer: Thin glass jars are more delicate. You should use the lowest possible speed on your drill and even less pressure. A shallow dish filled with water around the jar can also provide extra stability and cooling.
Question: How do I clean up the glass dust after drilling?
Answer: Always wear gloves and safety glasses when cleaning up. Carefully sweep or vacuum up the glass dust. You can also use a damp cloth to wipe down the area.
Dispose of glass shards safely in a sturdy container.
Conclusion
You have learned how to drill a hole in a glass jar safely and effectively. By using the right tools and techniques, like diamond bits and steady cooling, you can achieve great results. Remember to prepare your workspace and wear your safety gear.
Now you can confidently tackle your projects, turning ordinary jars into useful or decorative items.