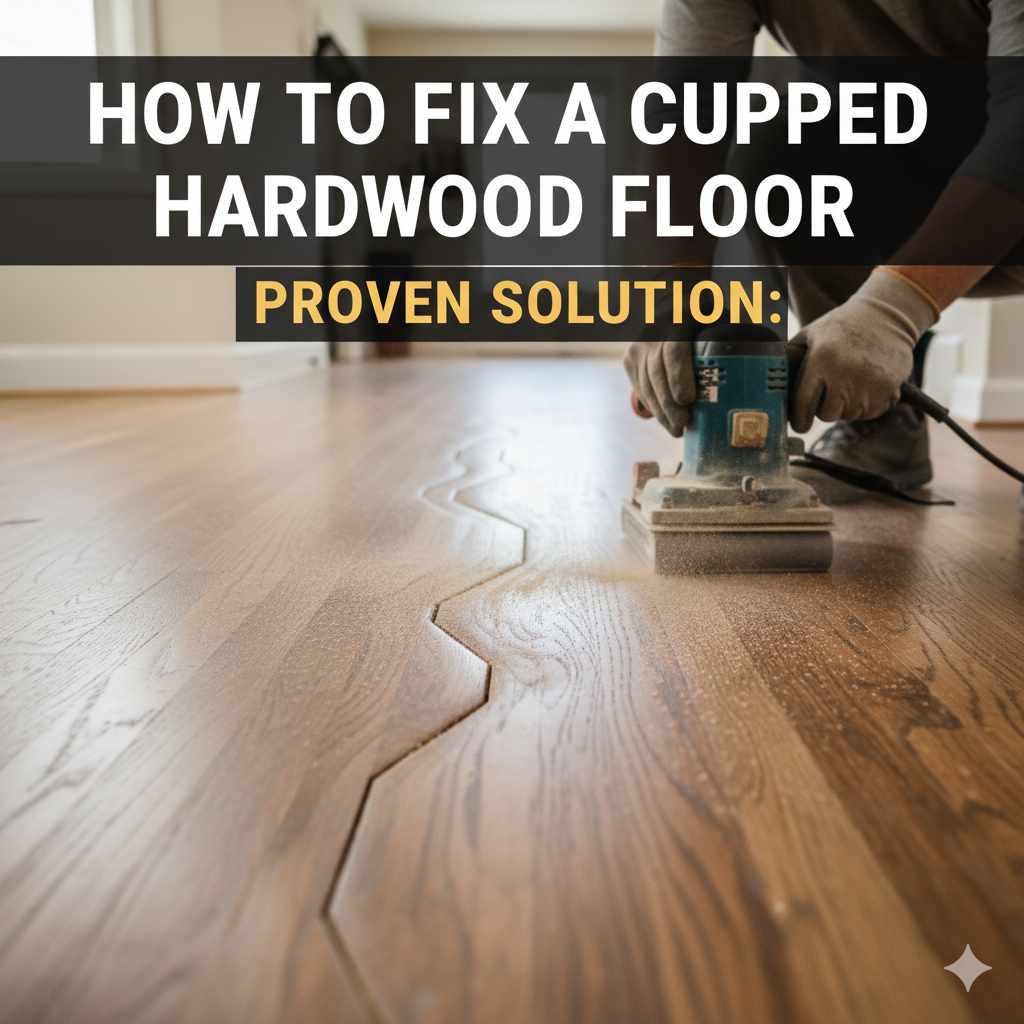
How to Fix a Cupped Hardwood Floor: Proven Solution
A cupped hardwood floor is usually caused by moisture imbalance. Fixing it often involves controlling humidity, allowing the wood to acclimate, and in some cases, sanding and refinishing once the moisture issue is resolved. Patience is key to a successful repair.
Hey there, fellow DIYers and homeowners! Md Meraj here. If you’re looking at your beautiful hardwood floors and noticing that the edges are lifting, making them look like little boat hulls, you’re likely dealing with “cupped” wood flooring. Don’t worry, this is a common issue, and it can be frustrating to see your floors lose their smooth, flat appeal. But the good news is, with a little understanding and some straightforward steps, you can bring your floors back to their former glory. This guide will walk you through exactly how to tackle a cupped hardwood floor, explaining why it happens and how to fix it. Get ready to restore that perfect floor!
Understanding Why Your Hardwood Floor is Cupping
Before we dive into fixing it, let’s chat about why this happens. Hardwood floors are made of natural wood, and wood loves to absorb and release moisture from its surroundings. This is called acclimation, and it’s a normal process. However, when the moisture levels inside your home get out of whack, especially when there’s a big difference between the top surface of the floor and the underside, the wood boards can react. This reaction causes the wood to expand or contract unevenly.
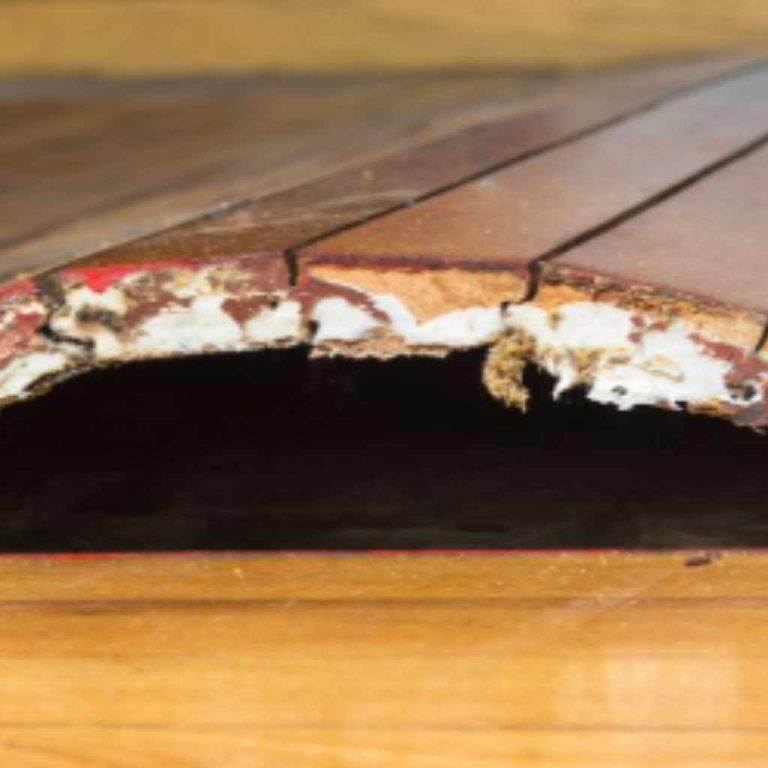
Specifically, cupping occurs when the moisture content on the underside of the floorboards is significantly higher than on the top surface. Think of it like a sponge; when one side gets wetter than the other, it swells more. The edges of the board swell outward, causing them to lift up, creating that characteristic cup shape. This is most common in areas with high humidity or where there’s been a spill or leak that wasn’t dried thoroughly. Understanding this moisture imbalance is the first, most crucial step in finding the right solution.
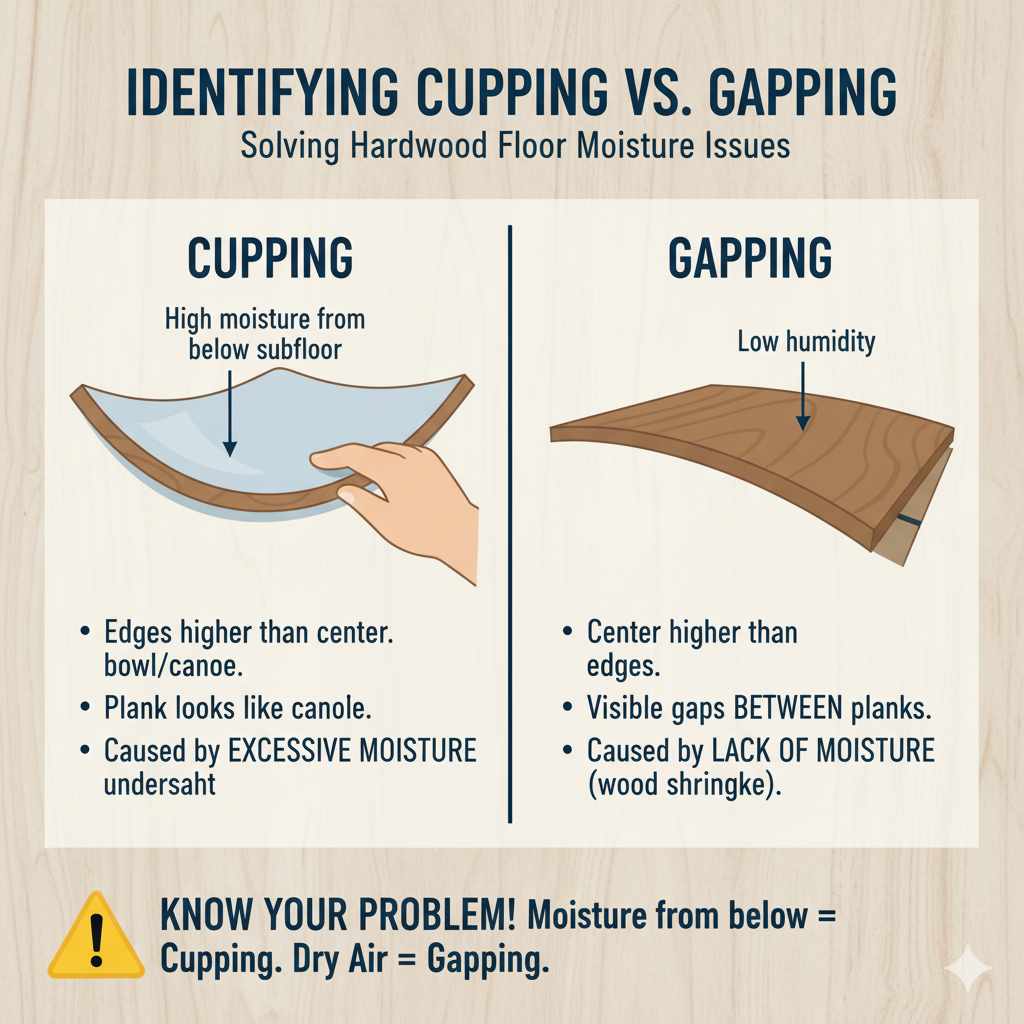
Identifying Cupping vs. Gapping
It’s important to distinguish cupping from a similar-looking issue called gapping. Sometimes, beginners can confuse the two.
- Cupping: The edges of the wood plank are higher than the center, making the plank resemble a shallow bowl or a canoe. This is typically caused by high moisture levels from below the subfloor.
- Gapping: The center of the wood plank is higher than the edges, or there are visible gaps between the planks. This is often due to low humidity, causing the wood to shrink.
Knowing which problem you have helps guide the solution. For cupping, we’re usually dealing with too much moisture underneath. For gapping, it’s usually too little moisture in the overall environment.
The Proven Solution: Addressing the Moisture Imbalance
The “proven solution” for fixing a cupped hardwood floor always comes back to stabilizing the moisture levels. You can’t truly fix the shape of the wood until you address the root cause – the uneven moisture. This usually involves two key things: identifying and fixing the source of excess moisture, and then allowing the floor to acclimate properly.
Step 1: Find and Eliminate the Moisture Source
This is the most critical step. If you don’t stop the moisture from getting to your floor, any fix you attempt will likely be temporary. Think like a detective! Where could extra moisture be coming from?
- Below the Floor:
- Crawl Space Issues: Is your crawl space damp or flooded? Check for leaks in pipes, poor ventilation, or direct water intrusion. Ensure the crawl space has a proper vapor barrier (like a thick polyethylene sheet). You can learn more about crawl space encapsulation from resources like Energy.gov’s guide to crawl space insulation, which touches upon moisture control.
- Basement Leaks: If you have a concrete slab or a basement below, check for cracks or leaks that might be allowing moisture to seep up.
- Plumbing Leaks: A slow leak in a pipe running under the floorboards can saturate the underside of your hardwood.
- Above the Floor:
- Spills and Mops: Are you or someone else using too much water when mopping? Use a well-wrung-out mop, or better yet, a hardwood-specific cleaner designed to be used sparingly.
- Damaged Appliances: Leaks from dishwashers, refrigerators with ice makers, or washing machines can directly drench your floor.
- Pet Accidents: While often cleaned up quickly, persistent pet accidents can soak into the wood.
- High Indoor Humidity: In very humid climates, the air itself can contribute moisture to your home.
Once you find a source, you need to stop it. Fix leaky pipes, seal cracks in the foundation, improve crawl space ventilation or encapsulation, and be mindful of how you’re cleaning your floors.
Step 2: Improve Air Circulation and Dehumidify (If Necessary)
Once you’ve stopped the source of excess moisture, you need to help dry out the wood. Good air circulation is key.
- Ventilation: Open windows and doors (if the outside humidity is lower than inside). Use fans to move air around the room, especially near the edges of the floor. Consider using exhaust fans in kitchens and bathrooms to remove excess moisture.
- Dehumidifier: If indoor humidity is persistently high, a dehumidifier can be a lifesaver. Aim to keep your home’s relative humidity between 30% and 50%. You can get a reliable hygrometer (humidity gauge) to monitor levels. Many modern dehumidifiers are quite efficient and programmable. Resources like the EPA’s guide on moisture and mold control offer excellent advice for maintaining healthy humidity levels indoors.
Running a dehumidifier and using fans might take a few days or even weeks, depending on how severe the cupping is and how much moisture is trapped. Be patient!
Step 3: Allow the Floor to Acclimate
After addressing the moisture source and improving the air quality, the wood needs time to “acclimate” back to a stable moisture level. This means letting it dry out or absorb moisture from the air until the top and bottom of the planks are balanced again.
This process can take anywhere from a few days to several weeks. You’ll know it’s getting there when the cupping starts to lessen on its own. Resist the urge to force it. Wood moves at its own pace!
Step 4: Assess and Consider Refinishing (If Necessary)
Once the wood has fully acclimated and the cupping has significantly reduced or disappeared, you’ll need to assess the floor.
- Minor Cupping: If the cupping was minor to begin with, and the floor has flattened out completely, you might be done! Just ensure your humidity controls are in place to prevent it from happening again.
- Stubborn Cupping or Damage: If the cupping was severe, or if the wood has been permanently affected (e.g., edges are frayed, stains from moisture remain, or it hasn’t completely flattened), you might need to consider sanding and refinishing.
Sanding removes a thin layer of wood. Once the floor is sanded smooth and flat, you can apply a new finish. This process effectively “resets” the floor surface. It’s important to note that sanding will remove some of the wood’s thickness, so it’s not a solution you can repeat indefinitely. A professional flooring contractor can assess if your floor has enough thickness left to be safely sanded and refinished.
Tools and Materials You Might Need
Depending on the severity of the cupping and the chosen fix, you might need a few things. For just addressing humidity and acclimation, you’ll need:
- Hygrometer/Hygrometer: To measure indoor humidity levels.
- Dehumidifier: To reduce moisture in the air.
- Fans: To improve air circulation.
- Shop Vacuum & Mop: For immediate cleanup of spills.
If you need to address a leak or structural issue, you might need:
- Plumber’s Tools
- DIY Sealing Compounds (for concrete cracks)
- Vapor Barrier Material (for crawl spaces)
For sanding and refinishing (which is often best left to pros unless you have experience):
- Drum Sander
- Edger Sander
- Orbital Sander
- Sanding Belts/Screens (various grits)
- Wood Filler
- Stain (optional)
- Polyurethane or Other Finish
- Brushes/Rollers for Finishing
- Safety Gear (dust mask, safety glasses, ear protection)
Cost and Time Considerations
The cost and time involved really depend on what’s causing the cupping and how severe it is.
Simple Moisture Control:
- Cost: Can range from $50 – $300 for a decent dehumidifier and hygrometer. If you need minor crawl space work, it could be a few hundred dollars for materials.
- Time: Identifying and fixing leaks: hours to days. Running dehumidifiers and fans: days to weeks. Waiting for acclimation: days to weeks.
Sanding and Refinishing (DIY):
- Cost: Sander rental ($100-$200 per day), sandpaper ($50-$100), finish ($100-$300). Total: $250 – $600+ for a typical room.
- Time: Sanding: 1-3 days. Filling, staining (if applicable): 1 day. Finishing: 2-3 coats, with drying time between coats (24 hours total). Total: 4-7 days of active work and waiting.
Sanding and Refinishing (Professional):
- Cost: Typically $3 – $7 per square foot, so $1000 – $3000+ for a medium-sized room.
- Time: Professionals can usually complete sanding and refinishing in 3-5 days.
It’s always best to prioritize fixing the moisture issue first and allow the floor to settle naturally before investing in refinishing. Sometimes, the floor will correct itself!
When to Call a Professional
While many DIYers can handle humidity control and basic troubleshooting, there are times when it’s wise to bring in the experts:
- Significant Structural Issues: If you discover major plumbing failures, foundation cracks, or extensive crawl space damage that requires specialized repair.
- Extensive Wood Damage: If the cupping has led to warped boards, water stains you can’t remove, or mold growth.
- Lack of Experience with Sanding/Refinishing: Achieving a professional-looking finish requires practice and the right equipment. Sanding too deep can ruin your floor.
- Uncertainty: If you’ve tried basic moisture control and the cupping persists, a professional flooring expert can perform moisture testing and diagnose more complex issues.
A good flooring contractor should be able to test the moisture content of your floorboards and subfloor, which is a key diagnostic tool for these problems. Organizations like the National Wood Flooring Association (NWFA) offer resources and can help you find qualified professionals in your area.
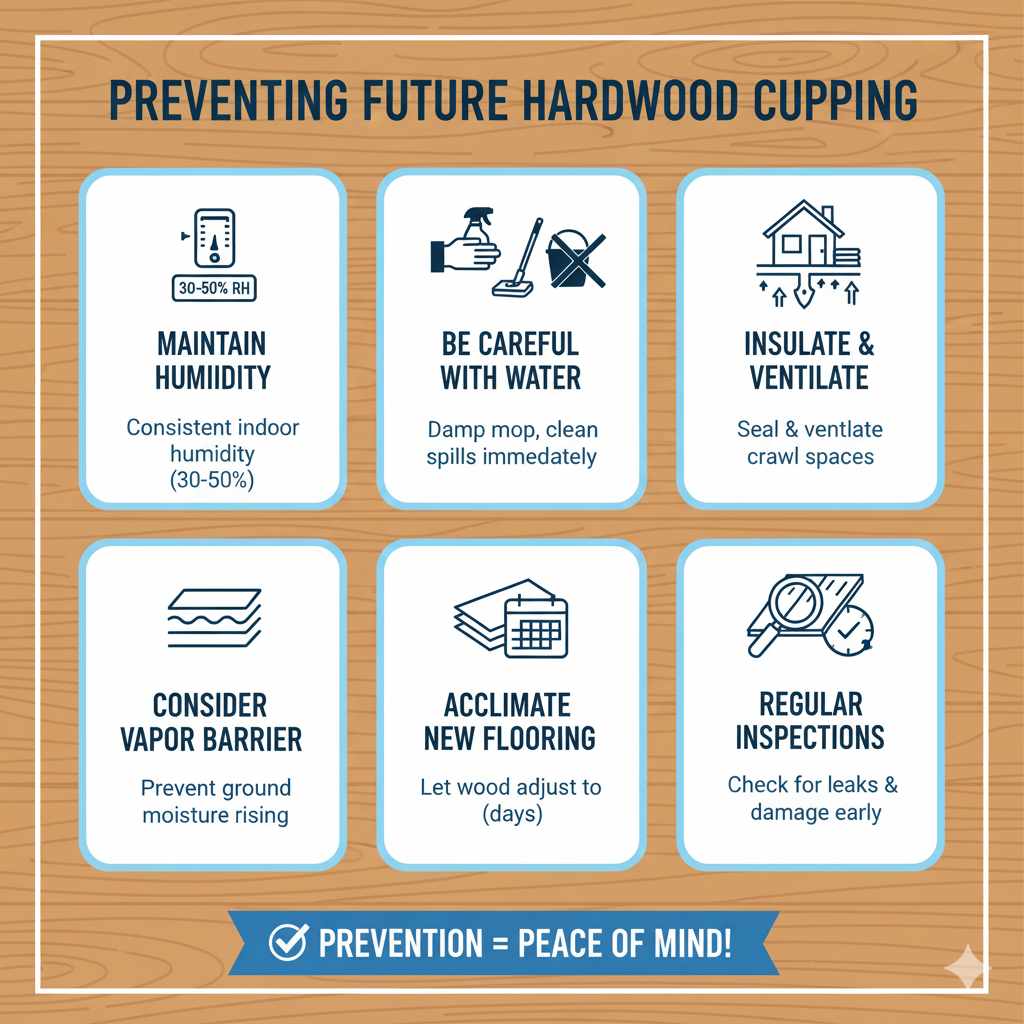
Preventing Future Cupping
Prevention is always better than a cure! Implementing a few good habits can save you a lot of heartache and expense down the line.
- Maintain Consistent Humidity: Use your HVAC system, humidifiers, and dehumidifiers to keep indoor humidity within the recommended range (30-50% relative humidity) year-round. This is crucial for all your wood furniture and finishes, not just floors.
- Be Careful with Water: Use damp mops, not wet ones. Clean up spills immediately. Ensure appliances that use water are in good working order and have no leaks.
- Insulate and Ventilate Properly: Ensure your basement and crawl space are properly sealed, insulated, and ventilated. This prevents temperature and moisture fluctuations from affecting your subfloor.
- Consider a Vapor Barrier: Especially in basements and crawl spaces, a good quality vapor barrier is essential to prevent ground moisture from rising into your home.
- Allow New Flooring to Acclimate: When installing new hardwood, always let it acclimate in the room where it will be installed for several days (check manufacturer guidelines) to adjust to the home’s environment.
Frequently Asked Questions (FAQ)
Q1: How long does it take for a cupped hardwood floor to flatten out?
It can take anywhere from a few days to several weeks. It depends on how much moisture caused the cupping, the type of wood, and how effectively you’re controlling the environment (humidity, air circulation). Be patient and focus on stabilizing the moisture levels.
Q2: Can I just sand down a cupped floor without fixing the moisture issue?
No, this is not recommended. Sanding down cupped wood without addressing the root cause of the moisture imbalance will likely result in the cupping returning, and you’ll have wasted the effort and material. Always fix the moisture problem first.
Q3: What is the ideal humidity level for hardwood floors?
The ideal relative humidity level for most hardwood floors is between 30% and 50%. Fluctuations outside this range can cause expansion, contraction, cupping, or gapping.
Q4: Can a spill cause permanent cupping?
A significant spill that saturates the wood from the top and seeps below can cause cupping. If it’s cleaned up quickly and the area is dried thoroughly, the floor might flatten over time. However, if the moisture is trapped or the wood is significantly damaged, it might require sanding and refinishing.
Q5: Is my subfloor causing the cupping?
Likely yes, if the excess moisture is coming from below. Common culprits include a wet crawl space, a leaky basement, or condensation issues. The subfloor absorbs the moisture and then transfers it to the hardwood flooring above, causing it to cup.
Q6: Can I use a filler to fix cupped boards?
Wood filler is generally not suitable for fixing cupping because cupping is about the shape of the entire board, not just a small crack or hole. Filler would just sit on top of the curve and wouldn’t address the underlying issue or the unevenness of the board.
Conclusion
Dealing with a cupped hardwood floor can seem daunting at first, but as you can see, it’s a solvable problem that primarily comes down to understanding and managing moisture. By systematically identifying and eliminating the source of excess water, improving your home’s ventilation, and letting your floors acclimate properly, you stand a great chance of restoring their beautiful, flat appearance. Remember, patience is your best tool here. If the issue persists or the damage is extensive, don’t hesitate to call in the professionals to ensure a lasting, quality repair.
Keep those humidity levels in check, clean up spills promptly, and your hardwood floors will thank you with years of stable, gorgeous service. Happy flooring!