How to Fix Cedar Slats: Expert Tips for Perfect Repairs
Fixing cedar slats can seem challenging, but it’s manageable with the right steps. Whether you’re dealing with broken, warped, or loose slats, there’s a solution.
Cedar slats are a popular choice for fences, furniture, and siding due to their durability and aesthetic appeal. Over time, weather conditions and wear can cause damage. Knowing how to fix these issues is essential to maintaining the beauty and function of your cedar structures.
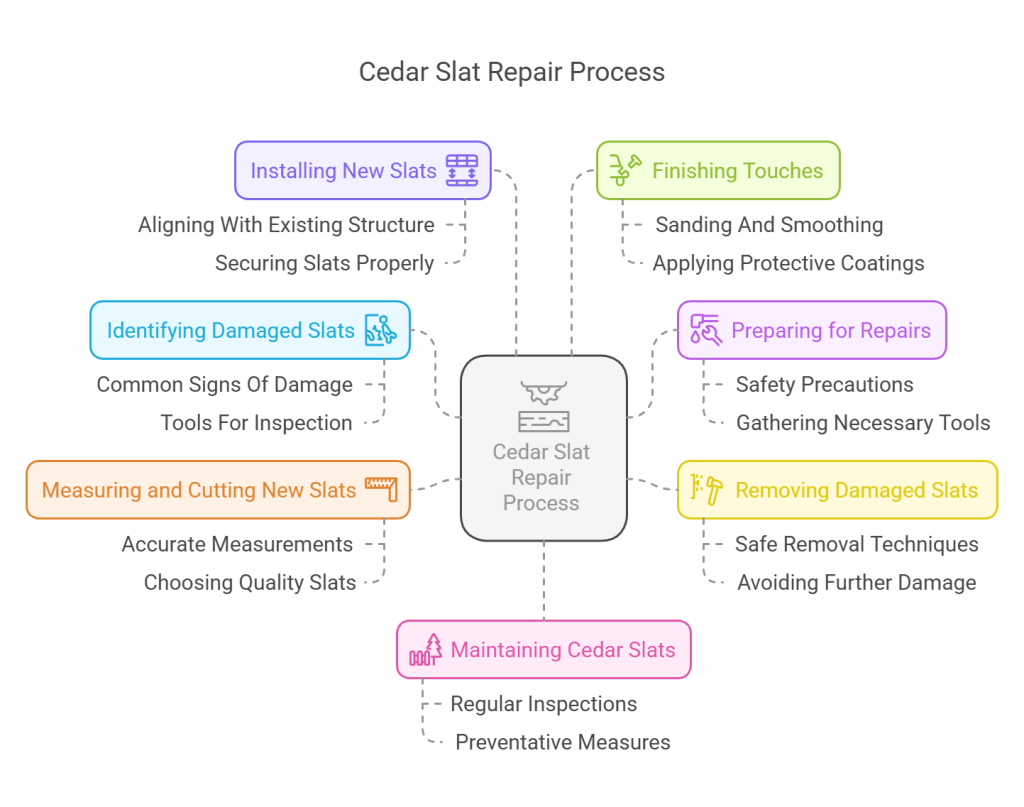
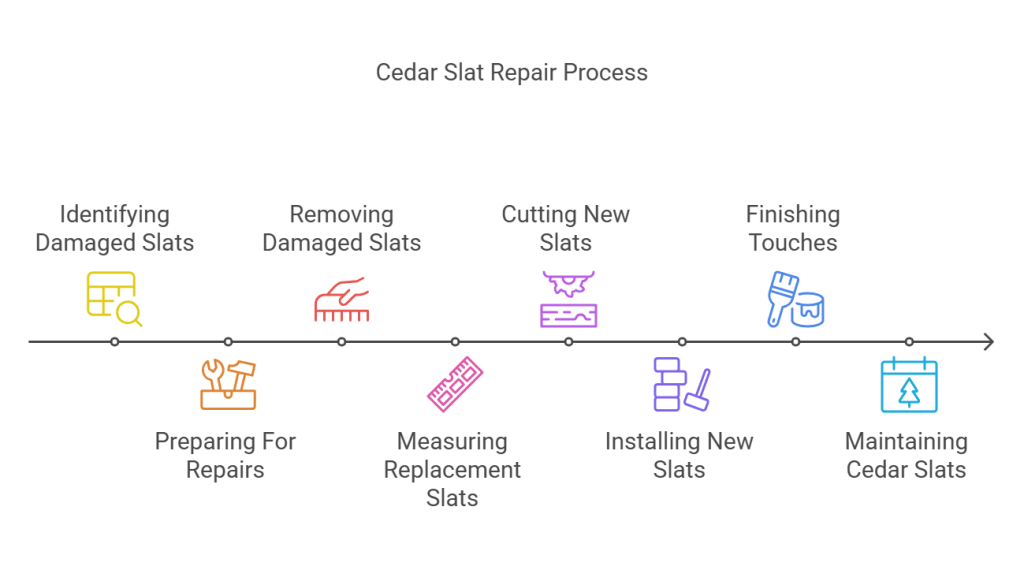
This guide will help you identify common problems with cedar slats and provide practical solutions. From simple repairs to preventive measures, you’ll learn how to keep your cedar slats in top shape. Let’s dive into the steps to fix cedar slats and restore your wooden structures.
Identifying Damaged Cedar Slats
When it comes to maintaining the beauty and longevity of your cedar slats, identifying damaged ones is crucial. Over time, cedar slats can suffer from various forms of damage, which can compromise both their aesthetic appeal and structural integrity. In this section, we’ll delve into how to spot these issues early on, ensuring your cedar slats remain in top-notch condition.
Common Signs Of Damage
Recognizing the signs of damage in cedar slats can save you a lot of hassle down the road. Here are some of the most common indicators:
- Cracks and Splits: These are often the first visible signs of damage. Cracks can appear due to prolonged exposure to weather conditions or physical impact.
- Discoloration: Cedar slats can change color over time, especially if they are not treated regularly. Look for patches that are significantly lighter or darker.
- Warping: This happens when the wood bends or twists out of its original shape. Warping can occur due to moisture absorption or uneven drying.
- Mold and Mildew: These fungi thrive in moist environments and can cause green or black stains on your cedar slats.
- Loose or Missing Nails/Screws: Check for any hardware that might have come loose or fallen out, as this can lead to instability in your slats.
Tools For Inspection
Conducting a thorough inspection of your cedar slats requires a few basic tools. Here’s a list to get you started:
| Tool | Purpose |
|---|---|
| Flashlight | Helps you see cracks and splits clearly, especially in low light conditions. |
| Moisture Meter | Measures the moisture content in the wood, helping you detect areas at risk of warping or mold. |
| Magnifying Glass | Useful for spotting fine cracks and early signs of mildew. |
| Screwdriver/Drill | Check the tightness of nails and screws, ensuring your slats are securely fastened. |
| Wood Cleaner | Helps remove surface dirt and reveal hidden damage. |
By equipping yourself with these tools and keeping an eye out for common signs of damage, you can maintain the beauty and durability of your cedar slats for years to come. Remember, a stitch in time saves nine – addressing small issues now can prevent bigger problems later!
Preparing For Repairs
Fixing cedar slats involves careful preparation. Start by gathering tools like a hammer, nails, and wood glue. Ensure the slats are clean and dry before making any repairs.
Fixing cedar slats can be a rewarding DIY project. Proper preparation ensures a smooth process. Before starting, make sure you understand each step.
Safety Precautions
Safety comes first. Wear gloves to protect your hands from splinters. Safety goggles shield your eyes from dust and debris. Use a mask to avoid inhaling sawdust. Ensure your workspace is well-lit and ventilated. Clear the area of any trip hazards.
Gathering Necessary Tools
Having the right tools makes the job easier. Gather a hammer, nails, and a saw. A measuring tape ensures accuracy. Sandpaper smooths rough edges. You may need a drill for stubborn slats. Keep a level handy for straight installations.
Prepare your tools in advance. This saves time and reduces stress. A well-organized workspace helps you work efficiently.
Removing Damaged Slats
Nothing is more frustrating than seeing damaged cedar slats on your beautiful fence or furniture. Removing and replacing these slats can seem daunting, but with the right techniques, it’s a manageable DIY project. This guide will walk you through the safest and most effective ways to remove those damaged slats without causing further harm to the surrounding wood.
Safe Removal Techniques
Before you start, gather all the necessary tools: a pry bar, hammer, gloves, and safety goggles. Safety first, always! You don’t want to end up with splinters or worse.
- Start by inspecting the slat to understand how it’s attached. Most slats are nailed or screwed in place.
- If nails are used, gently slide the pry bar under the slat near the nail. Apply slow, steady pressure to lift the slat without cracking it.
- If screws are used, simply unscrew them using the appropriate screwdriver. This is often the easiest method.
Remember, patience is key. Rushing can lead to more damage, and nobody wants that!
Avoiding Further Damage
It’s not just about removing the damaged slats; it’s about doing it without causing further harm. Here are some tips to avoid additional damage:
- Use the Right Tools: A sharp pry bar and a good hammer make all the difference. Dull tools can cause splintering.
- Work Slowly: Haste makes waste, especially with wood. Take your time to ease the slats out.
- Protect Surrounding Slats: Place a piece of scrap wood under the pry bar to distribute the pressure and protect nearby slats from damage.
Here’s a little tip from my personal experience: I once tried to rush through a similar project, and I ended up damaging more slats than I fixed. Lesson learned!
In conclusion, removing damaged cedar slats doesn’t have to be a headache. With the right tools, a bit of patience, and careful techniques, you can do it like a pro. Ready to tackle those slats?
Measuring Replacement Slats
Measuring replacement slats for your cedar fence is vital for a perfect fit. This ensures your fence looks neat and functions well. Accurate measurements will save you time and effort. This guide will help you measure and choose the right slats with ease.
Accurate Measurements
First, measure the length of the existing slats. Use a tape measure. Write down the measurements carefully. Measure the width of the slats next. Ensure the tape measure is straight and tight. Record these measurements as well. Check the thickness of the slats, too. Use a caliper if possible. Accurate measurements ensure the new slats fit perfectly.
Choosing Quality Slats
Quality slats make your fence last longer. Look for cedar slats that are free from knots. Knots can weaken the wood. Choose slats that are smooth and straight. Inspect for any signs of damage or warping. Quality slats should be uniform in size and color. This will give your fence a consistent look. Opt for cedar slats treated for outdoor use. This will prevent rot and insect damage.
Cutting New Slats
Cutting new cedar slats can breathe new life into your outdoor furniture or fencing. It’s a simple yet crucial step in ensuring your project stands out. With the right tools and techniques, you can achieve a perfect fit every time.
Proper Cutting Tools
Using the right tools is essential for cutting cedar slats. A circular saw or a miter saw is ideal. These tools provide clean, precise cuts. Make sure the blades are sharp to avoid splintering the wood. A measuring tape and a pencil are also necessary. They help mark accurate cut lines. Safety gear like goggles and gloves is vital. It protects you from sawdust and potential injuries.
Ensuring Perfect Fit
Measure twice, cut once. This old saying holds true. Accurate measurements ensure your slats fit perfectly. Use a measuring tape to get the exact dimensions. Mark the lines clearly with a pencil. Make sure the cuts are straight. Use a square to check your angles. A perfect fit makes your project look professional. It also ensures the slats are secure and stable.
Installing New Slats
Installing new cedar slats can give your fence or furniture a fresh look. This process ensures stability and longevity. Follow these steps to install new slats correctly.
Aligning With Existing Structure
Begin by measuring the space between the existing slats. This ensures a uniform look. Mark the spots where new slats will go. Use a level to keep everything straight. Check for any damaged parts in the structure. Fix these before adding new slats. This ensures a sturdy base.
Securing Slats Properly
Place the new slat in its marked spot. Use clamps to hold it in place. Drill pilot holes to prevent wood splitting. Secure the slat with screws or nails. Ensure each slat is tightly fastened. This prevents movement and increases durability. Repeat for each slat. Check alignment after securing each one.
Finishing Touches
So, you’ve come a long way with your cedar slats project. The slats are in place, looking good, but there’s one last step that can make or break the final look: the Finishing Touches. This part is all about making sure your work stands the test of time and looks great while doing it. Let’s dive into the details, shall we?
Sanding And Smoothing
The first step in finishing touches is sanding. Grab some sandpaper or a sanding block. Start with a coarse grit to smooth out any rough spots or splinters. Trust me, you don’t want any surprises later! Move in the direction of the wood grain to avoid scratches.
Once you’ve tackled the rough spots, switch to a finer grit sandpaper. This will give your cedar slats a smooth, polished finish. It might feel like a lot of work, but think of it as the difference between a good job and a great one.
To make sure you didn’t miss a spot, run your hand over the surface. It should feel as smooth as a baby’s bottom. If it doesn’t, keep sanding. It’s like baking a cake; you can’t rush the process if you want the best results.
Applying Protective Coatings
Once your cedar slats are smooth, it’s time to protect them. Cedar is pretty durable, but a little extra protection never hurts. Start with a wood sealer. This helps to lock in the natural oils and keep out moisture. Apply it with a brush, and make sure to cover every inch.
Next, consider adding a layer of stain or paint. Staining can bring out the beautiful natural patterns in the wood, while paint can give you a pop of color. Whatever you choose, make sure it’s designed for outdoor use if your slats are outside. This will help them withstand the elements.
Finally, apply a topcoat of clear varnish or polyurethane. This will give your slats a shiny finish and extra protection. It’s like the icing on the cake. Let it dry completely before using your slats, and you’re done!
And there you have it! With these finishing touches, your cedar slats will look fantastic and last for years. It’s all in the details, so take your time and enjoy the process. After all, isn’t that why we love DIY projects?

Maintaining Cedar Slats
Maintaining cedar slats is crucial for preserving their natural beauty and longevity. Cedar is a durable wood, but it still requires regular care to prevent damage from weather and pests. In this section, we’ll explore practical tips to keep your cedar slats in top-notch condition.
Regular Inspections
Conducting regular inspections is the first step in maintaining your cedar slats. Inspecting your slats allows you to catch any issues early before they become major problems.
- Check for cracks: Look for any visible cracks or splits in the wood. These can let in moisture and cause further damage.
- Look for discoloration: Discoloration can be a sign of mold or mildew. If you see any dark spots, it’s time to take action.
- Inspect for pests: Termites and other wood-boring insects can wreak havoc on cedar. Look for small holes or sawdust around your slats.
Preventative Measures
Preventative measures can save you a lot of time and effort in the long run. Here are some simple steps to keep your cedar slats in pristine condition:
- Seal the wood: Applying a sealant can protect the wood from moisture and UV damage. Make sure to use a product that is designed specifically for cedar.
- Keep it clean: Regularly clean your cedar slats with a mild detergent and water. Avoid using harsh chemicals that can damage the wood.
- Trim nearby plants: Overgrown plants can trap moisture against your cedar slats, promoting mold and mildew growth. Keep vegetation trimmed back.
- Apply a fresh coat of stain: Staining your cedar slats every few years can help maintain their color and protect them from the elements.
By following these simple steps, you can ensure that your cedar slats remain beautiful and durable for years to come. Remember, a little effort goes a long way when it comes to maintaining cedar slats.
Frequently Asked Questions
How To Fix Fence Slats?
To fix fence slats, remove damaged ones, measure and cut replacements, and secure them with screws or nails. Ensure alignment and stability.
Are Cedar Fence Slats Treated?
Cedar fence slats are generally not treated because cedar wood is naturally resistant to decay and insects. Treated options are available if extra protection is desired.
How To Make Cedar Look New Again?
Clean cedar with a mild detergent and water. Sand the surface gently. Apply a wood brightener. Finish with a UV-protectant sealer.
Is It Better To Seal Or Stain A Cedar Fence?
Sealing a cedar fence provides better protection against weather and UV damage. Staining adds color but requires more frequent maintenance. Sealing is generally recommended for longer-lasting results.
Conclusion
Fixing cedar slats can be simple with the right steps. First, gather your materials. Then, carefully follow the instructions. Pay attention to detail. Your cedar slats will look great and last longer. Regular maintenance helps keep them strong. Enjoy your improved outdoor space.
Happy fixing!