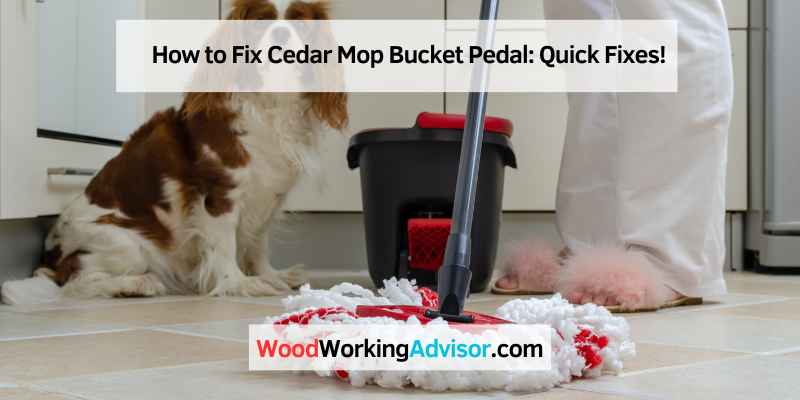
How to Fix Cedar Mop Bucket Pedal: Quick Fixes!
To fix a cedar mop bucket pedal, first ensure the bucket is empty. Then, use a screwdriver to tighten any loose screws.
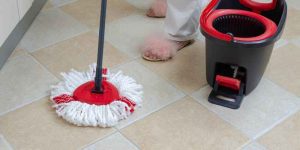
When it comes to maintaining your cleaning equipment, it’s essential to address any issues promptly. A cedar mop bucket is a handy tool for keeping your floors clean and shiny. However, if the pedal is not working correctly, it can hinder your cleaning routine.
By following a few simple steps, you can easily fix the pedal on your cedar mop bucket and get back to cleaning effectively. In this blog post, we will discuss how to troubleshoot and repair a cedar mop bucket pedal to ensure smooth operation and longevity of your cleaning tool.
Introduction To Cedar Mop Bucket Pedal Issues
Fixing Cedar mop bucket pedal issues is not a difficult task. Firstly, check the pedal’s spring and ensure it is not damaged. Secondly, tighten any loose screws or bolts on the pedal. Lastly, lubricate the pedal mechanism with oil to ensure smooth operation.
When it comes to efficient cleaning tools, a cedar mop bucket with a pedal is a popular choice for many households. The pedal mechanism allows for hands-free operation, making it convenient and time-saving. However, like any mechanical device, the pedal on a cedar mop bucket can experience malfunctions over time. In this blog post, we will explore common pedal malfunctions that you may encounter and the benefits of DIY repairs.
Common Pedal Malfunctions
Dealing with a malfunctioning pedal can be frustrating when you’re in the middle of cleaning. Here are some of the most common issues you might face:
- Pedal Sticking: The pedal may get stuck in the down position, making it difficult to release and operate the mop bucket.
- Pedal Not Responding: Sometimes, the pedal may become unresponsive, failing to activate the bucket’s mechanism.
- Weakening Springs: Over time, the springs that control the pedal’s movement may weaken, causing the pedal to lose its effectiveness.
- Broken or Loose Parts: The pedal assembly may have broken or loose parts, hindering its proper functioning.
Identifying the specific issue with your cedar mop bucket pedal is crucial for an effective repair. Now that we understand the common malfunctions, let’s explore the benefits of opting for DIY repairs.
Benefits Of DIY Repairs
Instead of immediately replacing your cedar mop bucket or seeking professional help, attempting a DIY repair can have several advantages:
- Cost Savings: DIY repairs are often more budget-friendly compared to purchasing a new mop bucket or hiring a professional.
- Empowerment: By fixing the pedal yourself, you gain a sense of accomplishment and become more self-reliant.
- Quick Resolution: With a basic understanding of the issue, DIY repairs can often be completed promptly, minimizing downtime in your cleaning routine.
- Enhanced Knowledge: Repairing the pedal allows you to gain insights into the inner workings of your cedar mop bucket, helping you troubleshoot future issues.
Now that we’ve explored the benefits of DIY repairs, it’s time to roll up our sleeves and address those cedar mop bucket pedal malfunctions. In the next sections, we will guide you through step-by-step instructions to fix common issues and restore your mop bucket’s functionality.
Initial Troubleshooting Steps
To fix a Cedar mop bucket pedal, first check for any loose screws or connections. Next, ensure the pedal is properly aligned and securely attached. If the issue persists, lubricate the pedal mechanism and test for smooth operation.
Safety Precautions
Before attempting to fix your cedar mop bucket pedal, it is important to prioritize safety. By following these precautions, you can ensure a secure and accident-free troubleshooting process:
- Make sure to wear protective gloves to avoid any potential injuries.
- Disconnect the mop bucket from the power source before proceeding with any repairs.
- Clear the surrounding area to create a safe working environment.
- Read the manufacturer’s instructions and guidelines to familiarize yourself with the mop bucket’s components.
Identifying The Problem
The first step in fixing your cedar mop bucket pedal is to identify the underlying issue. By correctly identifying the problem, you can efficiently troubleshoot and implement the necessary repairs. Here are some common problems you may encounter:
- The pedal is not responding when pressed.
- The pedal is stuck or difficult to operate.
- The pedal is making unusual noises.
- The pedal is loose or detached from the mop bucket.
To determine the cause of the problem, visually inspect the pedal mechanism and surrounding components. Look for any signs of damage, loose connections, or obstruction that may be hindering the pedal’s functionality. If necessary, refer to the manufacturer’s manual or online resources for specific troubleshooting instructions.
Once you have identified the problem, you can proceed with the appropriate troubleshooting steps to fix your cedar mop bucket pedal. By following these initial steps, you can effectively address the issue and restore the functionality of your mop bucket pedal.
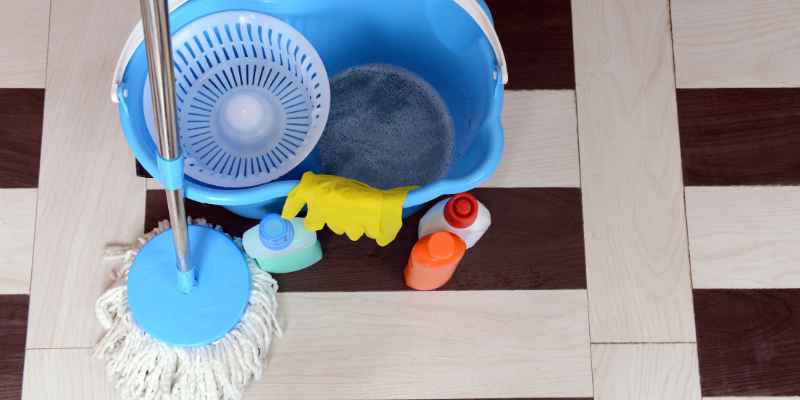
Tools And Materials Needed
To fix a cedar mop bucket pedal, you will need a few essential tools and materials. These include a screwdriver, replacement pedal, pliers, and wood glue. By following these steps, you can easily repair your mop bucket and have it working like new again.
To fix a Cedar Mop Bucket Pedal, you will need the following tools and materials:
Essential Repair Kit
Finding Replacement Parts
Pedal Mechanism: Basic Operation
The pedal mechanism of a cedar mop bucket is crucial for its proper functioning. If you need to fix the pedal, follow these simple steps for a smooth operation and hassle-free cleaning experience.
Understanding The Pedal’s Function
If you own a cedar mop bucket with a pedal mechanism, you know how convenient it is to use. However, over time, the pedal mechanism may become faulty and require repair. Understanding the pedal’s function is essential in fixing the cedar mop bucket pedal.
The pedal mechanism is the primary component of the cedar mop bucket. It enables you to control the water release by pressing down on the pedal with your foot. The pedal is connected to a linkage system that controls the flow of water in and out of the bucket. To fix the cedar mop bucket pedal, you need to understand how the pedal mechanism works.
Linkage System Overview
The linkage system of the cedar mop bucket is made up of several components that work together to control the flow of water. These components include the pedal, a rod, a lever, and a stopper.
When you press down on the pedal, it activates the rod, which pushes the lever. The lever, in turn, lifts the stopper, allowing the water to flow out of the bucket. When you release the pedal, the stopper falls back into place, stopping the flow of water.
To fix the cedar mop bucket pedal, you need to inspect each component of the linkage system to identify the faulty part. It could be a broken pedal, a bent rod, a loose lever, or a damaged stopper. Once you have identified the faulty component, you can replace it or repair it to restore the pedal’s function.
In conclusion, understanding the pedal’s function and the linkage system overview is essential in fixing the cedar mop bucket pedal. With this knowledge, you can diagnose the problem and repair the faulty component to restore the pedal’s functionality.
Quick Fixes For Loose Pedals
If your cedar mop bucket pedal is loose, here are some quick fixes. First, tighten the screws to secure the pedal. If that doesn’t work, consider replacing the pedal mechanism for smoother operation. Regular maintenance can also help prevent pedal issues in the future.
Tightening Screws and Bolts
If you’ve been using your cedar mop bucket for a while, you may have noticed that the pedal has become loose over time. This can be frustrating, as it can make it difficult to use the bucket properly. Fortunately, there are some quick fixes that can help you tighten up the pedal and get your mop bucket working like new again. In this post, we’ll explore some of the best ways to fix a loose pedal on a cedar mop bucket.
One of the easiest ways to fix a loose pedal is to tighten up the screws and bolts that hold it in place. To do this, you’ll need a screwdriver or wrench, depending on the type of screws and bolts used. Start by locating the screws and bolts that hold the pedal in place. Use your tool to tighten them up, being careful not to overtighten them. Once you’ve tightened up all the screws and bolts, test the pedal to see if it feels more secure.
Lubricating the Moving Parts
Another way to fix a loose pedal is to lubricate the moving parts. Over time, the pedal and other moving parts of the mop bucket can become dry and stiff, making them more prone to looseness and wear. By lubricating these parts, you can help them move more smoothly, reducing the risk of looseness and wear. To lubricate the moving parts, you’ll need a lubricant such as WD-40 or a similar product. Apply the lubricant to the moving parts, being careful not to overdo it. Test the pedal to see if it feels more secure after lubrication.
Overall, fixing a loose pedal on a cedar mop bucket is a relatively simple task that can be accomplished with a few basic tools and some elbow grease. By tightening up screws and bolts and lubricating the moving parts, you can help ensure that your mop bucket stays in good working order for years to come.
When it comes to maintaining your cedar mop bucket pedal, it’s essential to address any spring-related issues promptly. Here are the steps to solve common spring problems, ensuring your mop bucket pedal operates smoothly and efficiently.
Replacing Worn-out Springs
To replace worn-out springs, follow these simple steps:
- Remove the old spring carefully to avoid any damage to the surrounding components.
- Measure the dimensions of the old spring to ensure you select the correct replacement.
- Install the new spring by positioning it securely in place, ensuring it aligns with the designated attachment points.
- Test the pedal to ensure the new spring functions effectively.
Adjusting Spring Tension
If you encounter issues with the spring tension, here’s how to make the necessary adjustments:
- Identify the tension adjustment mechanism on the mop bucket pedal.
- Using the appropriate tool, tighten or loosen the tension according to the manufacturer’s guidelines.
- Test the pedal to ensure the tension is adjusted to the optimal level for smooth operation.
Dealing With Broken Or Bent Components
Dealing with broken or bent components in your cedar mop bucket pedal can be frustrating, but with the right approach, you can easily restore functionality to your mop bucket. Whether you’re dealing with bent metal or broken parts, taking the time to address these issues will ensure that your mop bucket pedal works smoothly and efficiently.
Straightening Bent Metal
If you find that the metal components of your cedar mop bucket pedal are bent, it’s important to address this issue promptly. Using a pair of pliers, carefully grip the bent metal and apply gentle pressure to straighten it out. Ensure that the metal is fully straightened before reassembling the pedal. This simple fix can make a significant difference in the functionality of your mop bucket pedal.
Swapping Out Broken Parts
When dealing with broken parts in your cedar mop bucket pedal, it’s crucial to replace them to restore functionality. Start by identifying the broken component, whether it’s a pedal, hinge, or other part. Order a replacement part from the manufacturer or a trusted supplier. Once the new part arrives, carefully remove the broken component and install the replacement. Test the pedal to ensure that it’s working as intended with the new part in place.
Testing And Final Adjustments
After fixing the cedar mop bucket pedal, it’s crucial to conduct thorough testing and make final adjustments to ensure its smooth and efficient operation. This step is essential to guarantee that the repair work has been completed successfully and that the pedal functions as intended. Below, we will outline the process for testing and making final adjustments to the cedar mop bucket pedal.
Conducting A Function Test
Once the repair work on the cedar mop bucket pedal is completed, it’s time to conduct a function test to ensure that the pedal is working properly. This involves pressing the pedal several times to check for smooth and consistent movement. Additionally, ensure that the pedal’s spring mechanism is functioning as intended, providing the necessary resistance and returning the pedal to its original position after each use.
Fine-tuning For Smooth Operation
After conducting the function test, it may be necessary to fine-tune the cedar mop bucket pedal for smooth operation. This can involve adjusting the tension of the spring mechanism or ensuring that the pedal’s components are properly lubricated to minimize friction. Carefully observe the pedal’s movement during this process, making incremental adjustments as needed to achieve optimal performance.
Maintenance Tips To Prevent Future Problems
To prevent future problems with your cedar mop bucket pedal, regular maintenance is key. Check for any loose screws or broken parts, lubricate moving components, and clean the pedal mechanism to ensure smooth operation and longevity.
Regular Cleaning and Care
Regular cleaning and care of your cedar mop bucket pedal is crucial for ensuring its longevity and optimal performance. To maintain the functionality of the pedal, it’s essential to clean it after each use. Use a mild detergent and warm water to wipe down the surface of the pedal and remove any accumulated dirt or debris. Additionally, ensure that the pedal mechanism is free from any obstructions or blockages that could impede its movement.
When to Seek Professional Help
Despite regular maintenance, there may be instances where professional assistance is necessary. If you notice any unusual noises, resistance, or irregularities in the function of the pedal, it’s advisable to seek the expertise of a professional repair service. Prompt attention to any issues can prevent further damage and ensure the continued smooth operation of your cedar mop bucket pedal.
By following these maintenance tips, you can effectively prevent future problems and extend the lifespan of your cedar mop bucket pedal.
Conclusion: Ensuring Longevity Of Your Cedar Mop Bucket
To ensure the longevity of your cedar mop bucket, fixing the pedal is crucial. Regularly check for any loose screws or broken parts and replace them promptly to maintain the bucket’s functionality and durability. Proper maintenance will extend the life of your cedar mop bucket.
Recap Of Repair Steps
To fix your cedar mop bucket pedal, you’ll need to follow a few simple steps. First, remove the pedal by unscrewing it from the bottom of the bucket. Then, clean the area around the pedal and the inside of the pedal mechanism. Replace any damaged or broken parts, and lubricate the pedal and mechanism before reassembling the bucket. Finally, test the pedal to ensure it’s working correctly.
Encouragement For Ongoing Maintenance
Regular maintenance is key to ensuring the longevity of your cedar mop bucket. To keep it in good condition, be sure to clean it thoroughly after each use, store it in a dry place, and inspect it periodically for any signs of wear or damage. With proper care, your cedar mop bucket can last for many years and continue to provide you with reliable cleaning performance.
In conclusion, by following these simple steps and taking care of your cedar mop bucket, you can ensure that it remains in good working condition for years to come. Regular maintenance is essential to avoid costly repairs and replacements, so be sure to make it a part of your cleaning routine.
Frequently Asked Questions
Does The O Cedar Mop Bucket Come Apart?
Yes, the O Cedar mop bucket comes apart for easy cleaning and storage.
Why Won’t My Rotating Mop Spin?
Check if the mop handle is secure and the spin mechanism isn’t jammed. Ensure the mop head is properly attached.
How Do You Take Apart An O Cedar Mop Head?
To take apart an O Cedar mop head, twist and pull the mop head to remove it. Then, squeeze the plastic tabs to release the mop head.
How Do You Change The Head On An O Cedar Roller Mop?
To change the head on an O Cedar roller mop, follow these steps:
1. Locate the release button on the mop handle.
2. Press the button to release the old mop head.
3. Align the new mop head with the mop base.
4. Push the new head onto the base until it clicks into place.
5. Ensure it is securely attached before using.
Conclusion
Repairing your cedar mop bucket pedal is a simple task that can save you time and money. By following the steps outlined in this guide, you can easily fix the issue yourself. Remember to use the right tools and take your time to ensure a successful repair.
Keep your mop bucket functioning smoothly with these easy steps!