How to Install Hardwood Flooring on Stairs With Nosing: Step-by-Step Guide
Are you ready to transform your staircase into a stunning focal point of your home? Installing hardwood flooring on stairs with nosing can elevate your interior design, adding warmth and sophistication.
But, you might be wondering: where do you start? This guide is crafted just for you, simplifying the process into easy-to-follow steps. Imagine walking up the stairs and feeling the sturdy, elegant touch of hardwood beneath your feet. It’s more than just a home improvement project; it’s a way to increase your home’s value and aesthetic appeal.
We’ll walk you through each phase, ensuring you can tackle this task with confidence and precision. Curious about how to achieve that seamless finish? Or perhaps you’re concerned about the tricky parts like nosing and fitting each step perfectly? Don’t worry. You’re about to discover the secrets to a flawless installation. Let’s dive in, and by the end of this article, you’ll have the knowledge and motivation to get started on your staircase makeover.
Preparation And Tools
Get the right tools for the job. You need a tape measure, a saw, and a drill. Don’t forget the nail gun and hammer. A good level is key. You’ll also need a safety mask. Protect your eyes with goggles. Work gloves are important too. Gather all supplies before starting.
Keep your workspace clean. Remove clutter and debris. Clear the stairs. Make space for tools. Good lighting helps you see better. Ensure stairs are dry. Check for loose nails. Fix any problems now. Safety is your priority.
Selecting The Right Hardwood
Hardwood comes in many types. Each type is unique. Some are very hard. Others are softer. Oak is a popular choice. It is strong and durable. Maple is another option. It has a smooth finish. Cherry is beautiful and rich in color. Each type has its own look and feel.
Stairs need special care. Wood must be strong. It should handle lots of use. Safety is key. Wood should not be slippery. Thickness is important. Too thin and it might break. Color and grain should match the home. Choose wisely for the best look.
Measuring And Cutting
Get a tape measure and a notepad. Measure each stair carefully. Write down the width and length. Check the depth too. Each stair might be different. Check twice to be sure. Accurate measurements help in a good fit. Never guess the sizes. Mistakes can be costly. Use these numbers later for cutting.
Use a saw to cut the hardwood. Follow the measurements closely. Safety first: wear goggles and gloves. Cut the wood slowly. Make sure edges are smooth. Test fit each piece on the stair. Make adjustments if needed. Cutting right ensures a perfect fit. Don’t rush the process. Take your time for best results.
Installing The Nosing
Start by preparing the stair surface, ensuring it’s clean and smooth. Measure and cut the nosing for each step. Secure the nosing with glue or nails, aligning it neatly with the stair edge for a polished finish.
Choosing Nosing Material
Picking the right nosing materialis very important. Wood, metal, and plastic are popular choices. Each material has its own look and feel. Wood is classic and blends well with hardwood floors. Metal can be shiny and modern. Plastic is affordable and easy to clean. Think about the look you want and your budget. The nosing should be strong and durable. It keeps the stairs safe and looking good.
Attaching Nosing Securely
Make sure the nosing is secure on each step. Use strong glueor nails to hold it in place. Check the fit before attaching. It should sit flat and snug on the edge. A loose nosing can be a trip hazard. Always follow the instructions for the materials you use. Double-check each step to ensure safety. A well-secured nosing makes the stairs safe and neat.
Laying The Hardwood Flooring
Begin installing hardwood flooring at the top stair. Ensure each plank fits snugly. Cut the wood to match the stair’s size. Check that the edges are smooth. The top step sets the tone for the rest.
Align each plank carefully with the stair’s edge. Use a level to make sure it’s straight. Misalignment causes gaps and uneven surfaces. Double-check your work. Take your time to ensure a neat finish. Proper alignment is key to a beautiful look.
Securing The Flooring
Glue helps keep the wood in place. Apply a thin layer of adhesive. Use a notched trowel for even spread. Make sure all areas are covered. Press the wood down firmly. This ensures a strong bond. Let it dry for a few hours. Do not walk on it during this time. Check for gaps after drying. If any, fill with extra glue.
Nails add extra support. Use a nail gun for quick work. Place nails at regular intervals. This makes the wood more secure. Avoid placing nails too close to the edges. This can cause splitting. Always wear safety gear when nailing. Check if any nails are loose. Hammer them down if needed. This will keep your stairs safe.
Finishing Touches
Installing hardwood flooring on stairs with nosing adds elegance and safety. Begin by measuring each step for precision. Securely attach the nosing and flooring, ensuring a smooth transition.
Sanding And Sealing
Ensure each stair is smooth by gently sandingthe surface. Use fine-grit sandpaper for a soft finish. Sand along the wood grain for the best result. After sanding, clean the dust with a damp cloth.
Next, apply a sealerto protect the wood. A clear sealer works well. It highlights the wood’s natural beauty. Use a brush for even application. Let it dry completely before the next step.
Inspecting For Consistency
Check each stair for a consistent look. The color and finish should match. If one stair looks different, adjust it. You might need to sand or apply more sealer. This step ensures your stairs look perfect.
Walk on the stairs to test stability. Listen for any creaks or noises. Fix any issues you find. Your stairs should feel solid and safe.

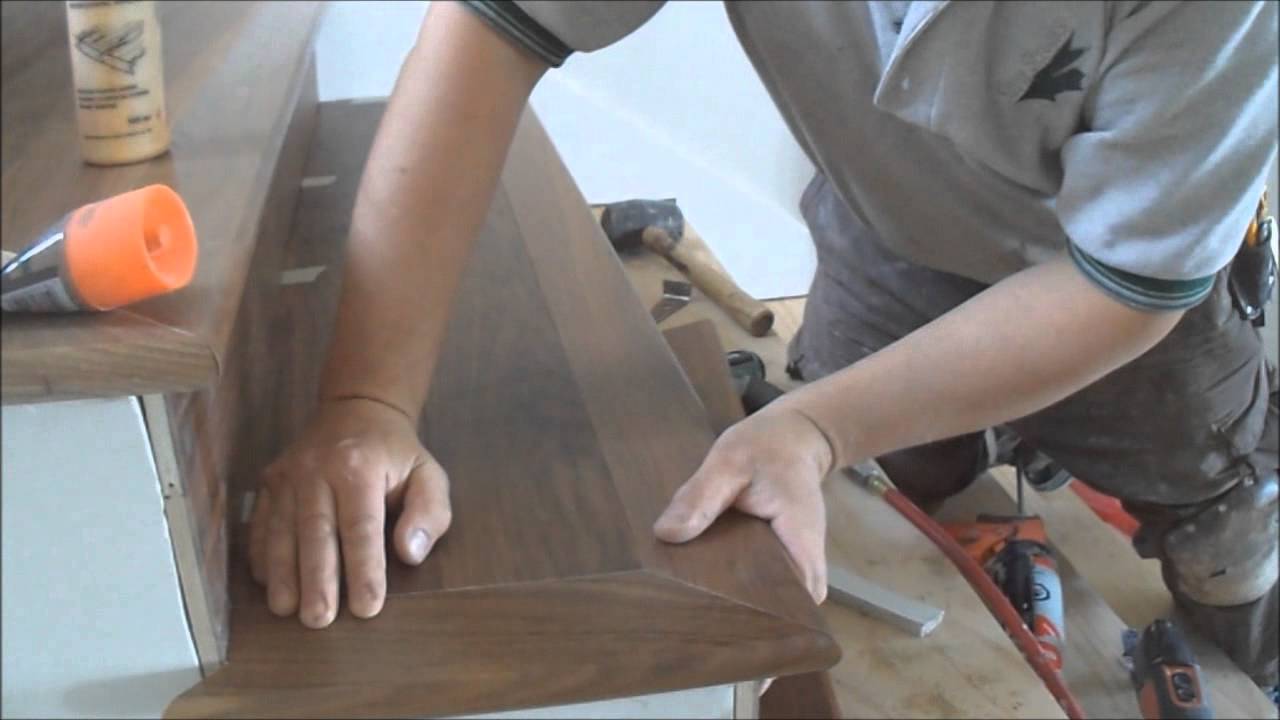
Credit: www.uptownfloors.com
Maintenance Tips
Installing hardwood flooring on stairs with nosing enhances durability and aesthetics. Start by measuring each stair precisely. Secure the nosing firmly to prevent slipping and ensure a smooth transition.
Cleaning Techniques
Keep hardwood stairs clean for long-lasting beauty. Use a soft broom daily. A vacuum with a soft brush attachmentworks well. Avoid water spills on stairs. Water can damage wood. Use a damp cloth for sticky spots. Quick drying prevents damage. Avoid harsh chemicals. Choose gentle wood cleanersinstead. Test cleaner on small area first. Ensure cleaner is safe for wood.
Preventing Wear And Tear
Protect stairs from wear. Place rugs at the top and bottom. Rugs absorb dirt and prevent scratches. Use felt padsunder furniture near stairs. Felt pads stop scratches when moving furniture. Limit shoe wear indoors. Shoes can damage stairs. Encourage family to wear soft slippersindoors. Regular checks for loose boards are important. Tighten screws promptly to avoid damage.

Credit: www.youtube.com
Frequently Asked Questions
How Do You Start Installing Hardwood On Stairs?
Begin by measuring each stair for precise cuts. Cut the hardwood planks to fit each step and riser. Secure the planks using adhesive and nails. Ensure the nosing fits securely and is aligned properly. This initial setup is crucial for a seamless and professional-looking installation.
What Is Stair Nosing, And Why Is It Important?
Stair nosing is the horizontal edge of each step. It provides a finished look and enhances safety by offering slip resistance. Proper nosing installation prevents damage to the stair edges and ensures durability. It also adds aesthetic value, blending seamlessly with the stair design.
Do You Need Underlayment For Hardwood Stairs?
Underlayment isn’t typically used on stairs. Instead, focus on securing each hardwood piece firmly with adhesive and nails. Proper installation ensures stability and reduces noise. Underlayment is more common for flooring to provide cushioning and soundproofing, but stairs require a more solid attachment.
How Do You Ensure Nosing Is Secure?
To secure nosing, apply strong adhesive along the stair edge. Press the nosing firmly into place. Use finish nails to ensure additional stability. Properly secure nosing prevents accidents and enhances the longevity of the stairs. This step is crucial for maintaining a safe and durable staircase.
Conclusion
Installing hardwood flooring on stairs with nosing enhances beauty and safety. Follow steps carefully for best results. Measure accurately and choose quality materials. Use tools safely and wear protective gear. Maintain patience during installation process. Ensure nosing aligns well for smooth transitions.
Secure planks properly for durability. Check each step for stability. Clean the surface before final finish. Enjoy the elegant look and feel of your stairs. With practice, you can do it yourself. Transform your stairs into a stunning focal point.
Experience the satisfaction of a job well done.