Tile to Wood Flooring Transition Ideas: Design Options + Height Fix
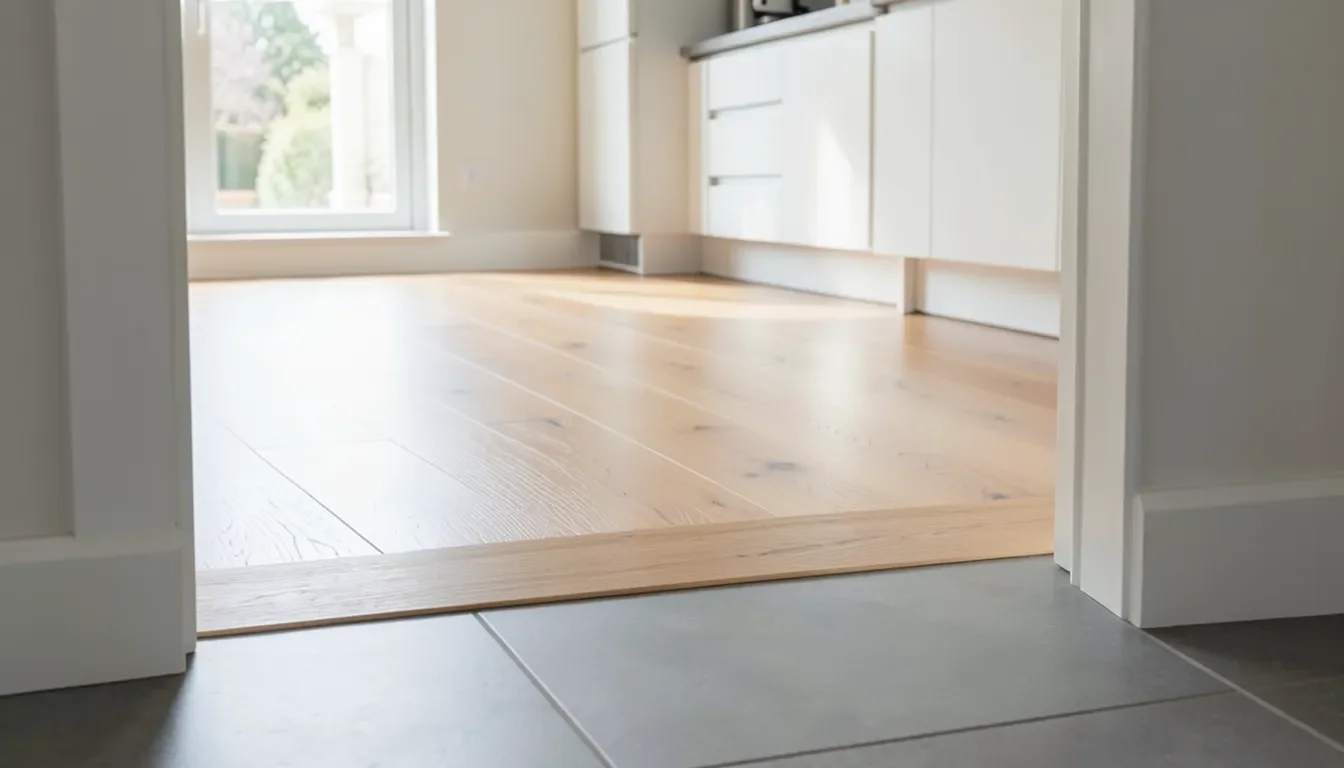
Tile and wood look great side by side, but they almost never sit at the exact same height once they are installed – and that single fact causes more failed transitions than any color or pattern mistake. Porcelain tile sits on a bed of thinset, sometimes over a layer of backer board, while wood flooring has its own build-up from underlayment and plank thickness. The two totals rarely match. Get the transition strip wrong for that gap and you end up with a lip that catches your toe, or a piece of trim that cracks the first time the wood floor breathes with the seasons. This guide covers real transition ideas for combining the two floors, plus the height-mismatch fix and the expansion-gap rule that most “tile to wood” guides skip entirely.
Why Tile and Wood Almost Never Meet at the Same Height
Best Height-Mismatch Fix
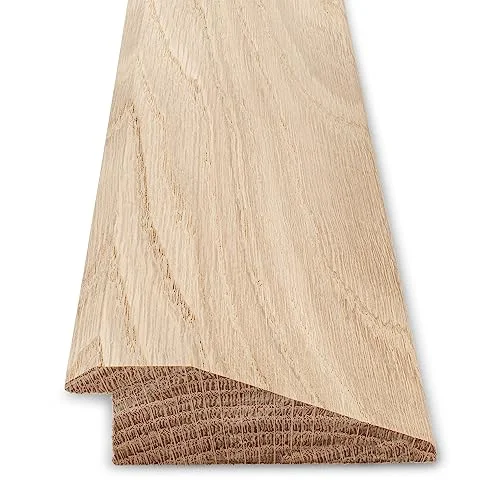 |
Solid Oak Wood Floor Transition/Overlap Reducer (3/4 in.) – $49.99 Built for the exact tile-to-wood height gap this guide covers, this 3/4 inch solid oak reducer tapers from the higher tile edge down to the lower wood floor instead of sitting flush like a T-molding.
|
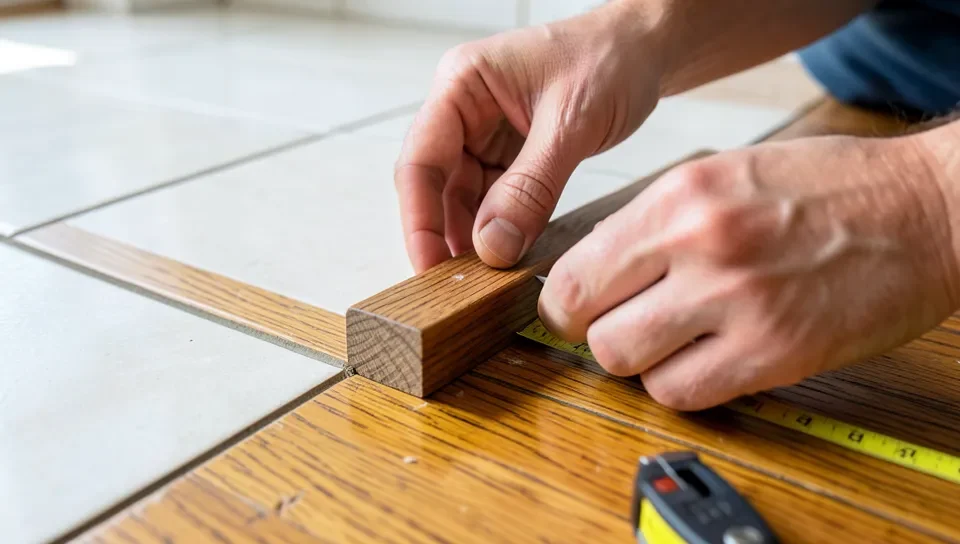
Start by actually measuring the two floors at the seam before you pick a transition style. A typical porcelain tile assembly – tile, thinset, and often a cement backer board underneath – commonly runs thicker than people expect, sometimes thicker than the wood flooring going in next to it. Solid hardwood and engineered wood have their own thickness depending on the product, so the finished height on the wood side can land anywhere from flush to as much as an inch lower than the tile. That difference is what decides which transition piece will actually work, not personal preference.
As a rule of thumb, a flat T-molding only works cleanly when the two floors are within about 1/8 inch of each other. Once the gap grows past that – up to roughly 3/4 inch – a reducer strip is the right call, since it tapers down from the higher tile to the lower wood instead of sitting flush on both sides. Anything beyond about 3/4 inch usually means adjusting the subfloor before installation (adding an extra layer of plywood under the wood side, or thinning the mortar bed under the tile) rather than trying to force one oversized strip to bridge the whole gap.
Reducer, T-Molding, or Threshold: Matching the Strip to the Actual Gap
Once you know the real height difference, the choice gets simple:
- T-molding – for seams where tile and wood finish at nearly the same height (roughly 1/8 inch or less). It sits centered over the joint with equal reveal on both sides.
- Reducer strip – for the much more common case where tile sits higher than wood, typically a 1/4 to 3/4 inch difference. It slopes from the tile edge down to the wood so there is no sharp lip to catch a foot or a chair leg.
- Threshold or saddle – a flatter, wider piece usually reserved for doorways, especially when the gap is larger or when building codes or accessibility requirements call for a low-profile ramp rather than a molding.
If you are planning the layout before either floor goes down, it is worth asking your installer to check the combined thickness on paper first. Shaving a little off the mortar bed or adding an extra layer of underlayment on the wood side ahead of time is far cheaper than discovering a 5/8 inch mismatch after both floors are already finished. For a closer look at each strip type, pricing, and a side-by-side comparison table, see our full T-molding vs. reducer buying guide.
Picking Tile and Wood That Actually Work Together
Before the transition strip ever comes into play, the tile and wood themselves need to make sense next to each other, or the seam between them will always look like a hard stop rather than a deliberate design choice. A few pairings hold up well in practice:
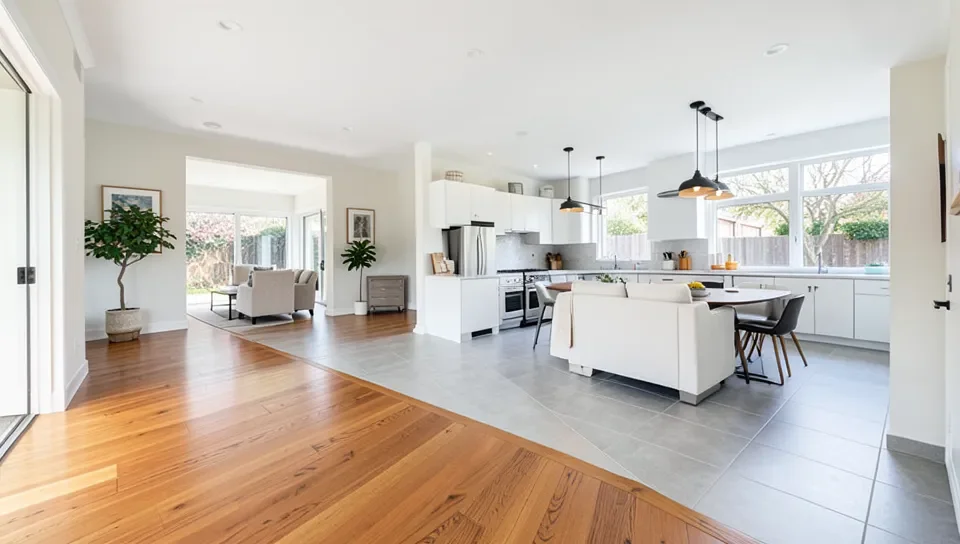
- Warm-toned wood with cool-toned tile (a honey or amber oak next to a gray or blue-gray porcelain) reads as a clear, intentional contrast rather than a mismatch, because the two are not trying to be the same color and failing.
- Matte finishes on both sides. A high-gloss porcelain next to a satin-finished wood floor tends to fight for attention at the seam; matching the sheen level, even across different materials, makes the transition read as calmer.
- Plank width proportional to the tile size. Narrow 2.25 inch strip flooring next to large 24 by 24 inch porcelain tile can look out of scale; wider engineered planks (5 to 7 inches) tend to pair better with larger-format tile.
- Same undertone, different value. If the tile has warm gray undertones, a wood with a slightly warm (not orange) cast will transition more smoothly than a cool ash-gray wood next to a warm tile.
Wet areas are the other practical filter: tile belongs in bathrooms, entryways, and around fireplaces where moisture or heavy foot traffic is a concern, while wood is better suited to living and sleeping areas. Planning the transition at a natural use-case boundary – a kitchen threshold, a bathroom doorway, a hearth – avoids an arbitrary seam in the middle of an open room.
Design Ideas for the Transition Line Itself
The strip is functional, but where and how you run the seam is what actually makes the combination look intentional instead of accidental:
- Follow the doorway, not the room. Running the transition directly under a door slab (rather than a foot into either room) reads as a natural room break instead of an odd stopping point mid-floor.
- Cut the seam on an angle. A 45-degree diagonal cut across an open-concept kitchen-to-living-room line softens the boundary and works well when the two rooms are not perfectly square to each other.
- Border the tile in a matching wood strip. A 3 to 4 inch wood border laid flat along the tile’s edge, with the transition strip beyond it, creates a picture-frame effect that hides minor height differences better than a single molding line.
- Match the metal or wood finish to your hardware, not your floor. A brushed-nickel or matte-black metal transition strip can look more deliberate in a modern kitchen than a wood-tone strip that has to match two different floors at once.
- Keep grout color close to the wood tone at the last row of tile before the seam – a stark white grout line next to dark wood is usually what makes a transition look unfinished, more than the strip itself does.
Why the Strip Needs an Expansion Gap on the Wood Side
Tile is dimensionally stable – it does not meaningfully expand or contract with humidity. Wood does. A solid or engineered wood floor moves seasonally, expanding slightly in humid months and contracting in dry ones, and that movement has to go somewhere. If a transition strip is glued or face-nailed rigidly into both the tile and the wood, the wood has nowhere left to move and can cup, buckle, or push the strip loose at the first seasonal swing.
The fix is straightforward: leave the manufacturer-recommended expansion gap (commonly around 1/4 to 3/8 inch, but check the specific flooring’s installation instructions) between the wood flooring’s edge and the tile or subfloor beneath the strip, and fasten the transition strip itself to the subfloor or to a track/channel system rather than face-nailing through both floors. The strip’s overlap covers the gap visually while still letting the wood move underneath it.
Installing the Transition Without Cracking Tile or Buckling Wood
A few installation habits prevent most of the common failures (the same core rules apply if you are joining two wood floors of different species or ages instead of tile and wood – see our guide to transitioning hardwood floors between rooms for that scenario):
- Never screw or nail directly through finished tile – use a track/channel base that is fastened to the subfloor before the tile is set, or a construction adhesive rated for masonry if the tile is already down.
- Pre-drill the wood side of any screw-down transition to avoid splitting solid oak or maple strips, especially near the ends.
- Check the strip with a level across the seam, not just by eye – a strip that rocks even slightly will loosen within a season of foot traffic.
- Let both the reducer and the wood flooring acclimate in the room for the time the manufacturer specifies before final fastening, the same way you would with the flooring itself.
Frequently Asked Questions
Do I always need a reducer between tile and wood flooring?
Only when the two floors finish at meaningfully different heights. If a careful measurement shows the tile and wood are within about 1/8 inch of each other, a flat T-molding works fine and looks less bulky than a reducer.
Can I use a flat T-molding if the tile is higher than the wood?
Not reliably. A T-molding is designed to sit level across an even seam. Forced over an uneven one, it either rocks on the high side or leaves a visible gap on the low side, and it will loosen faster than a reducer sized for the actual height difference.
Does the transition strip need to match the wood floor finish?
It looks best when it does, but it is not required. Many transition strips come unfinished so they can be stained to match after the fact, and a contrasting metal strip can look intentional in a more modern kitchen or bath.
Why does my new transition strip keep coming loose?
The most common cause is a missing expansion gap – if the strip was fastened rigidly into both the wood and the tile with no room for the wood to move seasonally, normal humidity swings will eventually pop it loose or bow it.
Sponsored / affiliate links. As an Amazon Associate I earn from qualifying purchases. I may earn additional commission from eligible campaigns.