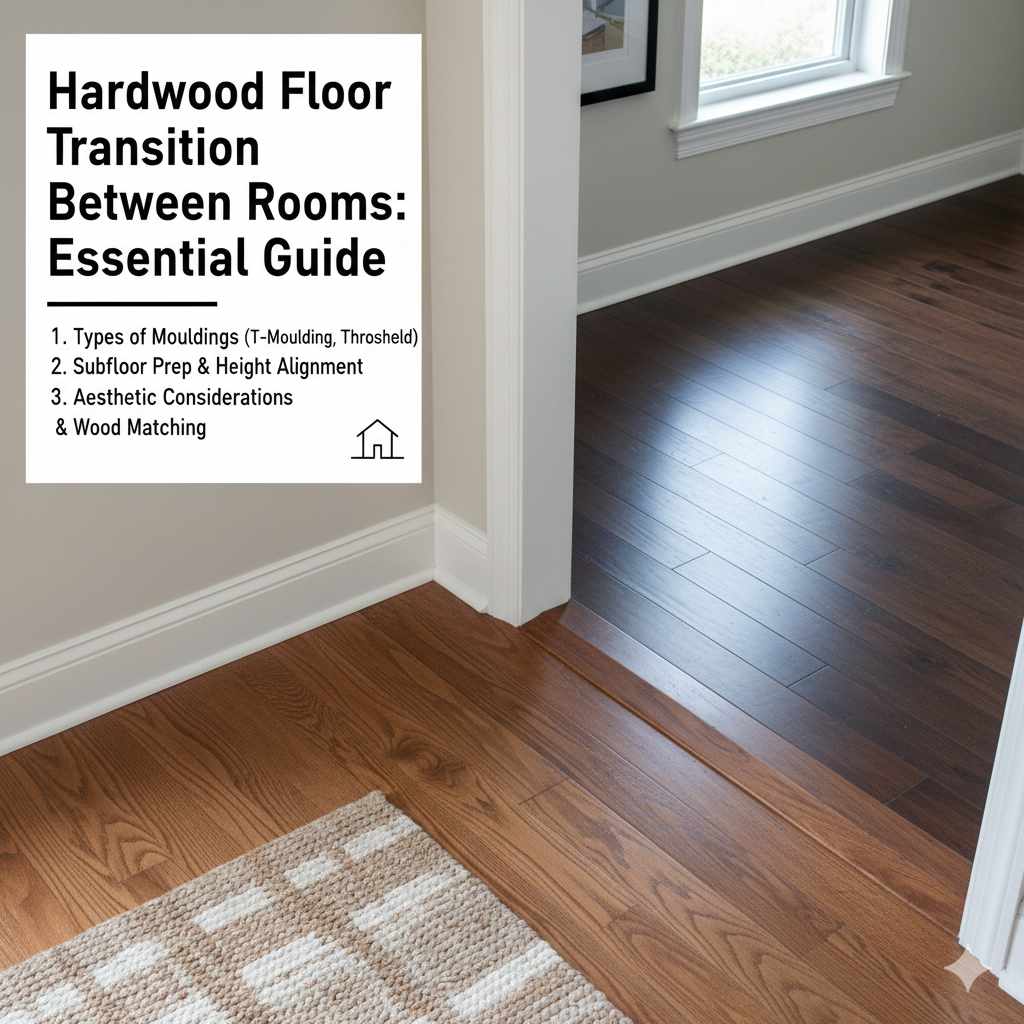
How to Transition Hardwood Floors Between Rooms (Even at Different Heights)
The right hardwood floor transition strip bridges two rooms in under an hour — and the wrong one creates a tripping hazard or gap that undermines your entire floor. There are 5 transition types covering every height difference and design scenario: T-molding, overlap reducer, multi-purpose reducer, stair nose, and end cap. This guide shows which one to use for your situation, how to install it correctly, and how to handle contrasting wood floors between rooms.
Use T-molding when two hardwood floors meet at the same height. Use an overlap reducer when there’s a height difference up to ½ inch. For contrasting wood species in adjoining rooms, match stain tones or use a border strip to create a deliberate design line. All transition strips attach to the subfloor — never directly to the flooring planks.
Why Transitions Matter: More Than Just Aesthetics
A proper hardwood floor transition between rooms serves four purposes beyond looks:
- Safety: Transitions prevent abrupt height changes that create tripping hazards. A smooth, properly installed transition ensures a safe path between areas.
- Durability: Without a transition, exposed flooring edges chip, splinter, and wear prematurely. The strip protects the vulnerable edge of your hardwood.
- Aesthetics: A well-matched or intentionally contrasting transition strip makes the join between floors look deliberate and polished rather than accidental.
- Expansion and Contraction: Hardwood expands and contracts with temperature and humidity changes. Transitions provide the necessary gap for this movement, preventing buckling.
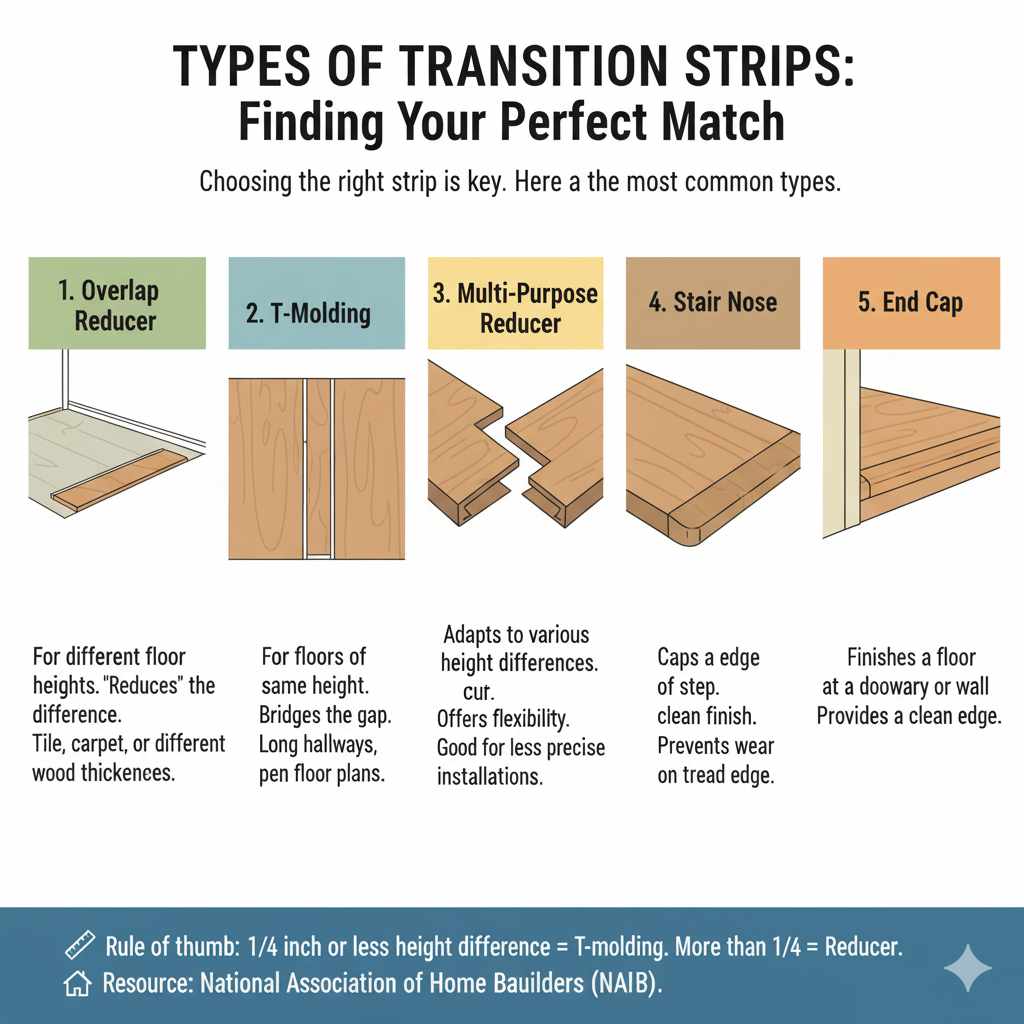
Types of Transition Strips: Finding Your Perfect Match
Choosing the right transition strip depends on the height difference between the two floors. Here are the five types you’ll encounter:
1. Overlap Reducer (or Reducer Strip)
This is the most common transition where one floor sits higher than the other. The reducer strip creates a gentle slope from the higher surface down to the lower one, eliminating the step-up tripping hazard. Use it when the height difference is between ¼ inch and ½ inch — anything larger may need subfloor leveling first.
| Height Gap | Strip Type | Notes |
|---|---|---|
| 0 inches (flush) | T-Molding | Same height, covers expansion gap |
| Up to ¼ inch | T-Molding or Reducer | Minimal slope acceptable |
| ¼ inch to ½ inch | Overlap Reducer | Most common scenario |
| Over ½ inch | Multi-Purpose Reducer + leveling | May need subfloor buildup |
| Floor ends at wall/cabinet | End Cap | Terminates the floor cleanly |
2. T-Molding
T-molding is used when two floors meet at the same height. Shaped like a “T” from the side, it bridges the gap between two similar floor heights while covering the expansion gap. It’s ideal for long hallways, open floor plans, or anywhere two hardwood runs of the same species meet in different directions.
3. Multi-Purpose Reducer
This versatile strip adapts to various height differences, offering more flexibility than a standard reducer. It can often be cut or adjusted to accommodate minor subfloor irregularities — a good choice when the height difference is inconsistent across the doorway width.
4. Stair Nose
While not strictly for room-to-room transitions, stair noses cap the exposed edge of a step, preventing wear on the tread edge and providing a clean finish where hardwood meets a stair drop.
5. End Cap
An end cap terminates the floor at a doorway or where flooring meets a vertical surface like a wall or cabinet base. It provides a clean edge where the hardwood simply ends, rather than disappearing under a baseboard unevenly.
You can find detailed flooring component best practices from the National Association of Home Builders (NAHB).
Contrasting and Different Wood Floors Between Rooms
Using different wood species or stain tones in adjoining rooms is a deliberate design choice — not a problem to hide. A light maple kitchen opening to a rich espresso oak living room creates visual depth and defines each room’s purpose. The key is making the transition look intentional rather than accidental.
Design Approaches for Contrasting Wood Floors
- Border strip method: Install a 2–3 inch border strip in a contrasting species between the two floors. This creates a defined frame that makes the transition look architectural rather than mismatched.
- Matching the stain tone: Even if the species differ, pulling both floors to similar warm or cool undertones ties them together. A cool gray oak can coexist with cool gray maple without a transition strip at all.
- Plank direction contrast: Running planks perpendicular between rooms creates a bolder visual divide. Parallel plank runs across the transition soften the boundary.
- T-molding for same-height joins: When two contrasting hardwoods meet at flush height, a T-molding in a neutral finish (ebony or natural) defines the transition cleanly without competing with either floor.
When Different Species Work Without a Strip
In open floor plans without a doorway, you can butt two species together directly with no transition strip — as long as both floors are nail-down or glue-down (not floating), heights are flush, and the junction is straight. Use a chalk line to mark a clean border, cut both floors to the line, and butt them tightly. Fill the seam with color-matched wood filler.
Floating floors always need a strip between them, regardless of species match, because each floor section needs its own independent expansion gap.
Tools and Materials You’ll Need
Gather everything before you start — interrupting mid-install to find tools makes the job harder:
| Tools | Materials |
|---|---|
| Tape Measure | Transition Strip (correct type for your height difference) |
| Pencil | Subfloor Adhesive (if needed) |
| Utility Knife | Screws or Nails (appropriate for subfloor type) |
| Miter Saw or hand saw | Wood Filler or caulk (color-matched) |
| Level | Sandpaper (fine-grit) |
| Pry Bar (if removing old transition) | Cleaning supplies |
| Safety Glasses + Work Gloves | Optional: Wood stain or finish |
Step-by-Step Guide: Installing Your Hardwood Floor Transition
Step 1: Prepare the Area
Clear the area around the transition. Move furniture and rugs. Sweep and vacuum the subfloor thoroughly to remove debris, dust, and old adhesive. If you’re removing an old transition strip, use a pry bar to carefully lift it — be gentle to avoid damaging the existing flooring.
Step 2: Measure and Plan Your Transition Strip
Measure the doorway or transition length. Then measure the height difference between the two floors using a level and tape measure — this confirms which strip type you need. If the strip is longer than the opening, plan your cuts carefully: measure twice, cut once.
Step 3: Cut the Transition Strip
Using a miter saw, cut the strip to the exact length needed. For angled or corner transitions, consult the manufacturer’s instructions — most T-moldings require angled cuts at corners.
Step 4: Fit and Test the Placement
Lay the cut strip in place dry before fastening. Check: does it sit flush? Does it bridge the gap without rocking? For reducers, verify the slope is gentle and even across the full length. For T-moldings, confirm it sits snugly against both floor surfaces.
Step 5: Secure the Subfloor
Before fastening the transition, check the subfloor for squeaks or soft spots. Add screws to secure any loose panels. For laminate or engineered wood, check the manufacturer’s guide — many floating floors use a specific track system that the transition clicks into rather than screws directly into the subfloor.
Step 6: Install the Transition Strip
Fasten method depends on strip type and subfloor:
- Nails/Screws: For wood strips, use finishing nails or flooring nails spaced 8–12 inches apart. Pre-drill pilot holes to prevent splitting the wood. Don’t over-drive fasteners.
- Adhesive: Floating floor transitions often use subfloor adhesive. Apply a bead where the strip will sit, press firmly, and weigh down while curing.
- Click-Lock / Track Systems: Attach the base track to the subfloor first, then snap the visible strip into place. Follow manufacturer instructions — track spacing is critical for these systems.
This guide from Tools of the Trade covers fastening techniques applicable to most DIY flooring installs.
Step 7: Final Touches and Cleanup
Inspect the installed strip for gaps at the edges. Fill small gaps with color-matched wood filler or flexible caulk, sand smooth once dry. Clear sawdust and debris. Allow any stained or finished strips to cure fully before foot traffic.
Common Challenges and How to Overcome Them
- Uneven subfloor: Build up minor dips with floor leveling compound before installing. For significant unevenness, address the subfloor directly.
- Transition strip rocking: Usually means the subfloor isn’t flat or the strip is warped. Drive all fasteners securely, or use shims to stabilize.
- Gaps underneath: Use flexible caulk for minimal gaps. Larger gaps may require a different strip type or subfloor correction.
- Color mismatch between strips and floors: If an exact match isn’t available, choose a strip 1–2 tones darker than your floor — it reads as intentional contrast rather than a failed match.
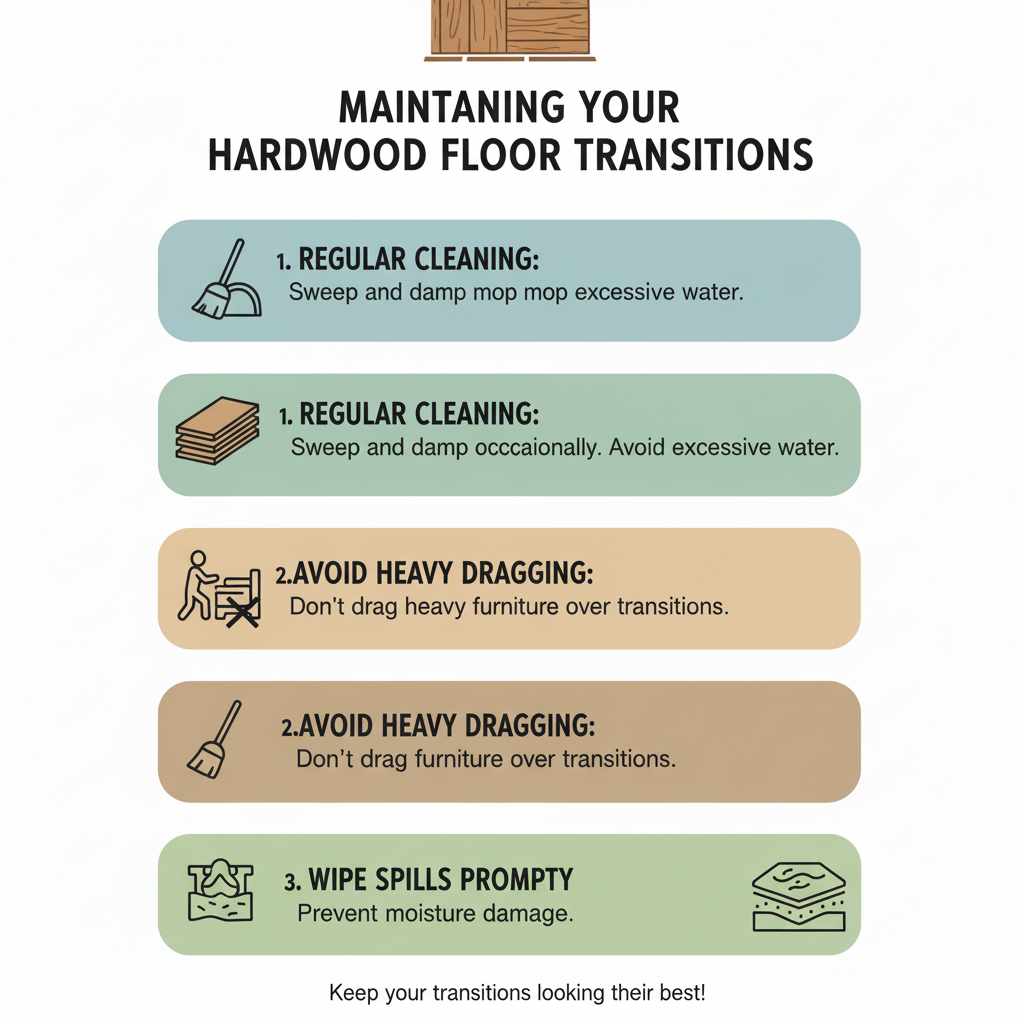
Maintaining Your Transitions
Regular sweeping and occasional damp mopping keeps transitions looking sharp. Avoid excessive water near the strip edges. Don’t drag heavy furniture directly over transition strips — the concentrated load can loosen fasteners or crack the strip over time. Inspect annually for loose sections and re-fasten as needed.
Frequently Asked Questions (FAQ)
What is the most common type of hardwood floor transition?
The overlap reducer is the most common, used when there’s a height difference between adjoining floors. T-molding is the second most common, used when floors meet at the same height.
Can I join two hardwood floors of different thicknesses?
Yes. Use an overlap reducer or multi-purpose reducer sized to the exact height difference. Measure precisely — a reducer that’s too steep creates its own tripping hazard.
How do I choose the right color transition strip?
Match the strip to the floor you’re transitioning from, or go 1–2 tones darker for a deliberate contrast. Match undertones (warm vs. cool) rather than chasing an exact grain match — undertone consistency reads as cohesive even if the strip is visibly different.
Can I use T-molding if there’s a small height difference like 1/8 inch?
In most cases yes — a 1/8 inch difference is within T-molding tolerance. Anything above ¼ inch should use a reducer for safety and aesthetics.
How long should a transition strip be?
It should span the full width of the doorway or transition gap. Measure the exact opening, then cut to fit. Most strips are sold in lengths of 6–8 feet and cut down to size.
Do I need to glue down hardwood transition strips?
It depends on your floor type. Floating floors typically use adhesive or a snap-in track. Nail-down and glue-down floors typically use finishing nails or screws. Always follow the manufacturer’s installation guide for the specific strip.
How do I transition between two different wood species in adjoining rooms?
If floors are the same height, use a T-molding in a neutral finish, or butt them directly with no strip (nail-down floors only, straight joint, color-matched filler). For a more intentional look, install a 2–3 inch border strip in a contrasting species to frame each room. Floating floors always need a transition strip between them regardless of species.
What transition strip works on a slope or uneven threshold?
A multi-purpose reducer is the best choice for sloped or uneven thresholds. It can be shimmed underneath along its length to follow an inconsistent height difference. If the slope is severe (over ½ inch across the doorway width), level the subfloor with floor leveling compound before installing any strip.
Conclusion
A well-chosen hardwood floor transition between rooms protects your floor edges, eliminates tripping hazards, and — when done right — can be a deliberate design feature. Match the strip type to the height difference, choose a color that complements both floors, and fasten to the subfloor rather than the planks. For contrasting species in adjoining rooms, decide early whether you want the join to blend or stand out — both work, but each needs a different approach.