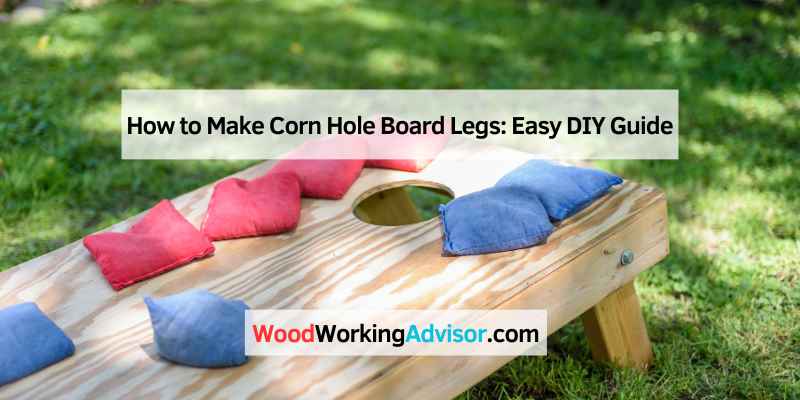
How to Make Corn Hole Board Legs: Easy DIY Guide
To make Corn Hole board legs, cut two pieces of 2×4 lumber to 12 inches each. Attach them securely to the back of the board at a 10-degree angle.
Creating a Corn Hole board involves more than just the playing surface. The legs play a crucial role in stability and height adjustment. Properly built legs ensure the board remains level during games, enhancing playability. Many enthusiasts choose to customize the design to fit their style.
This project is suitable for both beginners and seasoned DIYers. With a few materials and tools, anyone can craft durable and functional legs. Understanding the necessary steps will lead to a successful build. Let’s dive into the specifics of constructing those essential Corn Hole board legs.
Introduction To Corn Hole Boards
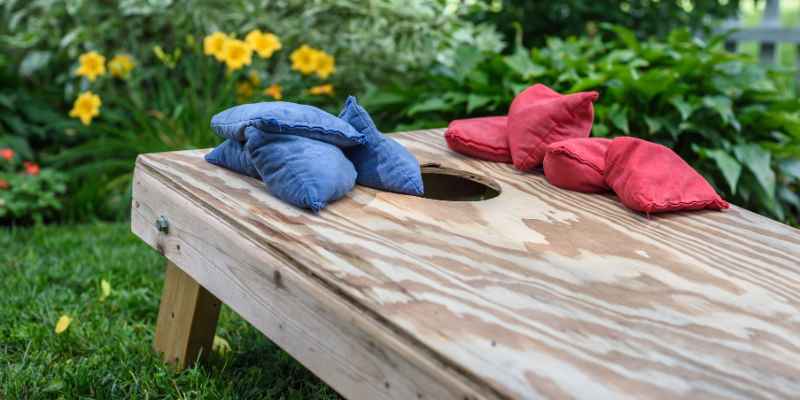
Corn hole is a fun outdoor game enjoyed by many. Players toss bean bags at a raised platform. The goal is to land the bags in a hole. Corn hole boards are essential for this game. Making your own board can be rewarding and cost-effective.
Popularity Of Corn Hole
Corn hole has gained immense popularity across the United States. Here are some reasons for its rise:
- Easy to learn and play.
- Suitable for all ages.
- Great for gatherings and parties.
- Can be played in backyards, parks, or beaches.
Many communities hold tournaments. Friends and family enjoy friendly competitions. The game’s casual nature makes it appealing.
Importance Of Sturdy Legs
Sturdy legs are crucial for corn hole boards. They ensure stability during play. Weak legs can cause accidents and injuries. Here are some key benefits of strong legs:
| Benefit | Description |
|---|---|
| Safety | Prevents board from tipping over. |
| Durability | Supports weight of players and bags. |
| Performance | Ensures consistent gameplay. |
Building strong legs can enhance your game experience. Choose the right materials for stability.
Tools And Materials Required
Building sturdy legs for your corn hole board is essential. The right tools and materials make this task easier. Here’s what you need.
List Of Tools
- Drill – For creating holes.
- Screwdriver – To drive screws in place.
- Saw – For cutting wood to size.
- Measuring tape – To measure dimensions accurately.
- Square – Ensures right angles.
- Sandpaper – Smooths rough edges.
- Clamps – Holds pieces together while working.
Types Of Wood And Hardware
| Material | Description |
|---|---|
| Plywood | Durable and lightweight; ideal for boards. |
| 2×4 Lumber | Strong option for legs; provides stability. |
| Wood Screws | Secures parts firmly; choose stainless steel. |
| Wood Glue | Extra hold for joints; use waterproof glue. |
Choose quality materials. Strong legs ensure your corn hole board lasts. Use the right tools to make the process smooth.
Measuring And Cutting The Wood
Creating sturdy legs for your corn hole board starts with proper measurements. Accurate cutting ensures your board stands stable and functions well. Follow these steps to achieve perfect leg dimensions and cuts.
Determining Leg Dimensions
Leg dimensions impact the board’s height and stability. Use the following measurements:
| Leg Length | Leg Width |
|---|---|
| 24 inches | 2 inches |
Adjust these dimensions based on your preference. Ensure each leg is identical. Consistent dimensions create balance.
Precision Cutting Techniques
Cutting wood accurately is vital for strong legs. Use the following tools:
- Table saw
- Miter saw
- Measuring tape
- Square
Follow these steps for precise cuts:
- Measure each leg’s length.
- Mark the wood with a pencil.
- Use a square to ensure straight lines.
- Cut along the marked lines carefully.
Double-check your measurements before cutting. This ensures each leg fits perfectly.
Shaping The Legs
Shaping the legs of your corn hole board is essential. Properly shaped legs provide stability and support during play. Follow these steps to create sturdy legs that enhance your game experience.
Creating The Leg Angle
Start by determining the angle for your legs. A typical angle is 45 degrees. Use a protractor or a speed square for accuracy. Mark the angle on the wood using a pencil.
- Choose 2×4 lumber for durability.
- Measure each leg to 12 inches.
- Use a circular saw to cut the legs at the marked angle.
Check that both legs match in length. This ensures even support. If adjustments are needed, make them before proceeding.
Sanding For Smoothness
Sanding the legs is crucial for safety. Rough edges can cause splinters. Use 80-grit sandpaper to start.
- Smooth the cut edges first.
- Switch to 120-grit sandpaper for finer details.
- Ensure all surfaces are smooth to the touch.
Wipe off any dust with a damp cloth. This prepares the surface for painting or staining. A well-sanded leg enhances the overall look of your board.
Drilling Holes For Attachments
Drilling holes is a key step in building cornhole board legs. Proper hole placement ensures stability. It helps secure the legs tightly. Follow these guidelines for best results.
Placement Of Holes
Getting the right hole placement is crucial. Here’s how to do it:
- Measure 1 inch from the edge of the board.
- Space holes about 3 inches apart.
- Mark the spots with a pencil.
Use a drill bit that matches your bolts. Common sizes are 1/4 inch or 3/8 inch. Make sure to drill straight down. This helps keep the legs aligned.
Securing The Bolts And Nuts
Secure the bolts and nuts tightly for stability. Follow these steps:
- Insert bolts through the drilled holes.
- Place a washer on each bolt.
- Screw on a nut and tighten with a wrench.
Check for any wobbling. Tighten more if needed. This ensures the legs hold well during play.
| Step | Action |
|---|---|
| 1 | Drill holes in marked spots. |
| 2 | Insert bolts and add washers. |
| 3 | Screw on nuts and tighten. |
Follow these tips for strong and durable cornhole board legs. Enjoy your game with confidence!
Assembling The Legs To The Board
Assembling the legs to your cornhole board is essential. Strong legs provide stability. They help keep the board in place during play. Follow these steps for a perfect assembly.
Attaching With Hinges
Using hinges ensures easy leg movement. Here’s how to attach them:
- Gather your materials: hinges, screws, and a screwdriver.
- Position the legs at a 90-degree angle against the board.
- Place the hinge on the edge where the leg meets the board.
- Secure the hinge with screws. Make sure it is tight.
Check that the hinge allows the leg to fold easily. This design saves space during storage.
Ensuring Swivel Movement
Swivel movement is crucial for stability. Here’s how to ensure it:
- Use a sturdy hinge designed for heavy use.
- Test the leg by folding it up and down.
- Make adjustments if it feels loose or wobbly.
Adjusting the hinge placement can improve movement. Ensure both legs move smoothly for balanced play.
| Part | Action |
|---|---|
| Legs | Attach at 90-degree angle |
| Hinges | Secure with screws |
| Movement | Ensure smooth folding |
Following these steps will help you assemble strong legs. Enjoy your cornhole games with a stable board!
Finishing Touches
After building your cornhole board legs, it’s time for the finishing touches. These final steps enhance the look and durability of your project. Proper finishing protects your boards from the elements and adds a personal touch.
Painting Or Staining
Selecting the right color or stain adds character to your cornhole board legs. Here are some tips:
- Choose Weather-Resistant Paint: Look for outdoor-rated options.
- Test Colors: Paint a small area first to see how it looks.
- Use a Primer: This helps paint adhere better.
- Stain for Natural Look: Staining preserves the wood’s grain.
Apply two coats for a rich finish. Allow ample drying time between coats. Use a brush or roller for even application.
Protective Coatings
Protective coatings shield your cornhole board legs from damage. Consider the following options:
| Coating Type | Benefits |
|---|---|
| Polyurethane | Durable and waterproof. |
| Varnish | Provides a glossy finish. |
| Sealant | Prevents moisture damage. |
Apply your chosen coating with a clean brush. Follow the manufacturer’s instructions for the best results. Allow the coating to dry completely before using the boards.
Maintenance And Care
Taking care of your corn hole board legs keeps them in great shape. Proper maintenance ensures durability and performance. Regular upkeep will help you enjoy the game for years.
Regular Check-ups
Performing regular check-ups is vital for longevity. Look for any wear and tear on the legs. Here are some key points to consider:
- Inspect for cracks or splinters.
- Ensure all screws are tight.
- Check for any signs of rust.
- Test stability before each game.
Fix any issues immediately. This prevents bigger problems later. Regular maintenance saves time and money.
Storage Tips
Proper storage keeps your corn hole board legs safe. Follow these tips to maintain them:
| Tip | Description |
|---|---|
| Store Indoors | Avoid moisture and direct sunlight. |
| Use a Cover | Protect from dust and dirt. |
| Keep Flat | Prevent warping by storing flat. |
| Avoid Heavy Objects | Don’t place heavy items on top. |
Following these storage tips enhances the lifespan of your corn hole board legs. Enjoy your game without worry!
Troubleshooting Common Issues
Building a cornhole board can be fun. Yet, sometimes issues arise. Knowing how to fix these problems can help you enjoy the game. Here are some common issues and easy solutions.
Wobbly Legs
Wobbly legs can make the game frustrating. Here are some steps to fix this issue:
- Check the ground surface. Make sure it is flat.
- Inspect each leg for unevenness. Use a level to measure.
- Add rubber feet to the legs. This helps stabilize the board.
To fix wobbly legs:
- Adjust the height of the legs.
- Secure them tightly with screws.
- Use a bracket for extra support.
Loose Bolts And Hinges
Loose bolts and hinges can cause instability. Follow these tips to tighten them:
| Issue | Solution |
|---|---|
| Loose bolts | Use a wrench to tighten them. |
| Worn-out hinges | Replace them with new ones. |
| Rusty bolts | Use rust remover before tightening. |
Regular checks help keep your board sturdy. Tighten bolts and hinges often to prevent issues. Enjoy your cornhole game without worries!
Enhancements And Customizations
Transform your cornhole board legs with exciting enhancements and customizations. These upgrades add flair and personality to your game. Personal touches make your boards stand out during play.
Adding LED Lights
LED lights enhance the fun during nighttime games. Follow these steps to install LED lights:
- Choose waterproof LED strips.
- Measure the length of the board edges.
- Cut the LED strips to fit.
- Peel and stick the lights along the edges.
- Connect the lights to a battery pack.
Consider these tips:
- Use bright colors for better visibility.
- Install a remote for easy control.
- Choose lights that sync to music for extra fun.
Custom Decals And Designs
Custom decals make your cornhole boards unique. Design your own or choose from popular themes. Here are some options:
| Theme | Description |
|---|---|
| Sports Teams | Show your favorite team’s logo or colors. |
| Personal Logos | Use your own logo for a personal touch. |
| Funny Quotes | Add humor with fun sayings. |
To apply decals:
- Clean the surface of the board.
- Measure and mark where to place decals.
- Peel off the backing and apply.
- Smooth out any bubbles.
Choose durable materials for long-lasting designs. Enjoy your personalized cornhole experience!
Safety Precautions
Building corn hole board legs is fun. Yet, safety must come first. Follow these safety tips to protect yourself while working.
Proper Handling Of Tools
Using tools safely is essential. Here are some tips:
- Wear safety goggles to protect your eyes.
- Use gloves when handling sharp objects.
- Keep tools organized to avoid accidents.
- Always unplug tools when not in use.
- Inspect tools before using them for damage.
Safe Woodworking Practices
Employing safe woodworking methods is crucial. Follow these practices:
- Work in a well-lit area.
- Keep your work area clean and free of clutter.
- Secure wood pieces tightly before cutting.
- Use clamps to hold materials in place.
- Never rush your work; take your time.
By following these safety precautions, you will enjoy a safe and successful project. Remember, safety first leads to great results.
Frequently Asked Questions
How Do You Attach Legs To A Cornhole Board?
To attach legs to a cornhole board, first, position the legs at the back. Use screws or brackets for secure attachment. Ensure they can fold for easy storage. It’s important to check the stability before use. Proper attachment enhances gameplay and safety.
What Materials Do I Need For Cornhole Legs?
For cornhole legs, you’ll need 2×4 lumber, screws, and brackets. A saw and drill are essential for cutting and securing. Sandpaper will help smooth any rough edges. Weatherproofing materials can protect against outdoor elements. Choose sturdy materials for durability and longevity.
How Tall Should Cornhole Board Legs Be?
Cornhole board legs should be approximately 12 inches tall when extended. This height ensures the board is at the official regulation height of 24 inches. It allows for proper gameplay and ensures comfort for players. Adjustable legs can offer versatility in different settings.
Can I Use Pvc For Cornhole Legs?
Yes, PVC can be used for cornhole legs. It’s lightweight and resistant to weather, making it ideal for outdoor play. However, ensure it’s sturdy enough to support the board. You may need to reinforce it for added stability during games.
PVC offers a unique look as well.
Conclusion
Building corn hole board legs is a rewarding project. With the right materials and tools, you can create sturdy and functional legs. Remember to follow safety guidelines while working. Enjoy your game with friends and family on a custom-made board.
Happy cornhole playing! Your craftsmanship will surely impress everyone.