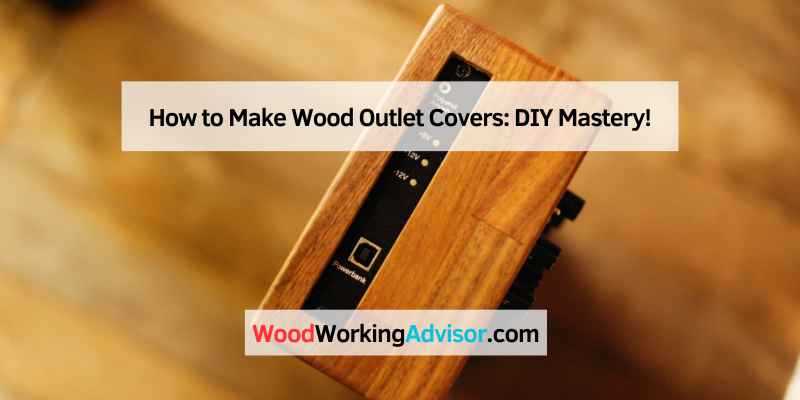
How to Make Wood Outlet Covers: DIY Mastery!
To make wood outlet covers, measure the outlet size and cut a wood piece to fit. Sand the edges and finish with paint or stain as desired.
Creating wood outlet covers adds a personal touch to your home decor. These custom covers can blend seamlessly with your interior design, enhancing the overall aesthetic. Crafting your own outlet covers also allows for creativity, letting you choose different types of wood and finishes.
This DIY project is both simple and rewarding, making it perfect for beginners and seasoned crafters alike. With just a few tools and materials, you can elevate your space while ensuring safety and functionality. Let’s explore the steps to create beautiful wood outlet covers that reflect your unique style.
Introduction To DIY Wood Outlet Covers
Making your own wood outlet covers is fun and rewarding. Wood adds a warm touch to any room. It blends well with many styles. Using wood also makes your home unique.
DIY projects let you create exactly what you want. You can choose the wood type and finish. This makes your covers special and personal. Cost is another benefit. Making them yourself often saves money compared to buying. Plus, it’s a great way to learn new skills.
Wood outlet covers can also be a great gift. Friends and family will appreciate the thoughtfulness. You can customize them for any occasion.

Materials Needed
To create wood outlet covers, gather essential materials. Choose from different types of wood. Popular choices include:
- Pine: Lightweight and easy to work with.
- Oak: Strong and durable, great for a classic look.
- Maple: Smooth finish, perfect for painted covers.
- Cedar: Naturally resistant to moisture and insects.
Tools and supplies are also important for this project. Essential items include:
- Jigsaw: For cutting the wood into shape.
- Sandpaper: To smooth the edges and surfaces.
- Wood glue: To secure pieces if needed.
- Paint or stain: To finish and protect the wood.
Designing Your Outlet Covers
Choosing a design for your wood outlet covers can be fun. Consider the style of your room. Traditional, modern, or rustic designs can all work well. Think about the colors that match your decor.
Measurement is key for a perfect fit. Use a ruler or tape measure to get the right size. Measure the width and height of the outlet. Don’t forget to account for any surrounding trim. Always double-check your measurements before cutting wood.
| Design Style | Color Suggestions |
|---|---|
| Traditional | Brown, Cream |
| Modern | White, Gray |
| Rustic | Dark Brown, Green |
Cutting The Wood
Safety is very important when cutting wood for outlet covers. Always wear safety goggles to protect your eyes. Use ear protection if you are using loud tools. Keep your fingers away from the blade. Make sure your workspace is clean and organized.
Check your tools before starting. Ensure everything is in good condition. Use a sharp blade for clean cuts. Measure the wood carefully to avoid mistakes. Mark the cut lines clearly with a pencil.
Secure the wood with clamps. This keeps it steady while cutting. Cut slowly and steadily for better control. Always follow the tool’s instructions and guidelines.
Sanding And Finishing
To achieve smooth surfaces, start by using coarse sandpaper. Gradually switch to finer sandpaper. This process removes rough spots and imperfections.
Use a sanding block for even pressure. Always sand in the direction of the grain. This technique helps avoid scratches and gives a better finish.
Choosing a finish is important for durability. Popular choices include varnish, stain, and polyurethane. Each has its unique look and protection level.
Test the finish on a scrap piece first. This step helps ensure the desired color and appearance. Apply multiple coats for the best results.
Customization Techniques
Customizing wood outlet covers can be fun and creative. Engraving details adds a personal touch. Use a laser engraver or wood burning tool. Choose designs that match your style. Simple patterns work well for beginners.
Painting and staining are great ways to enhance the look. Use high-quality paint or stain for the best results. Apply a primer before painting for a smooth finish. Choose colors that complement your decor. Allow each coat to dry completely.
Consider using a clear sealant to protect your work. This will help the covers last longer. With these techniques, your wood outlet covers will stand out beautifully.
Installation Tips
Start by turning off the power to the outlet. This ensures safety during installation. Remove the old cover using a screwdriver. Clean the area around the outlet to remove dust.
Next, measure the outlet to ensure a proper fit for the wood cover. Use a template to trace the shape onto the wood. Cut the wood carefully using a saw. Sand the edges for a smooth finish.
For securing the cover, align it with the outlet. Use screws to attach it firmly. Make sure the cover is flush with the wall. Double-check that the power is back on and the cover is secure.
Maintenance And Care
To keep wood outlet covers looking their best, regular cleaning is essential. Use a soft cloth for dusting. For stubborn stains, lightly dampen the cloth with water. Avoid harsh chemicals that can damage the wood finish.
Inspect the outlet covers every few months. Look for signs of wear or damage. If covers are cracked or chipped, they should be replaced. Replacing them ensures safety and maintains the home’s appearance.
| Sign of Damage | Action |
|---|---|
| Cracks | Replace immediately |
| Chips | Consider replacement |
| Fading | Refinish or replace |

Frequently Asked Questions
How Do I Choose Wood For Outlet Covers?
Selecting wood for outlet covers involves considering durability and aesthetics. Hardwoods like oak or maple are excellent choices due to their strength. Additionally, choose wood that complements your interior design. Ensure the wood is untreated to avoid electrical hazards. Always prioritize safety in your selection.
What Tools Do I Need For Making Wood Outlet Covers?
To make wood outlet covers, gather essential tools like a saw, drill, and sander. A measuring tape is crucial for accurate dimensions. You’ll also need screws and a screwdriver for installation. Finally, consider safety gear like goggles and gloves to protect yourself during the process.
Can I Customize My Wood Outlet Covers?
Absolutely! Customizing wood outlet covers is a great way to enhance decor. You can stain, paint, or carve designs into the wood. Ensure you maintain proper dimensions for a perfect fit. Customization allows you to reflect your personal style while adding functionality to your space.
How Do I Install Wood Outlet Covers?
To install wood outlet covers, first, turn off power at the breaker. Remove the existing cover using a screwdriver. Align the new wooden cover with the outlet and secure it using screws. Make sure it fits snugly and is level.
Finally, turn the power back on and enjoy!
Conclusion
Creating wood outlet covers is a rewarding DIY project. It adds a personal touch to your space. With the right materials and techniques, anyone can achieve beautiful results. Remember to prioritize safety while crafting. Enjoy the process, and don’t hesitate to share your finished project with others for inspiration!