How to Layout a Woodshop: Maximize Efficiency & Space
To layout a woodshop effectively, prioritize workflow and safety. Arrange tools and materials for easy access and efficient movement.
A well-organized woodshop enhances productivity and fosters creativity. Thoughtful layout planning can significantly improve your woodworking experience. Start by assessing your available space and understanding your workflow needs. Consider the type of projects you plan to undertake and the tools required.
Place larger machines, like table saws and jointers, in central locations for optimal use. Ensure workbenches are easily accessible, promoting smooth transitions between tasks. Incorporate storage solutions for materials and tools to minimize clutter. Proper lighting and ventilation also play crucial roles in creating a comfortable and safe workspace. With careful planning, your woodshop can become a haven for craftsmanship.
Introduction To Woodshop Design
A well-planned woodshop is essential for any woodworker. It helps to maximize efficiency and safety. A thoughtful layout allows for easy movement around tools. This setup reduces the risk of accidents and injuries.
Proper organization also saves time. Finding tools and materials becomes quick and simple. A good space encourages creativity and productivity. It also makes the woodshop more enjoyable to work in.
The main goals of an efficient woodshop include:
- Maximizing space for tools and equipment
- Improving workflow to save time
- Enhancing safety with clear pathways
- Facilitating easy access to materials
Essential Considerations Before You Start
Start by measuring your space. Knowing the dimensions helps in planning. Consider natural light sources. Good lighting is key for safety.
Think about your woodworking needs. Different projects require different tools. List essential tools you use often. Group similar tools together for easy access.
| Tool Type | Examples |
|---|---|
| Cutting Tools | Saws, Chisels |
| Assembly Tools | Clamps, Screwdrivers |
| Finishing Tools | Sanders, Brushes |
Leave space for moving around. This makes working easier and safer. Plan for storage solutions. Shelves and cabinets keep tools organized.
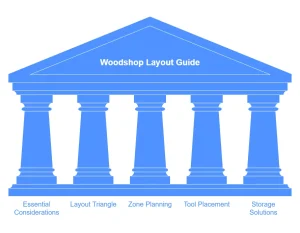
The Woodshop Layout Triangle
The layout triangle is key for an efficient woodshop. It involves three main areas: the cutting, assembly, and finishing zones. Each area should connect smoothly to improve workflow.
Defining the triangle helps to minimize walking distance. Place the cutting area near the entrance. This allows for easy access to raw materials. The assembly zone should sit between cutting and finishing.
| Zone | Purpose |
|---|---|
| Cutting | Initial processing of wood |
| Assembly | Putting pieces together |
| Finishing | Final touches and protection |
Apply this triangle layout to your space for better organization. Keep tools and materials within reach for efficiency. A well-planned layout saves time and effort.
Zone Planning For Optimal Flow
Creating specific work zones in your woodshop is essential. Each zone should serve a unique purpose. For example, have a cutting zone for saws and a assembly zone for putting pieces together.
Ensure a smooth transition between zones. Keep pathways clear for easy movement. Use color coding for each zone to help identify areas quickly. Place tools and materials close to their respective zones. This reduces time spent walking.
Consider the workflow. Tools should be arranged in the order of use. A well-planned layout saves time and energy. Regularly review and adjust zones based on your needs.
Tool Placement Strategies
Proper tool placement is essential for safety and efficiency. Place stationary tools like saws and drills close to your workbench. This setup reduces movement and prevents accidents. Ensure mobile tools are easily accessible. Keep them on wheels for quick relocation.
Prioritize access to frequently used tools. Keep them within arm’s reach. Store less-used tools in cabinets or on shelves. Clearly label all tools for quick identification. Create clear pathways to avoid tripping hazards.
Consider the workflow in your shop. Arrange tools in the order they will be used. This helps maintain a smooth workflow. Safety should always come first in your layout. Ensure adequate lighting and ventilation in your workspace.
Storage Solutions For Woodshops
Using vertical space is a great way to save room in a woodshop. Install shelves above workbenches for easy access to tools. Use pegboards to hang tools and keep them visible.
For organizing materials, consider bins and containers. Label each bin for quick identification. Store larger items on heavy-duty shelves. This keeps everything neat and reduces clutter.
Use wall-mounted racks for lumber and pipe clamps. This keeps them off the floor and easy to reach. Regularly check and rearrange your tools and materials for better organization.
Lighting And Electrical Layout
Good lighting is key for a functional woodshop. Use bright, white LED lights to help see details. Place lights over work areas for better visibility. Consider using task lighting for specific tasks like cutting or sanding.
Electrical outlets must be easy to reach. Place them near tools and machines for convenience. Install multiple outlets on each wall to avoid using extension cords. This keeps the space tidy and safe.
Consider the layout of your tools. Ensure outlets are close to power-hungry machines like saws and routers. This setup prevents overloading circuits and makes work smoother.
Dust Management Systems
Choosing the right dust collection system is very important for your woodshop. Consider the size of your shop and the tools you use. A centralized system works well for larger spaces. Smaller shops may benefit from portable units.
Integrating dust management into your layout helps keep the space clean. Place dust collectors close to machines that create the most dust. Use ductwork to connect machines to the collector.
Keep in mind the airflow in your woodshop. A good layout ensures that dust travels easily to the collection system. Regularly check and maintain your system for best performance.
Adapting The Layout For Growth
Designing a woodshop for future growth is essential. Start with a flexible layout. This allows easy changes later. Think about where new equipment will go. Make sure there is enough space for everything.
Consider using movable workstations. These can change positions as needed. Include storage solutions for tools and materials. Keep everything organized to save time.
Leave room for safety measures like clear walkways. Good lighting is also important. It helps to see what you are doing. A well-planned woodshop can adapt to new projects and tools easily.
Real-world Layout Examples
Many woodshops can serve as great examples. Professional setups show how to maximize space. A well-planned layout saves time and energy.
One case study features a U-shaped layout. This design keeps tools close together. It allows for easy movement between workstations.
Another example is the open layout. This setup encourages collaboration and creativity. It offers flexibility for different projects.
| Layout Type | Benefits |
|---|---|
| U-shaped | Efficient tool access and movement. |
| Open | Encourages teamwork and adaptability. |
Learning from these examples can help improve your own woodshop. Each layout type offers unique advantages. Choose the one that fits your needs best.
Common Pitfalls To Avoid
Overcrowding the space can lead to chaos. Each tool needs its own area. This helps to keep everything organized. Plan for enough workspace to move safely. A clear area improves safety and efficiency.
Underestimating storage needs is a common mistake. Proper storage solutions are essential. Use shelves, cabinets, and bins for tools and materials. This keeps the workspace tidy. Label everything to find items easily. A well-organized shop saves time and reduces frustration.
Final Thoughts On Woodshop Layout
Regularly revisiting the layout of your woodshop can lead to great benefits. Changes in tools or projects may require a different setup. Observe how your workflow functions. Look for any bottlenecks or areas needing improvement.
Involve your team in the process. Gathering feedback can provide fresh ideas. Make it a habit to reassess the layout every few months. This will keep the workspace efficient and enjoyable.
Continuous improvement is key. Small tweaks can create a huge impact on productivity. Organize tools and materials for easy access. This will save time and energy.
Consider using modular furniture. It offers flexibility for different tasks. An adaptable workspace promotes creativity and efficiency.
Frequently Asked Questions
How Do I Start Planning My Woodshop Layout?
Begin by measuring your space accurately. Consider the tools you’ll use and their dimensions. Create zones for cutting, assembly, and storage. Make sure to allow for easy movement between areas. A well-planned layout enhances workflow and maximizes productivity.
What Are The Essential Tools For A Woodshop?
Essential tools include a table saw, miter saw, and drill press. Don’t forget hand tools like chisels and clamps. Safety equipment, such as goggles and ear protection, is crucial. Prioritize quality over quantity to ensure efficiency and safety.
How Can I Optimize Space In My Woodshop?
Utilize vertical storage for tools and materials. Use pegboards to keep hand tools organized and accessible. Consider mobile workstations to allow flexibility. Additionally, keep frequently used items within reach to minimize movement and enhance workflow efficiency.
What Safety Measures Should I Implement In My Woodshop?
Always wear protective gear, including goggles and gloves. Keep the workspace clean to prevent accidents. Ensure proper ventilation to reduce dust and fumes. Familiarize yourself with each tool’s safety features to avoid injuries while working.
Conclusion
Creating an efficient woodshop layout enhances your workflow and boosts productivity. Prioritize organization to easily access tools and materials. Remember to consider safety and comfort in your design. With thoughtful planning, your woodshop can become a creative haven. Start implementing these tips today for a more enjoyable woodworking experience.