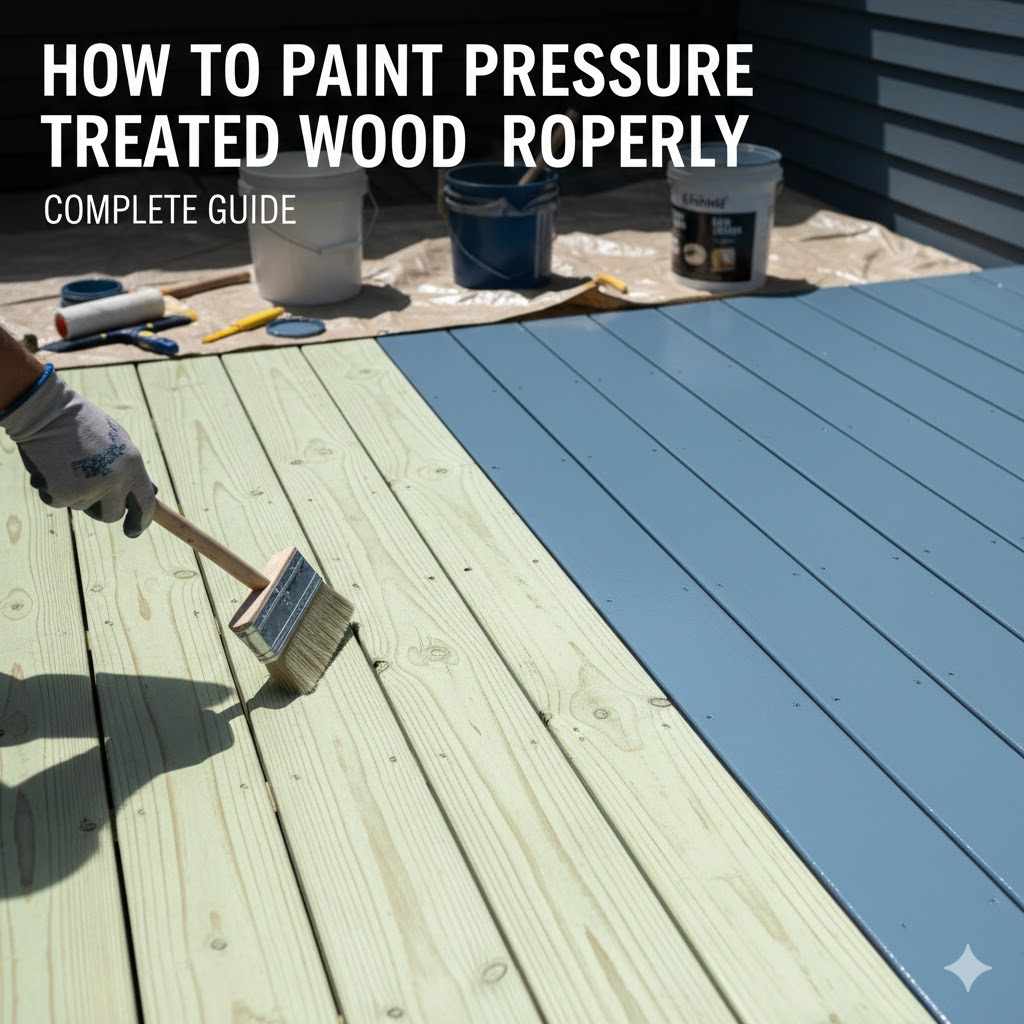
How to Paint Pressure Treated Wood Properly
Painting pressure-treated wood might seem tricky at first. Many people wonder if it’s different from painting regular wood. The truth is, there are a few key steps to make sure your paint job lasts.
It’s not as hard as you might think. We’ll walk you through how to paint pressure treated wood the right way, step by step. Get ready to make your outdoor projects look amazing!
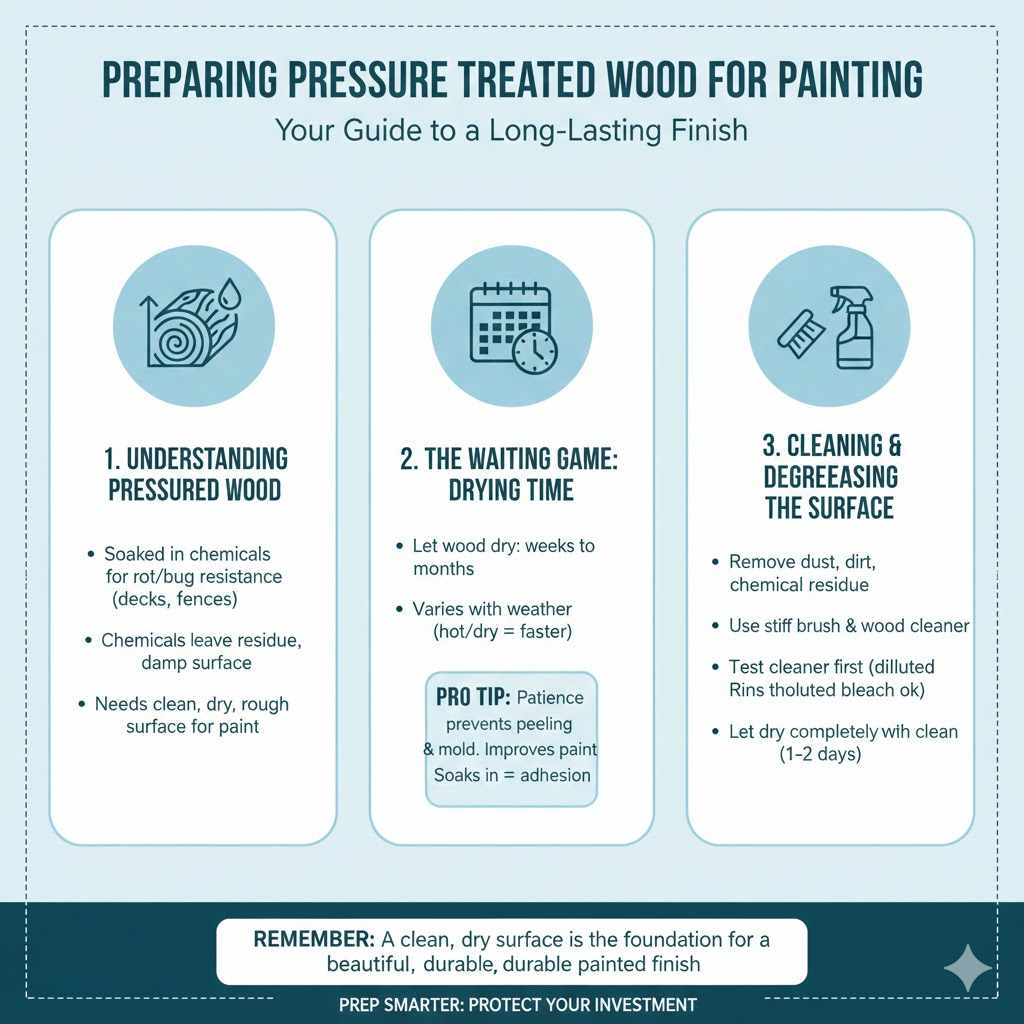
Preparing Pressure Treated Wood for Painting
Getting your pressure-treated wood ready is the most important part. This wood has chemicals in it to protect it from rot and bugs. These chemicals need time to dry out before you can paint them.
If you paint too soon, the paint might not stick well or could peel off later. This section will guide you through making sure your wood is perfectly prepped.
Understanding Pressure Treated Wood
Pressure-treated wood is wood that has been soaked in chemicals under high pressure. This makes it last much longer, especially outdoors. It’s great for decks, fences, and playground equipment.
The chemicals are added to fight off rot, fungi, and insects. This process makes the wood sturdy and durable for years to come.
These chemicals can sometimes leave a residue on the wood’s surface. They can also make the wood feel a bit damp or slick. This is why special preparation is needed before painting.
You want a clean, dry, and slightly rough surface for paint to grip onto. Imagine trying to stick a sticker on a wet, oily surface – it wouldn’t hold well, right? Wood is similar, but much more sensitive to its environment.
The Waiting Game Drying Time
After buying pressure-treated wood, you must let it dry. The chemicals are usually water-based, so drying takes time. This can range from a few weeks to several months.
It depends on how wet the wood is and the weather. Hot, dry, and windy conditions help it dry faster. Humid or rainy weather slows it down.
A good test to see if your wood is dry enough is the “water drop test.” Put a few drops of water on the surface. If the water beads up and sits on top, the wood is still too wet. If the water soaks in quickly, it’s likely ready.
This test helps you know for sure when you can move on to the next steps.
Waiting for the wood to dry is not just about appearance. It’s about the paint’s performance. Paint applied to wet wood can lead to blistering, peeling, and mold growth.
The chemicals can also interfere with adhesion if not properly aired out. Patience here saves you a lot of work later.
Cleaning and Degreasing the Surface
Once your wood is dry enough, it needs a good cleaning. Dust, dirt, and any remaining chemical residue must be removed. This ensures the primer and paint can stick properly.
Use a stiff brush and a cleaner specifically made for wood. A mixture of water and a mild detergent or a specialized wood cleaner works well.
For tougher grime or mold, you might need a stronger solution. Some people use a diluted bleach solution. Always test any cleaner on a small, hidden area first.
Make sure it doesn’t damage the wood or cause discoloration. After cleaning, rinse the wood thoroughly with clean water. This removes any soap or cleaner residue.
Allow the wood to dry completely again after cleaning. This might take a day or two, depending on the weather. A clean surface is key for a smooth, long-lasting paint job.
Think of it like cleaning your face before applying makeup – it helps everything go on better and look its best.
Choosing the Right Paint and Primer
Selecting the correct paint and primer is vital for a good finish on pressure-treated wood. Not all paints are made the same, and some work much better than others. Using the wrong products can lead to a paint job that fails quickly.
Types of Paint for Exterior Wood
For painting exterior pressure-treated wood, you should always use exterior-grade paint. These paints are designed to withstand sun, rain, and temperature changes. Latex or acrylic-based paints are often recommended.
They are flexible and expand and contract with the wood as temperatures change. This helps prevent cracking and peeling.
Oil-based paints can also be used, but they tend to become brittle over time. They might crack more easily as the wood moves. Latex or acrylic paints are generally easier to clean up, too.
Always check the paint can label to ensure it’s suitable for exterior use and for wood surfaces.
The Importance of a Good Primer
A primer is essential when painting pressure-treated wood. It acts as a bridge between the wood and the topcoat of paint. A primer helps the paint adhere better, giving you a smoother finish.
It also blocks stains from coming through the paint. Some primers are specially formulated for use on pressure-treated wood, which is ideal.
Look for an exterior-grade primer. A stain-blocking primer is a good choice. It will prevent any tannins or chemicals from the wood from bleeding through your paint color.
This is especially important if you are painting the wood a light color. Applying two coats of primer can often provide the best coverage and adhesion.
Using primer also means you might need fewer coats of your top paint color. This can save you time and money in the long run. It ensures that the final color looks rich and even.
It’s a small step that makes a big difference in the final result.
Color Choice Considerations
When choosing colors, think about where the wood is located. Darker colors can absorb more heat from the sun. This can cause the wood to expand and contract more, potentially stressing the paint.
Lighter colors tend to reflect sunlight, keeping the wood cooler.
Consider the overall look you want for your outdoor space. The color should complement your house and landscaping. For a natural look, greens, browns, or grays work well.
Brighter colors can add a pop of personality. Always get paint samples and test them on a small area before committing to a large project.
The Painting Process Step By Step
Now that your wood is prepped and you have your supplies, it’s time to paint! Following these steps will help you achieve a beautiful and lasting finish. Take your time and enjoy the process of transforming your project.
Applying the Primer
Start by applying the primer evenly to the wood. Use a good quality paintbrush or a roller, depending on the surface. For detailed areas like corners or edges, a brush is best.
For larger flat areas, a roller can speed things up.
Work in sections, applying the primer in the direction of the wood grain. This helps to create a smooth and uniform coat. Avoid over-brushing or leaving thick drips.
Most primers need about 2-4 hours to dry. Check the manufacturer’s instructions for specific drying times.
If you see any spots where the primer isn’t covering well, apply a second coat. Once the primer is completely dry, you might want to lightly sand any rough spots with fine-grit sandpaper. Wipe away the dust with a clean cloth before applying the paint.
Applying the Top Coat(s) of Paint
Once the primer is dry and smooth, you can begin applying the paint. Use the same technique as with the primer, brushing or rolling in the direction of the wood grain.
Apply thin, even coats of paint. It’s better to apply two or three thin coats than one thick coat. Thick coats are more prone to dripping, cracking, and peeling.
Allow each coat of paint to dry completely before applying the next. Drying times can vary depending on the paint type, humidity, and temperature. Typically, you’ll need to wait at least 4-6 hours between coats.
A common mistake is rushing the process. Patience is key to a durable finish. For best results, apply two to three coats of your chosen paint color.
This will ensure full coverage, rich color, and maximum protection for the wood.
Best Tools and Techniques
Using the right tools makes a big difference. For smooth surfaces, a good quality synthetic brush (for latex paint) or a natural bristle brush (for oil-based paint) is recommended. A dense roller with a medium nap is great for larger areas like deck boards.
For fences or vertical surfaces, a sprayer can be very efficient. If you use a sprayer, be sure to protect surrounding areas with drop cloths. Always wear a mask and safety glasses when spraying paint.
When painting, try to maintain a wet edge. This means that as you move to a new section, overlap a little with the still-wet paint from the previous section. This helps to avoid lap marks and create a seamless finish.
Working in good lighting is also helpful. Natural daylight is best. If you have to work indoors or in low light, use bright work lights to see your coverage clearly.
Inspect your work frequently as you go.
Maintaining Your Painted Pressure Treated Wood
Keeping your painted wood looking good means regular care. A little bit of effort can extend the life of your paint job and protect your wood.
Regular Cleaning and Inspection
Periodically clean your painted wood. Use mild soap and water with a soft brush or cloth. Rinse thoroughly.
This removes dirt, pollen, and any debris that can damage the paint.
While cleaning, inspect the surface for any signs of wear or damage. Look for small chips, cracks, or areas where the paint might be starting to peel. Catching these issues early makes repairs much easier.
Touch-Up and Repair
If you find small chips or cracks, touch them up right away. Clean the damaged area gently. Apply a small amount of matching paint with a fine brush.
This prevents the damage from spreading.
For larger areas of peeling or wear, you might need to do a more extensive repair. This could involve scraping away loose paint, sanding the area smooth, and reapplying primer and paint.
The goal is to keep the wood fully protected by the paint layer. Any exposed wood can be vulnerable to moisture and the elements, which can lead to rot over time.
When to Repaint
Eventually, your painted wood will need a fresh coat. The lifespan of paint on exterior wood can vary greatly. Factors like weather, sun exposure, and the quality of the initial job play a big role.
Generally, you might need to repaint every 3-7 years. Signs that it’s time include fading colors, chalking (a powdery residue on the surface), or significant peeling. Before repainting, clean the wood thoroughly and perform any necessary repairs.
If the old paint is still in good condition, you may not need to strip it. A light sanding to rough up the surface might be enough for the new paint to adhere. Always follow the paint manufacturer’s recommendations.
Troubleshooting Common Painting Problems
Sometimes, even with the best intentions, things don’t go perfectly. Here are some common issues and how to fix them.
Peeling or Blistering Paint
This often happens if the wood was too wet when painted, or if the primer didn’t adhere well. You’ll need to scrape off the loose paint. Sand the area smooth, clean it, and let it dry thoroughly.
Then, reapply primer and paint.
Sometimes, blistering can be caused by trapped moisture within the wood. In severe cases, you might need to allow the wood to dry out for a much longer period or use a specialized primer designed for problematic surfaces. Ensuring proper ventilation can also help.
Uneven Color or Streaks
This can occur if paint coats were applied too thickly, or if you didn’t maintain a wet edge. It can also happen if you didn’t stir the paint enough before and during use.
For minor streaks, you might be able to lightly sand them down and apply another thin coat of paint. Make sure to stir the paint well before and often during painting. If the issue is widespread, you may need to repaint the entire surface after proper prep.
Mold or Mildew Growth
If mold or mildew appears on your painted surface, it’s usually a sign of excess moisture. Clean the area thoroughly with a solution designed to kill mold and mildew. A mixture of 1 part bleach to 3 parts water can work, but test it first.
After cleaning and rinsing, allow the wood to dry completely. Then, reapply primer and paint. Consider using an exterior paint that contains mildewcides to help prevent future growth.
Improving ventilation around the wood can also help reduce moisture.

Frequently Asked Questions
Question: How long should I wait for pressure treated wood to dry before painting?
Answer: You should wait at least a few weeks, and ideally several months, for pressure treated wood to dry. A water drop test can help determine if it’s ready: if water soaks in, it’s likely dry enough.
Question: Can I paint pressure treated wood the same day I buy it?
Answer: No, you should not paint pressure treated wood the same day you buy it. It needs ample time to dry out for paint to adhere properly.
Question: What kind of paint is best for pressure treated wood?
Answer: Exterior-grade latex or acrylic-based paints are best. They are flexible and can withstand outdoor conditions.
Question: Do I need to use a primer on pressure treated wood?
Answer: Yes, using an exterior-grade primer is highly recommended. It helps paint adhere better and prevents stains from showing through.
Question: Will painting protect pressure treated wood from rot?
Answer: Pressure treated wood is already protected from rot by chemicals. Painting adds an extra layer of protection, enhances its appearance, and helps the wood last longer by shielding it from surface damage and moisture.
Summary
Painting pressure treated wood correctly involves patient preparation and the right materials. Waiting for the wood to dry, cleaning it thoroughly, and using a good primer are key steps. Applying exterior-grade paint in thin, even coats ensures a durable and attractive finish.
Regular maintenance will keep your painted wood looking great for years.