How to Propagate Japanese Maple: Fast Local Growth
Getting a new Japanese maple to grow from a cutting can feel tricky at first. Many people wonder how to propagate Japanese maple and worry about getting it to grow fast locally. It might seem like a big task, but it’s easier than you think.
We will show you exactly what to do, step by step. Let’s start by getting your new tree off to a great start with our How to Propagate Japanese Maple: Fast Local Growth Secrets.
Propagating Japanese Maple Methods
This section explores the different ways you can start new Japanese maple trees from existing ones. We will look at methods that work well for people wanting quick, local growth. The goal is to make it simple so anyone can try it.
You’ll learn which techniques give you the best chance for success, especially if you are just starting out. This will help you get more of these beautiful trees in your own yard or neighborhood.
Taking Cuttings for Propagation
Taking cuttings is a very popular way to create new Japanese maple plants. It’s like taking a small piece of the parent plant and helping it grow roots to become its own tree. This method is great because it lets you make many new trees from just one parent tree.
You get a clone of the original, so it will look just like the tree you took the cutting from.
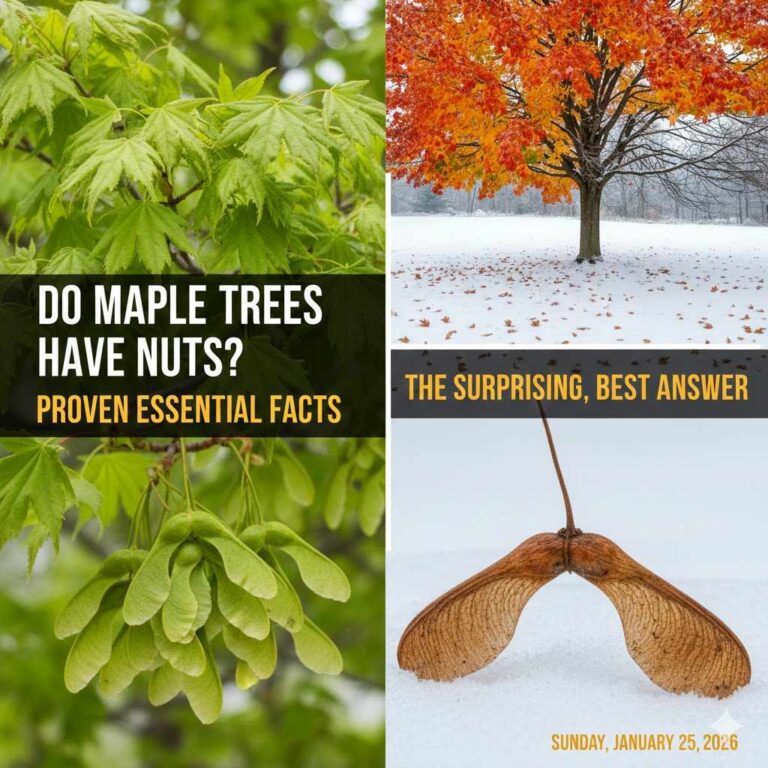
The best time to take cuttings is usually in early summer. This is when the new growth on the tree is semi-hard. This type of stem is called semi-hardwood.
It is not too soft and floppy like brand new spring growth, but it is also not old and hard like the woody growth from last year. This middle stage has just the right amount of flexibility and energy to root well.
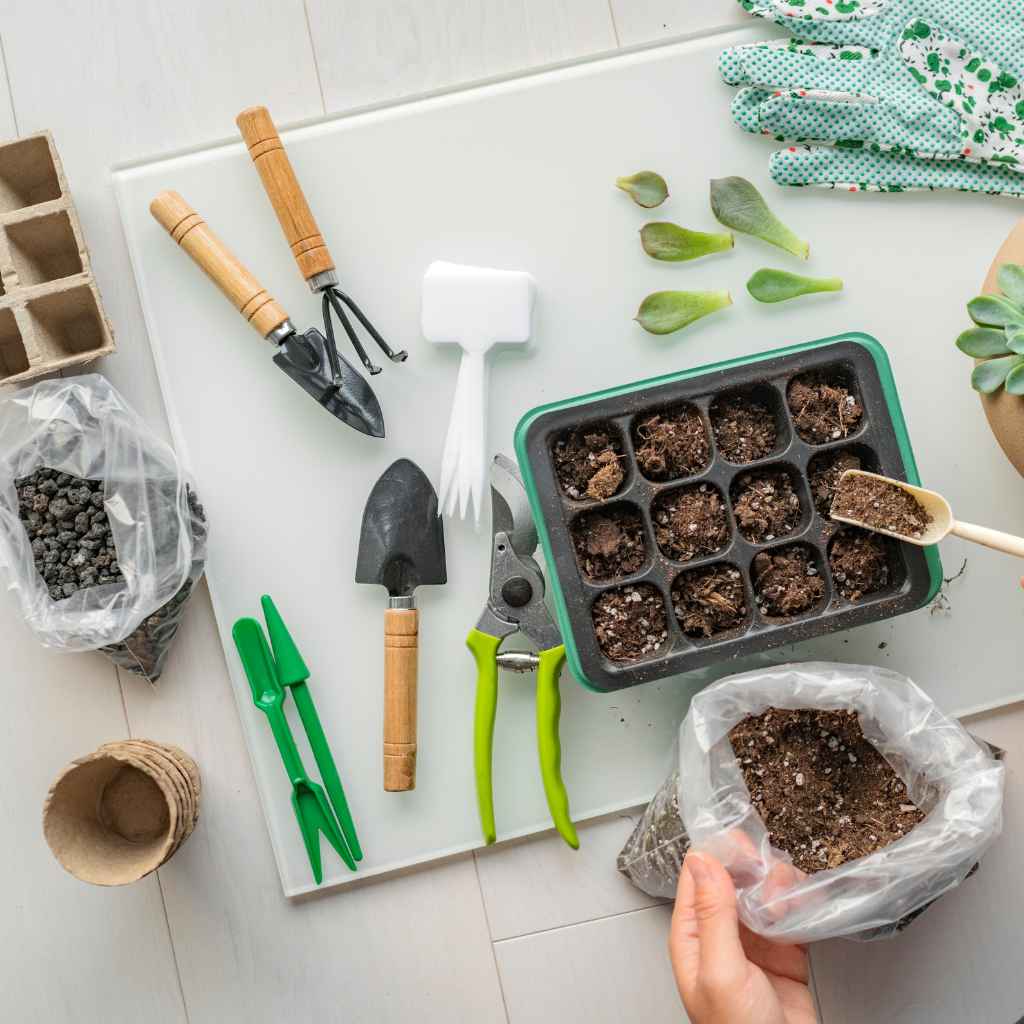
When you take cuttings, you want to select stems that are healthy and have no signs of disease or pests. Look for stems that are about 6 to 8 inches long. Use a clean, sharp knife or pruning shears to make the cut.
Make the cut just below a leaf node, which is where a leaf joins the stem. This is important because roots often grow from these nodes.
- Choose the right time of year. Early summer is ideal for taking semi-hardwood cuttings. This is when the stems have a good balance of flexibility and firmness for rooting.
- Select healthy parent plants. Ensure the Japanese maple you are taking cuttings from is free from diseases and pests. A healthy plant will give you the best chance of success.
- Prepare your cutting tool. Always use a very sharp and clean knife or pruning shears. This prevents damage to the stem and reduces the risk of introducing diseases to the cutting.
- Cut the stem to the correct length. Aim for cuttings that are about 6 to 8 inches long. Shorter cuttings can be harder to root, and much longer ones might struggle to support themselves and root effectively.
- Make the cut at a leaf node. Cut just below a point where leaves grow from the stem. This area, known as a node, is rich in hormones that encourage root development, making it the prime spot for root formation.
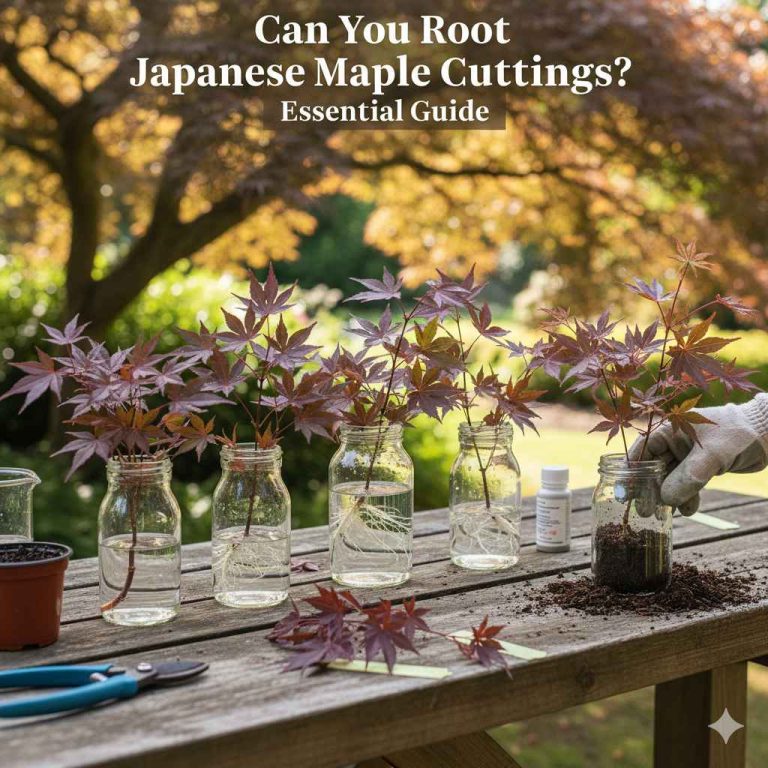
Preparing Cuttings for Rooting
Once you have your cuttings, you need to prepare them so they are ready to grow roots. This involves a few simple steps to give them the best start. It is important to remove some of the leaves from the bottom part of the cutting.
This helps the cutting use its energy for rooting rather than keeping all the leaves alive.
You can also use a rooting hormone to help speed things up. Rooting hormone is a powder or liquid that contains special plant growth substances. These substances encourage the cutting to form roots much faster and more reliably.
It is like giving your cutting a boost to get it going.
Gently dip the bottom end of the cutting into the rooting hormone. Make sure the end that was cut is covered. Then, gently tap off any extra hormone.
It is important not to use too much, as this can actually hurt the rooting process. A light coating is all that is needed to get the benefits.
- Remove lower leaves. Take off the leaves from the bottom half of the cutting. This reduces water loss and directs the plant’s energy towards root development rather than leaf maintenance.
- Use rooting hormone. Apply a rooting hormone product to the cut end of the stem. This product contains auxins, which are plant hormones that significantly increase the likelihood and speed of root formation.
- Apply correctly. Dip the bottom inch or so of the cutting into the hormone. For powders, tap off any excess; for liquids, follow product instructions carefully to avoid over-application.
Creating the Ideal Rooting Environment
To successfully root Japanese maple cuttings, you need to provide the right conditions. This means giving them a special place to grow where they can stay moist and warm. It’s like creating a mini greenhouse for your cuttings.
A good rooting medium is essential. You want something that drains well so the cuttings do not rot. A mix of perlite and peat moss or a special seedling starter mix works very well.
These materials hold moisture but also allow excess water to drain away, preventing soggy conditions that can kill the cutting.
Keep the cuttings in a bright spot, but out of direct sunlight. Too much sun can scorch the leaves and dry out the cuttings too quickly. A window that gets indirect light is perfect.
You also need to keep the humidity high. You can achieve this by covering the pot with a clear plastic bag or using a propagator with a lid. This traps moisture around the cuttings, mimicking the humid environment they need.
- Choose a good potting mix. Use a sterile, well-draining mix like a combination of peat moss and perlite. This ensures adequate aeration for roots while retaining enough moisture.
- Provide indirect light. Place the cuttings in a location that receives bright, indirect sunlight. Avoid direct sun exposure, which can overheat the cuttings and dry them out rapidly.
- Maintain high humidity. Cover the pots with clear plastic bags or use a humidity dome. This creates a humid microclimate that prevents the cuttings from drying out while they develop roots.
When to Expect Roots to Form
Patience is key when you are trying to root Japanese maple cuttings. It can take some time for roots to start growing. You usually won’t see roots right away, and that is perfectly normal.
The cutting needs time to heal from the cut and then start developing its root system.
Generally, you can expect to see roots forming within 4 to 8 weeks. Some might root faster, and others might take a bit longer. The key is to keep the environment consistent – moist, warm, and out of direct sun.
If you are using rooting hormone, this can often speed up the process.
You can gently tug on a cutting to check for resistance. If you feel a slight tug back, it means roots have started to form and are holding the cutting in place. Another way to check is to look at the drainage holes of the pot.
If you see roots poking out, you know they have successfully rooted. Once roots are about an inch long, your cutting is ready to be moved to a slightly larger pot.
- Be patient. Rooting can take a significant amount of time, typically between 4 and 8 weeks. It is crucial to avoid disturbing the cuttings too much during this period.
- Gently test for roots. After several weeks, you can carefully tug on a cutting. If you feel resistance, roots have likely formed.
- Inspect drainage holes. Look for any roots emerging from the bottom of the pot or cutting. This is a clear sign that the rooting process has been successful.
Layering for Japanese Maple Propagation
Layering is another excellent method for propagating Japanese maples, particularly for achieving fast local growth. This technique involves encouraging roots to form on a stem while it is still attached to the parent plant. Once roots develop, the new plant can be detached and grown independently.
It’s a bit like giving a branch a head start on becoming its own tree.
This method is often successful because the stem still receives nutrients and water from the mother plant. This support helps the stem develop strong roots more reliably than taking a cutting. It’s a more natural process that mimics how many plants would propagate in the wild if a branch bent down and touched the soil.
There are two main types of layering: air layering and ground layering. Ground layering is simpler for many common plants, where a low-hanging branch is bent down and covered with soil. Air layering is done on branches higher up, and it’s a bit more involved but can be very effective for Japanese maples.
Ground Layering Technique
Ground layering is a straightforward technique that works well for Japanese maples with flexible, low-growing branches. The idea is to encourage roots to grow from a section of stem that is buried in the soil. It is a simple way to get a new plant.
First, select a healthy, flexible branch that is close to the ground. Gently bend the branch downwards towards the soil. You might need to make a slight upward bend in the middle of the branch, right where you want roots to form.
This helps create a wounded area that will encourage rooting.
Make a shallow cut or scrape on the underside of the branch, at the point where it will contact the soil. This wound helps trigger root formation. You can also insert a small pebble or toothpick into the wound to keep it open.
Then, secure the wounded section of the branch firmly into the soil. You can use a landscape staple or a heavy stone to keep it in place.
- Choose a flexible branch. Select a healthy, pliable branch that can be easily bent down to the ground without snapping. Low-growing branches are ideal for this method.
- Wound the stem. Make a small cut or scrape on the underside of the branch where it will touch the soil. This wound stimulates root growth.
- Bury and secure. Bend the wounded section of the branch into the soil and secure it with a U-shaped landscape staple or a heavy rock. Ensure good contact between the wounded area and the soil.
- Maintain moisture. Keep the soil around the buried stem consistently moist. This is crucial for encouraging root development and preventing the stem from drying out.
Air Layering Technique
Air layering is a more advanced but highly effective method for propagating Japanese maples, especially if ground layering isn’t practical. This technique involves creating a rooting zone on a stem that is still attached to the tree, but is not touching the ground. It is like creating a temporary soil environment in the air.
You will need to choose a healthy, mature branch. About a foot or so from the tip, remove a ring of bark about 1 to 1.5 inches wide. It is important to remove all the green layer underneath the bark, down to the wood.
This exposes the inner tissues where roots will form.
After removing the bark, wrap the exposed area with moist sphagnum moss. This moss holds moisture and provides a good medium for roots to grow into. Then, cover the moss with plastic wrap.
Seal the top and bottom of the plastic wrap tightly with tape or twist ties. This creates a humid environment around the wound, encouraging root development.
- Select a suitable branch. Choose a healthy, 1-2 year old branch that is at least pencil-thick and easily accessible.
- Girdle the stem. Remove a ring of bark about 1 to 1.5 inches wide from the chosen branch. Ensure you remove all green cambium layer down to the wood.
- Apply moist sphagnum moss. Pack moist sphagnum moss generously around the exposed wood. The moss should be damp, not soaking wet.
- Wrap with plastic. Cover the moss-wrapped area with clear plastic wrap, creating a transparent ball. Secure the top and bottom of the plastic wrap firmly to maintain humidity.
- Monitor and wait. Keep an eye on the moss. Roots should start to appear through the moss in a few weeks to months. Once a good root ball has formed, you can cut the branch below the roots and plant it.
When to Separate Layered Branches
You will know your layered branch is ready to be separated when a healthy root system has developed. For ground layers, you might see roots emerging from the soil surface or when you gently probe the soil. For air layers, the roots will be visible through the plastic wrap.
A good sign is when the roots are thick and numerous, forming a solid ball. This usually takes several months, depending on the conditions and the specific Japanese maple variety. It is better to wait for a strong root system than to separate too early, as this can lead to the cutting failing to establish.
Once you are sure roots have formed well, you can carefully cut the branch from the parent plant. For ground layers, cut it just behind the new roots. For air layers, cut it just below the root ball.
Plant the newly separated layer in a pot with good soil and water it well. Treat it like a young plant needing care.
- Assess root development. Wait until a substantial root ball has formed around the layered section. For air layers, this means seeing a dense network of roots through the plastic.
- Sever the branch. Once roots are well-established, carefully cut the branch from the parent plant. For ground layers, cut behind the rooted section; for air layers, cut below the root ball.
- Transplant carefully. Immediately plant the separated layer into a pot with a good quality potting mix. Water it thoroughly to help settle the soil and reduce transplant shock.
Seed Propagation of Japanese Maples
Growing Japanese maples from seeds is another way to get new trees, but it is not the best method if you want fast local growth and to keep the exact traits of the parent tree. Seeds can take a long time to sprout, and the resulting trees might not be identical to the parent plant.
The seeds of Japanese maples require a period of cold stratification to break their dormancy. This means they need to experience a cold period, mimicking winter, before they will germinate. This process can be lengthy, often requiring several months of cold treatment.
Furthermore, the genetic variability in seeds means that each seedling can be unique. While this can lead to interesting new varieties, it also means that the offspring might not have the same leaf color, shape, or growth habit as the parent tree. For gardeners looking for predictable results and rapid establishment, cuttings or layering are generally preferred.
Collecting and Storing Seeds
Japanese maple seeds are typically found in samaras, which are winged fruits. These samaras usually ripen and fall from the tree in the autumn. The best time to collect them is when they turn brown and start to split open.
After collecting the samaras, you need to separate the seeds from the wings and any other debris. You can do this by gently rubbing them between your hands or using a sieve. Once the seeds are clean, they need to be stored properly to maintain their viability until you are ready to stratify them.
Store the seeds in a cool, dry place. A good method is to place them in a small paper bag or a container with a breathable lid. Avoid storing them in airtight containers, as this can lead to mold or rot.
Some growers prefer to store them in the refrigerator, mixed with a bit of damp peat moss or vermiculite, to keep them from drying out.
- Harvest at the right time. Collect Japanese maple samaras in the fall when they turn brown and begin to open, indicating seed maturity.
- Clean the seeds. Carefully separate the seeds from the wings and any chaff. Rubbing them gently or using a fine sieve can achieve this.
- Store properly. Keep clean seeds in a breathable container, such as a paper bag, in a cool, dry location. This prevents moisture buildup and potential spoilage.
Stratification Process for Seeds
Stratification is the process of breaking seed dormancy by simulating natural environmental conditions. For Japanese maples, this usually involves a period of cold and moist conditions. This is essential for the seeds to be able to germinate.
There are two main types of stratification: cold, moist stratification. For Japanese maples, a cold, moist stratification is most effective. This involves mimicking the conditions of winter.
To begin, mix the clean seeds with a slightly damp medium like peat moss, vermiculite, or sand. The medium should be moist but not waterlogged. Place this mixture in a plastic bag or container and store it in the refrigerator at temperatures between 35 and 41 degrees Fahrenheit (about 1 to 5 degrees Celsius).
This cold treatment typically needs to last for 90 to 120 days.
- Prepare the stratification mix. Combine clean seeds with a moist medium such as peat moss, vermiculite, or sand. The medium should feel like a wrung-out sponge.
- Refrigerate the seeds. Place the seed-medium mixture in a sealed plastic bag or container and store it in the refrigerator (35-41°F or 1-5°C).
- Maintain moisture. Check the medium periodically to ensure it remains consistently moist. If it starts to dry out, add a little more water.
- Stratify for the required period. Leave the seeds in the refrigerator for 90 to 120 days. This long period is crucial for breaking their dormancy and preparing them for germination.
Germinating and Growing Seedlings
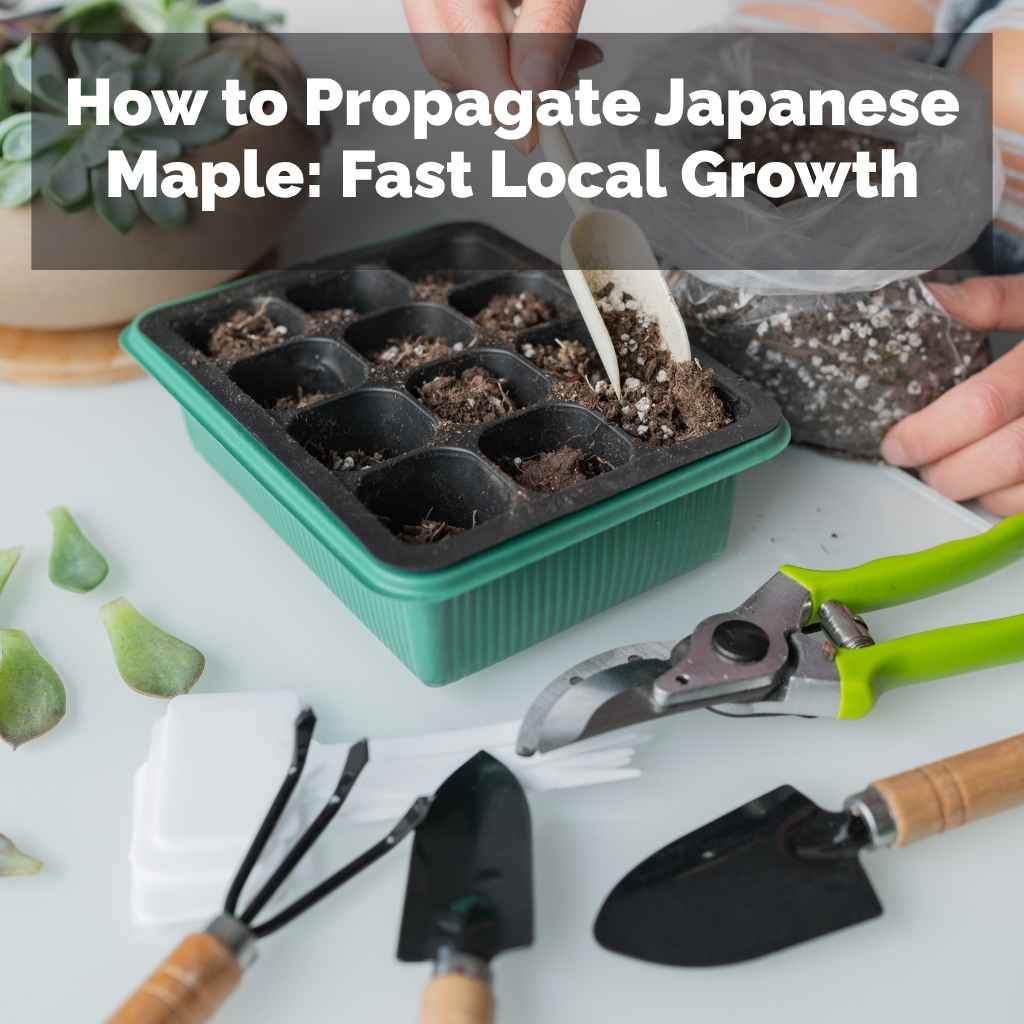
After the cold stratification period is complete, it is time to sow the seeds. You should use a well-draining seed starting mix in shallow trays or small pots. Sow the seeds about a quarter of an inch deep.
Keep the soil consistently moist and warm. A temperature of around 70-75 degrees Fahrenheit (21-24 degrees Celsius) is ideal for germination. You can achieve this by placing the trays in a warm spot or using a heat mat.
Covering the trays with a plastic dome or wrap will help maintain humidity and moisture levels.
Germination can be slow and uneven, even after stratification. Some seeds may sprout within a few weeks, while others might take months. Once the seedlings emerge, provide them with bright, indirect light.
Continue to keep the soil moist and allow them to grow. They will be delicate at first and will need careful attention.
- Sow the stratified seeds. Plant the seeds in a well-draining seed starting mix in shallow trays or pots, about 1/4 inch deep.
- Provide warmth and moisture. Keep the soil consistently moist and maintain a warm temperature (70-75°F or 21-24°C) for germination. Use a propagator or heat mat if needed.
- Offer bright, indirect light. Once seedlings emerge, move them to a location with bright, indirect sunlight. Avoid direct sun, which can scorch young plants.
- Care for young seedlings. Continue to water regularly and protect the delicate seedlings from harsh conditions until they are strong enough to transplant.
Choosing the Best Propagation Method for Local Growth
When you want to propagate Japanese maples for fast local growth, some methods are much better than others. The goal is to get new trees established quickly and reliably, and to ensure they grow well in your specific area. This means choosing techniques that have a higher success rate and a shorter turnaround time.
For many gardeners, taking cuttings and layering are the top choices. These methods produce plants that are genetically identical to the parent tree. This is important because you know exactly what you are getting.
You can be sure the new tree will have the same beautiful foliage and form as the one you admire.
Seed propagation, while interesting, is generally not recommended for fast local growth. The unpredictability of the results and the longer germination and growth times make it less suitable for immediate landscaping needs or expanding your collection quickly with known characteristics. Focus on cuttings or layering for the best results.
Cuttings vs. Layering for Speed
Both cuttings and layering can lead to relatively fast growth for Japanese maples, but there are differences in how quickly you can get a new plant ready to transplant. Cuttings can sometimes root faster than layers, depending on the conditions and the specific type of cutting used.
However, layering often provides a more robust start. Because the stem remains attached to the parent plant during root formation, it continues to receive nourishment. This results in a stronger, more established root system when the new plant is finally detached.
This can lead to faster growth in the first year after transplanting.
For example, a well-rooted air layer might already have a significant root ball and be ready for planting within 3-6 months. Cuttings, on the other hand, might take 4-8 weeks just to root, and then need time to develop a strong enough root system to be repotted. So, while cuttings can be quicker to initiate, layers often provide a more established plant sooner.
| Method | Time to Root/Root Development | Speed of Establishing After Separation | Likelihood of Success |
|---|---|---|---|
| Semi-hardwood Cuttings | 4-8 weeks for initial rooting; additional weeks for root development | Moderate to fast | Good, with proper care |
| Ground Layering | Several months (3-6 months or more) | Fast, due to established roots | High |
| Air Layering | 3-6 months for significant root ball development | Fast, due to established roots | High |
| Seed Propagation | Months to years for germination and initial seedling growth | Slow | Variable; offspring may differ |
Adapting to Local Conditions
When you propagate Japanese maples using cuttings or layering, you are essentially creating clones of an existing tree. This means the new plants will have the same genetic makeup and, therefore, the same tolerance for your local climate. If the parent tree thrives in your area, the propagated plants are very likely to do well too.
This is a significant advantage for fast local growth. You don’t have to guess how a new variety might perform in your soil, temperature, or humidity. The parent tree has already proven its adaptability.
This allows you to plant new trees with confidence, knowing they are well-suited to your environment.
For instance, if you have a Japanese maple that has survived harsh winters or hot summers in your region for years, propagating from it will give you new trees that are already pre-programmed to handle those conditions. This bypasses the guesswork and risk associated with introducing new species or varieties that might struggle to adapt.
Maximizing Growth Rates Locally
To ensure the fastest possible growth once your Japanese maple is propagated and established, a few key practices are important. Proper planting techniques and ongoing care are essential for promoting vigorous development.
Once your rooted cutting or layer is ready, plant it in a location that receives appropriate light for its variety. Most Japanese maples prefer dappled shade or morning sun and afternoon shade, especially in warmer climates. The soil should be well-draining, and slightly acidic is ideal.
Watering is critical, especially during the first year or two. Keep the soil consistently moist but not waterlogged. Mulching around the base of the tree helps retain moisture, suppress weeds, and regulate soil temperature.
Using a balanced, slow-release fertilizer in the spring can also give your young tree a boost for faster growth.
- Plant in the right location. Choose a spot with dappled shade or morning sun and afternoon shade. Protect young trees from harsh winds.
- Ensure excellent drainage. Japanese maples dislike soggy roots. Amend heavy soils with organic matter like compost to improve drainage.
- Water consistently. Keep the soil moist, especially during dry periods. Water deeply to encourage roots to grow deeper into the soil.
- Mulch regularly. Apply a layer of organic mulch around the base, keeping it a few inches away from the trunk. This conserves moisture and moderates soil temperature.
- Fertilize appropriately. Use a balanced, slow-release fertilizer in early spring. Avoid over-fertilizing, which can lead to weak, leggy growth.
Troubleshooting Common Propagation Issues
Even with the best intentions, propagation attempts can sometimes face challenges. Understanding common problems and how to fix them can save your young Japanese maples and help you achieve success.
One of the most frequent issues is cuttings failing to root. This can happen for many reasons, from incorrect timing to improper conditions. Similarly, layered branches might fail to develop roots, or seedlings might not germinate.
The key to troubleshooting is to systematically review the steps you took. By identifying where things might have gone wrong, you can adjust your approach for future attempts and learn from any setbacks.
Cuttings Not Rooting
If your Japanese maple cuttings are not rooting, several factors could be at play. The most common cause is inconsistent moisture. If the cuttings dry out even briefly, they will likely fail.
Over-watering can also be an issue, leading to rot.
Another reason might be poor timing. Taking cuttings too early in spring when the wood is too soft, or too late in fall when growth has stopped, can reduce success rates. The type of wood used is crucial; semi-hardwood cuttings in early summer are usually best.
Using a sterile rooting medium and clean tools is also vital. Fungal diseases can quickly attack cuttings in a contaminated environment. Ensure your rooting hormone is fresh and applied correctly.
If you are using a propagation chamber, make sure it maintains consistent humidity and temperature.
- Check moisture levels. Ensure the rooting medium is consistently moist but not waterlogged. Use a spray bottle for light misting if needed.
- Review your timing. If you took cuttings at the wrong time of year, try again during the optimal period for semi-hardwood cuttings.
- Sterilize everything. Use clean pots, sterile rooting mix, and clean tools to prevent diseases from affecting your cuttings.
- Ensure proper hormone application. If using rooting hormone, make sure it is fresh and applied according to instructions.
- Verify temperature and humidity. Maintain a warm environment (around 70-75°F or 21-24°C) and high humidity for optimal rooting.
Layers Failing to Develop Roots
For layering, if a branch isn’t forming roots, it often comes down to contact and moisture. The wounded part of the stem needs good, consistent contact with moist soil or sphagnum moss. If the soil dries out or the branch is not held firmly in place, roots are unlikely to form.
For air layering, the sphagnum moss must remain moist. If the plastic wrap is not sealed well, moisture will escape, and the moss will dry out. This prevents the development of the humid microclimate necessary for root growth.
Also, ensure the bark was completely removed. If any green cambium layer remains, it can heal over and prevent rooting.
Patience is also important with layering. Some branches can take many months to develop a significant root system. If the parent plant is unhealthy or the branch is too old or too young, it might also affect rooting success.
- Ensure consistent moisture. For ground layers, keep the soil around the buried stem consistently damp. For air layers, check that the sphagnum moss remains moist.
- Check bark removal. For air layering, confirm that all bark and cambium were removed in a complete ring. Re-girdle if necessary.
- Secure the layer firmly. Make sure the branch is held firmly in contact with the soil or moss. Use stakes or weights to keep it in position.
- Assess parent plant health. A strong, healthy parent plant is more likely to support successful layering.
Seedling Problems
Problems with seed propagation can range from seeds not germinating at all to seedlings dying soon after sprouting. If seeds fail to germinate after stratification, it could be that they were not viable to begin with, or the stratification period was too short or too cold.
Sometimes, seeds might germinate but the seedlings are very weak. This can happen if the stratification medium was too wet, leading to mold, or if the seedlings are not receiving enough light once they emerge. Overcrowding in seed trays can also stress young seedlings.
Once seedlings sprout, damping off is a common issue. This is a fungal disease that causes young stems to rot at the soil line, causing the seedling to collapse. It thrives in cool, damp conditions and is often associated with non-sterile soil or poor air circulation.
- Verify seed viability. If possible, test a small batch of seeds for viability before stratification.
- Ensure proper stratification. Follow the recommended duration and temperature for cold stratification precisely.
- Use sterile seed starting mix. This is crucial to prevent fungal diseases like damping off.
- Provide adequate light and air circulation. Once seedlings emerge, ensure they have enough bright, indirect light and good air movement.
- Avoid overwatering. Let the top surface of the soil dry slightly between waterings to discourage fungal growth.
Frequently Asked Questions
Question: What is the best time of year to take Japanese maple cuttings
Answare: Troubleshooting Common Propagation IssuesThe best time to take Japanese maple cuttings is usually in early summer, when the new growth is semi-hardened. This type of stem is called semi-hardwood and has a good balance of flexibility and firmness for rooting.
Question: How long does it take for Japanese maple cuttings to root
Answer: It can take anywhere from 4 to 8 weeks for Japanese maple cuttings to start forming roots. Some may root faster, while others might take a little longer. Patience is important.
Question: Can I propagate Japanese maples from seed
Answer: Yes, you can propagate Japanese maples from seed, but it is not ideal for fast local growth or for creating exact replicas of the parent plant. Seeds require a cold stratification period and the resulting trees can be quite variable.
Question: What is air layering for Japanese maples
Answer: Air layering is a propagation technique where you encourage roots to form on a stem while it is still attached to the parent tree, but not touching the ground. It involves wrapping a wounded section of the stem with moist sphagnum moss and plastic.
Question: Why are my Japanese maple seedlings dying
Answer: Seedlings often die from a fungal disease called damping off, which attacks the stem at the soil line. This is usually caused by overwatering, poor air circulation, or using non-sterile soil. Ensure good drainage and sterile conditions.
Conclusion
Mastering how to propagate Japanese maple fast local growth is achievable. By focusing on cuttings and layering, you can successfully create new trees that are genetically identical to your favorites. These methods offer quicker results than seeds and ensure adaptability to your local climate.
With careful attention to timing, preparation, and environment, you can expand your collection and enjoy more of these stunning trees.